
How to Can Diced Tomatoes

Diced tomatoes are simply one of the most versatile items in your pantry. Use them to make chili, soup, or spaghetti sauce. Use them in casseroles or one-pot meals. I even tend to just toss them into my blender with a few other ingredients to make easy tomato bisque for a cozy lunch. I'll never be without diced tomatoes in my pantry.
Buying canned diced tomatoes is a breeze (and relatively affordable), but as with most things in the kitchen, I find the flavor to be much superior when you can your own diced tomatoes at home. Not only do you get to use the ripest, best tomatoes picked at the peak of tomato season (hopefully from your own garden), but you can also control exactly what ingredients do and do not get put into your batch. Watching your salt intake? Leave it out! Worried about the BPA lining that a lot of tomato cans use? No worries, you're using glass! Want to spice up the jars with your own herb combos? Have at it!
Is this canning recipe good for beginners?
Canning diced tomatoes is one of the easiest canning projects for beginners. If you're new to canning-and maybe a bit intimidated-tomatoes (or pickles) are a great place to start! The biggest thing you have to worry about with canning tomatoes is heat shocking your jars and having them break. Just as long as you remember to never let your jars go from temperature extremes (hot to cold, or vice versa), you'll be good!
If you are new to canning, we highly recommend reading through our Canning 101 primer post to get your bearings on the basic process for canning.
Absolute Must-Have Supplies to Can Diced Tomatoes
- Tomatoes (duh)-A good rule of thumb is that for each pound of tomatoes, you'll get one pint of diced tomatoes (which equals about the size of a standard 15-ounce can of diced tomatoes). If you are really going big, a full bushel of tomatoes will get you about 50 pints. Roma/plum tomatoes are the best choice-they have the least amount of juice and seeds-but any kind of tomato will work. Farm stands and farmers' markets often sell "canning tomatoes" in bulk on the cheap in the summer. These are the ugly tomatoes that no one wants to buy for their caprese salads. Stock up on those! If you can find a u-pick place nearby, that's also a great way to get a lot on the cheap. And of course, growing your own is the cheapest way of all! I love the San Marzano variety of romas. They are easy to grow and super prolific. Plus, they taste great!
- Bottled lemon juice or citric acid-To safely can tomatoes without a pressure canner, you need to acidify each jar. This sounds like it's going to take some crazy calculations or something, but it's really simple. For each pint of tomatoes, add one tablespoon of bottled lemon juice (it must be bottled-fresh doesn't have consistent acidity) OR ¼ teaspoon powdered citric acid. Double that for quarts. I personally use citric acid because it doesn't affect the flavor at all and it's a heck of a lot cheaper than buying bottle after bottle of lemon juice. But if you're just working on a small batch and already have lemon juice in your fridge? Go that route.
- Jars, lids, and rings-I always can diced tomatoes in wide-mouth pints. The pint is roughly the same size as a store-bought can, so that makes it easier when working off of recipes, and the wide mouth makes the canning process simpler. You can find them at most grocery or hardware stores, and if all else fails, order them online (although they are much more pricey online).
- Water bath canner or large stock pot-You'll need to submerge your filled jars in a boiling water bath to process and seal them. Any large stock pot will work- in fact, most of the time when you buy a "canner," it's actually just a big ole pot with a canning rack stuck inside. If you already have a big stock pot, you can save some cash and just buy the rack (you do need one-this protects the bottom of the jars and allows hot water to circulate all around them).
- Jar lifter-Few things in this world are as slippery as a wet glass canning jar that just spent an hour in a boiling water bath. Spend the money and get yourself a good jar lifter. It'll last a lifetime and will pay for itself with how many broken jars and emergency room visits it saves you.
- Old towel-You'll need one to put down on your kitchen countertops so there isn't heat shock from your hot jars to your cold countertops (which results in broken jars).
- Knife, cutting board, slotted spoon, colander, other general kitchen tools-If you have a working kitchen, you probably have all the "normal" utensils you need to can tomatoes.
Nice-to-Have Supplies to Can Diced Tomatoes
- Canning Funnel-A funnel that is made to fit into the top of your jars will make your life easier (and less messy).
- Second stock pot-Part of canning tomatoes is blanching them to get the skins to peel off easily. You could do this in your water bath canner and just boil fresh water when it's time to process, but I find it a lot easier to have two big pots of water boiling. I actually use a stock pot on my stove for blanching tomatoes, and then an electric water bath canner (which is basically just an electric stock pot) for processing. It frees up burners on my stove and allows me to process my jars in an out-of-the-way spot-I do it in a corner of the counter.
- Headspace checker-Each time you can something, you'll need to leave adequate "headspace"-the space between the top of the food and the top of the jar. This little tool makes it easy to have accurate headspace in each jar. Honestly, I've been canning so long that I just eyeball it-I know where on the jar the right level is-so I don't always use one of these, but it's a very handy tool if you're a beginner.
- Second old towel-Tomatoes are juicy. And if you just cut them on your cutting board, you'll either be stopping every 10 minutes to wipe up juice or have it running down onto your toes. The solution? Put an old towel under your cutting board. Then when you are done canning, just toss the whole towel in the laundry.
Do I need a pressure canner?
Nope! You're going to add enough citric acid or lemon juice that this will be safe for water bath canning. Which is great, because a pressure canner's high heat and long processing time can turn tender tomatoes to mush if you aren't careful.
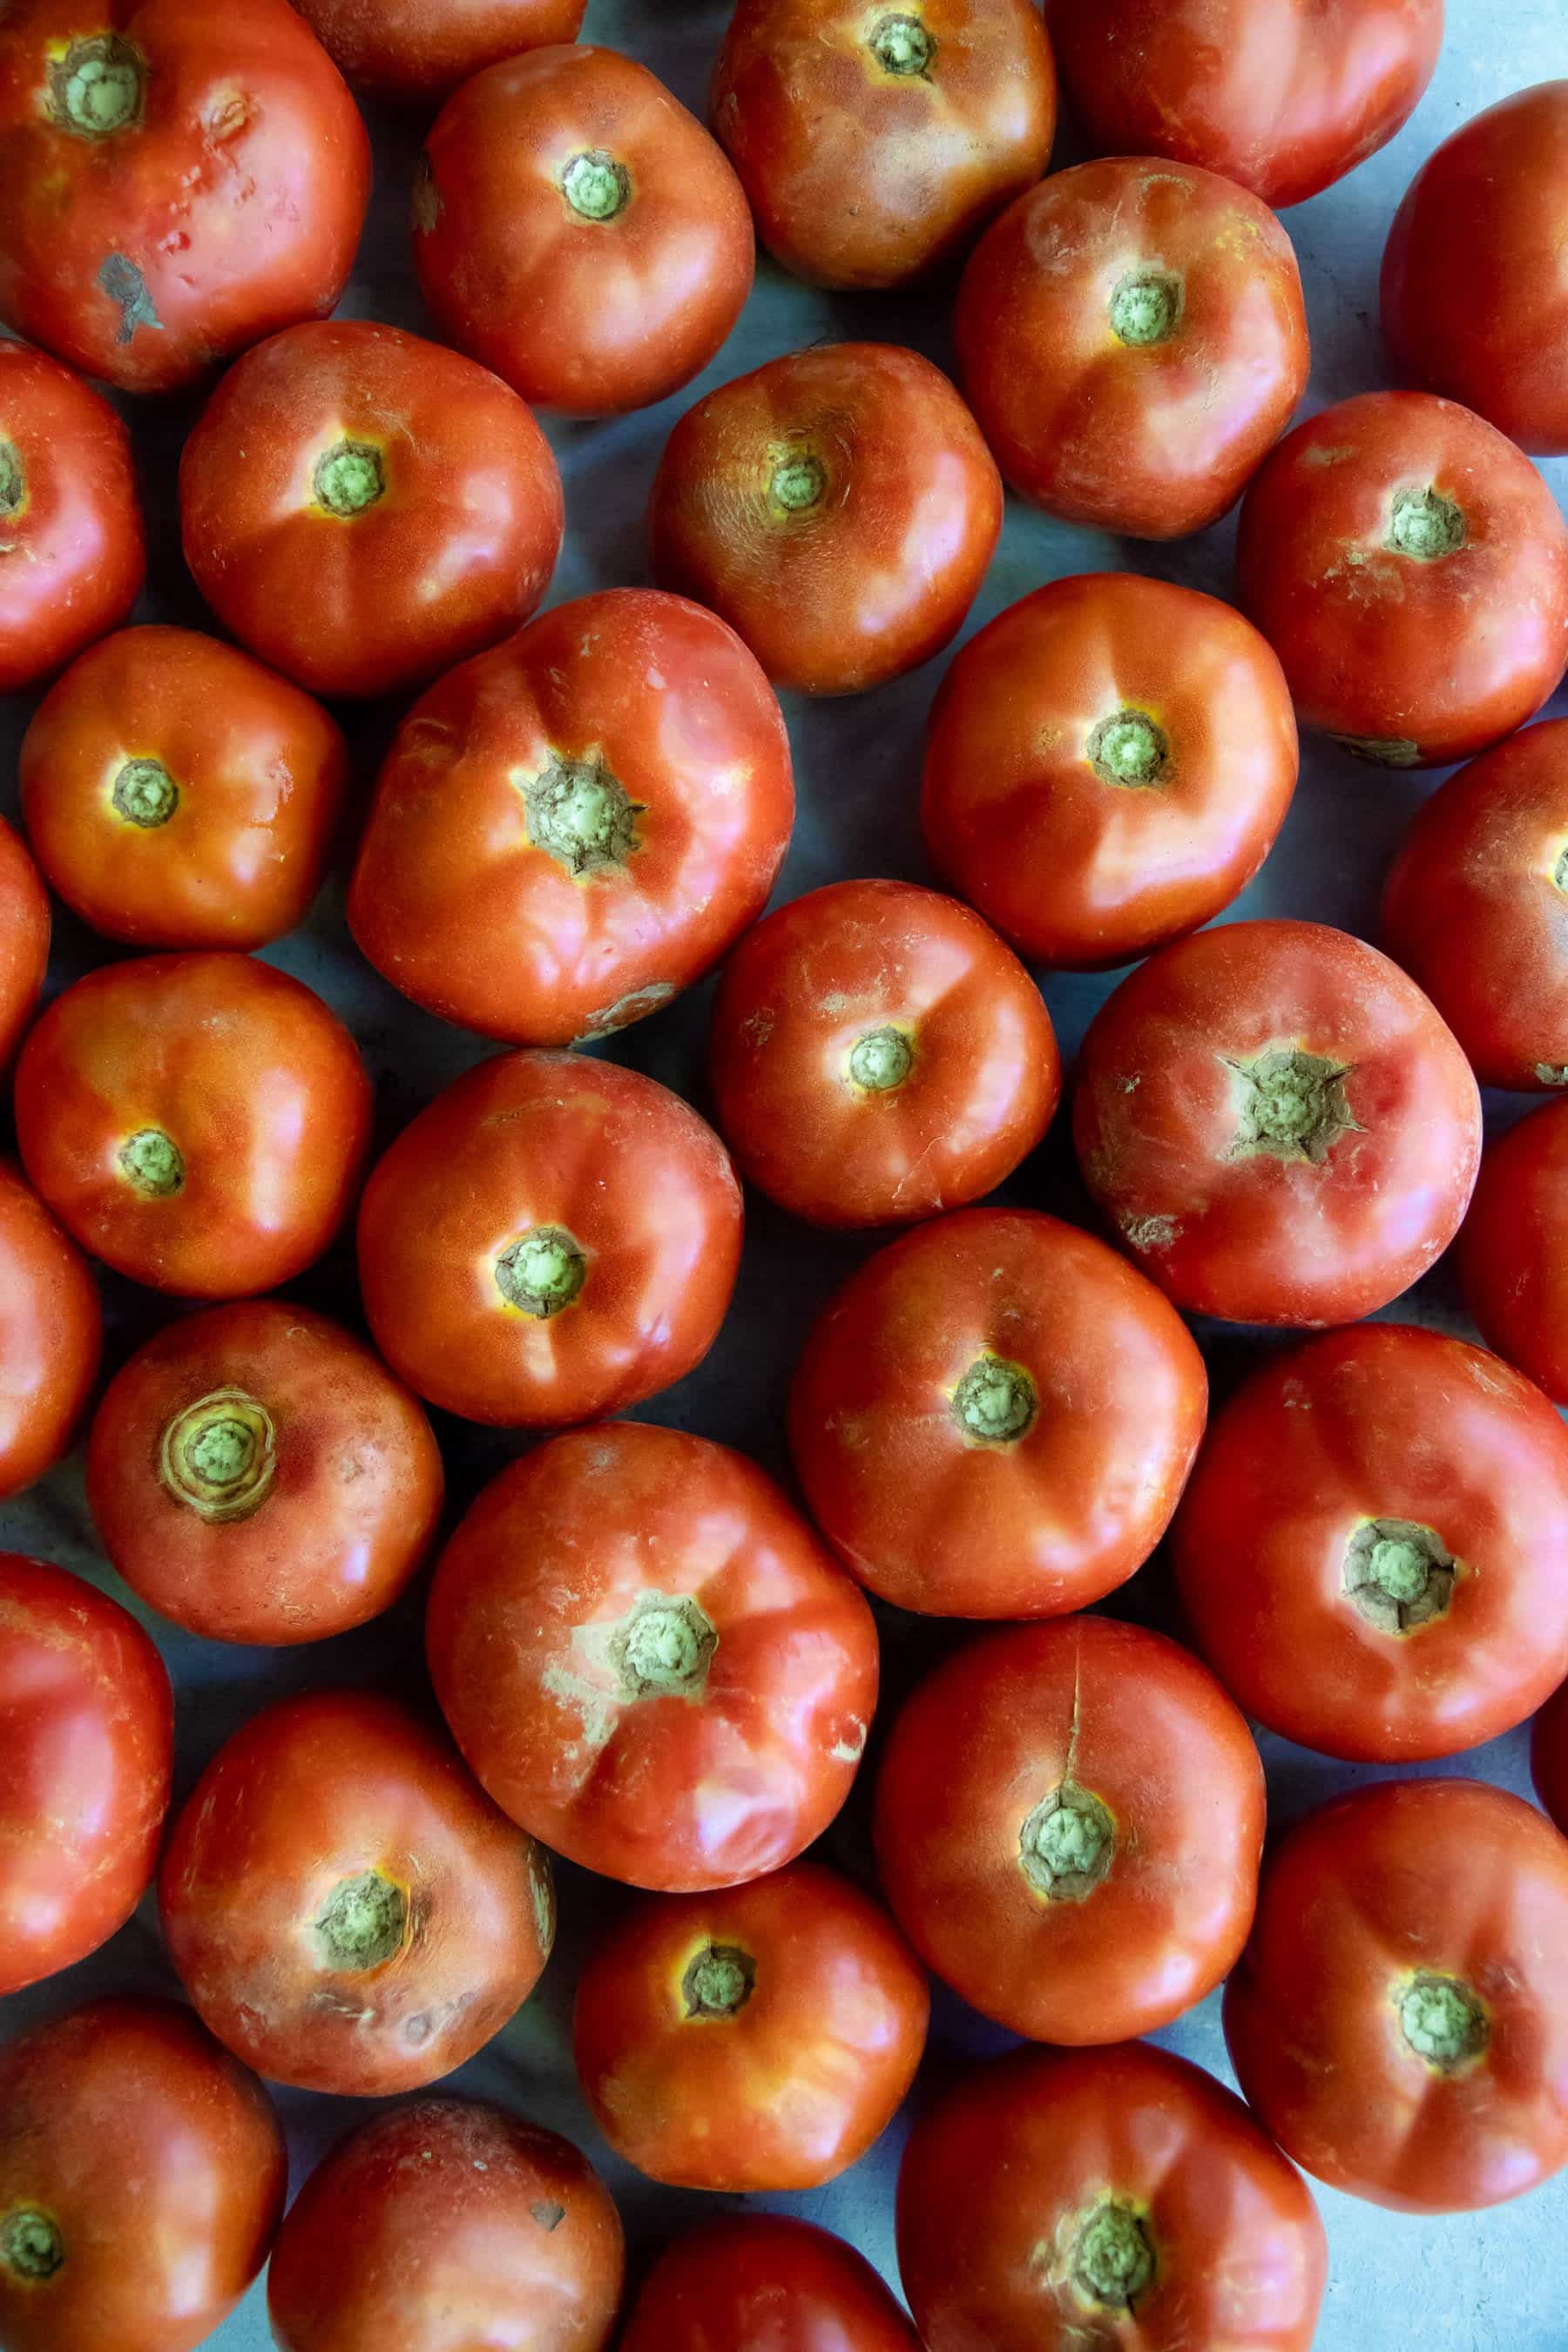
What are the best tomatoes for canning?
You can use any fresh tomatoes for diced tomatoes, but you'll get the best results with Roma, paste, or San Marzano tomatoes. These three have fewer seeds and liquid, and more flesh, so your diced tomatoes will have the density you'd expect from store-bought canned tomatoes.
Do you add water when canning tomatoes?
Nope! Tomatoes are quite juicy, and we recommend packing them in their own juices for the best flavor in this tutorial.
How long will my canned diced tomatoes last?
After 12-18 months, you'll start to see a decline in flavor quality, so we recommend you use them within a year and a half. However, properly canned goods can be safely eaten well beyond that.
How long will a jar of diced tomatoes be good once it is opened?
Once you've cracked open one of your sealed jars, we recommend eating the tomatoes within 7-10 days. This is also about how long you'll get out of any partial jars that aren't full enough to process.
If you don't think you'll get through them quickly enough, you can freeze the extras in wide-mouth freezer safe jars for up to a year.
How to Can Diced Tomatoes
Alright, you've got your tomatoes, you've got your lemon juice or citric acid- now let's actually dig into canning some tomatoes! I've got the full tutorial with pictures written out here, but if you're looking for a printable version, scroll to the bottom of this post. Okay, let's go!
Step 1: Get organized
The actual "canning" part of canning is a tiny part of the puzzle-especially when compared to the prep work. Before you slice into a single tomato, you need to prep your work space.
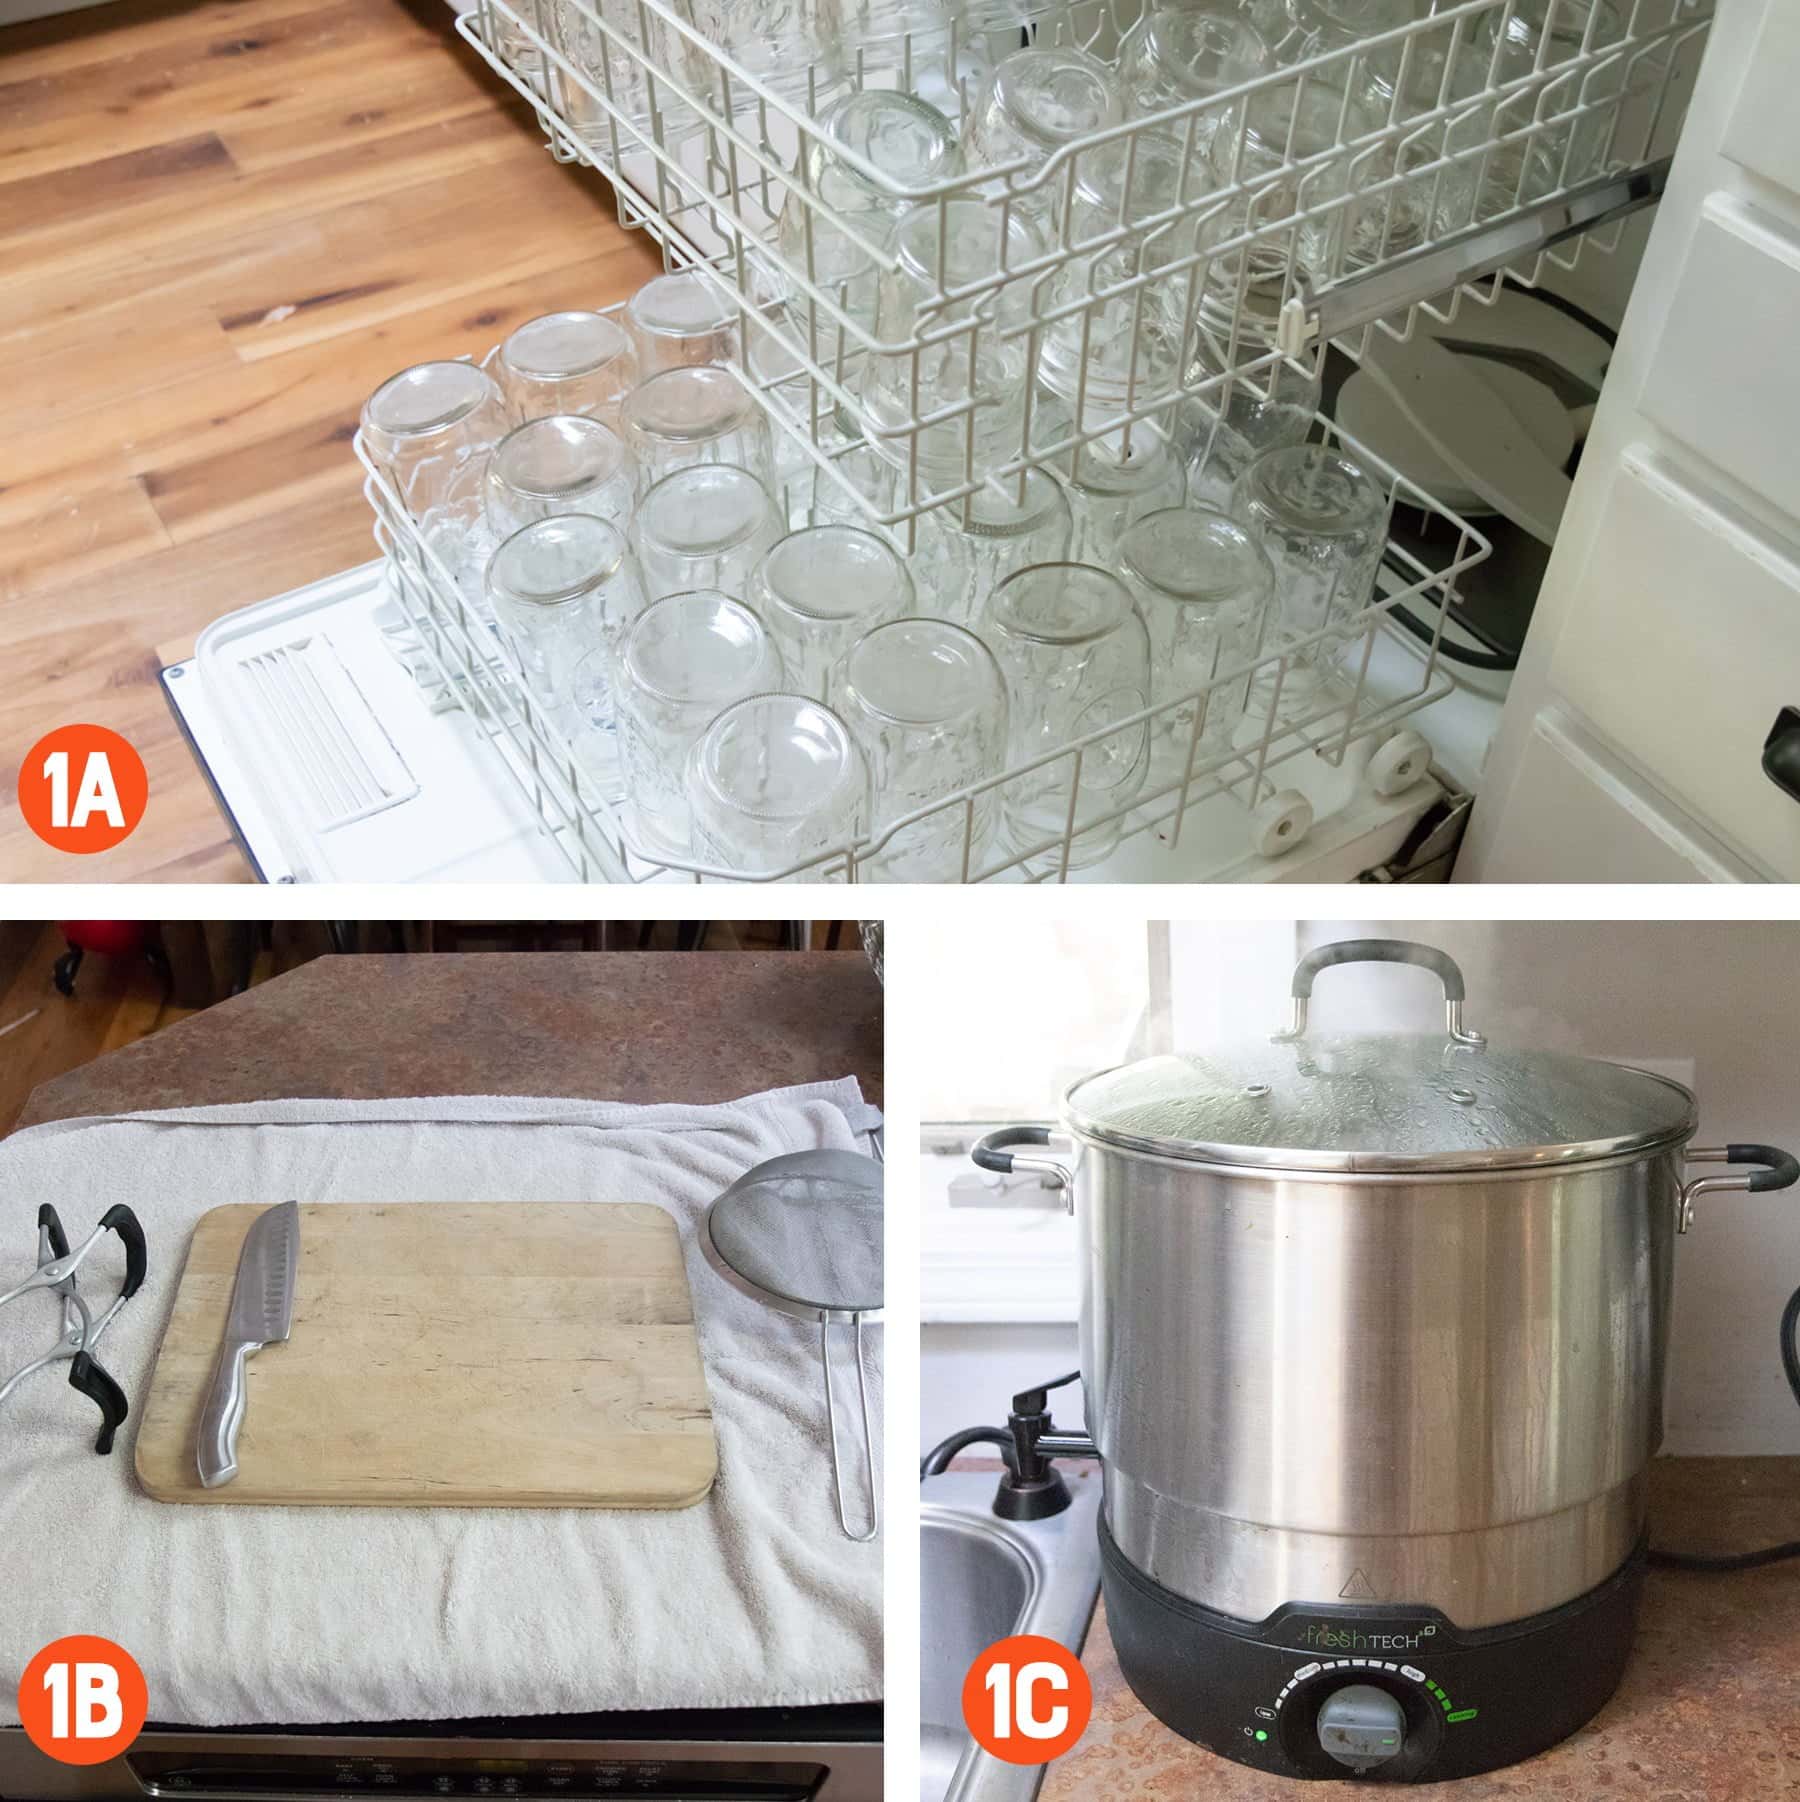
- Step 1A: Wash, sterilize, and heat the jars-Learn more about that in our Canning 101 tutorial if you're a beginner!
Wholefully Protip
Always wash, sterilize, and heat more jars than you think you'll need. It's no big deal to put them back on the shelf if you don't use them, but it's really annoying to need just one more jar in the middle of your canning and not have it ready to go.
- Step 1B: Get all your tools ready-I like to lay out a big towel on my counter to make cleanup easier (and to keep tomato juice from running down my cabinets onto my toes). On top of that, I place all the tools I'll need to can.
- Step 1C: Get your water bath canner heating-Boiling a large vat of water takes time, so go ahead and get it started. Fill the canner about ⅔ full of water and set to boil. You might not need that much water, but it's a lot easier to remove water than it is to add cold water and get the pot to reboil. I also recommend going ahead and putting the canning rack in the bottom of the pot (yes, I know it probably has handles to lift the jars, but you don't want to do that with raw-pack tomatoes-more on that in a sec).
Step 2: Peel your tomatoes (optional, but recommended)
You don't have to peel your tomatoes. But I highly recommend it. Since I'm always looking for kitchen shortcuts, I've canned without peeling before, and I wished I had taken the time to do it. Tomato skins get very tough through the canning process, and unless they are chopped into minuscule pieces, they aren't very appetizing. Plus, the peeling process is made easy thanks to blanching!
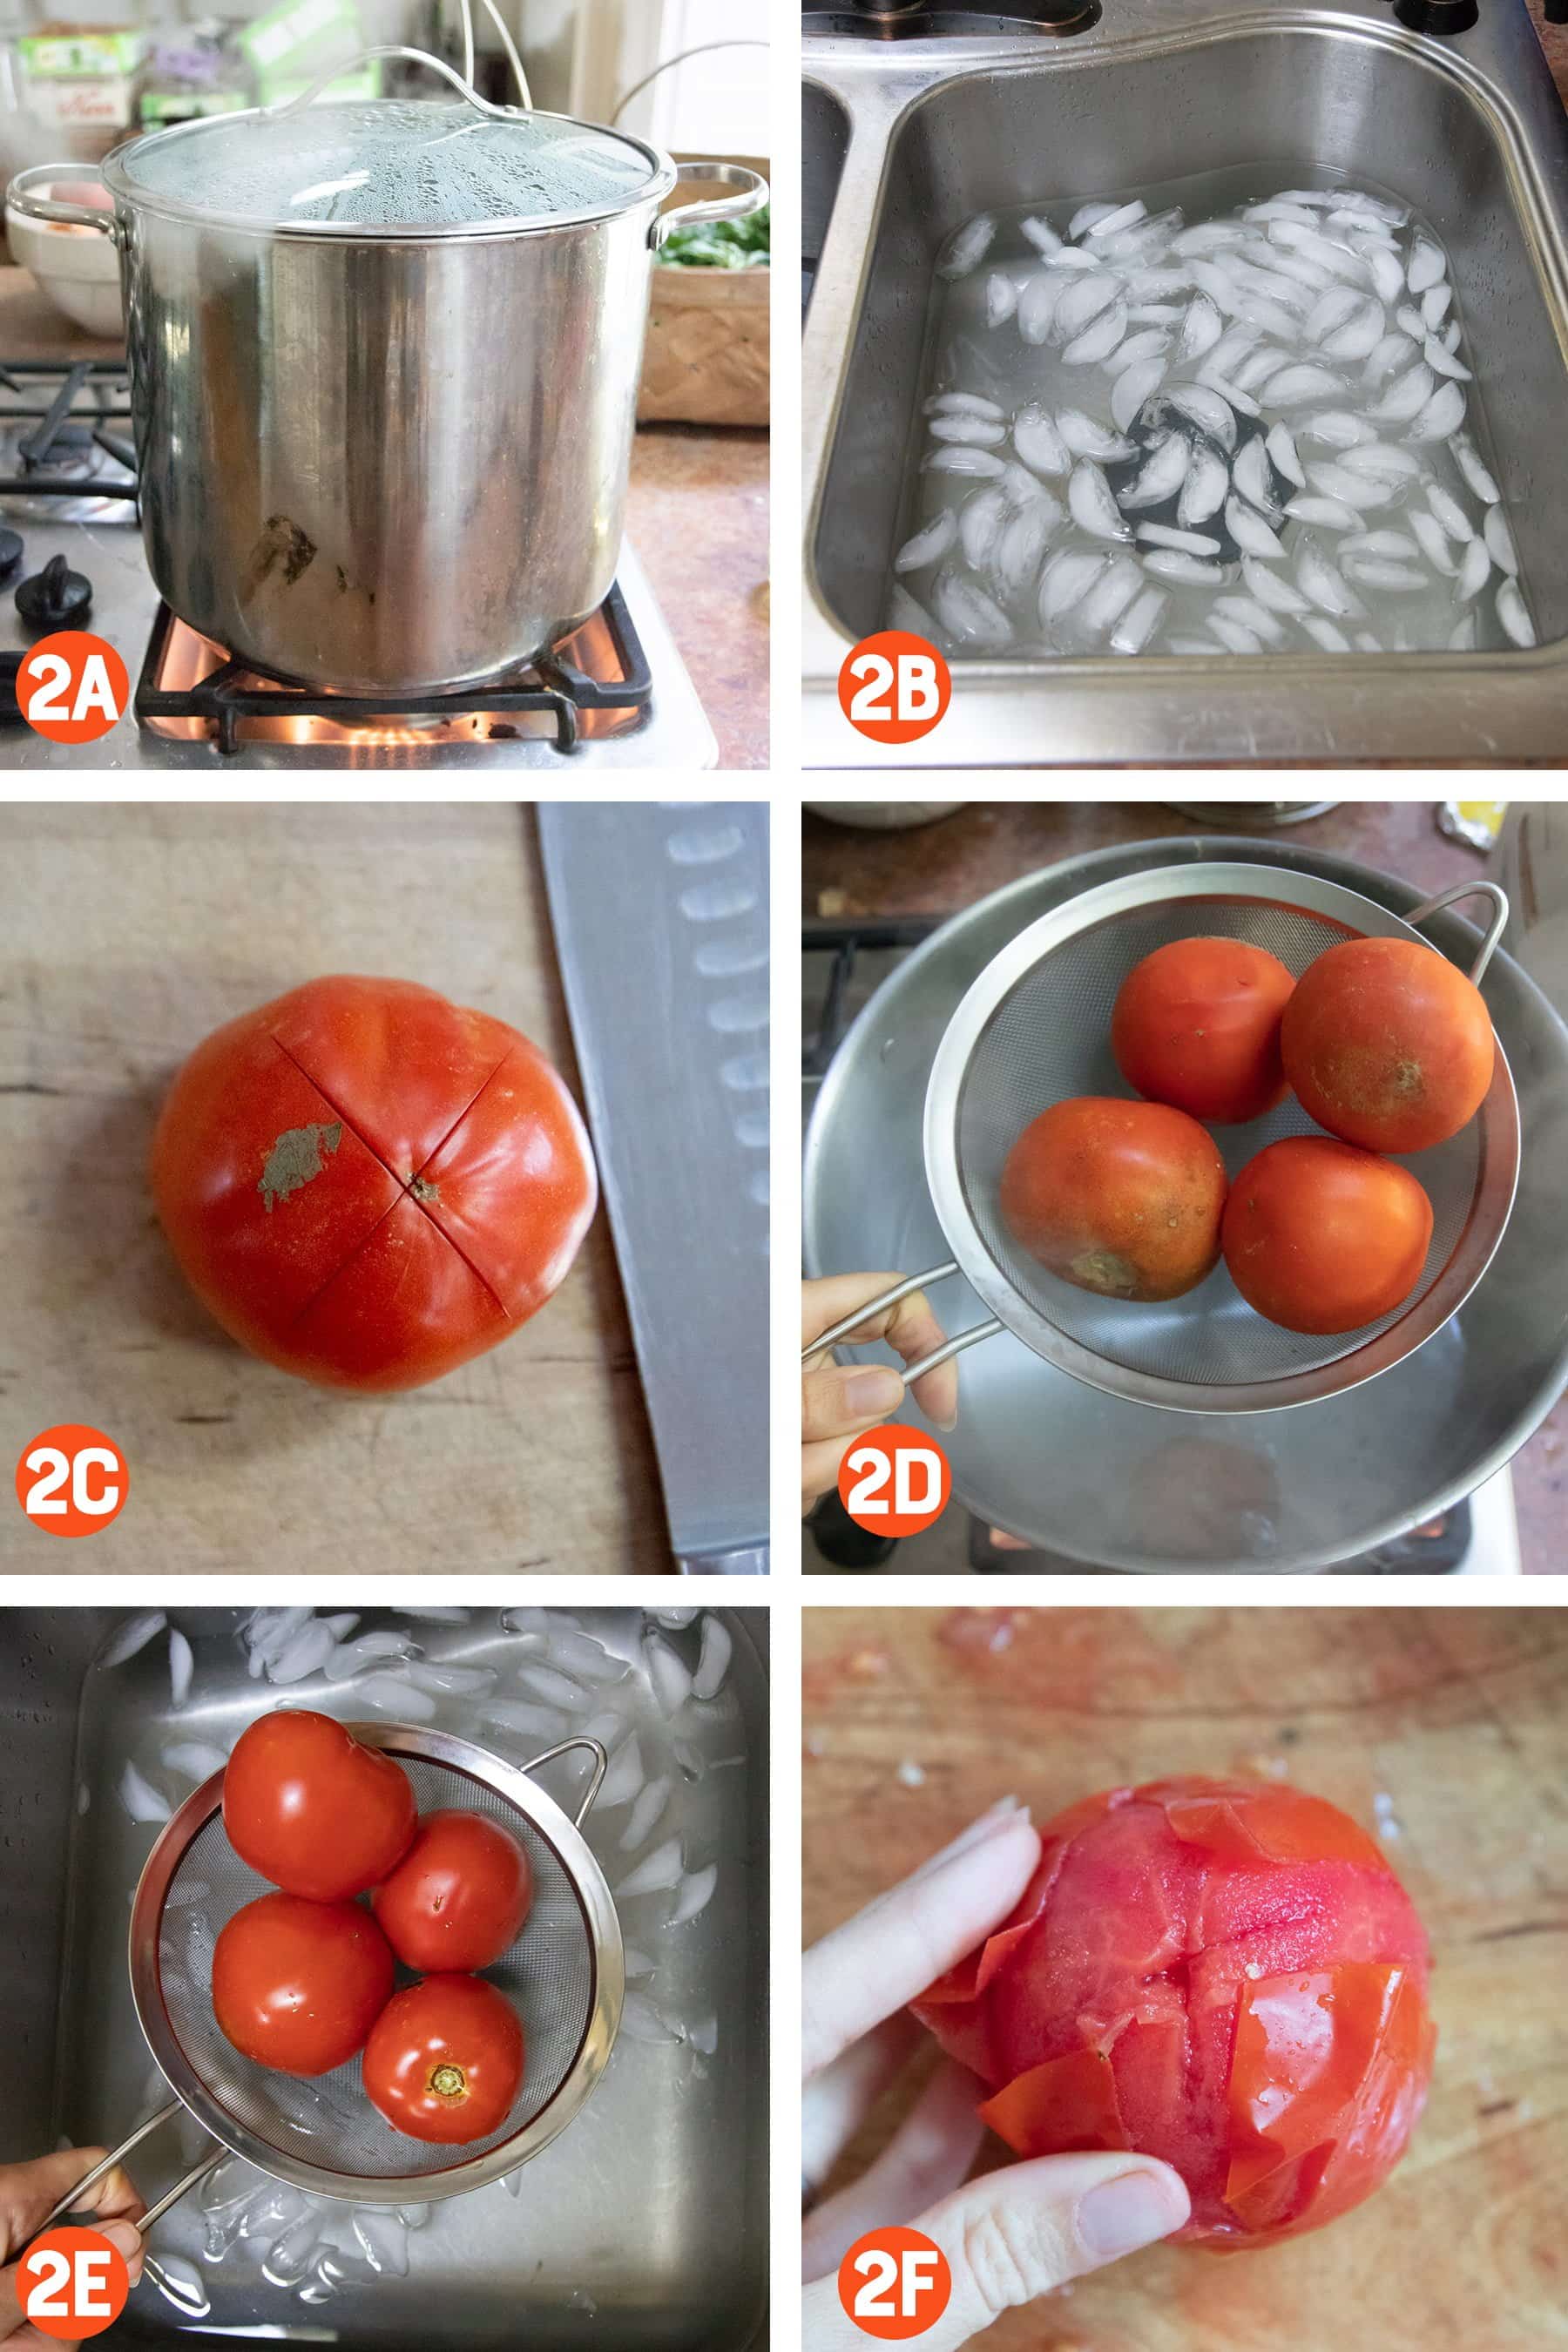
- Step 2A: Boil a large pot of water-You can use the same pot of water you are using for your water bath canner if you like, but for efficiency's sake, I prefer to have a second stock pot dedicated to blanching the tomatoes.
- Step 2B: Prepare an ice bath-Fill your (clean!) sink with water and ice.
- Step 2C: Score the tomatoes-This is an optional step, but I find it makes the peeling easier. Flip each tomato over and, using a sharp knife, score the bottom of the tomato in an "X" shape.
- Step 2D: Blanch for 45-60 seconds-Working a few tomatoes at a time, place them in the boiling water bath and blanch for around one minute. Don't freak out if you go over-tomatoes are pretty resilient. I'd actually rather you overcook them than undercook them-underblanched tomatoes are frustrating to peel. You'll know the tomatoes are ready to come out when the peel is starting to pull away from the tomato where you scored it. You'll get the hang of the timing after just a few batches.
- Step 2E: Plunge into ice bath-You immediately want to stop the cooking, so plunge those tomatoes into your ice bath. If you prefer, you can go ahead and blanch all of your tomatoes and get them hanging out in the ice bath before moving on to the next step.
- Step 2F: Slip off the skins-If blanched properly, the skins will slip right off the tomato. Add them to your compost or feed them to your chickens (that's what I did).
Step 3: Core and dice your tomatoes
Some people choose to remove seeds and juices here-and you can absolutely do that if you prefer a drier tomato product-but I like to leave all of it. Not only is it easier, but it also makes for stronger flavor.
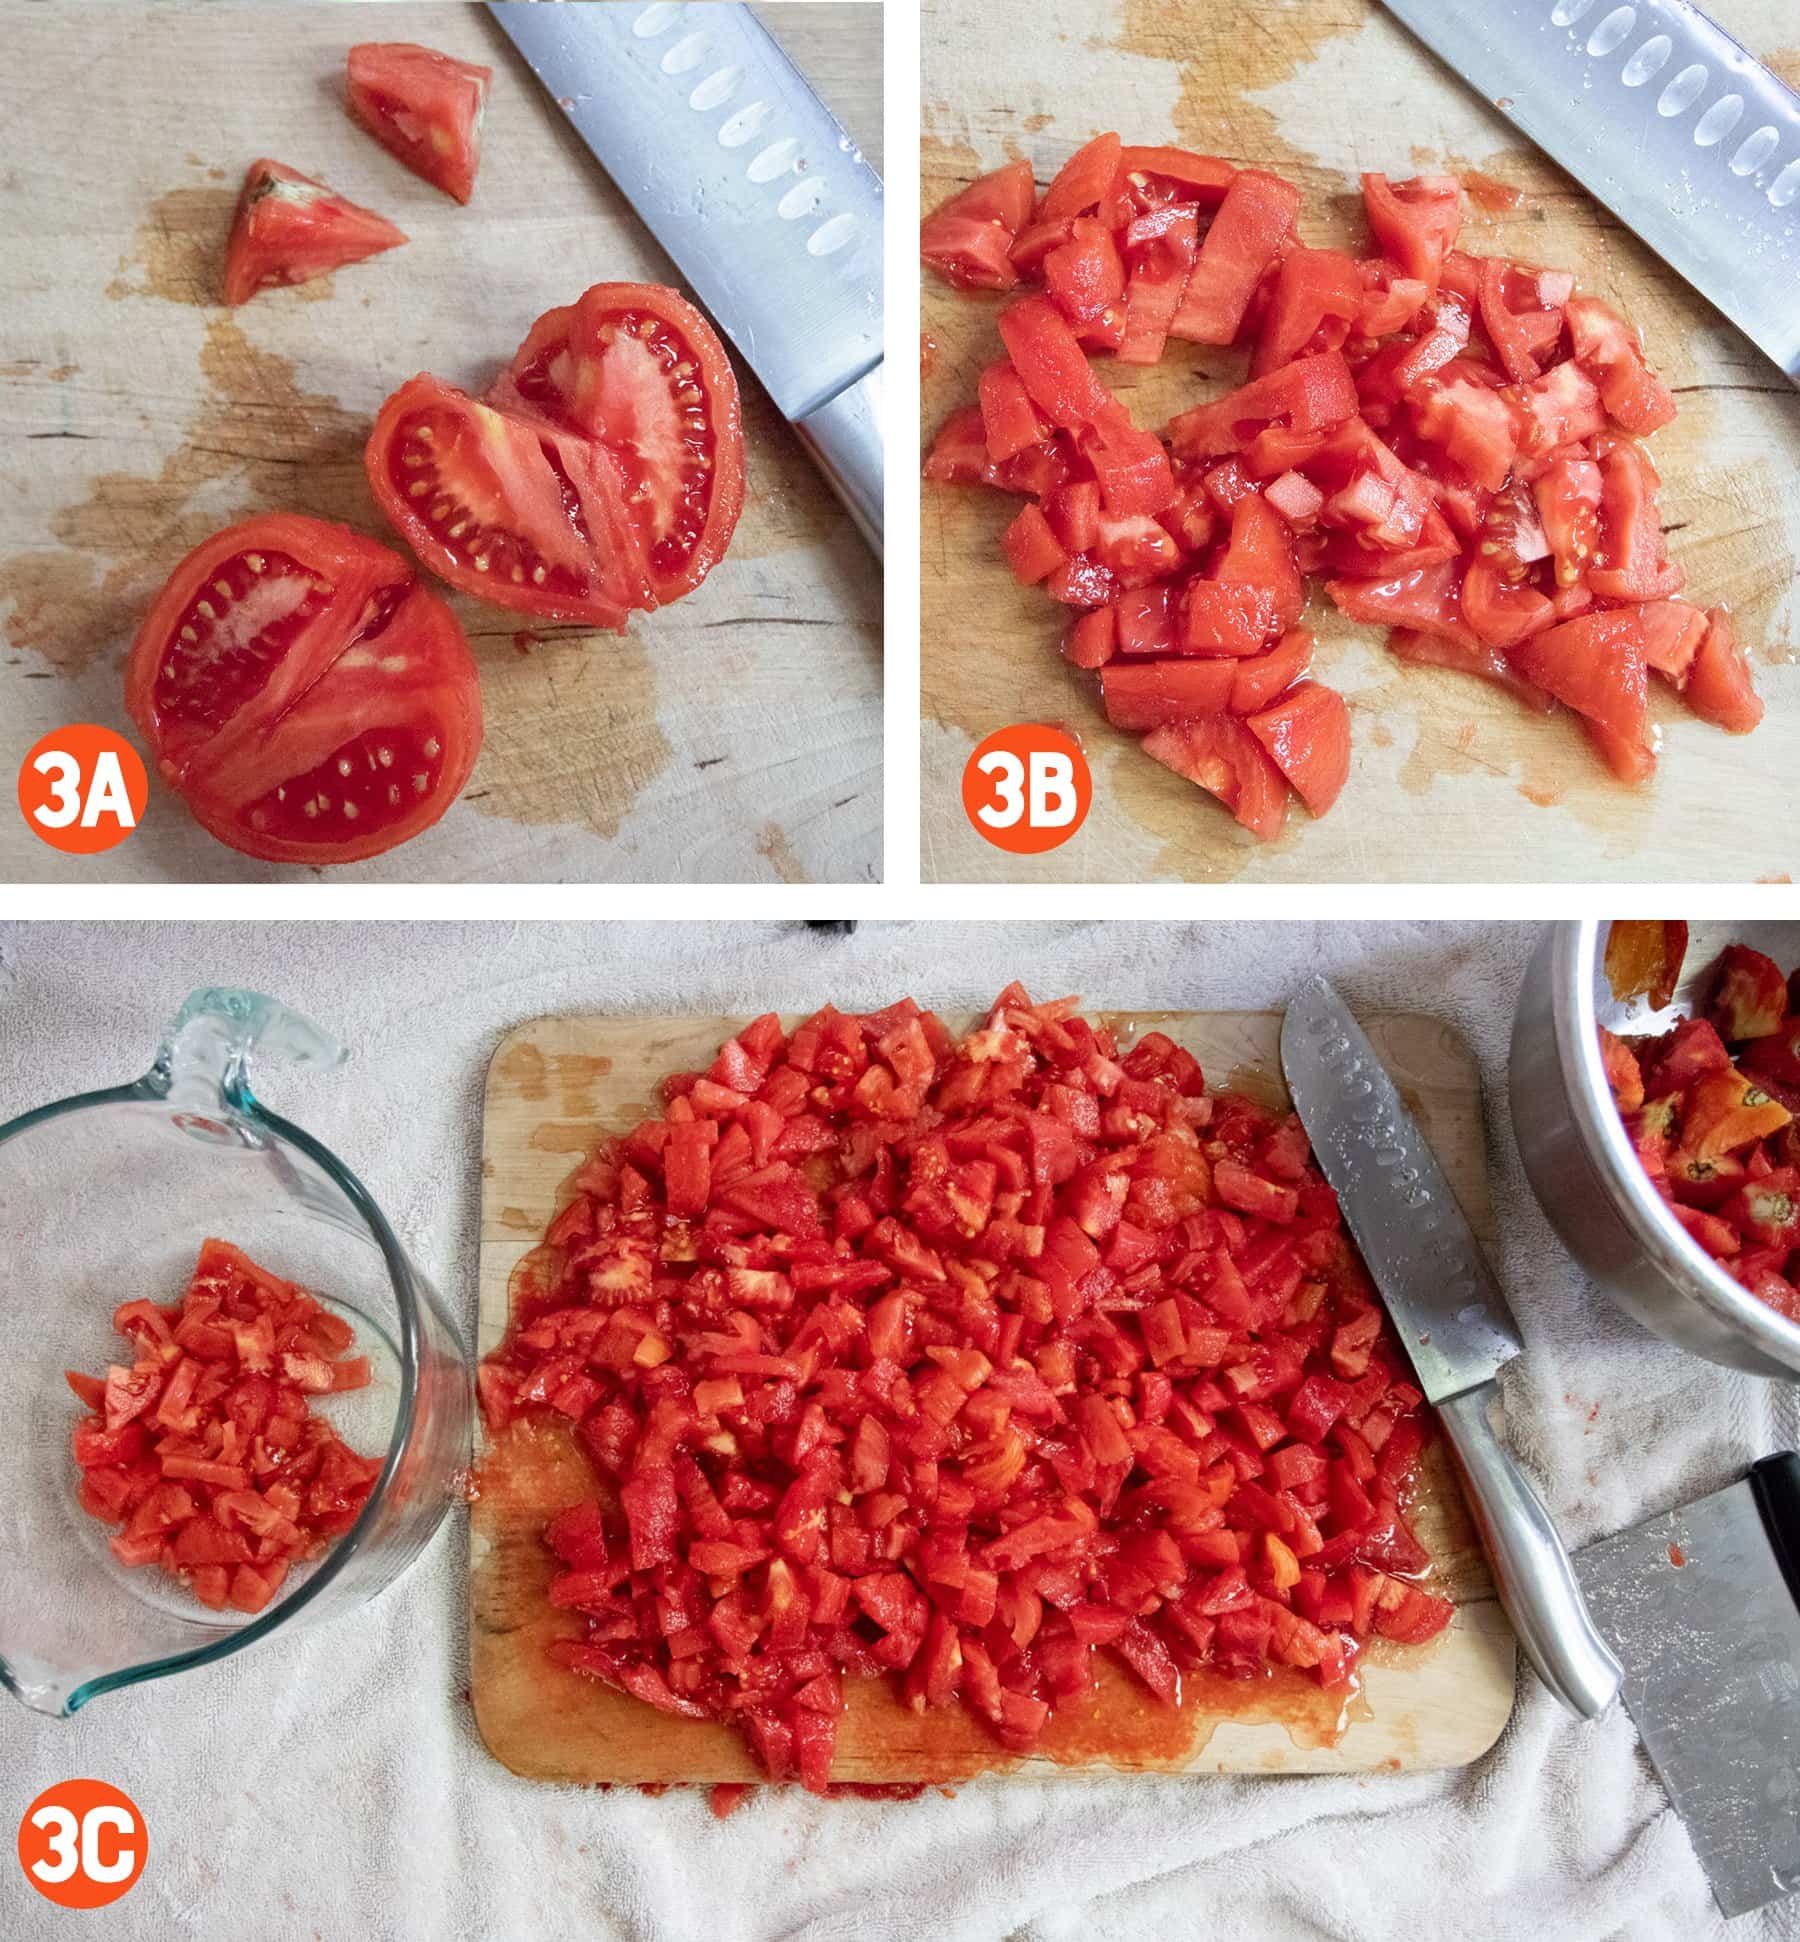
- Step 3A: Core the peeled tomatoes-Slice the tomato in half, and then remove the core from each half. Also cut out any unripe parts ("green shoulders") or bruised spots, and discard.
- Step 3B: Dice the tomatoes-Roughly dice the tomatoes to your desired size.
- Step 3C: Measure your tomatoes-Keep cutting until you either get through all your tomatoes, or you have enough for your canner load. Most water bath canners will hold 7 quart jars (28 cups of diced tomatoes) or 9 pint jars (18 cups of diced tomatoes). I was canning pints, so I stopped when I reached 18 cups of tomatoes.
Step 4: Pack the jars
If you're new to canning, I highly recommend filling one jar at a time, placing it into the hot water bath canner, and then moving onto the next jar. This process is for raw-pack tomatoes-meaning you don't heat the tomatoes before they go in the jar. The tomatoes will quickly cool down the hot jars, and just by the nature of being a newbie, you'll be a little bit slower at this process. If you do all the jars at once, the jars might cool down too much before you place them in the boiling water-which could lead to jar breakage. Start with one at a time. In these pictures, I did a whole canner load at once, but I'm pretty speedy!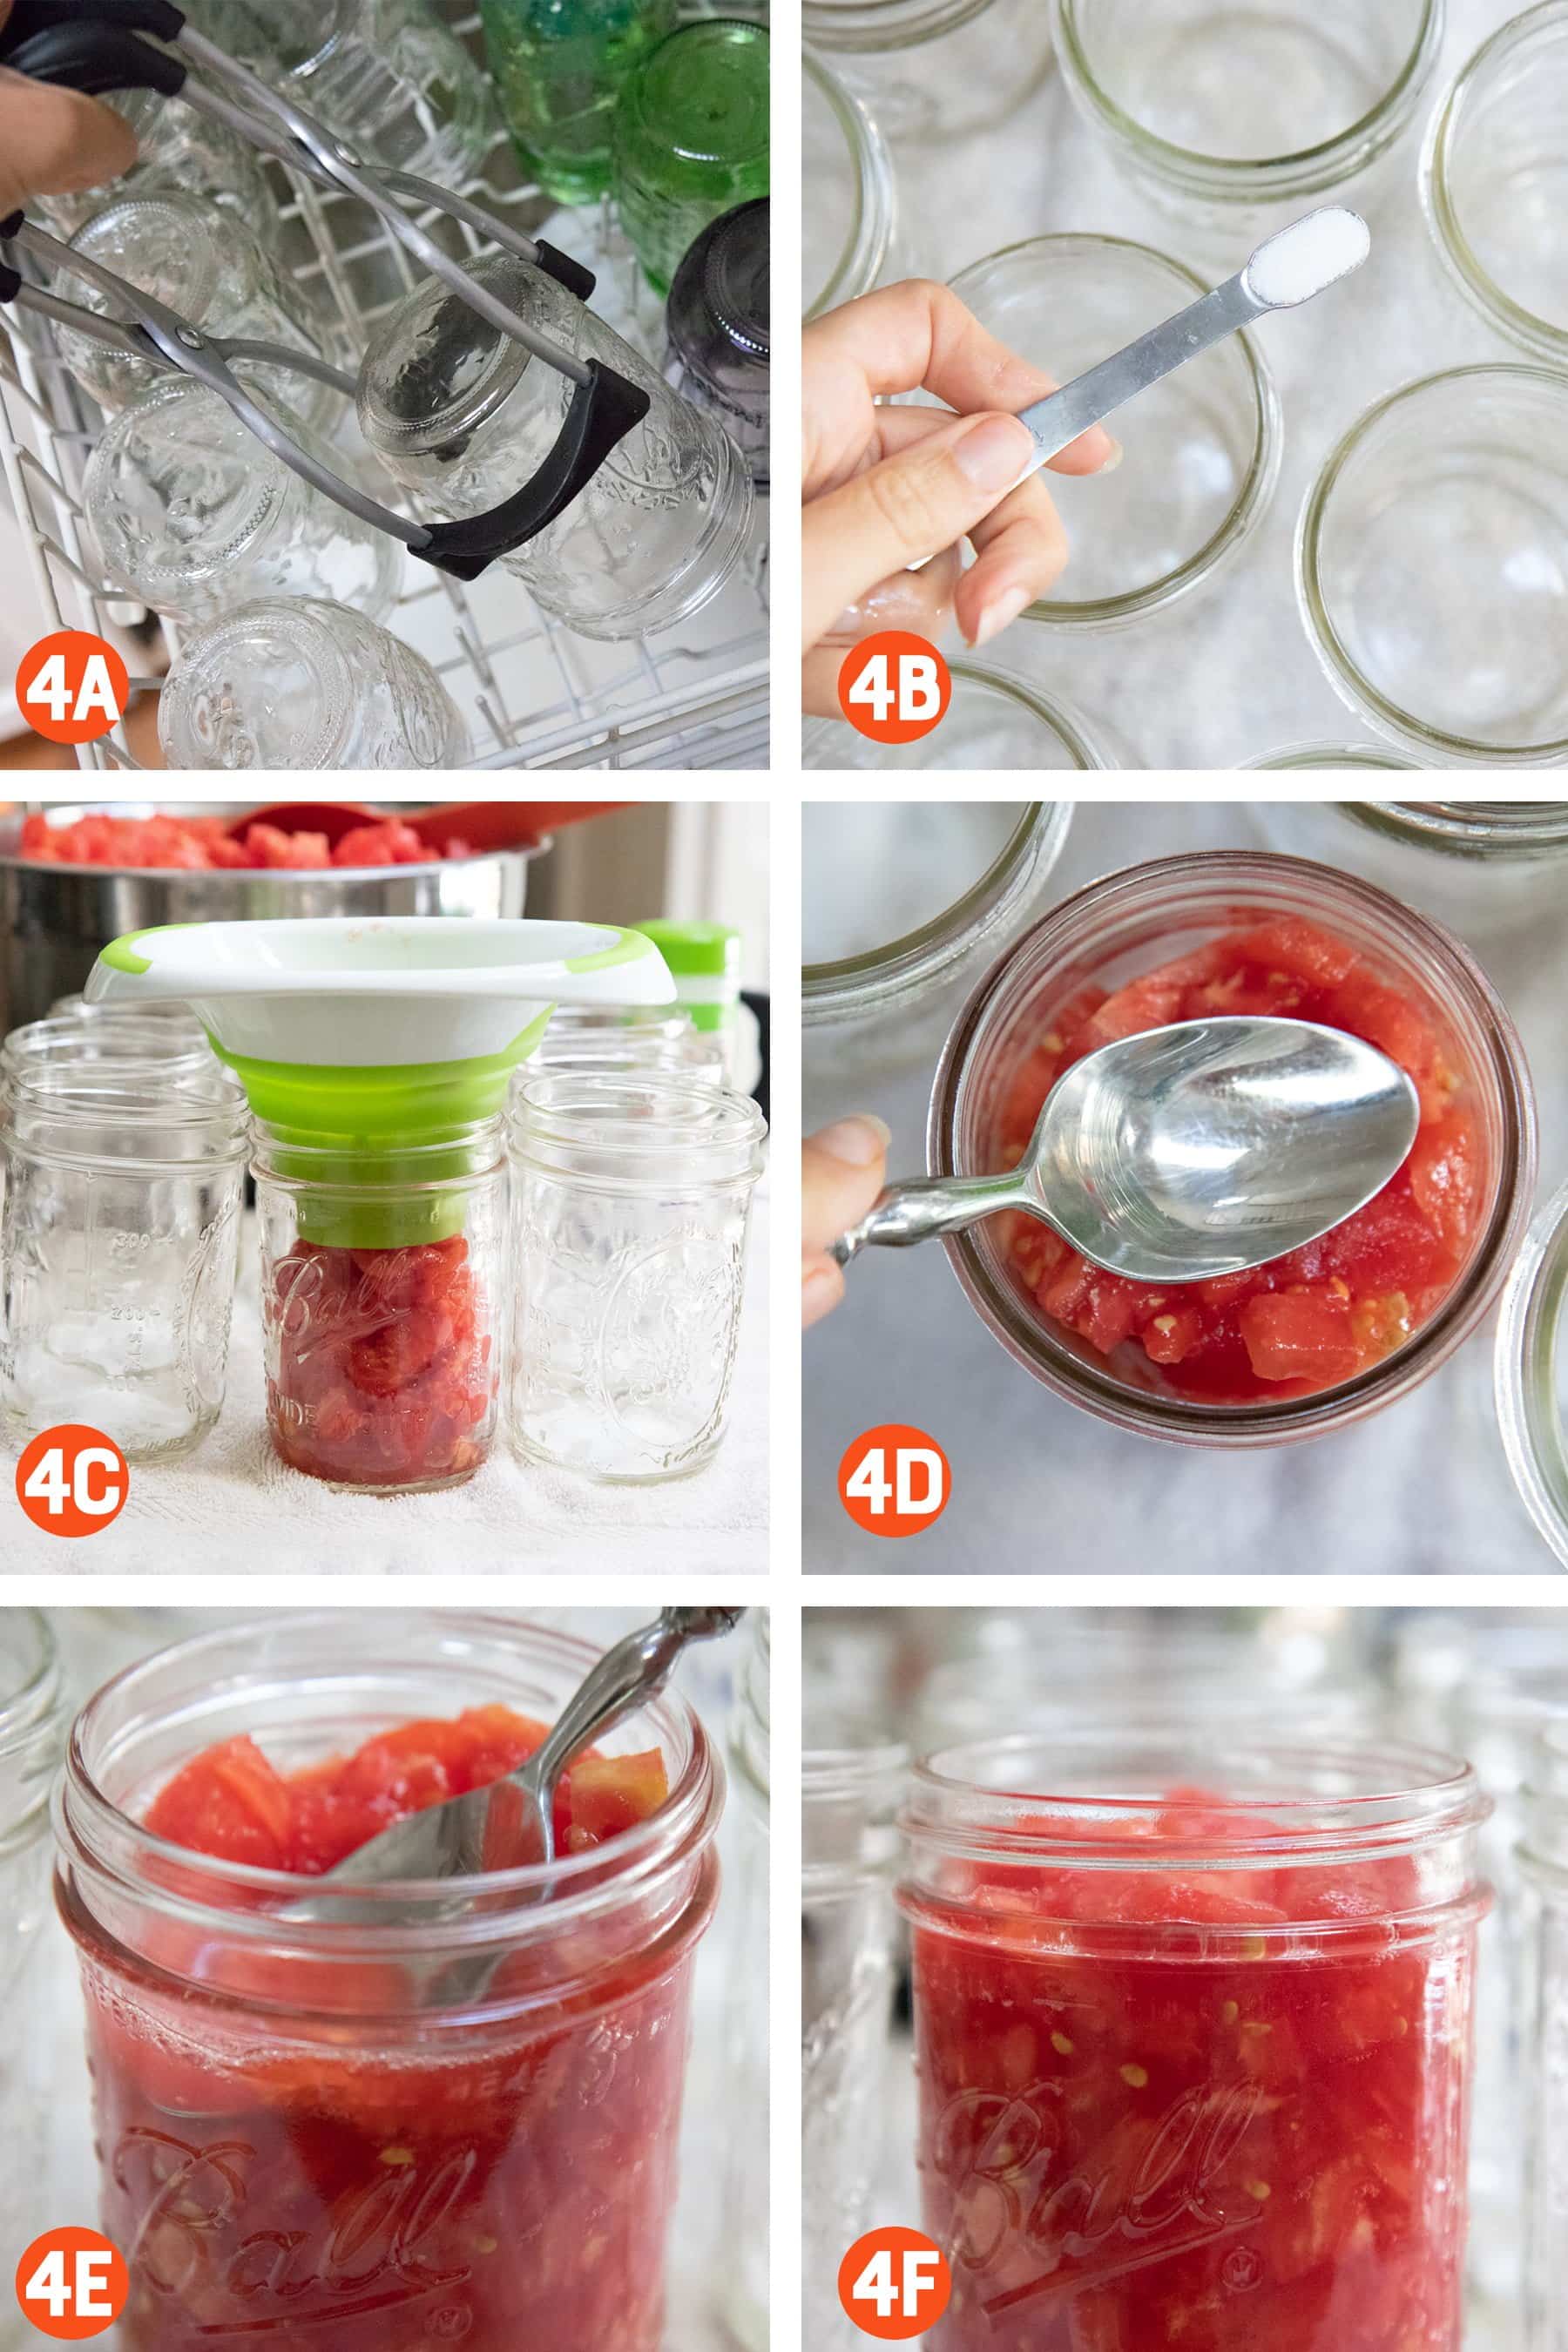
- Step 4A: Remove a single hot jar-Place an old towel on your countertop (to protect the jars from the cold temperature). Remove one hot jar from the water bath canner (dumping the hot water back into the canner), and place it on the towel.
- Step 4B: Acidify the jar-To safely can tomatoes, you must acidify each jar by using either lemon juice or powdered citric acid. For each pint of tomatoes, add one tablespoon of bottled lemon juice (it must be bottled-fresh doesn't have consistent acidity) OR ¼ teaspoon powdered citric acid to the bottom of the jar before adding tomatoes. Double that for quarts.
- Step 4C: Fill the jar-Loosely pack the tomatoes in the jar. A funnel makes this easier, but if you're using wide-mouth jars, you can also easily do this with just a spoon.
- Step 4D: Compress-With the back of a spoon, press down on the tomatoes to release juices and fill up air spaces.
- Step 4E: Add more and repeat-Add more tomatoes, compress again, and repeat the process until the jar is tightly-packed with tomatoes ½" below the top lip of the jar.
- Step 4F: Double check headspace-This ½" headspace is an important number to stay fairly accurate with-proper headspace helps the jars seal properly and safely. Bring out a ruler if you're new to canning. Adjust the headspace by adding more juice/tomatoes or removing some.
Step 5: Close and process
You're almost done! Just a few more steps and you can go kick back and relax while your tomatoes process (or, as I often do, start working on the next batch).
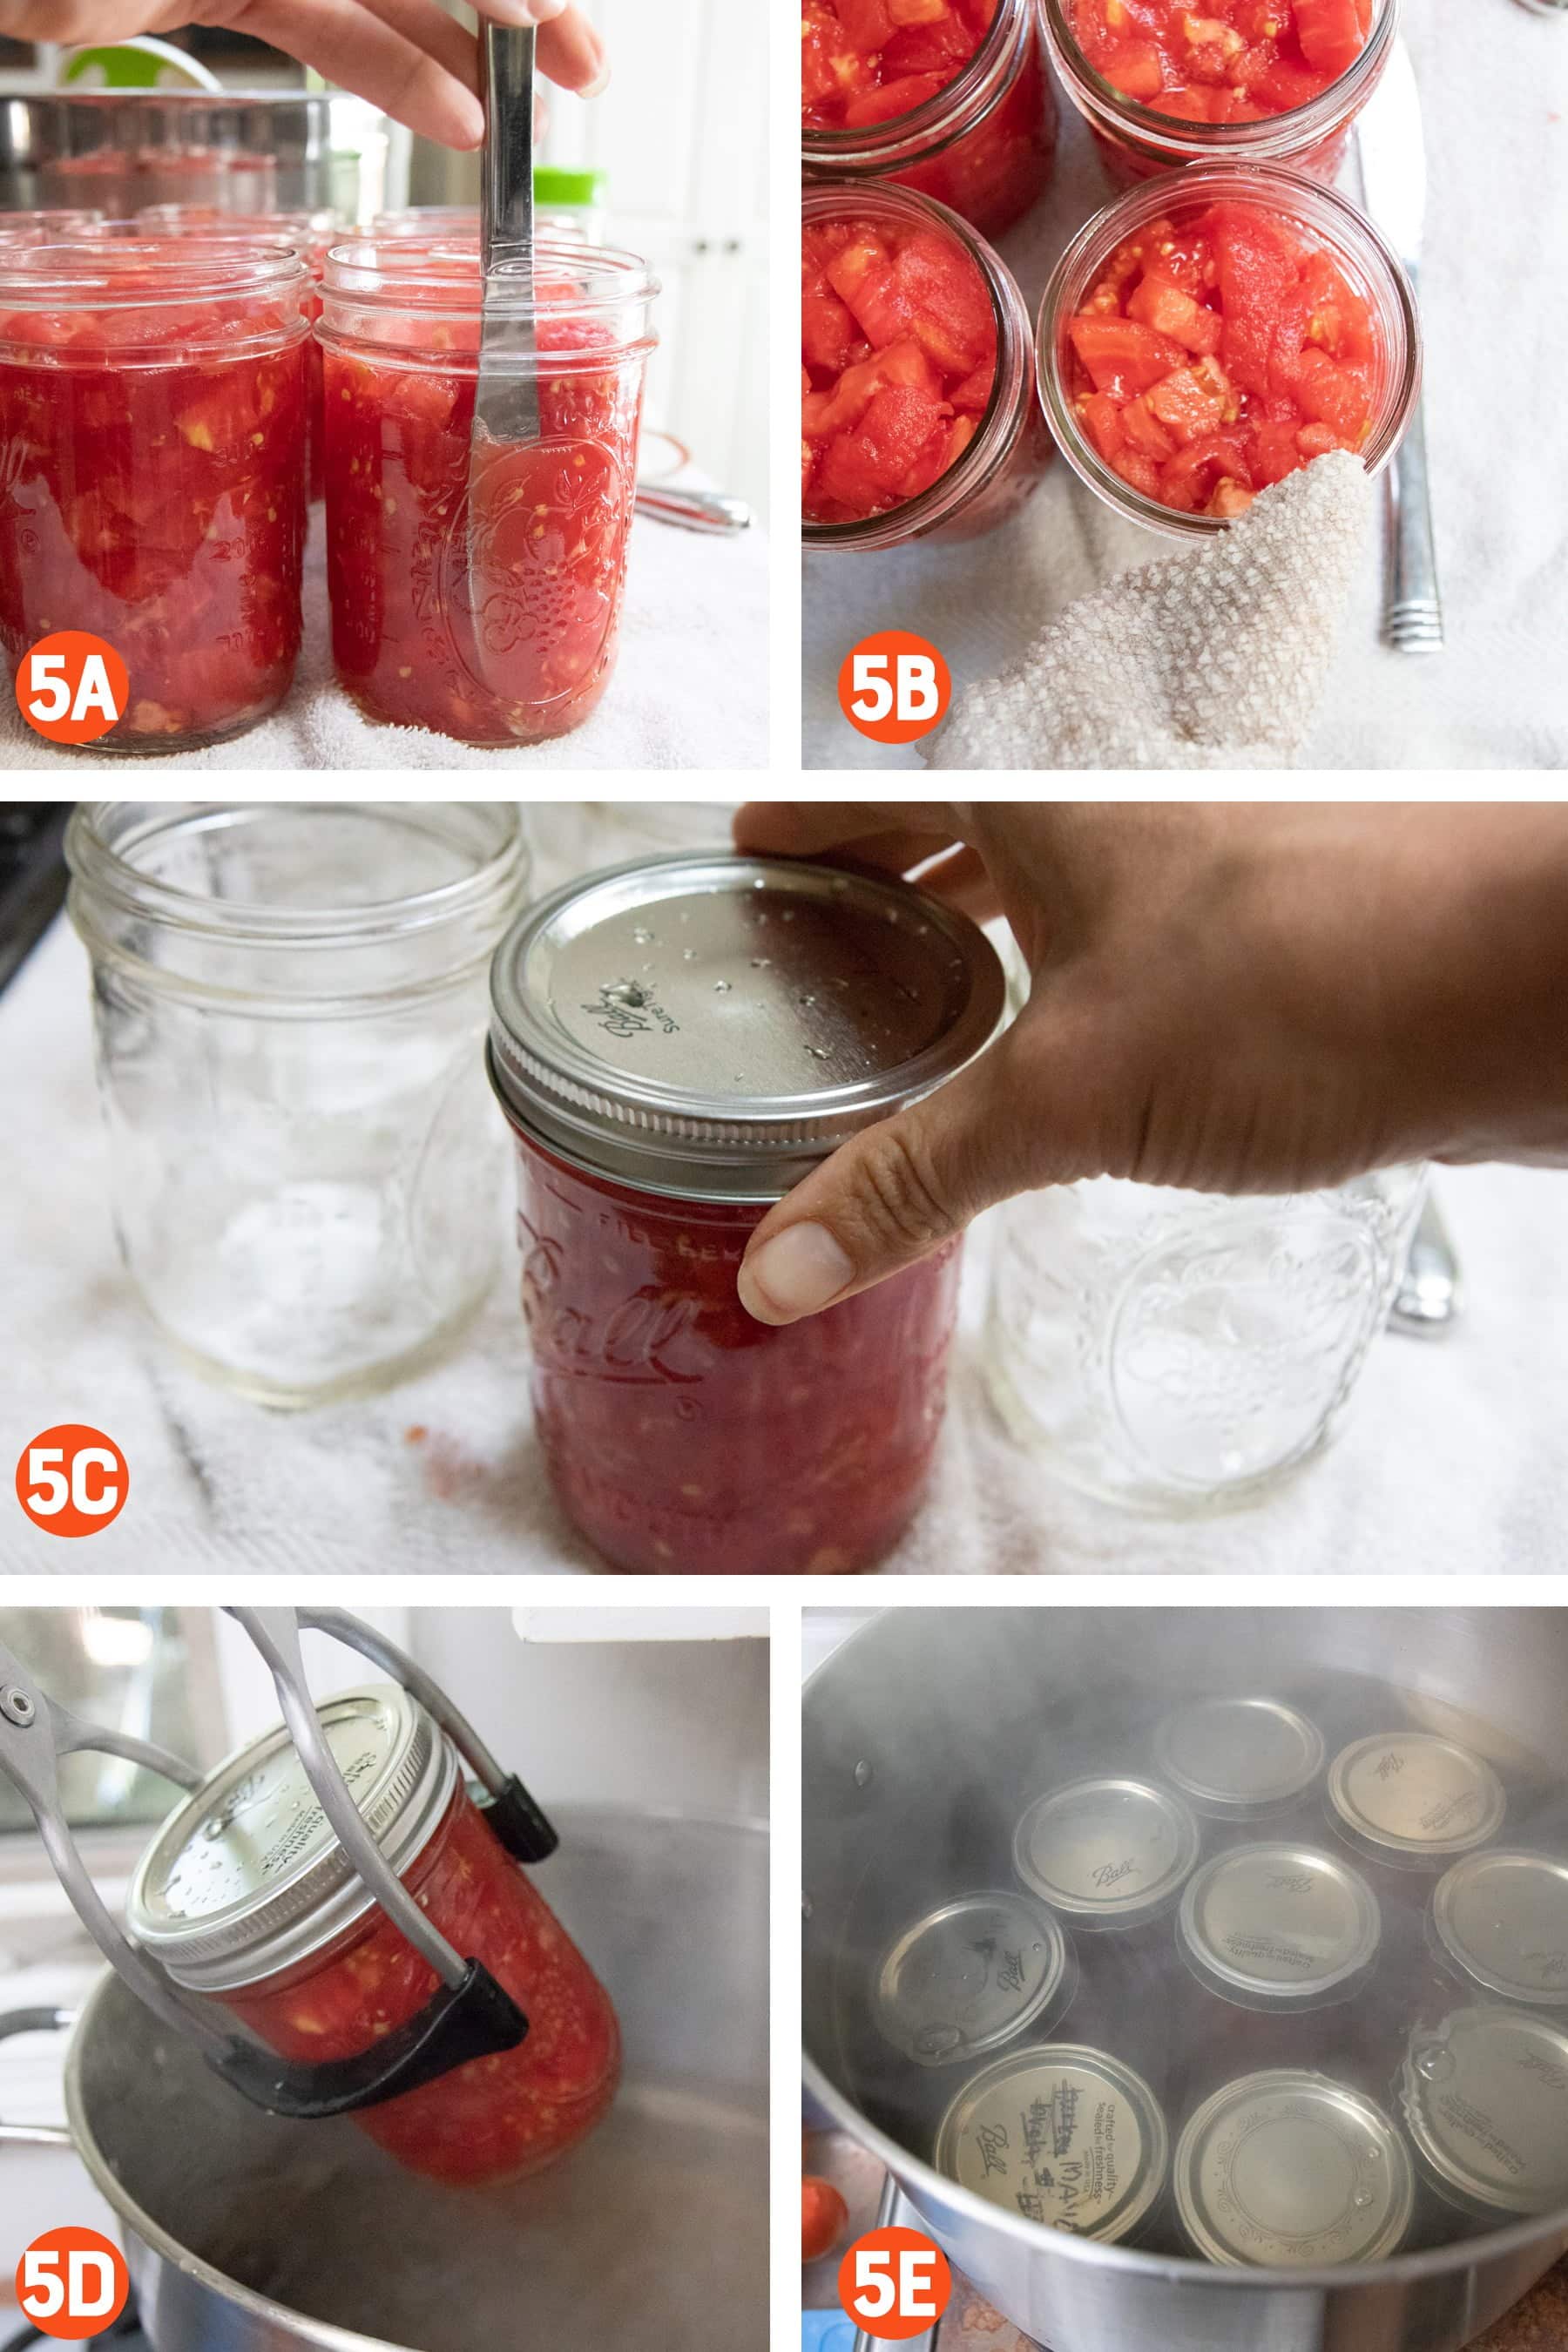
- Step 5A: Release air bubbles-Because you packed down the tomatoes, this step is a bit of overkill-so if you forget it in this particular instance don't stress-but in general, it's a good idea with canning to run a rubber spatula or butter knife along the sides of the jar to release any trapped air bubbles (don't use anything sharper than a butter knife- you don't want to nick your jars and make it easier for the glass to crack!).
- Step 5B: Wipe the rim of the jar-Using a clean, damp cloth, wipe the top rim of the jar to remove any food residue that could keep the jar from sealing.
- Step 5C: Place on the lid-Center the flat piece of the lid on top of the jar. Place on a ring and tighten until just fingertip tight. It's important to not over-tighten the lids-don't ratchet them down with your hands or some other tool. Just tight enough to feel secure.
- Step 5D: Place in water bath and repeat with remaining jars-Place your finished jar in the hot water bath, and then head back and finish Steps 4 and 5 for the remainder of your jars (working one at a time).
- Step 5E: Process-Once your canner is full, double check the water level (it should be at least an inch above your jars), put on the lid, and bring to a rolling boil. Once boiling, set a timer for 85 minutes. When processing time is up, turn off the canner, remove the lid, and wait for five minutes. Then remove the jars (using your jar lifter) and place them on a towel on your counter or table. Let cool completely.
Step 6: Test seals, label, enjoy!
Great work! Two last (important) steps, and you're on your way to all kinds of delicious soups and stews.
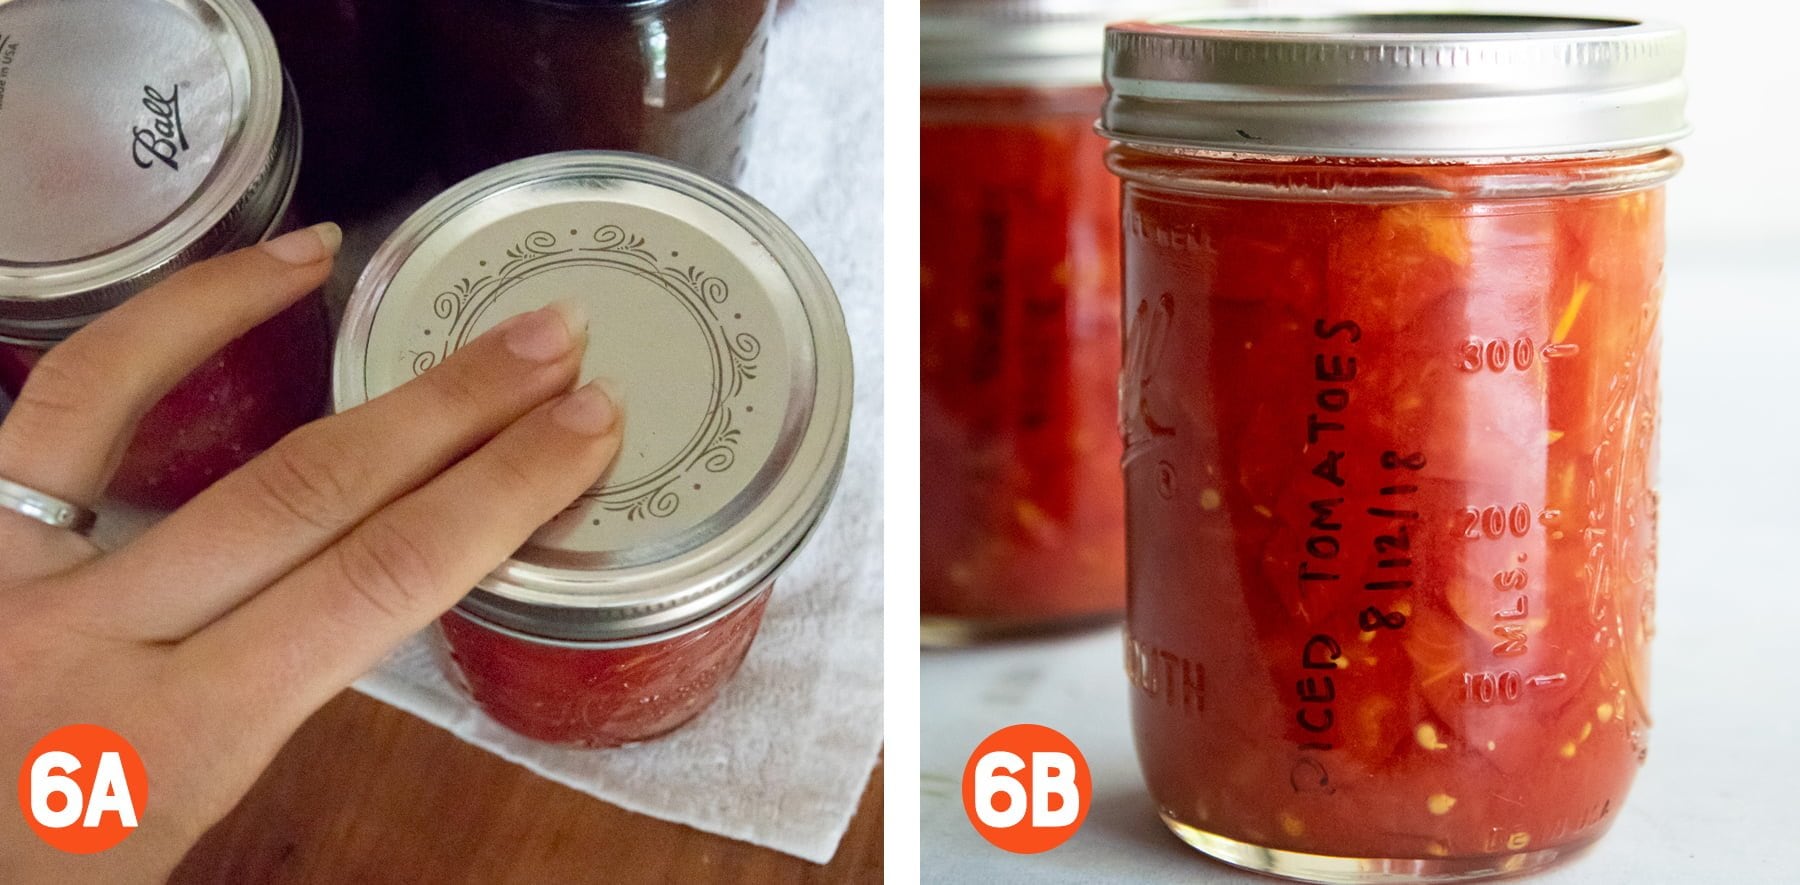
- Step 6A: Check the seals-While your jars are cooling, you should hear a beautiful symphony of pop-pop-pop every now and again! That's the sound of the jars sealing as they cool. Once the jars are completely cool (usually overnight), press down on the top of each jar. If it doesn't move, it's sealed and safe to be stored in your pantry. If the jar lid flexes when you push on it, it didn't seal. It's still safe to eat, it just needs to be stored in the fridge and used within 7-10 days. It's pretty common to have a jar or two not seal during a canning session, so don't feel like a failure if it happens to you. It just means you get to try your goodies soon!
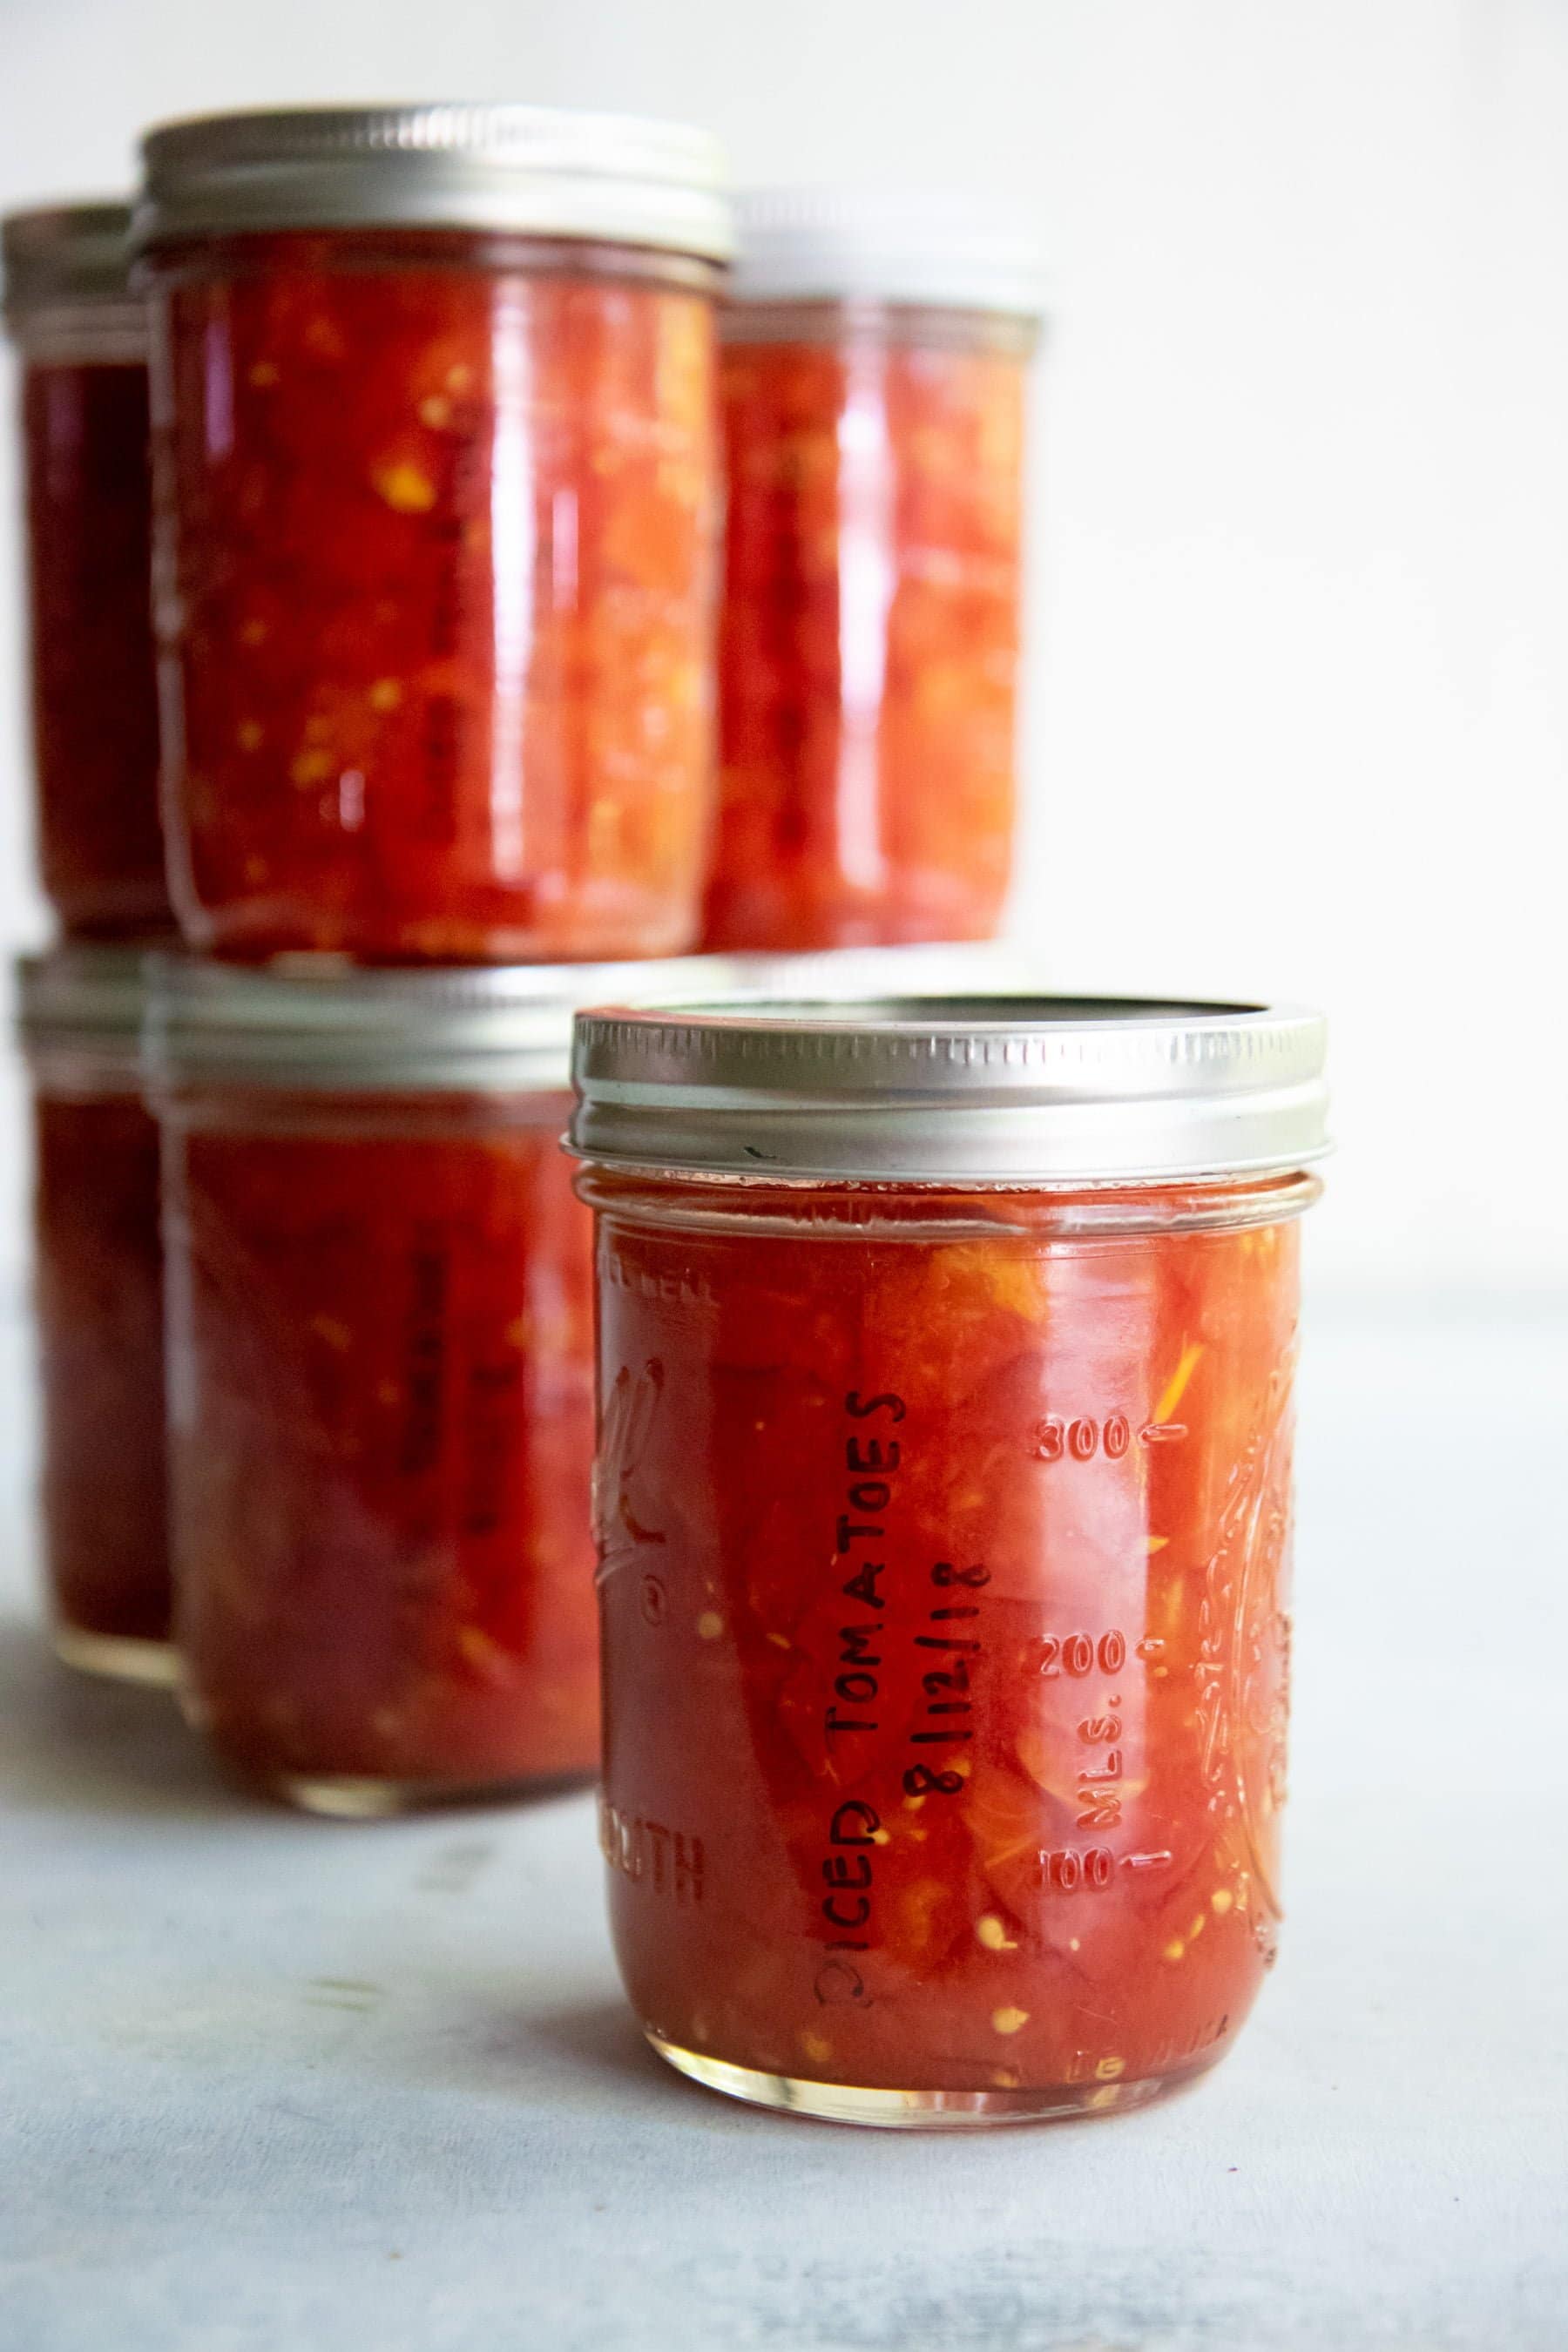
- Step 6B: Label and store-Trust me, you will not remember what is in your jars in eight months, so please label them. There are all manner of cute and interesting ways to label mason jars, but my favorite low-tech method is with a Sharpie. I just write the contents and the date on the jar. When the jar is empty, the marker comes right off with some rubbing alcohol and leaves no sticky residue like you get with stickers and labels. I also like that if I decide to gift a jar, I can wipe off the Sharpie label and affix a decorative label at a later date. Store your canned goods in a dark, cool spot-your pantry is just perfect. For best taste, use within a year, but as long as the jar stays sealed and there is no bulging, mold, or weird smells, canned goods will store almost indefinitely.
Help, my jars lost a lot of liquid in the canner!
Siphoning is the canning term that's used when liquid is sucked out of a jar during the cooling process after canning-it happens to even the most seasoned of canners. As long as jars are sealed properly (see Step 6A for how to check your seals!), they are still safe to eat, even with significant liquid loss. However, they might lose quality (color, flavor) slightly faster than the jars that are completely full of liquid, so you'll want to use the siphoned jars first.
You can help reduce siphoning by making sure the cooling process is slow. Leave your jars in the waterbath canner for at least five minutes with the heat off and the lid off after your processing time is complete before lifting the jars out to cool completely on a folded towel-this should help you avoid losing liquid from your jars.
Is it okay that the tomatoes and liquid separated?
Yep, your diced tomatoes will still be safe to eat. This is quite normal with canning tomatoes! This more commonly happens when you're canning hot pack tomatoes (putting hot tomatoes into hot jars), rather than the raw pack method we are using here, because the heated tomatoes start to break down.
We recommend the raw (cold) packing we use in this recipe to avoid as much separation as possible-though you still might see some. As the jars cool, the tomato solids and liquids may come back together, but if they don't, just shake the jar before using. When you go to use them, you can either drain the liquid or use the entire jar, depending on what's called for in the recipe.
Variations to try
I prefer to keep my tomatoes plain and spice them up later, but you might like having some ready-to-go flavor combos already in your pantry. Here are three of my favorite diced tomato variations to try. I never salt my tomatoes before canning, but you are welcome to add salt (about ¼-1/2 teaspoon per pint jar) if you'd like.
Note: If you're going to make your own flavor combos, be sure to only use dried spices. Ingredients like fresh onions or peppers are not acidic enough to can with tomatoes safely unless you are following a recipe that has been tested for proper pH levels. Always accurately follow a tested recipe when canning things like salsa, spaghetti sauce, or chutney.
- Fire-roasted diced tomatoes-Fire up your grill to medium-high, and place the raw (unpeeled) tomatoes directly on the grill grates. Close lid and let cook for one minute. Using tongs, flip over and cook an additional minute. Remove to a baking sheet and let cool until you can handle them. Slip off the skins, and then core, dice, and can as noted above.
- Italian diced tomatoes-Add ½ teaspoon each of dried basil and oregano, ¼ teaspoon garlic powder, and a small pinch of red pepper flakes to each pint jar before packing with tomatoes.
- Mexican diced tomatoes-Add 1 teaspoon chili powder, ½ teaspoon each cumin, oregano, and coriander, ¼ teaspoon garlic powder, and a small pinch of red pepper flakes to each pint jar before packing with tomatoes.
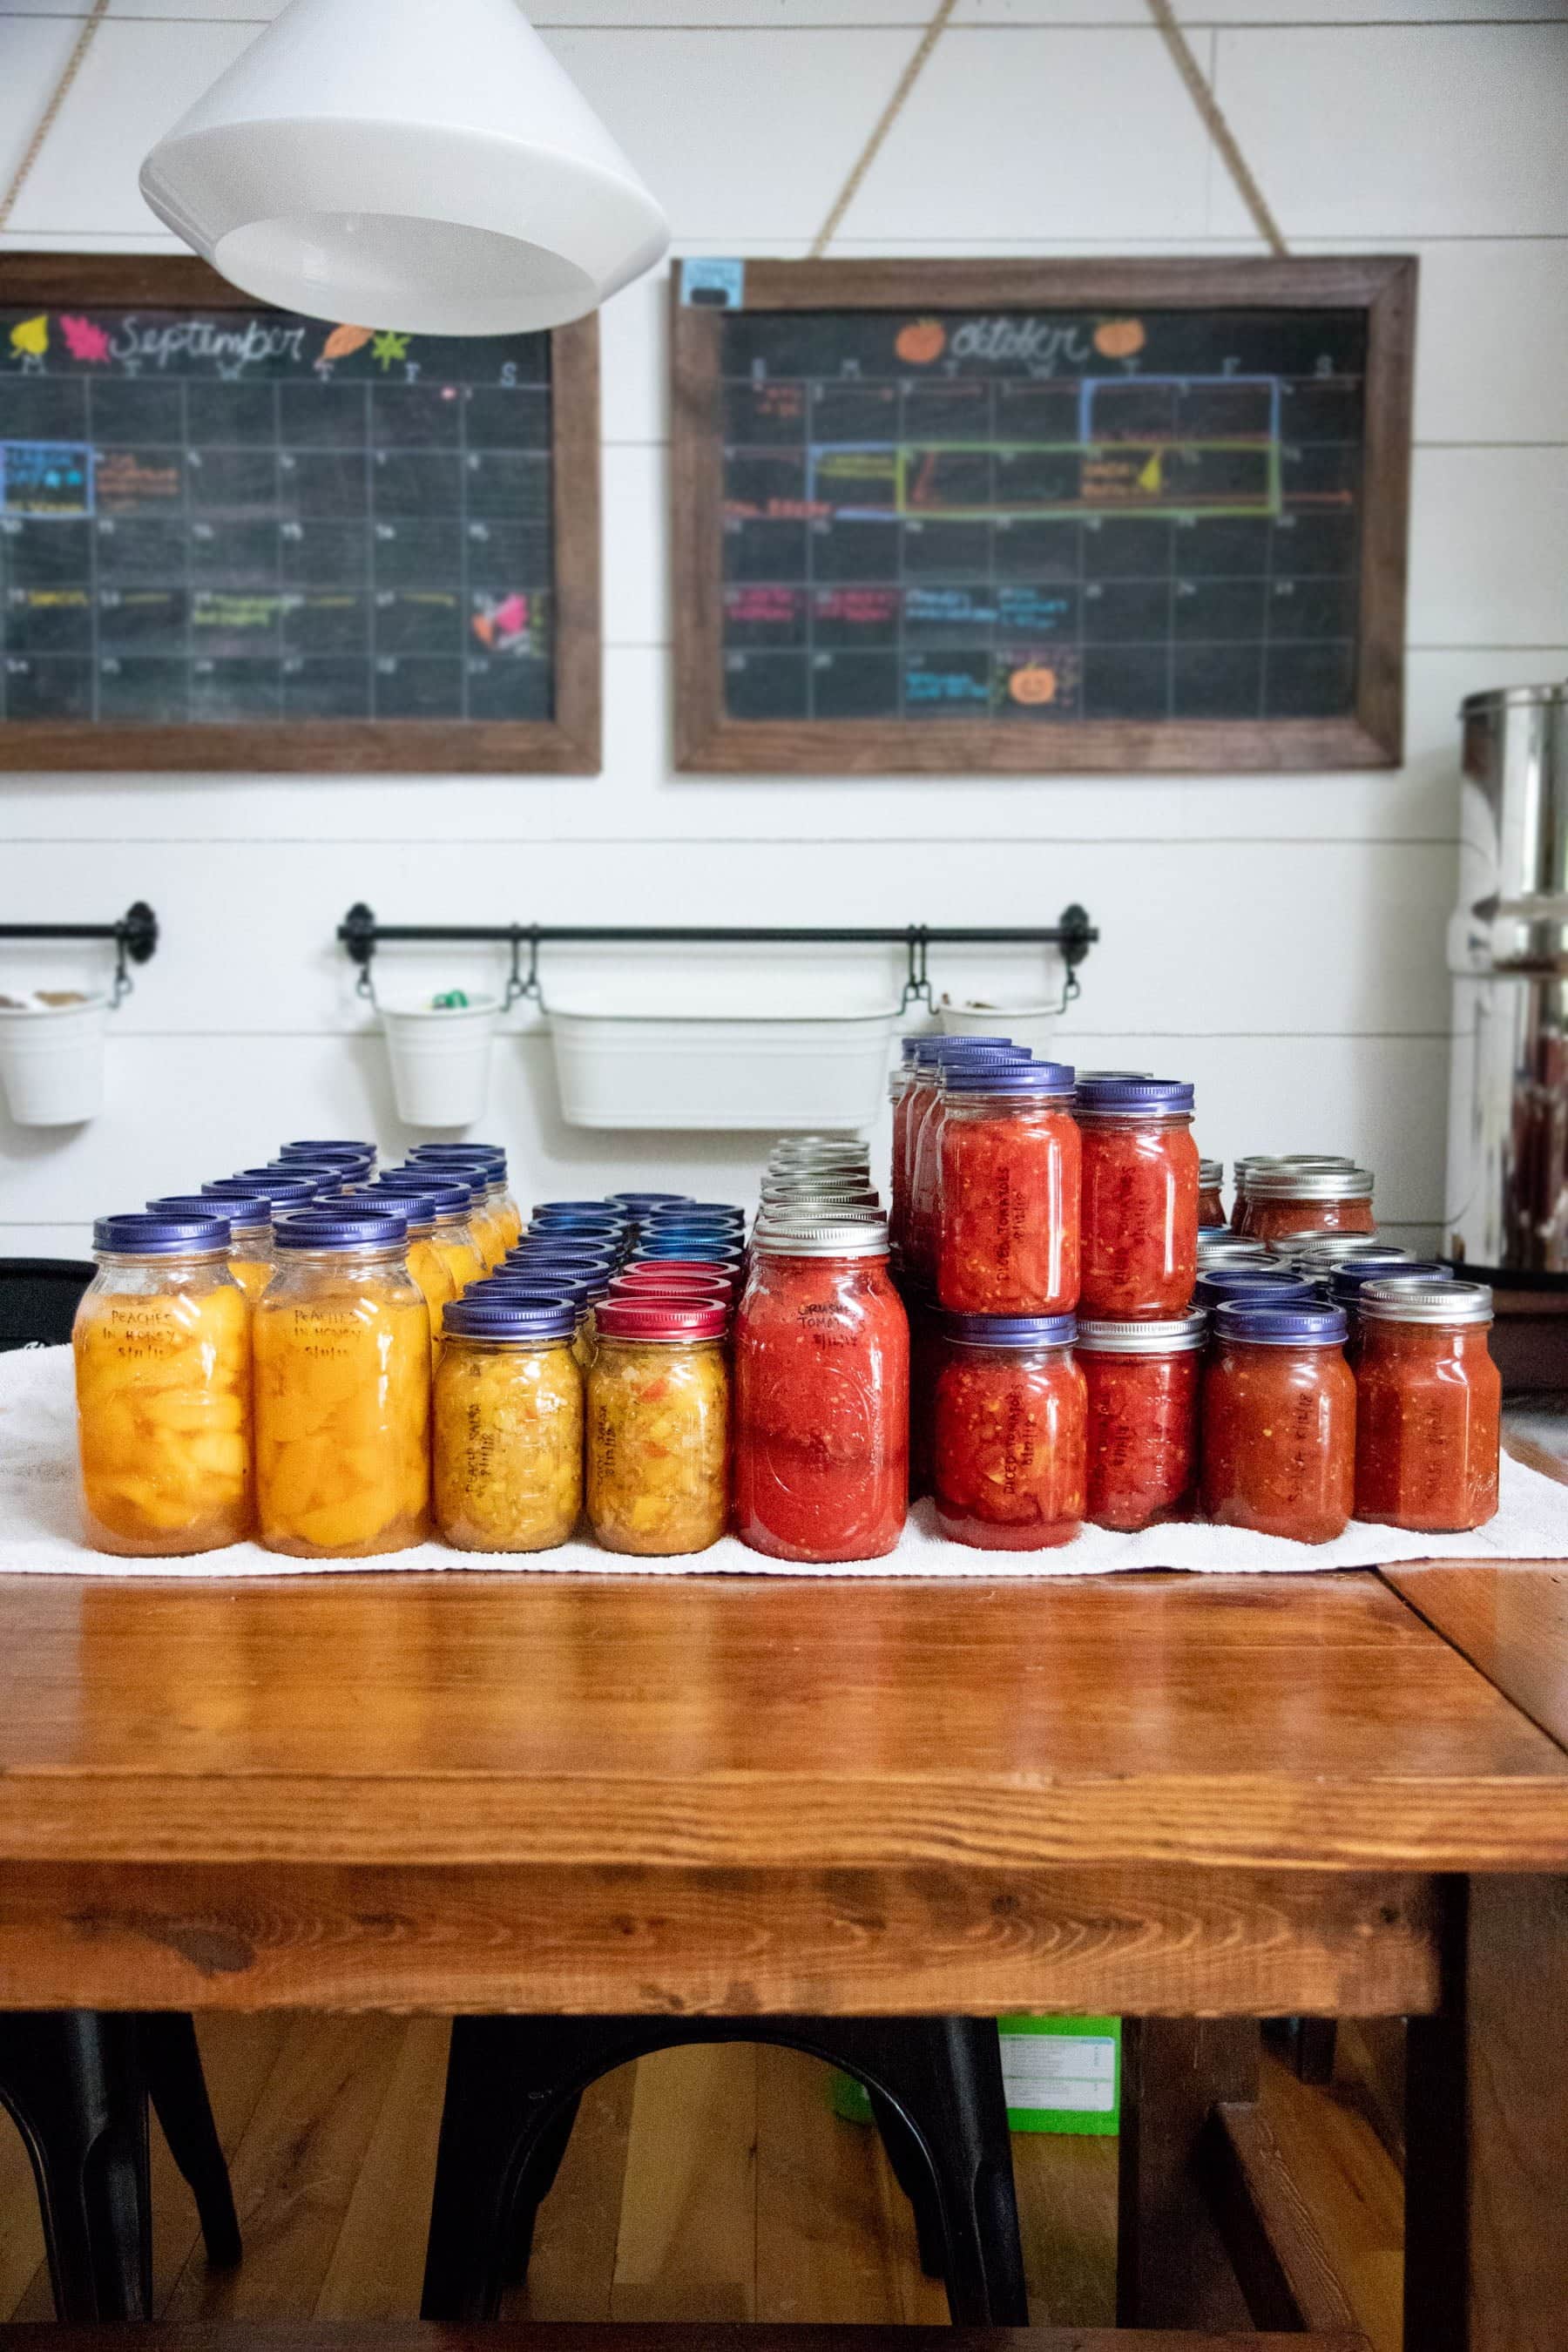
I know that was a lot of information, but I wanted to really make sure you felt confident and prepared for when you fire up your canner. I promise you can do this! And you'll feel so proud when you see a beautiful row of jars of tomatoes sitting on your pantry shelves. As always, if you have any questions, feel free to leave a comment below or shoot us an email. We'd love to help!
Want more recipes to use your diced tomatoes?
- Penne Rosa. This Noodles & Co. copycat recipe is a long-standing favorite around here!
- Split Pea Curry. This vegan curry recipe is a quick and easy way to use your diced tomatoes.
- Vegetable Beef Soup. Meal prep your lunch and use some of your diced tomatoes with this soup recipe.
- Instant Pot Jambalaya. Another great use for diced tomatoes, this jambalaya comes together easily on a weeknight, thanks to the Instant Pot.
- Turkey Taco Chili. Our turkey taco chili recipe calls for crushed tomatoes, but you can easily swap in diced, in a pinch.
📖 Recipe

How to Can Diced Tomatoes
Ingredients
- 9 pounds tomatoes approximately
- 2 ¼ teaspoons powdered citric acid OR 9 tablespoons bottled lemon juice
Instructions
- Fill a water bath canner fit with a canning rack ⅔ full with water. Bring to a boil.
- Wash, sterilize, and heat nine wide-mouth pint canning jars.
- Score the bottom of each tomato in the shape of an "X." Working in small batches, plunge tomatoes into boiling water for 45-60 seconds, or until the skins start to pull away from the tomato.
- Immediately submerge tomatoes into an ice bath and slip off the skins. Remove tomato cores and dice.
- Working one jar at a time, place ¼ teaspoon of powdered citric acid OR 1 tablespoon bottled lemon juice in the bottom of the hot jar.
- Pack raw diced tomatoes into the prepared jar. Press tomatoes with the back of a spoon to release juice and fill in spaces between tomatoes. Add in more tomatoes and juice, if necessary, to reach a ½" headspace between the top of the tomatoes and the top of the jar.
- Wipe the rim of the jar, place on the lid, and then screw on the band until fingertip tight. Place jar in canner, and then repeat with remaining eight jars, working one jar at a time.
- Ensure that jars are covered by at least 1" of water in the canner, then bring to a boil and process for 85 minutes. When processing time is up, turn off the canner and remove the lid. Wait five minutes, then remove the jars to a towel-lined countertop or table and cool completely.
- Check the seals by pressing on the top of the lid. If it flexes, immediately refrigerate the jar and use within 7-10 days. If the lid doesn't flex, it is safe to store in a cool dark place. Use within a year for best flavor. Make sure to label your jars with contents and date before storing.
Video

Hello,
As others have mentioned, I think you have the wrong processing times.
https://www.ballmasonjars.com/blog?cid=tomatoes-whole-halved-or-quartered-packed-water
Hi Donna: This processing time is directly from the Ball Complete Book of Home Preserving. They may have updated the processing times since the book was released, but there will be no harm done in processing them longer.
The recipe was very easy to follow. My question... Is there a tolerance for error on the amount of lemon juice required in each jar? I am asking because when packing several jars some of the juice spilled out as i was pressing in the chunks of tomato. After i was done packing the jars i noticed a slight taste of lemon in the bowl where i had collected the overflow. I almost dumped everything out thinking i should start over but that would be so messy.
We recommend erring on the side of caution, so if you're not sure that all the lemon juice made it into the jars, you can add some to each jar before sealing to be safe.
Hi! I tried this for the first time but there was a lot of liquid at the bottom of the jar when I removed from the water bath. Is this the separation that you described? If so how can I avoid that next time?
Hi Allison! We talk about that in the post under the heading "Is it okay that the tomatoes and liquid separated?" I'll copy some of it here for easier finding, but definitely check out the full section for more info: "We recommend the raw (cold) packing we use in this recipe to avoid as much separation as possible—though you still might see some. As the jars cool, the tomato solids and liquids may come back together, but if they don’t, just shake the jar before using. When you go to use them, you can either drain the liquid or use the entire jar, depending on what’s called for in the recipe." Hopefully this helps!
This receipe is a keeper. Super easy and can't wait to try. Anything easy to can is my thing. Will check you out further.
Would you please put a disclaimer at the top of your instructions letting people know this is an unsafe process? People deserve to know that this is a botulism risk as there are no safe tested recipes for diced tomatoes. In addition, tomatoes must be peeled unless the tested says otherwise. It's not right to put people at risk by giving out bad information.
Hi Amanda! Our recipe comes directly from the Ball Complete Guide to Home Preserving and has been tested as safe for water bath canning. We also highly recommend and have complete instructions for how to peel your tomatoes in the post and recipe card.
Hi, do you have to blanch and skin the tomatoes before you can them. Can you raw pack them unblanched and with the skins on? Thank you
Hi Kelly! We highly recommend removing the skins. Here's what we say in the post, "You don’t have to peel your tomatoes. But I highly recommend it. Since I’m always looking for kitchen shortcuts, I’ve canned without peeling before, and I wished I had taken the time to do it. Tomato skins get very tough through the canning process, and unless they are chopped into minuscule pieces, they aren’t very appetizing." Blanching makes the peeling easier, and the peeling keeps the finished tomatoes nicer—no tough skins! I hope that helps!
Great article with clear directions and easy to follow steps. Thank you! I'd like to point out that the images show hot jars being taken out of the dishwasher (apparently directly from being sterilized like I do it). But somewhere else it mentioned that the jars need to be in the hot water in the canner. I pulled mine out of the dishwasher, packed them, and put them in the hot water bath one at a time as you recommend. I lost a jar 🙁 The jars aren't hot enough being pulled out of a hot dishwasher I guess. I just thought you might want to match your picture with the proper instruction, and discuss putting the empty jars in the hot water bath for safe cold packing. 🙂
We're so sorry you lost a jar, Katherine! You're correct—the instructions are right, but the image needs to be updated. Thank you for pointing it out so we can fix it! We really appreciate you helping us improve!
I've been looking up processing times for diced tomatoes, and other sites say 45 minutes for quarts, 35 for pints in a water bath canner. I've canned tomatoes before and they were cooked to smithereens in the pressure canner so that they disintegrated into mush when I opened the jars a few months later; and I thought I remembered water-bath canning being for a shorter time.
Hi Terry! The water-bath canner and pressure canner work very differently, so this recipe will be much gentler on your 'maters. Even with the longer processing time, they won't turn to mush! We can't speak to the processing times you found on other recipes, but this one is a tested recipe from a trusted source (Ball), and we've used it with consistently great results for years!
Hi! I was wondering if I use quart size jars, is the processing time the same or longer? Also can I process different size jars at the same time? Thanks!
Hi Cheryl! If you'd like to process quart jars, we recommend you seek out a tested recipe from a trusted source for that particular size. Our recipe has only been tested for pint jars! We also don't recommend processing different size jars at the same time. It's best to stick with the size indicated in the recipe, and use a different recipe for a different size.
Can you add fresh oregano and thyme without affecting canning process?
Hi Tracy! If you'd like to add fresh herbs, you should seek out a tested recipe that calls for fresh herbs. You can safely add small amounts of dried herbs and seasonings to change the flavor profile, though. We list some of our favorites in the section, "Variations to try."
Hey Cassie,
Just a little safety note~
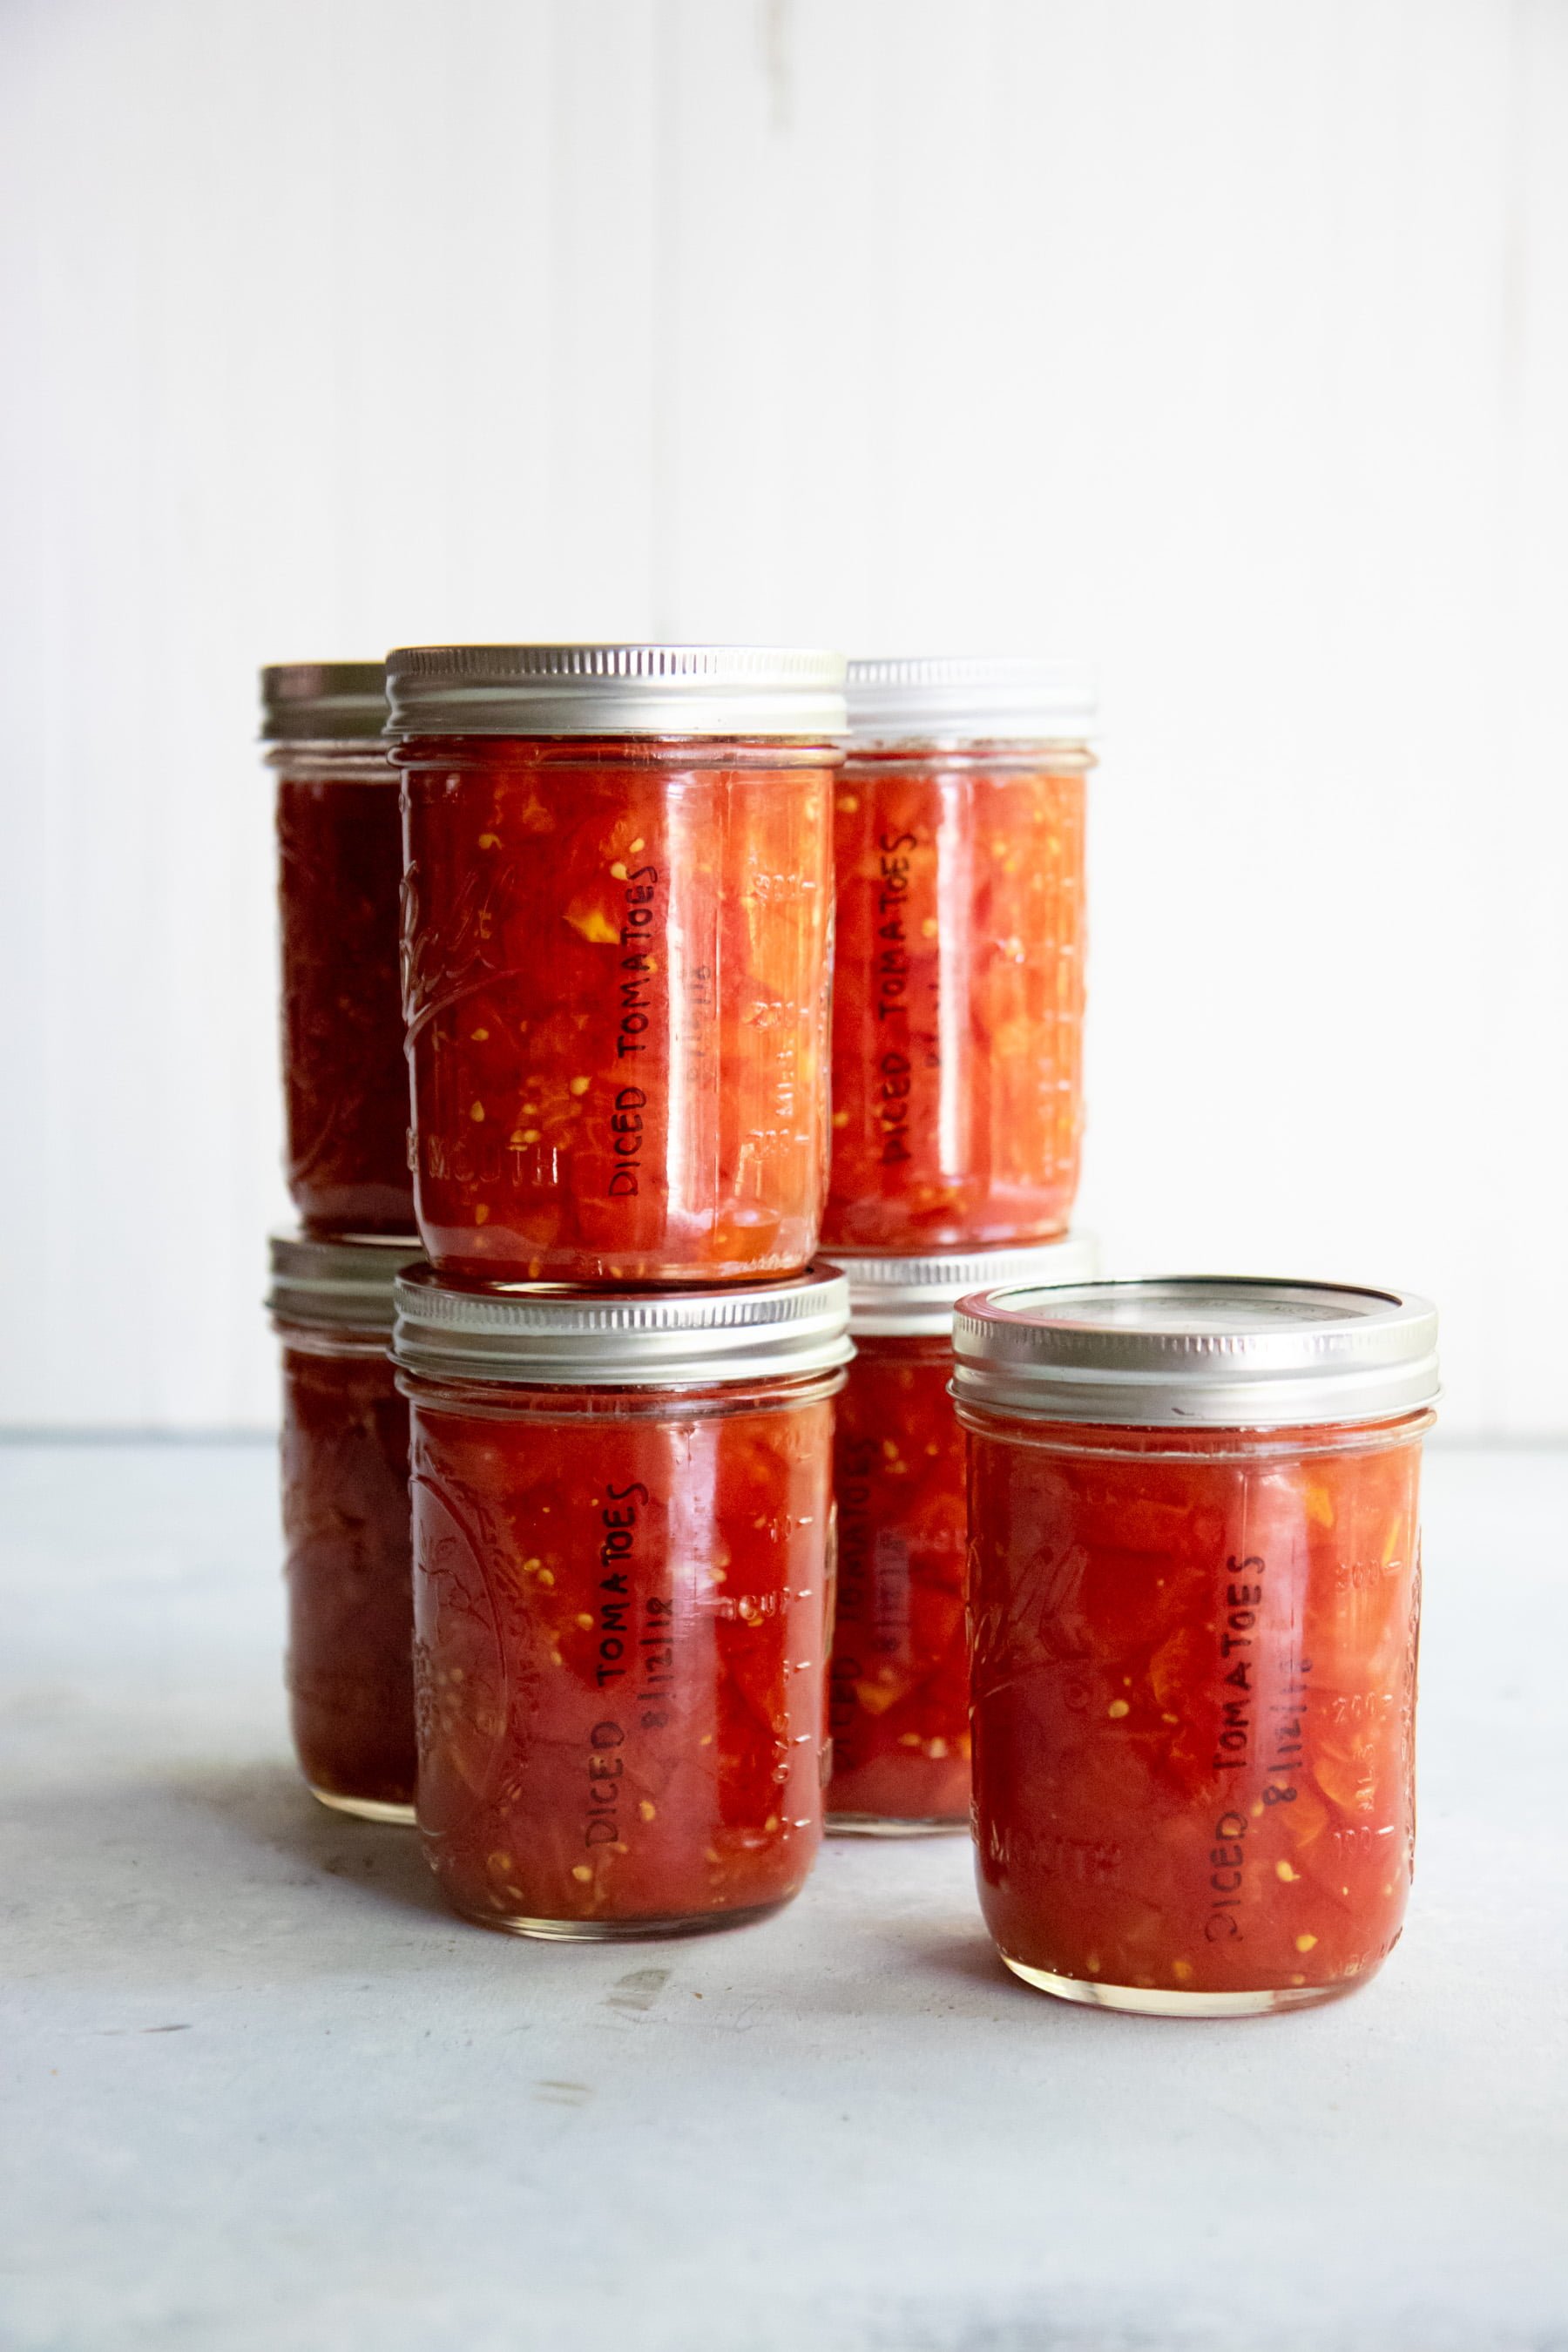
I noticed your photo of either cooling or ready to be stored jars in your kitchen. My canning book (Ball Blue Book 2013) states that there should be at least an inch of space around each jar after removing from the water bath canner, and that no jar should ever be stacked directly on top of another jar, especially when storing it, it could compromise the seal. I did not see any mention of this in your post or recipe, and thought it might be helpful to add.
All of that said, I am looking forward to trying your recipe in the next few days!
Hi Amber! Yes, we recommend spacing between jars while cooling. But stacking your jars when storing them is just fine! We confirmed with Ball themselves in 2022 that it's safe to stack jars for storage just as long as they are stable. =)