
Easy Homemade Sandwich Bread
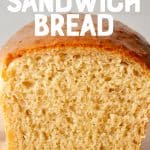
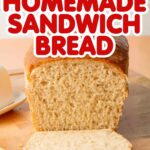

This easy homemade sandwich bread bakes up tall, soft, and perfectly sliceable with just 7 ingredients and one bowl. It's the beginner-friendly loaf that'll make you wonder why you ever bought bread from the store.

Featured Review

"I am a first-time bread maker. I have tried many recipes, and my breads always end up hard. I have not been able to get it right. Until now. This is the first recipe that my family drooled over. We ate it all in one night. I will use your recipe over and over."
- Carolina -
🔍 Recipe At-A-Glance
- Prep Time: 20 minutes
- Rise Time: 2-3 hours (varies by kitchen temp)
- Bake Time: 25-30 minutes
- Flour Options: All-purpose, whole wheat, or a mix of both
- Yield: 1 loaf (12 thick slices or up to 18 thin slices)
- Equipment: Stand mixer or just your hands
- Difficulty: Beginner-friendly. If you've never worked with yeast before, this is the recipe to start with.
- Storage: Counter for 4-5 days, freezer for up to 6 months
🍞 Why I Love This Recipe
My kiddo has asked for this homemade sandwich bread every single week for years. That kind of consistency from a picky eater is the best recipe review I've ever gotten.
My daughter has strong opinions about bread. Specifically, she has one opinion: it has to be this bread. Every single week, without fail, she asks when we're making more.
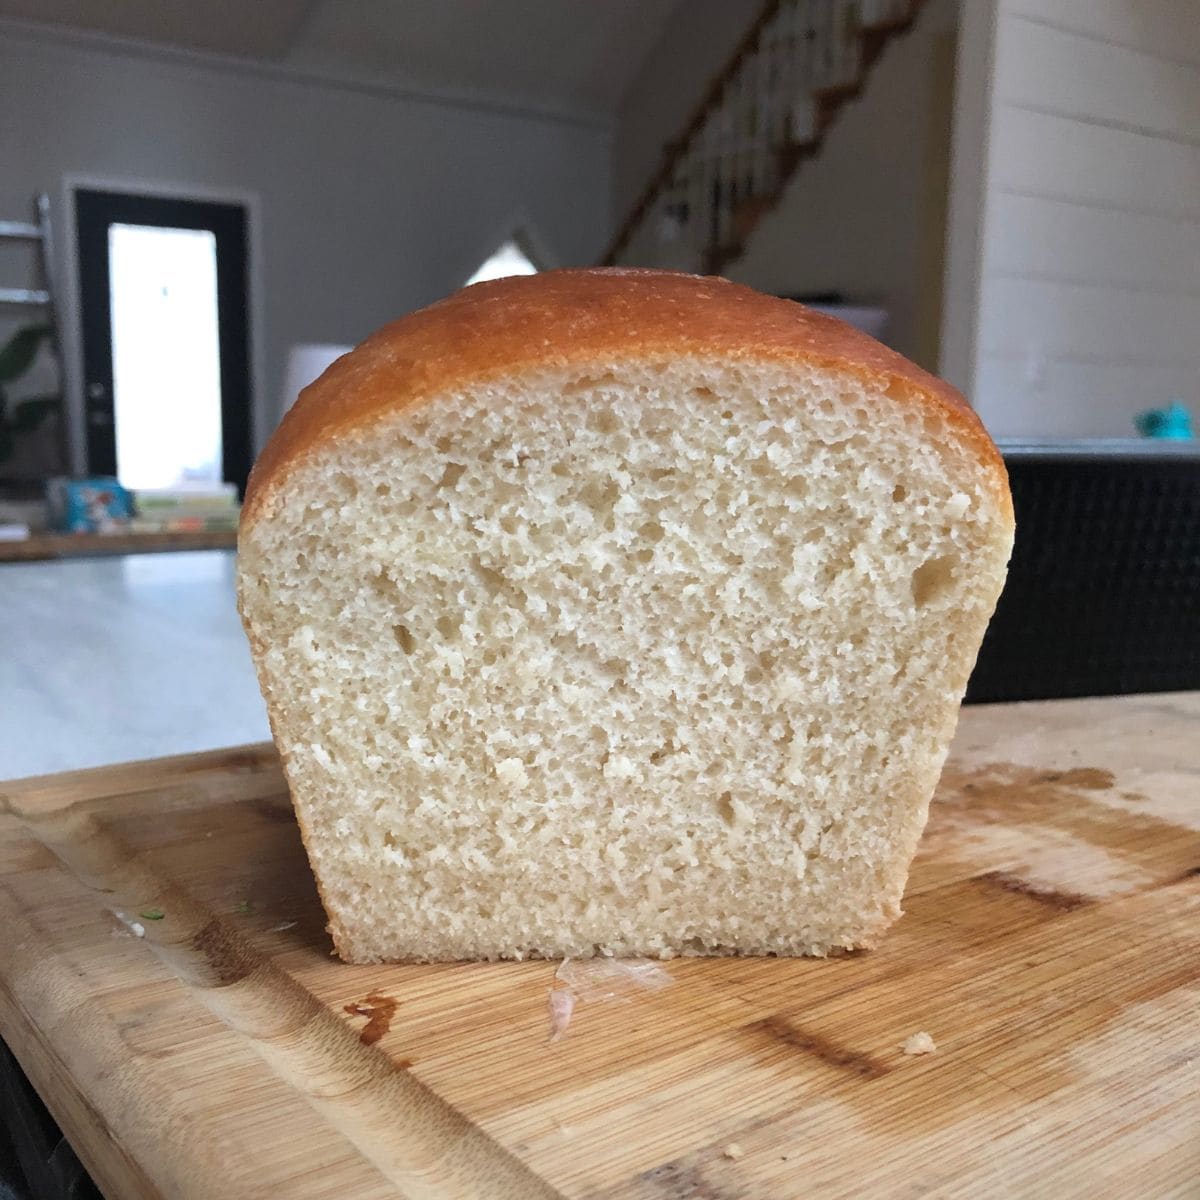
And honestly? I get it. This homemade sandwich bread is soft, fluffy, and tender in a way that hits straight in the nostalgia. You know that pillowy, pull-apart softness of Wonder Bread? That's exactly what this is. I had a babysitter growing up who made me bologna and Miracle Whip sandwiches on Wonder Bread after school, and this bread brings that feeling back every single time I slice into the loaf.
I first nailed this recipe during the pandemic, when we were all home and craving something warm and comforting. Homemade bread felt like the answer to everything that year. Since then, thousands of people have made it and told me it's the best bread they've ever baked. That never gets old to hear.
Here's why it keeps earning a spot in our weekly rotation:
- Genuinely beginner-friendly: No thermometer, no fancy flour, no bread machine. Just a bowl, your hands, and a little patience.
- Incredibly flexible: Works beautifully with all-purpose flour, whole wheat, or anywhere in between.
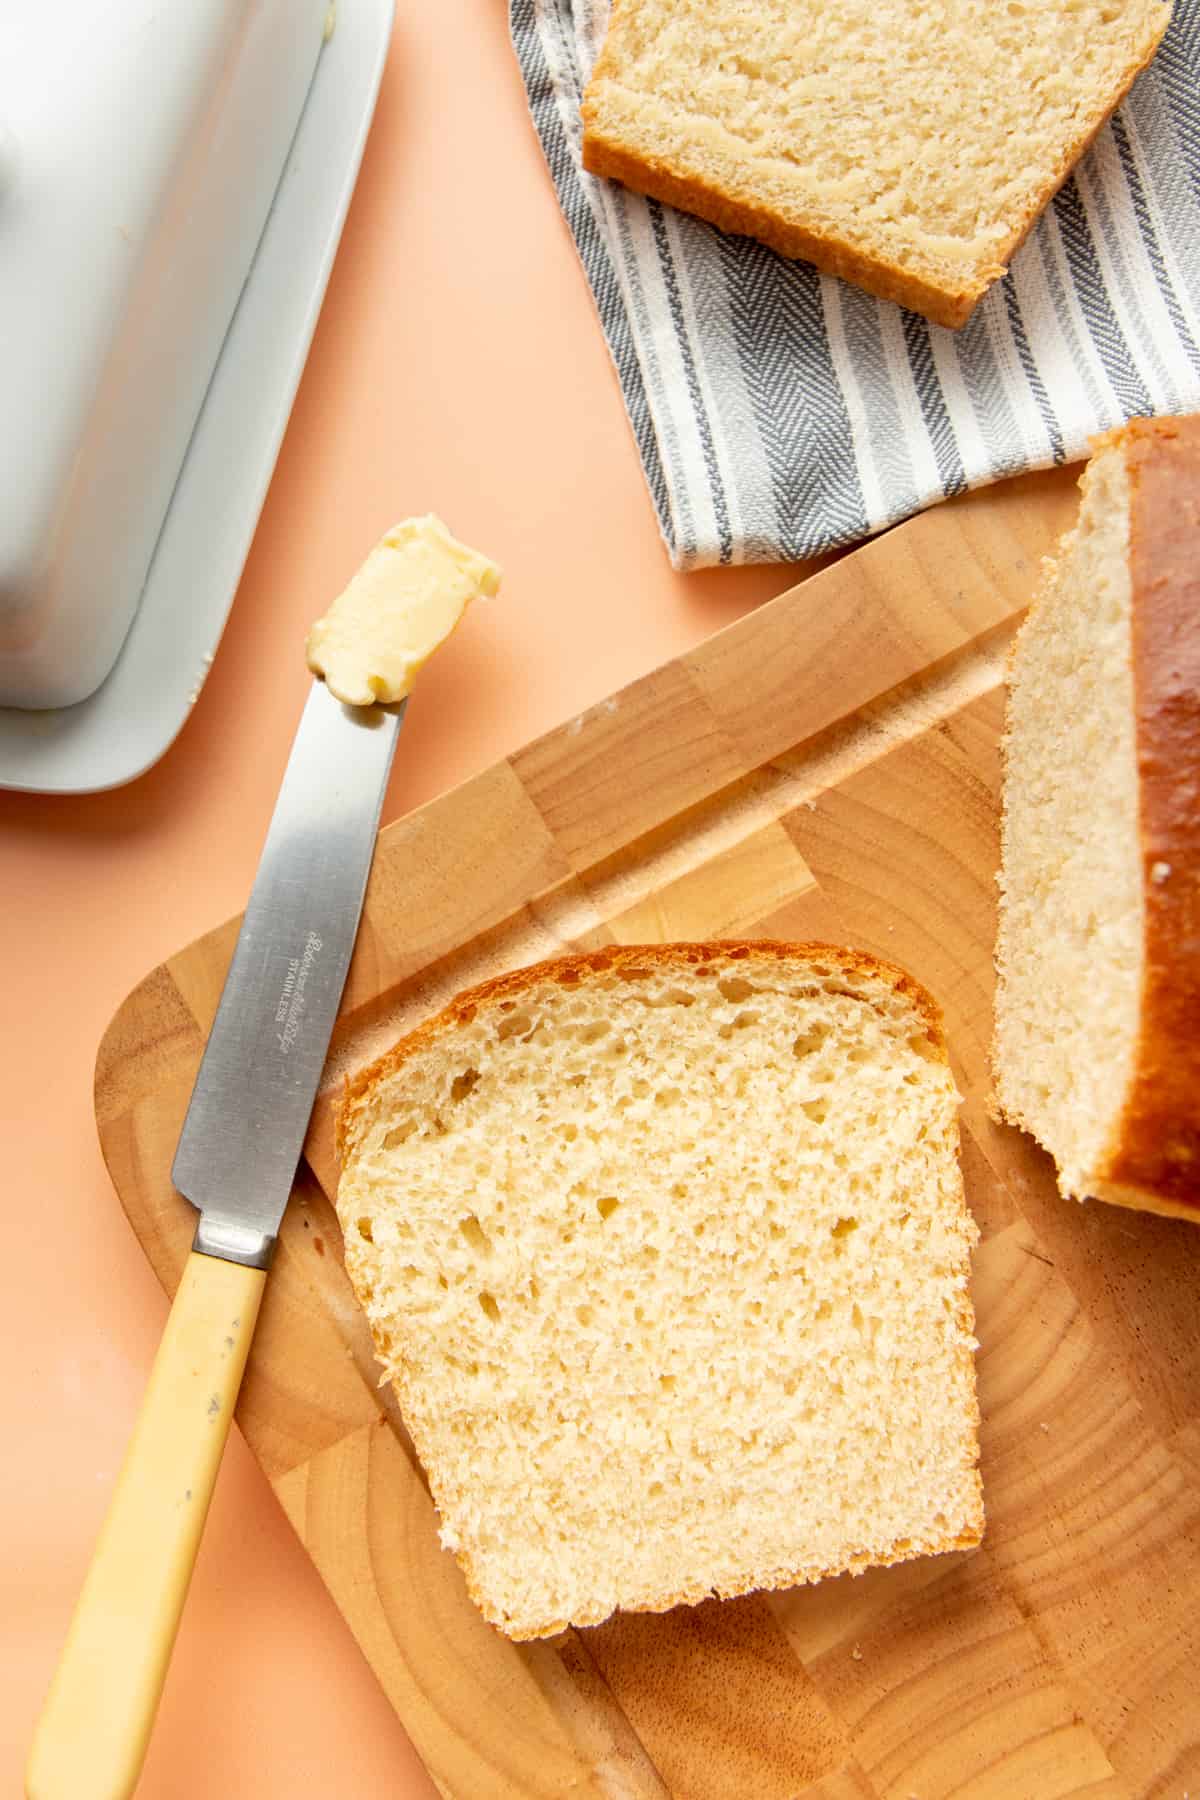
- That soft, fluffy crumb: Perfect for PB&Js, toast, grilled cheese, or just eating warm with butter straight from the pan.
- Freezer-friendly: Make a loaf, freeze half, and you've always got fresh bread on hand.
- A recipe that actually works: Over 150 five-star ratings and thousands of happy bakers don't lie.
If you're looking for a breakfast that actually holds you till lunch and tastes like joy in a jar, this is it. I hope it becomes a staple in your kitchen the way it has in mine.

Featured Review
"PERFECTION!! This recipe worked exactly as promised. For me, the real test is the next day. It was still light, fluffy and delicious this morning."
- TANYA -
🍯 Ingredients
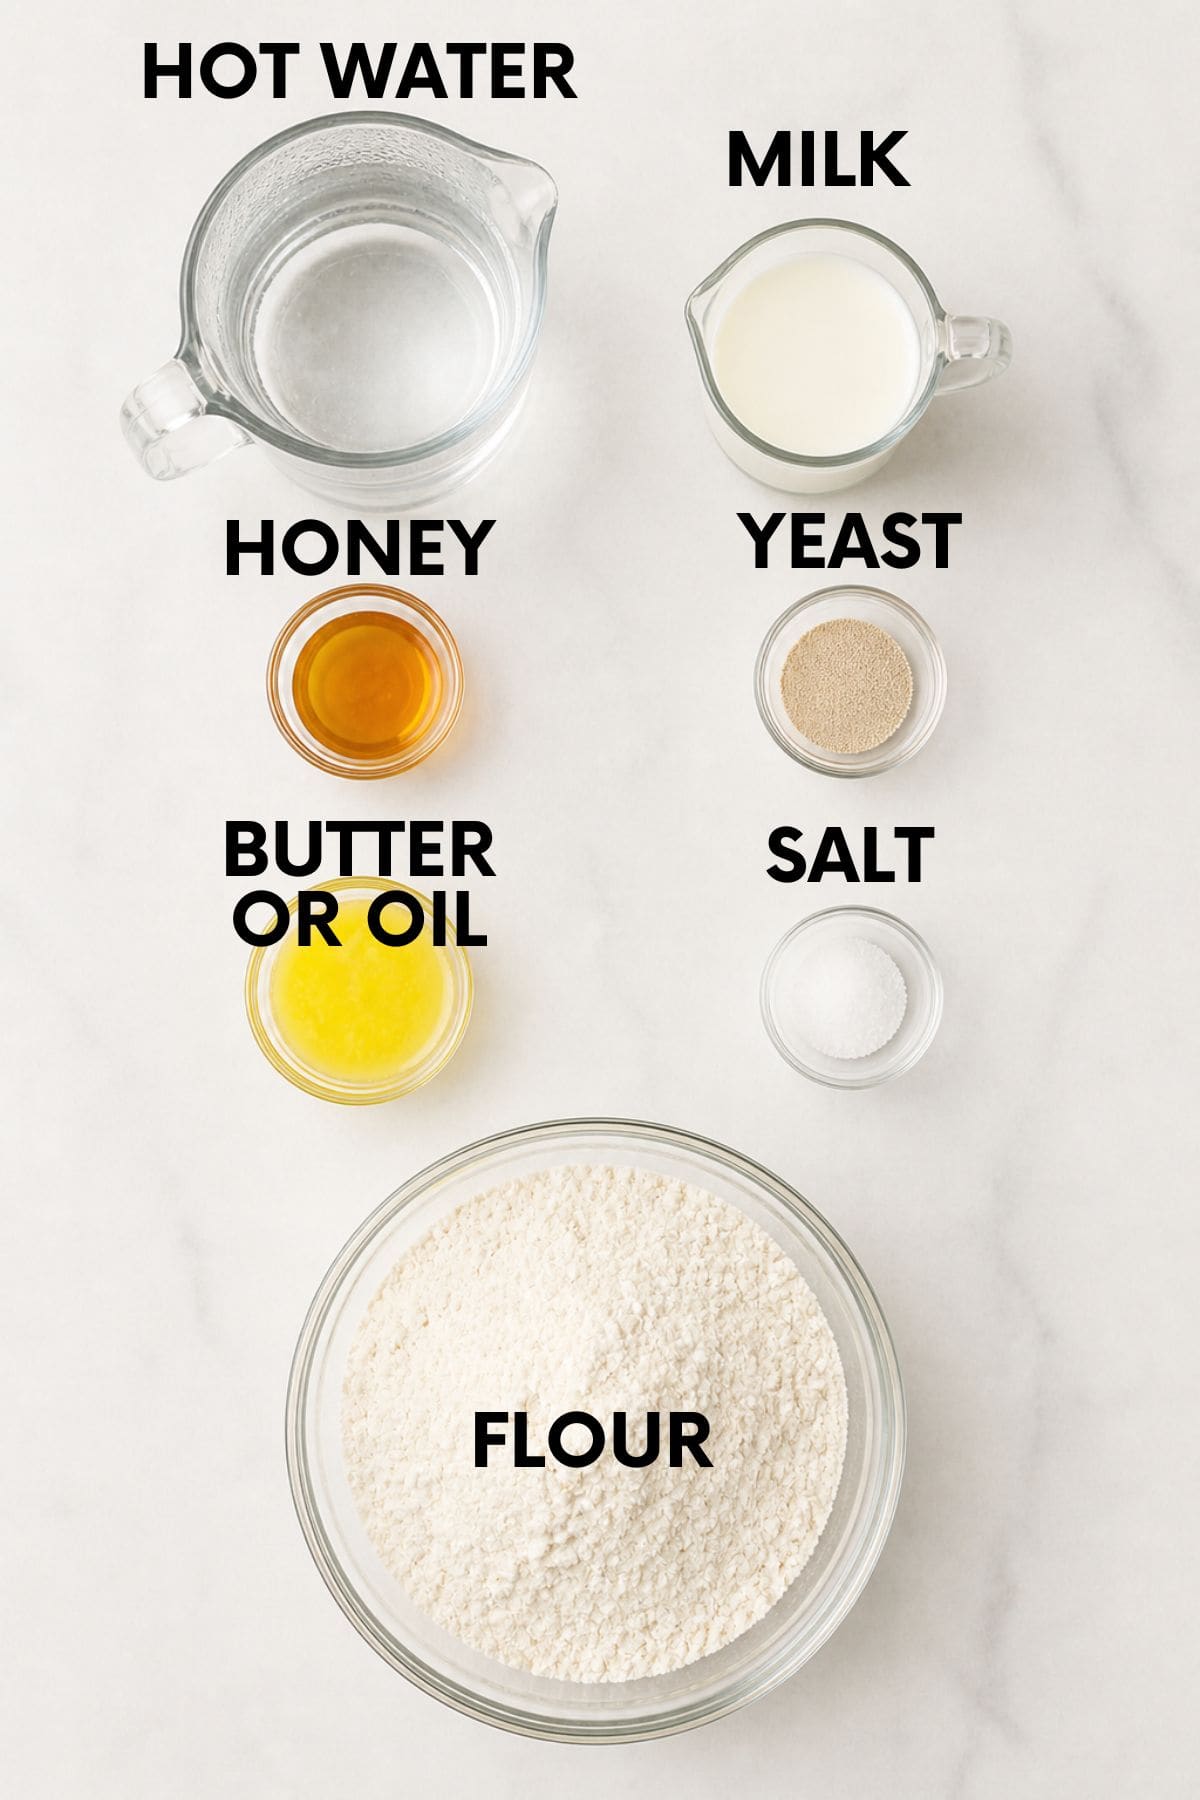
Head's up: Check the recipe card below for the full ingredients list
- Hot water and cold milk: Most bread recipes call for warm water to activate the yeast, but combining hot tap water with cold milk gets you to the perfect temperature without a thermometer. It's my favorite trick for foolproof yeast activation every time.
- Honey or sugar: This feeds the yeast and helps give you a lighter, fluffier loaf. Either works, but honey is my preference just for flavor.
- Active dry yeast: This recipe is flexible enough to work with rapid rise, instant, or bread machine yeast too. Whatever you can get your hands on.
- Butter or vegetable oil: I usually reach for avocado oil because we always have it, but melted butter makes a beautiful, buttery (obviously) loaf. Use unsalted if you go the butter route so you can control the final flavor.
- Flour: All-purpose, whole wheat, or a mix of both all work beautifully. My favorite is King Arthur Organic Bread Flour, but store-brand all-purpose makes a great loaf, too. The difference is noticeable but not dealbreaking.
🌾 Bread Flour vs. All-Purpose Flour
You can use all-purpose or bread flour in this recipe with good results.
Bread flour is simply flour that has a higher protein content than "regular" flour. That extra protein can help make breads rise better and have fluffier, more tender end results, but it is absolutely not a necessity.
While the quality of your flour can impact your final results-my favorite flour for this sandwich bread recipe is King Arthur's Organic Bread Flour-you're still going to have excellent results using run-of-the-mill all-purpose or whole wheat flour. I've tested this recipe using both high-end organic bread flour and store-brand all-purpose flour, and while the difference is there, it's not enough for us to recommend one over the other. Use what you got!
Featured Review
"I've never been able to make bread, but I followed instructions to a T and it came out perfect! I did ¼ whole wheat flour and ¾ white flour and used my stand mixer to do the initial mixing. This is a keeper for sure."
- WENDY -
🔄 Variations & Substitutions
- Flour: All-purpose, whole wheat, or a mix of both all work beautifully. The 100% whole wheat version is slightly denser and needs a longer rise time, but it's a wonderful, nutty loaf. The half-and-half version is the favorite in our house.
- Gluten-free: This recipe is specifically formulated for wheat flour, and I don't recommend a gluten-free swap here. For a gluten-free loaf, our Cashew Grain-Free Sandwich Bread is grain-free and delicious. If you need a traditional gluten-free yeast sandwich bread, Kim at Let Them Eat GF Cake has a well-tested recipe I've made dozens of times.
- Honey or sugar: Both work interchangeably here. Honey has a slightly more neutral flavor that lets the bread shine; sugar works just as well.
- Butter or oil: Melted unsalted butter, avocado oil, vegetable oil, or any neutral-flavored oil all work. We usually use avocado oil because we always have it on hand.
- Milk: Out of milk? Just sub in cold water instead. No other adjustments needed.
- Yeast: Active dry yeast is our preference, but rapid rise, instant, and bread machine yeast all work interchangeably in this recipe.
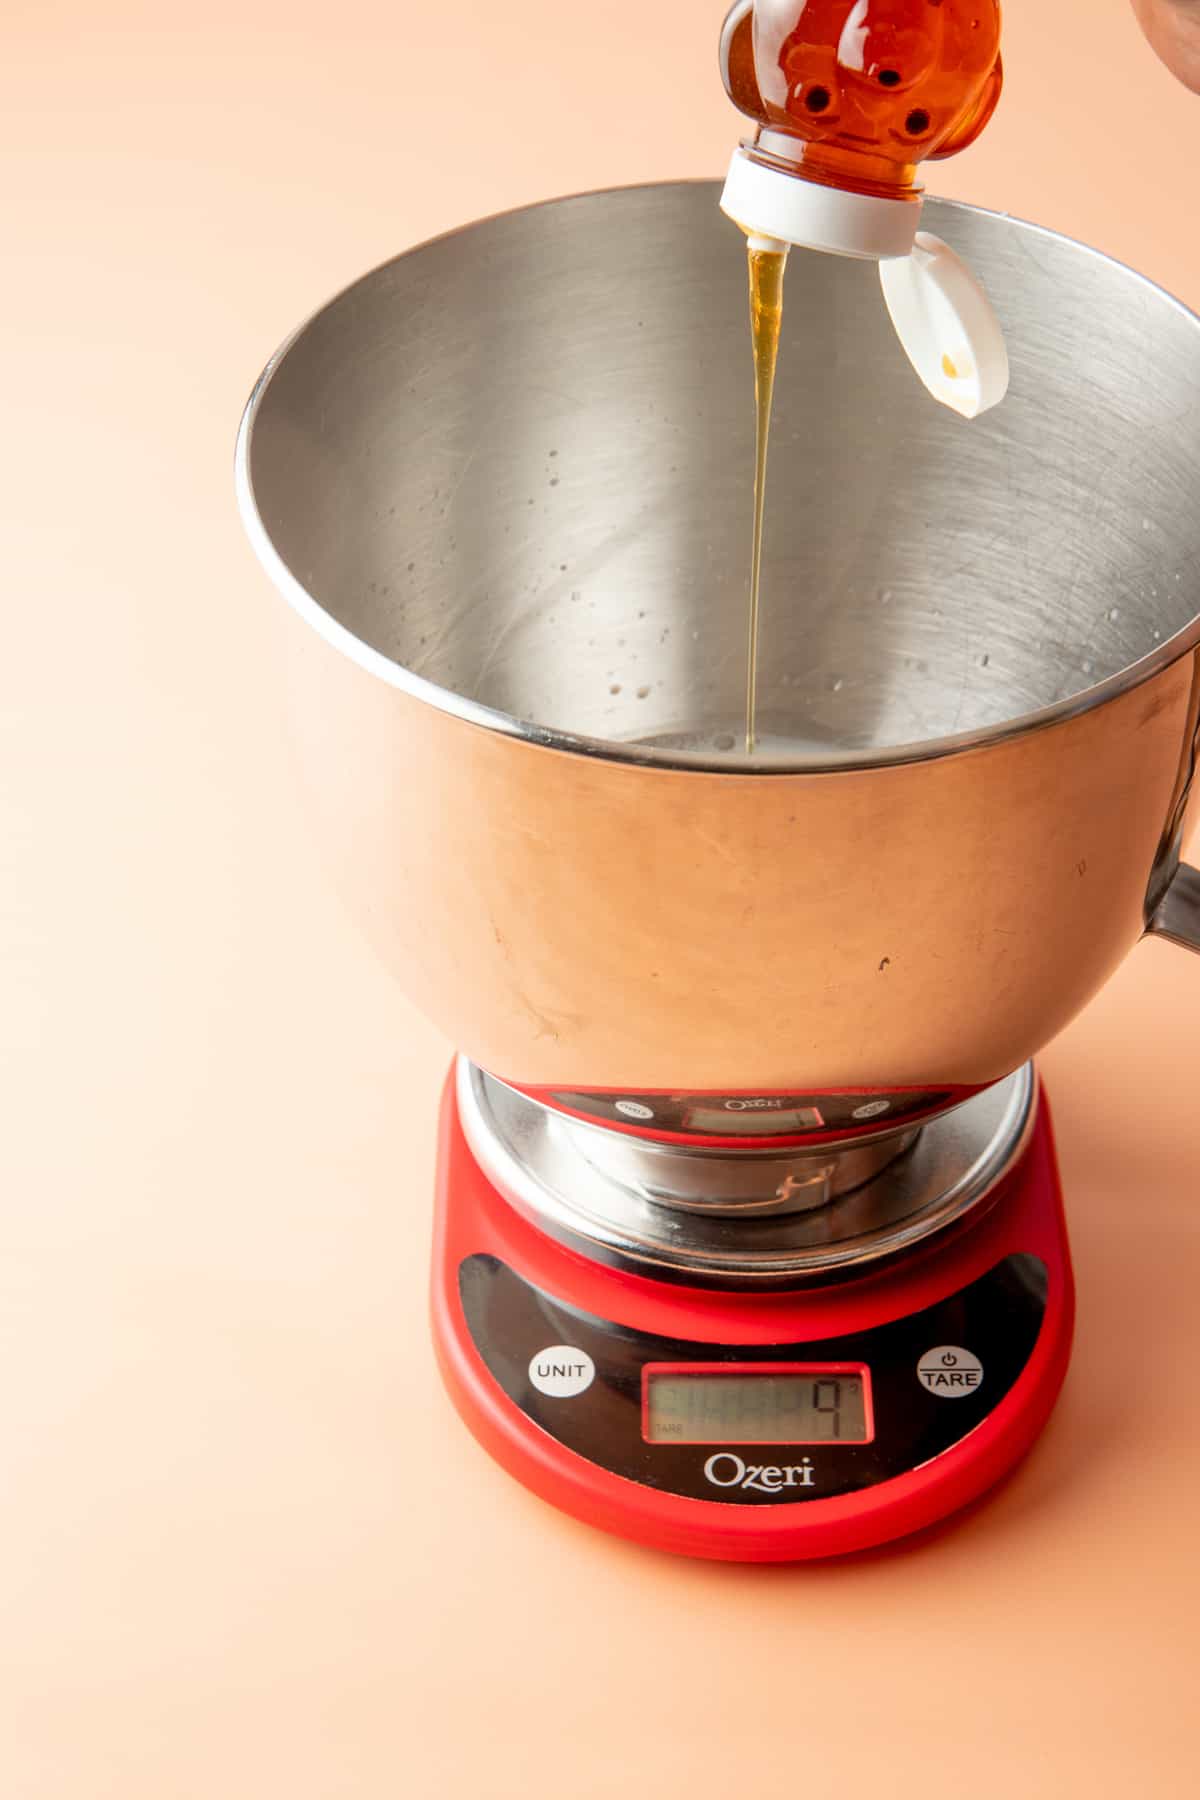
⚖️ A Note on Measuring
I highly recommend using a kitchen scale to measure all ingredients for bread making, but especially the flour.
Head's up: In the recipe card below, you can toggle between volume measurement (U.S. Customary) and weight measurements (Metric).
A kitchen scale is the most accurate way to ensure the same results every time you bake. I've tested this recipe multiple times using volume measures (cups) and weight measurements (grams), and when using weight measurements, the results were exactly the same each time. When using volume measurements, there were slight variations in the texture and behavior of the dough, which could be really frustrating for a first-time baker.
If you must use volume measurements for measuring the flour, be sure to use the scoop and sweep method for measuring the flour. If you just scoop the flour out of the container, you'll end up with a very dry dough/bread.
🥣 How to Make It
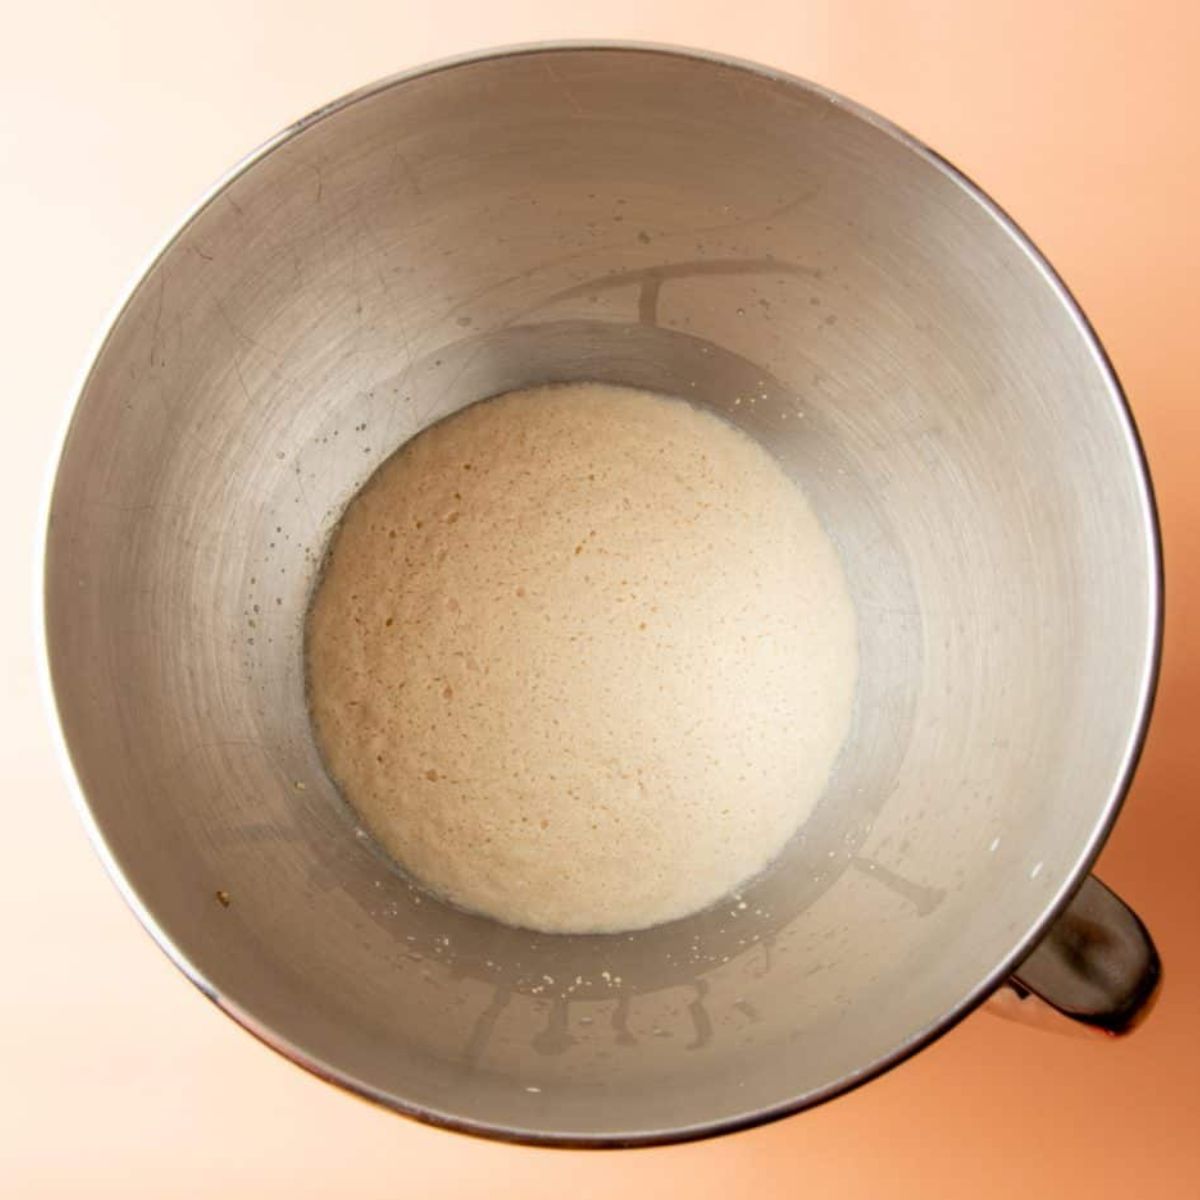
Step 1: Proof the yeast. In the bowl of a stand mixer, or a large mixing bowl if mixing by hand, combine hot tap water, cold milk, honey or sugar, and dry active yeast. Yeast likes warm, but not too hot, water to activate it, so I find that combining hot tap water and cold milk makes a temperature that yeast is very happy with! Set this mixture aside to activate (or "proof") the yeast. After about 5 minutes, the mixture should look nice and foamy-like the head of a beer. This is how you know your yeast is alive and ready to go!
If your yeast doesn't foam up after five minutes, it might just be that it needs a few more minutes to do its thing. If you still don't see any activity after 10 minutes, your yeast might be old or dead, and it's time to invest in fresh yeast.
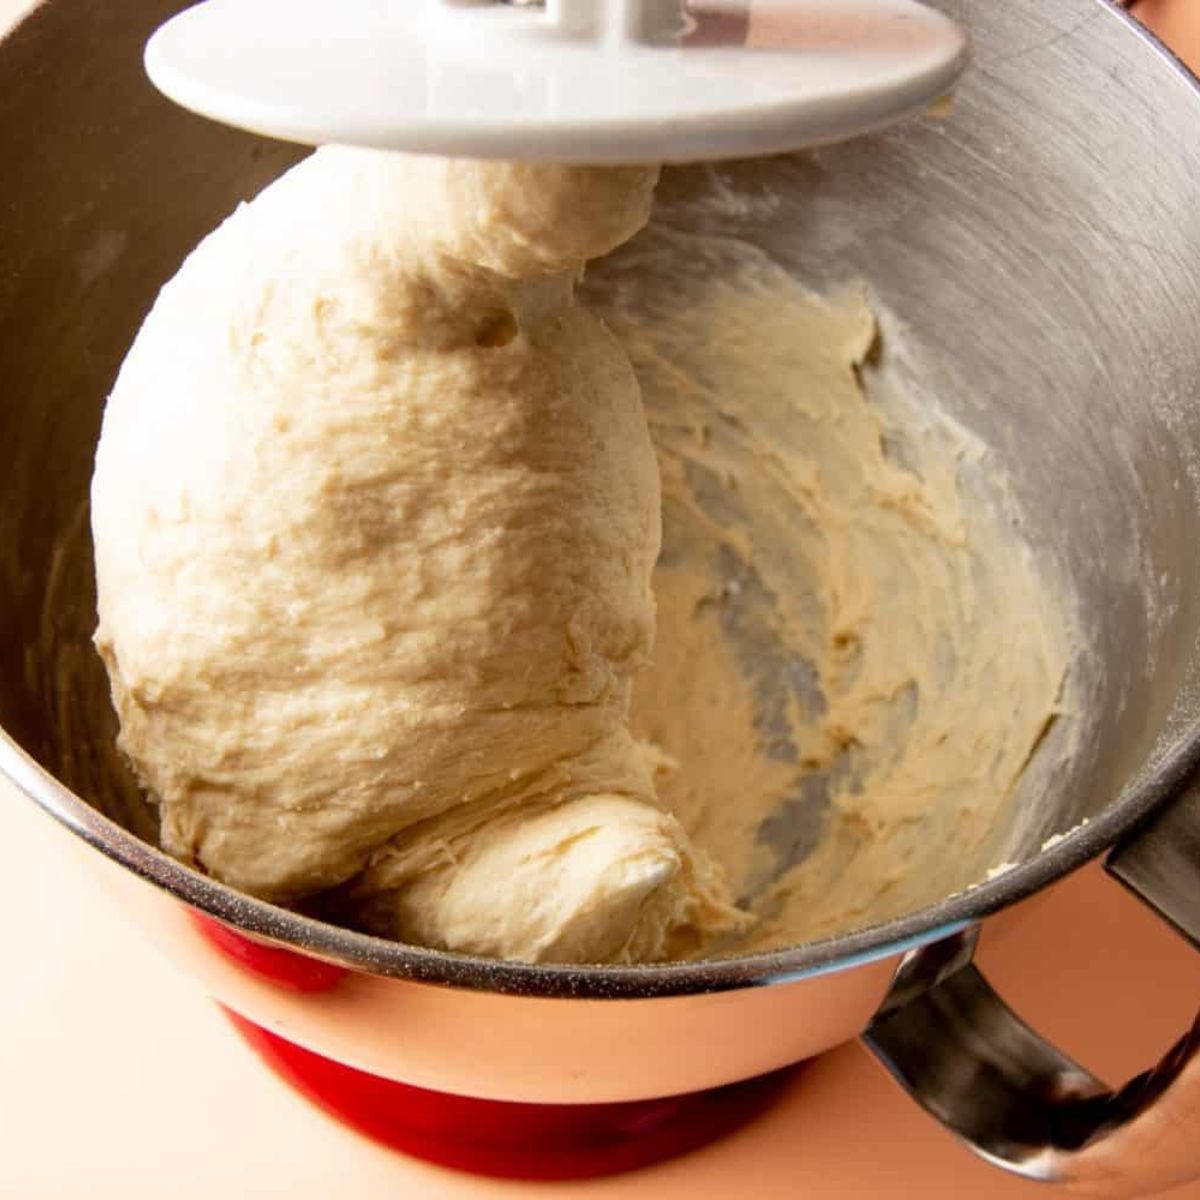
Step 2: Mix the dough. Add the melted butter or oil, salt, and flour to the yeast mixture. Mix on the lowest speed with the dough hook, or stir by hand, until it comes together into a soft, sticky dough-about 3 minutes.
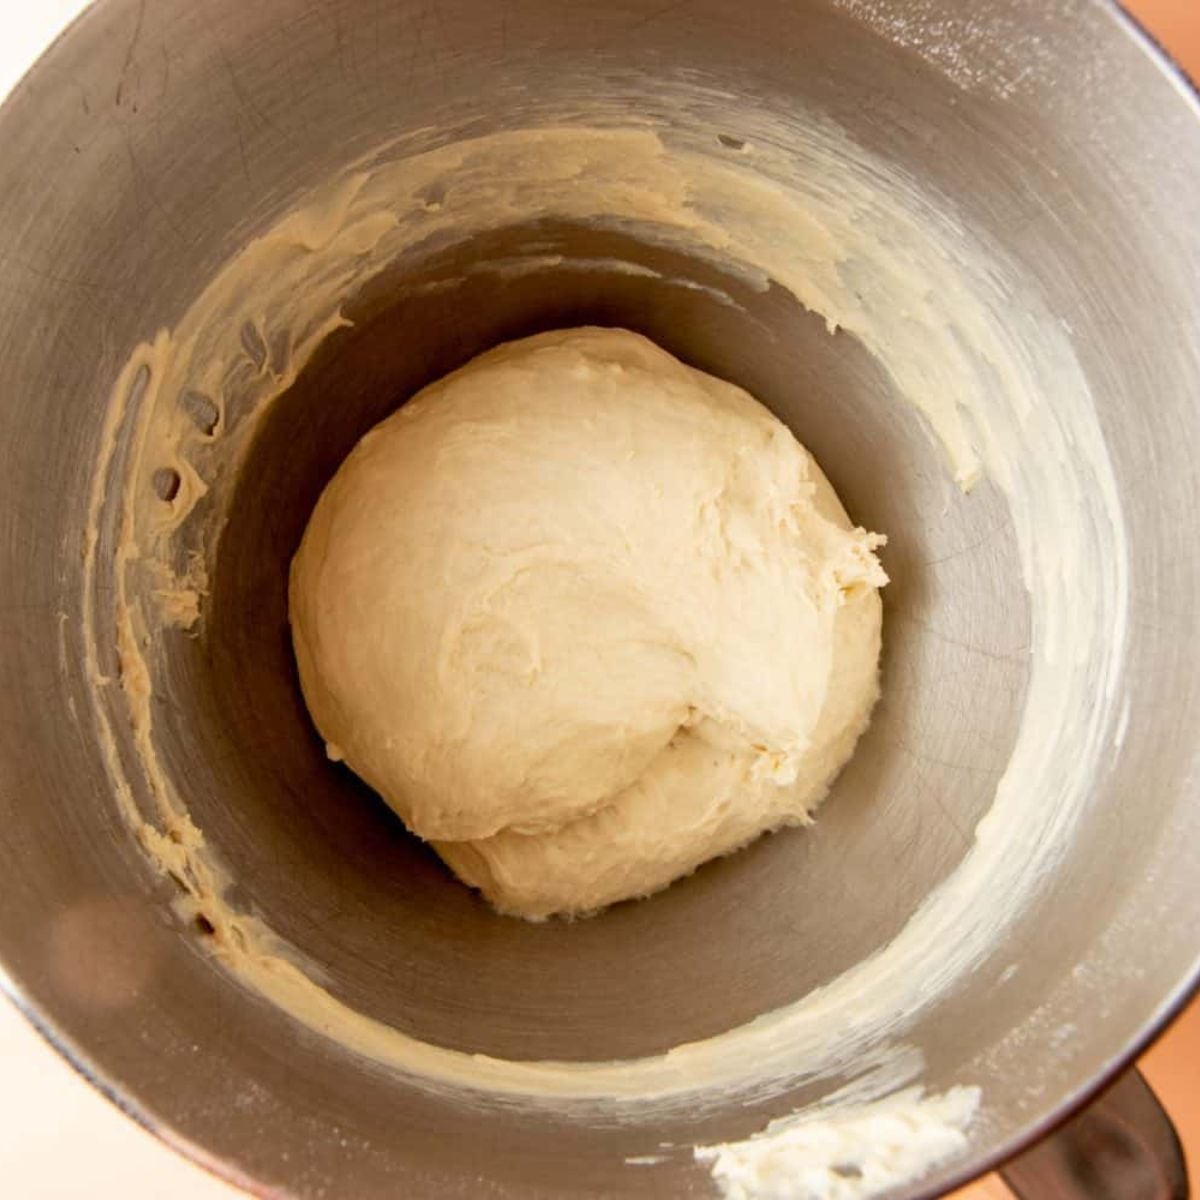
Step 3: Knead the dough. Kneading dough is how you activate the gluten in the flour to make the dough smooth and elastic. To knead dough, you push, stretch, and pull the dough until it turns smooth and easy to work with. You can either knead the dough by hand on a lightly floured surface, or you can do it in a stand mixer fitted with a dough hook on medium-low. Either way, you'll need to knead for about 7-10 minutes to get the desired smoothness. When it's ready, the dough will be a smooth ball and lose almost all of its stickiness.
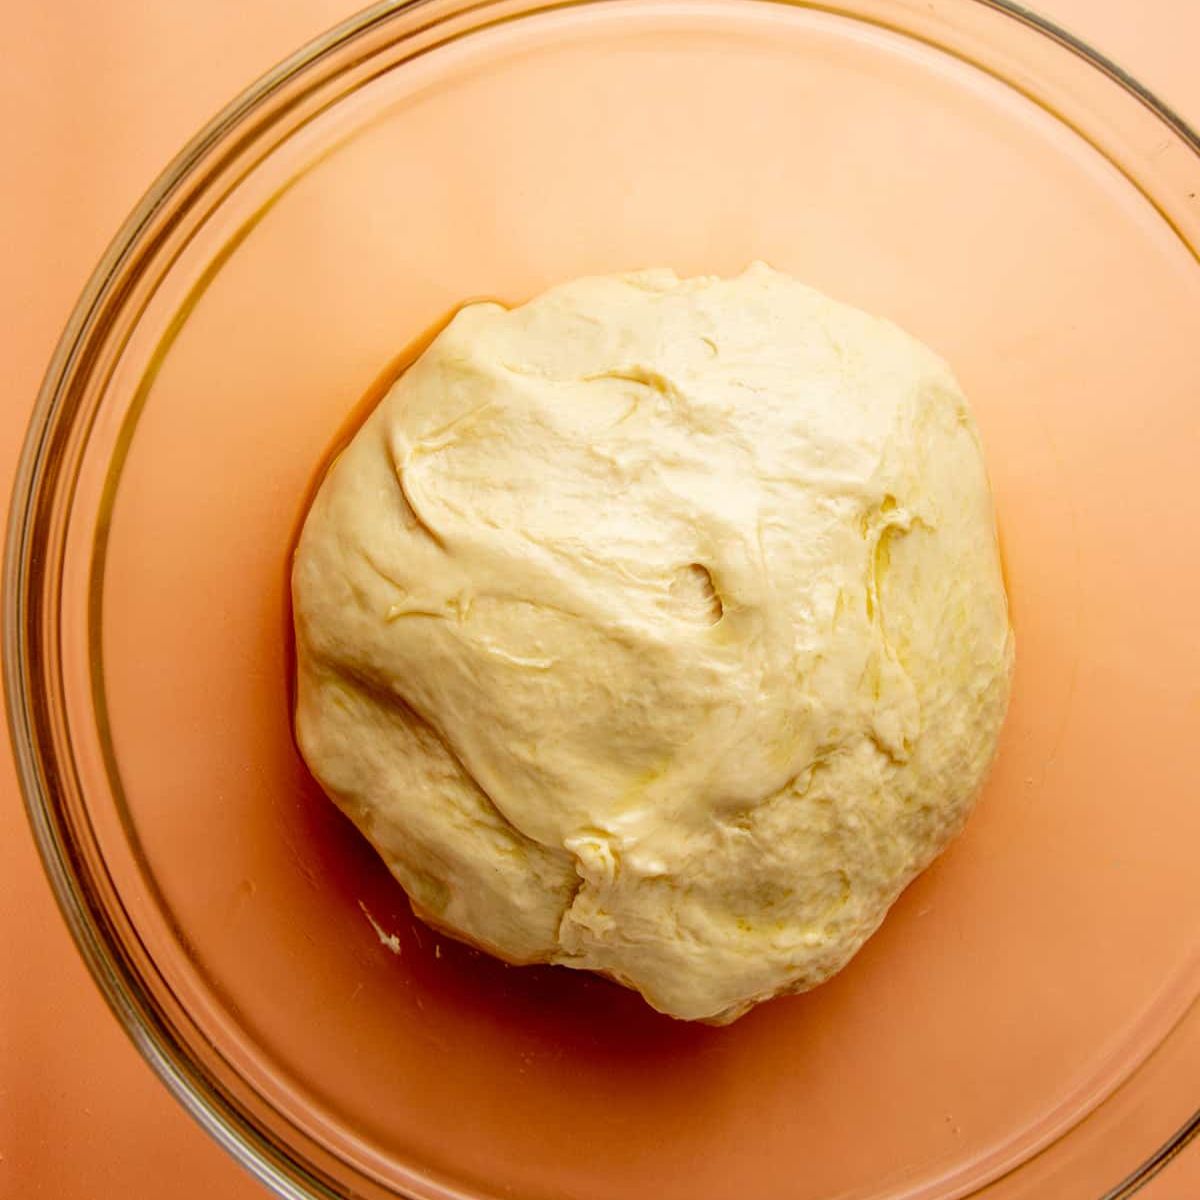
Step 4: Prep for proofing. Grab a clean, medium-size bowl, and add about a tablespoon of vegetable oil (olive oil and avocado oil both work), place the dough in the oil, and then rotate the dough around so it's all covered in oil. Cover the dough to keep in moisture-you can use plastic wrap, a damp kitchen towel, bowl covers, or even cheap-o plastic shower caps! Those are my fave.
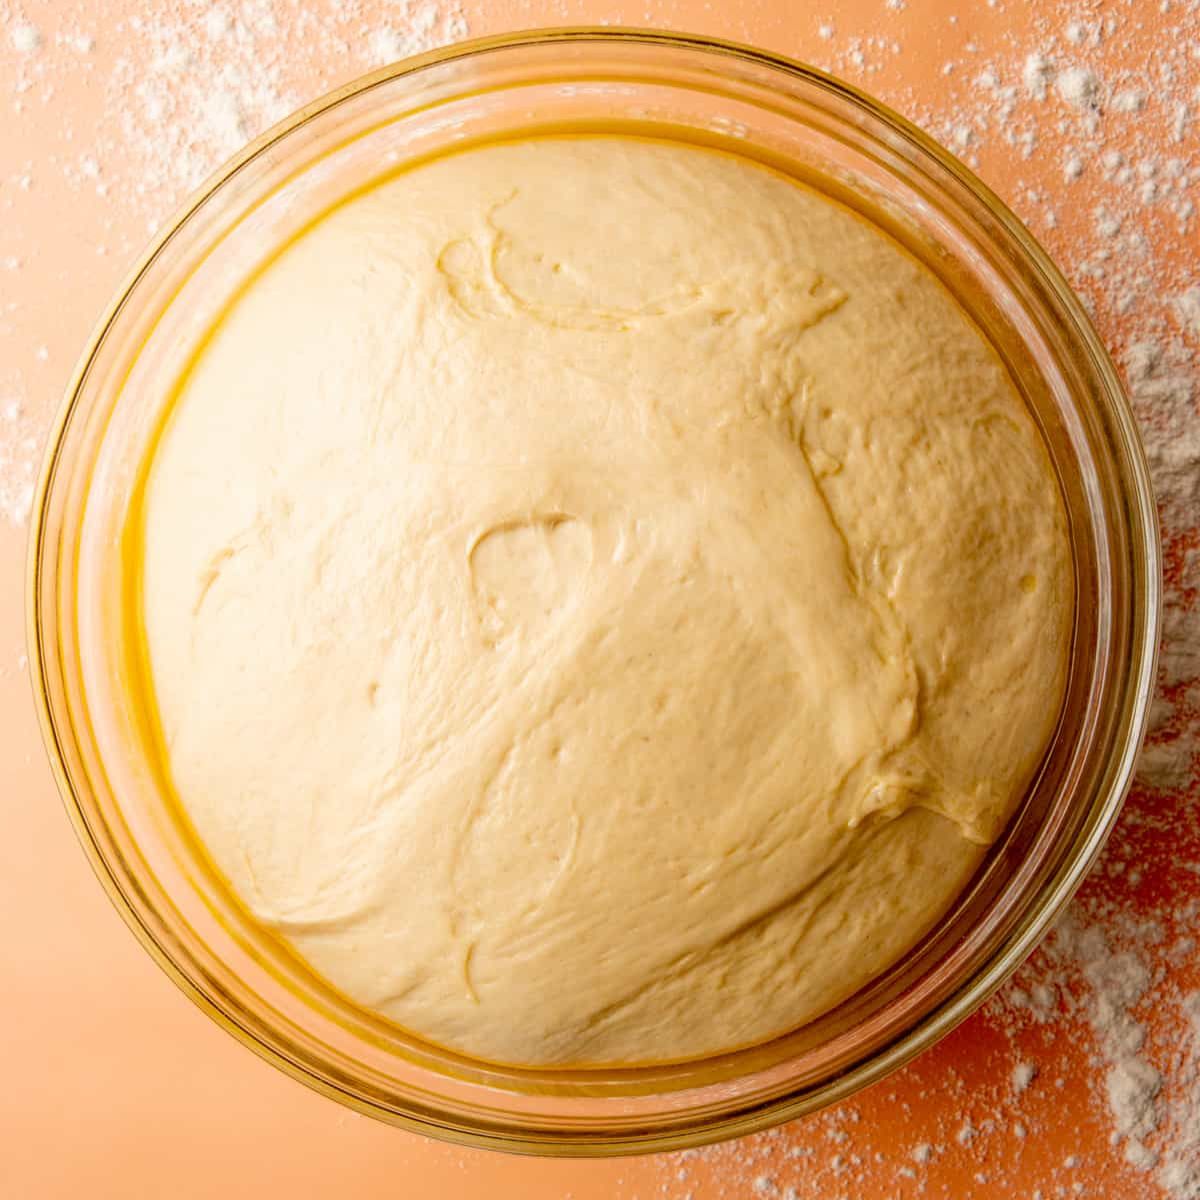
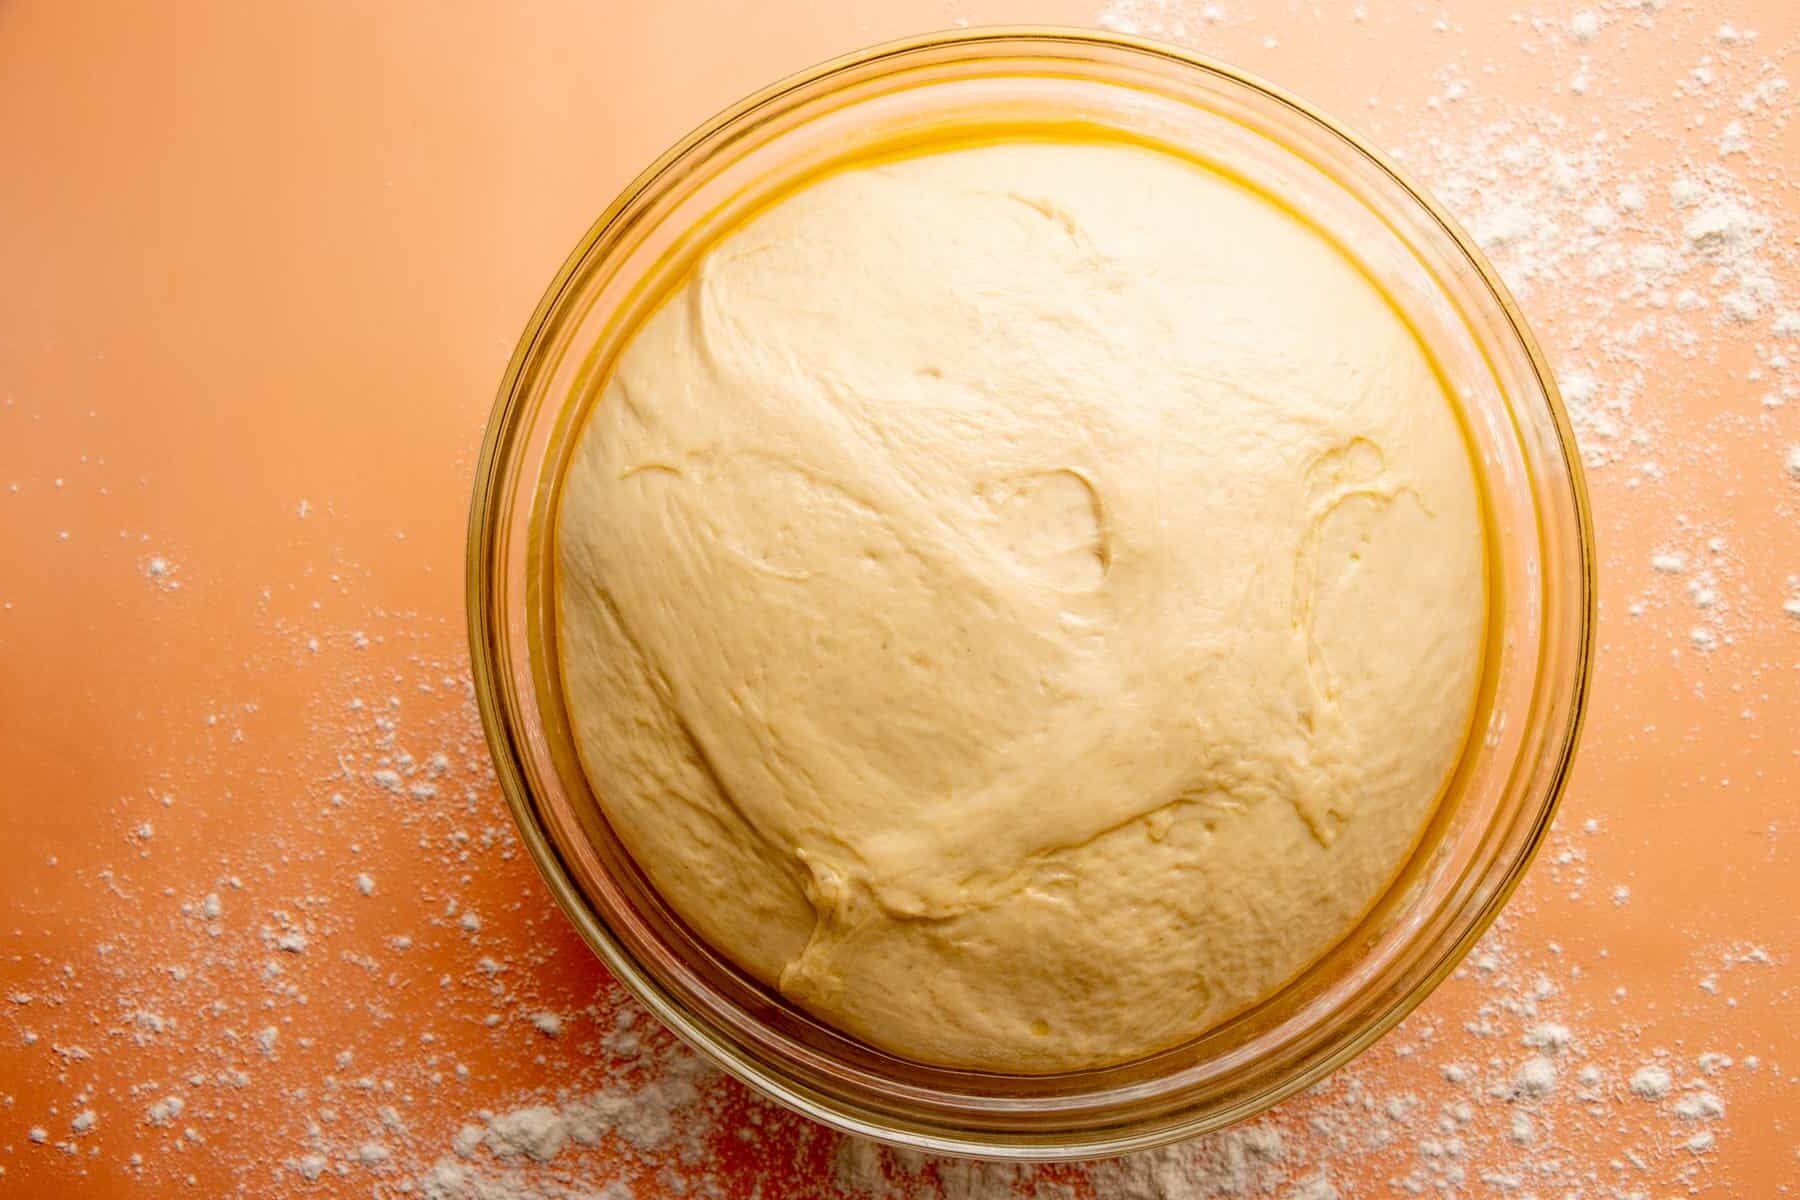
Step 5: First rise. Let rise until doubled in size. Don't stress about exact timing here: a warm kitchen might get you there in an hour, a cool one might take three. Watch the dough, not the clock. If you are having a hard time estimating what "double the size" looks like, they sell bulk fermentation containers that are clear and have lines on the outside so you can easily tell when you've reached the double mark.
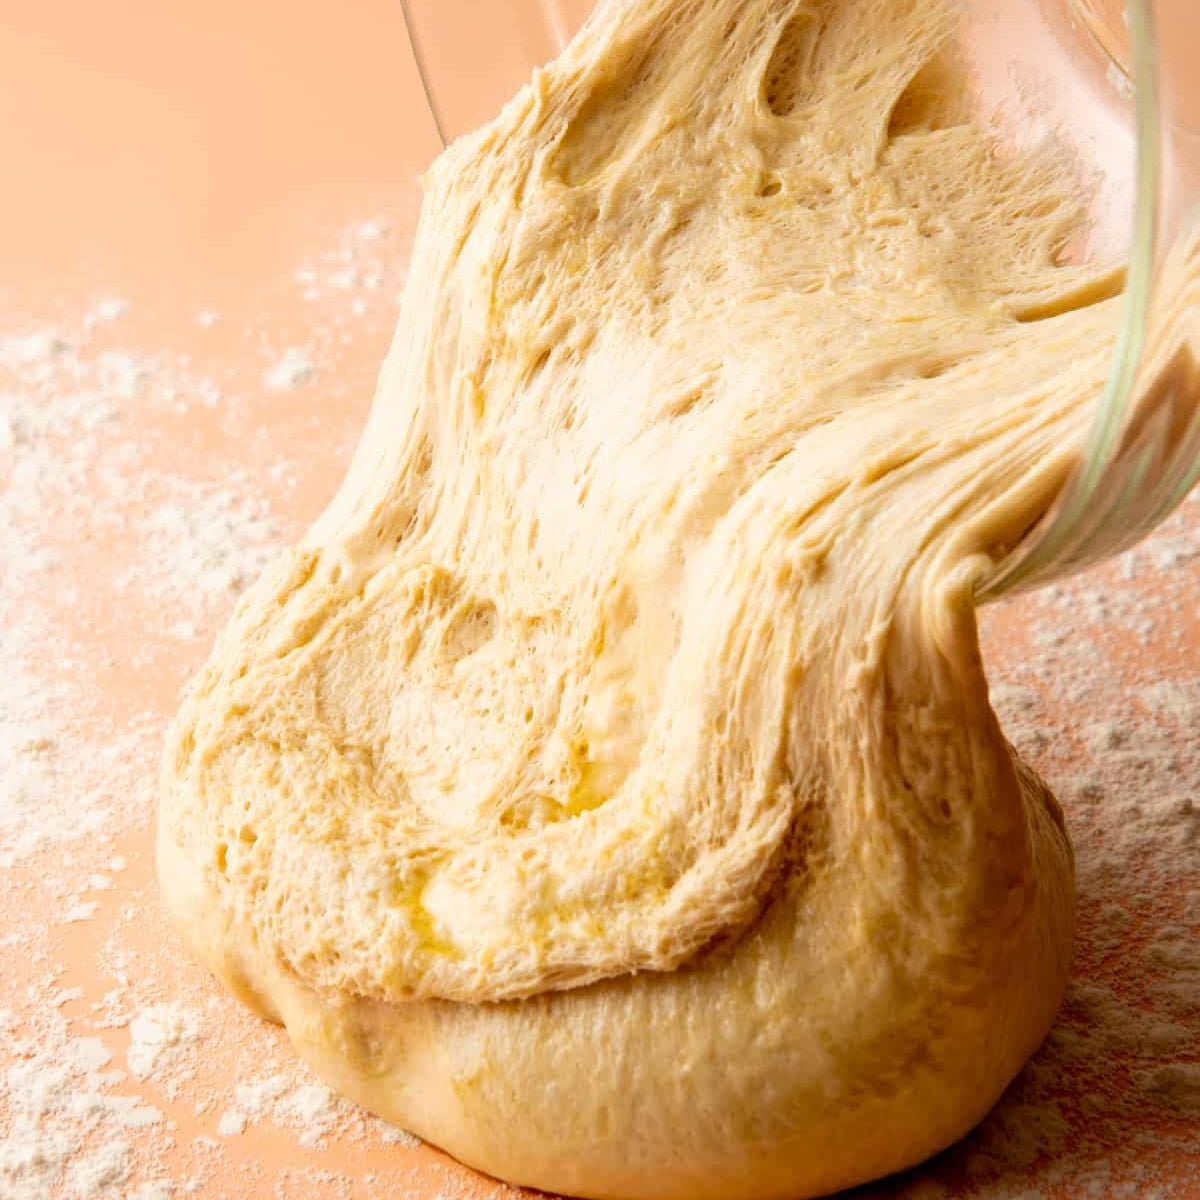
Step 6: Turn out dough. Once your dough has doubled in size, lightly flour a work surface, and dump the whole bowl of fluffy dough out. When you pour it out, the mixture should look fluffy, stringy, elastic, and be full of tiny bubbles/holes. Yay! You've successfully completed your first rise. There is no need to "punch" down the dough as you see on TV a lot-the process of shaping the loaf will deflate it enough, and punching it down might remove too much air and make for a denser loaf.
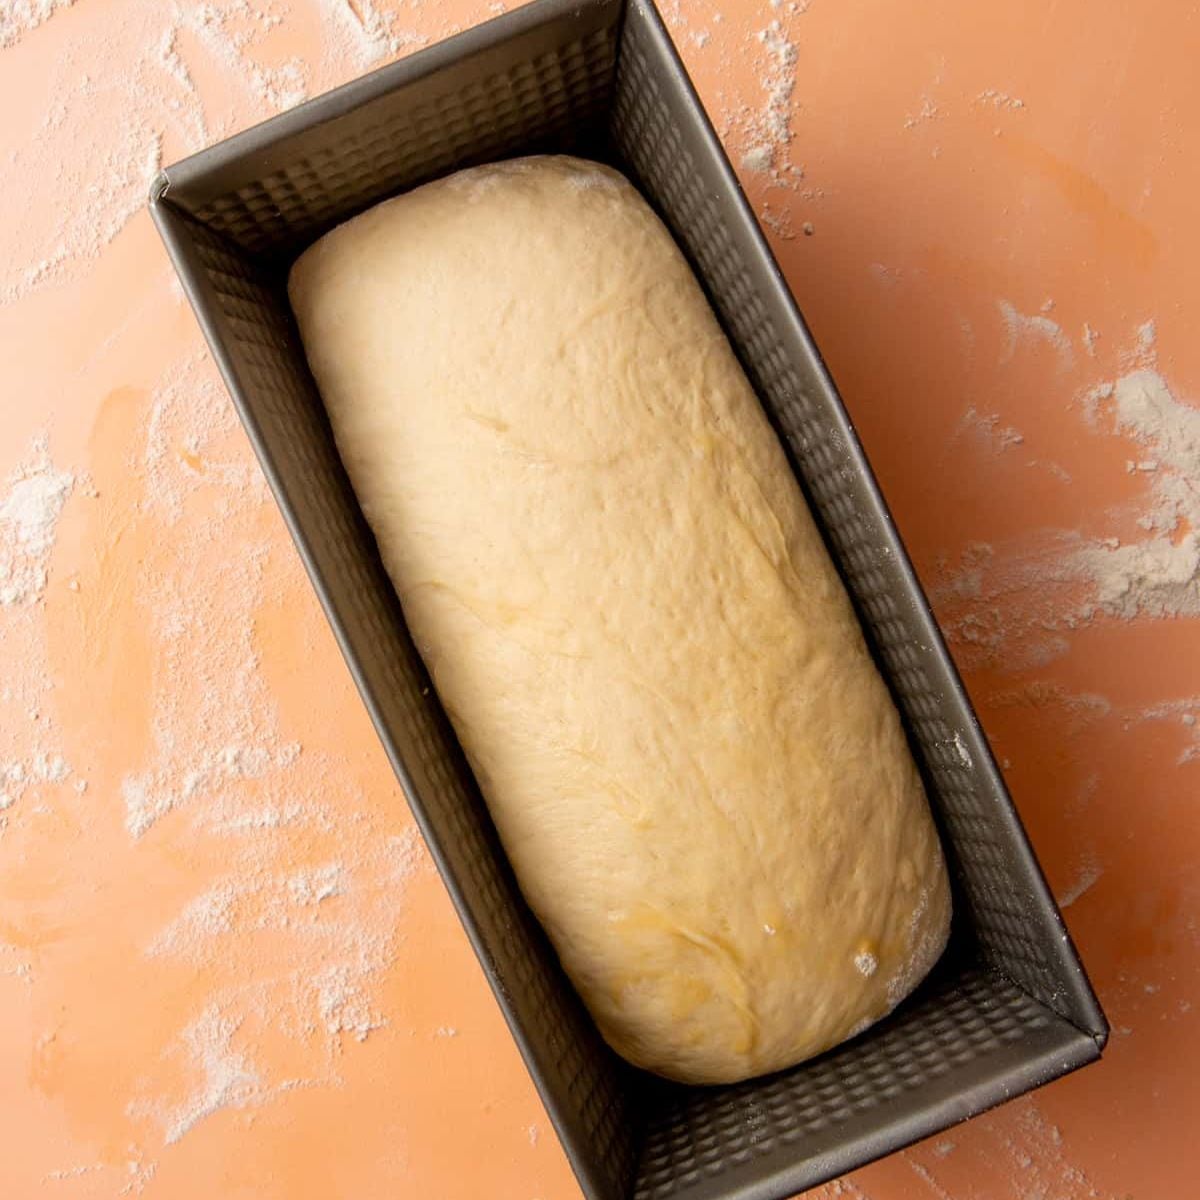
Step 7: Shape the dough. Using floured hands, quickly form the dough into a loaf shape. You really don't have to worry about it being too perfect or fancy because we're going to do a second rise that'll smooth out most of the bumps and imperfections. I use 10 x 4½ inch loaf pan because I like the shape of the slices. A bench scraper makes moving the soft dough into the loaf pan easier, but it definitely isn't necessary.
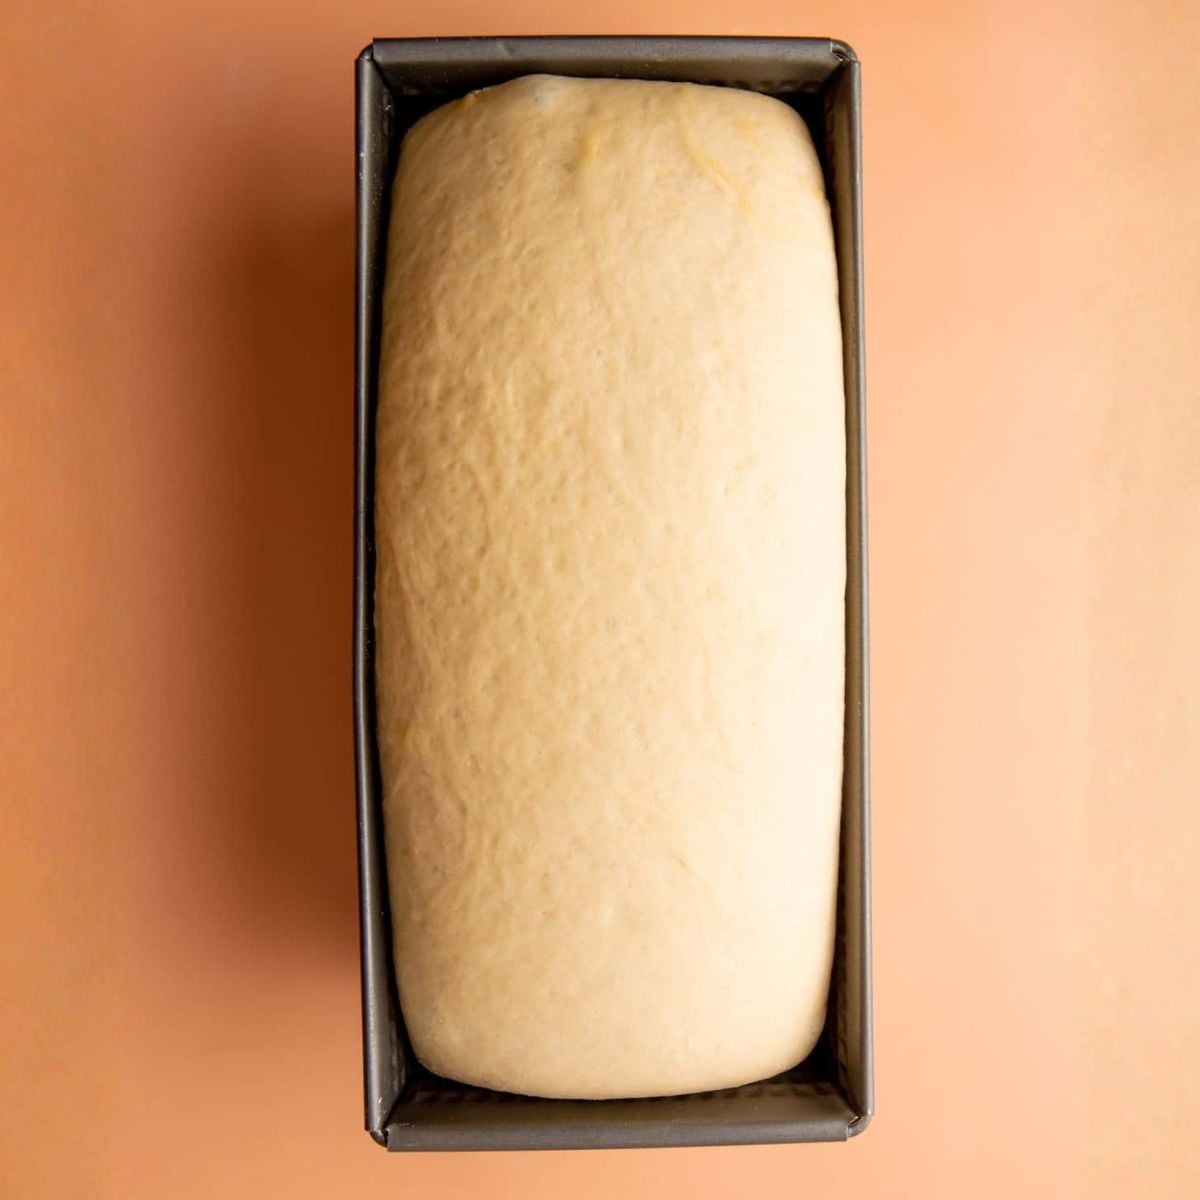
Step 8: Second rise. Cover the loaf pan loosely to prevent drying out, but this time, I recommend using something that can give the dough some space to rise. I like using either oiled plastic wrap (it'll rise with the dough and be easy to remove later), or a plastic storage bin turned upside-down over top of the dough. This rise goes faster than the first, so keep an eye on it. The proof is done when the loaf is cresting about 1 inch above the rim of the pan.
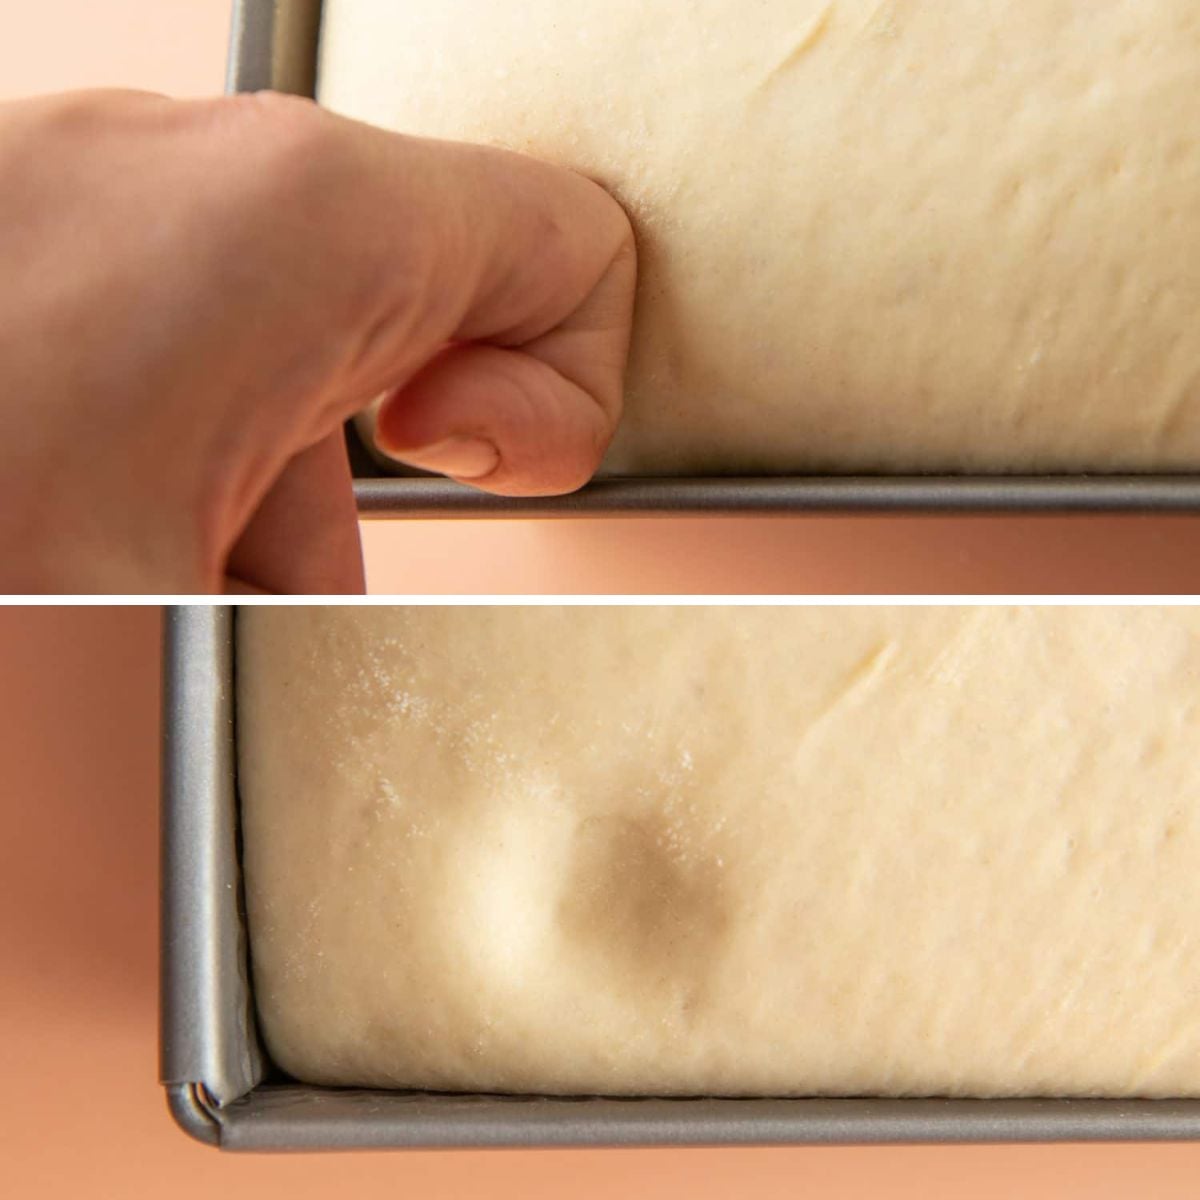
Step 9: Check the rise. Before you bake, you need to know your dough is properly proofed. The best way to do this is through the poke test. Press your knuckle about ½ inch into the dough and watch what happens. You can tell how well risen your bread is by how the indentation behaves:
- Indentation bounces back slowly-over a minute or more: your bread is ready to bake!
- Bounces back immediately or almost immediately: the bread is under-risen (AKA: under-proofed), and could use some more rise time. Try again in 10-15 minutes.
- Bread or indentation collapses (like popping a bubble): the bread is over-risen (AKA: over-proofed) and needs to be dumped out, reformed into a new loaf, and re-proofed.
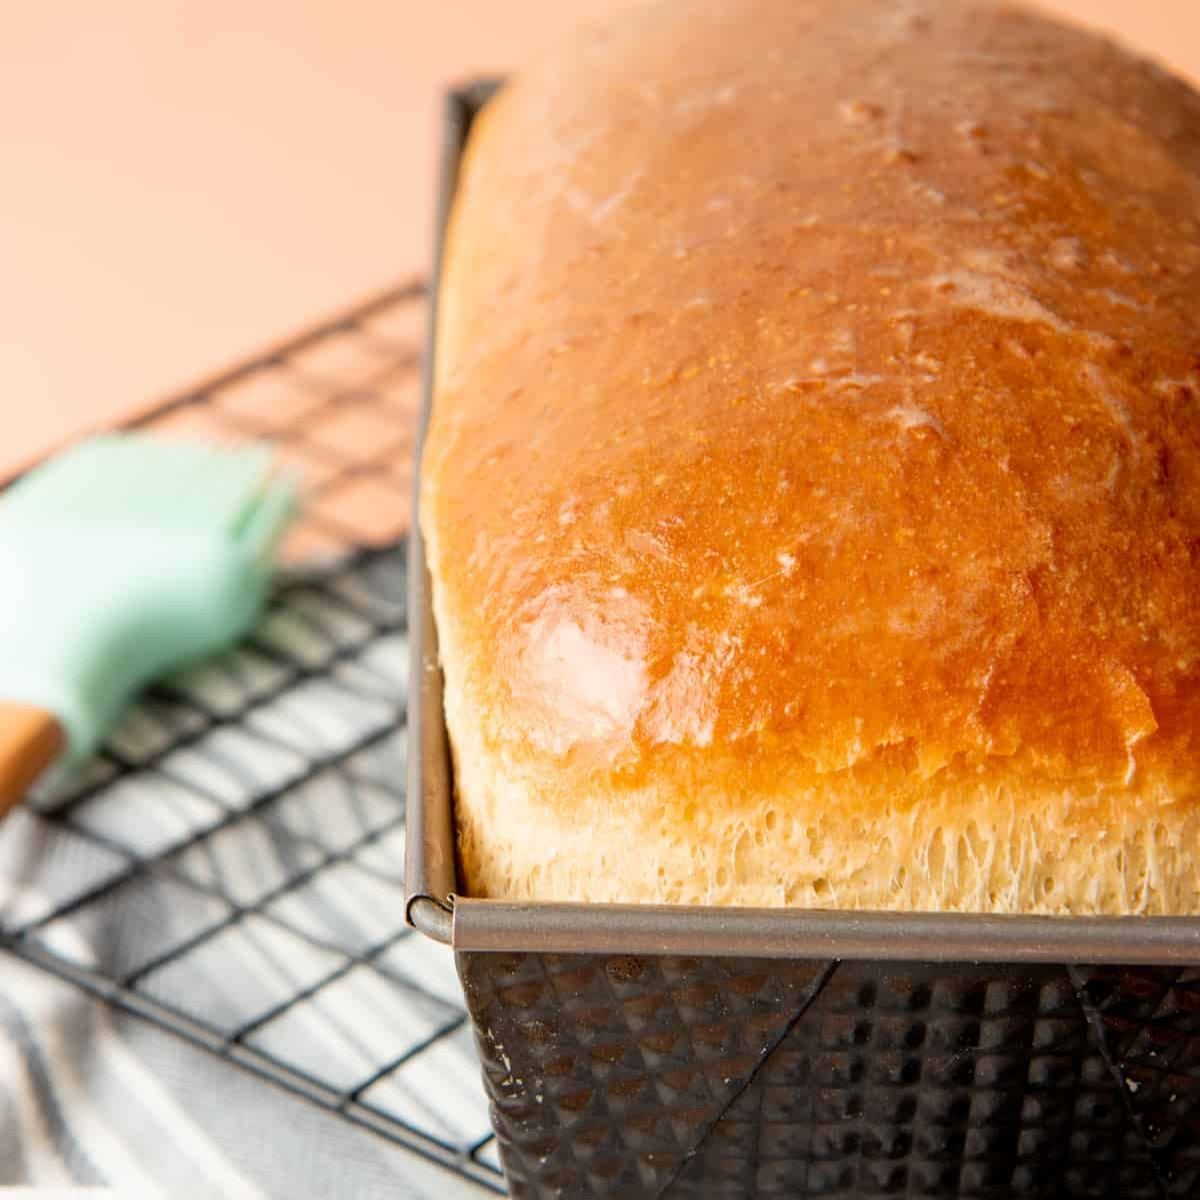
Step 10: Bake. During the last few minutes of your second rise, preheat the oven to 425°F. When the bread passes the poke test, pop it in the oven, and immediately reduce the temperature to 375°F. Bake in the oven for 25-30 minutes, or until the top is golden brown and the bread sounds hollow when you rap on it with your knuckles. Do your very best not to open the oven door to check on the bread while it bakes-especially in the first 10-15 minutes. The high oven temperature will help give the bread "oven spring," which is the rapid rise that happens when cold (or colder) dough hits a hot oven-opening the door reduces the oven temperature dramatically, and that reduces the oven spring.
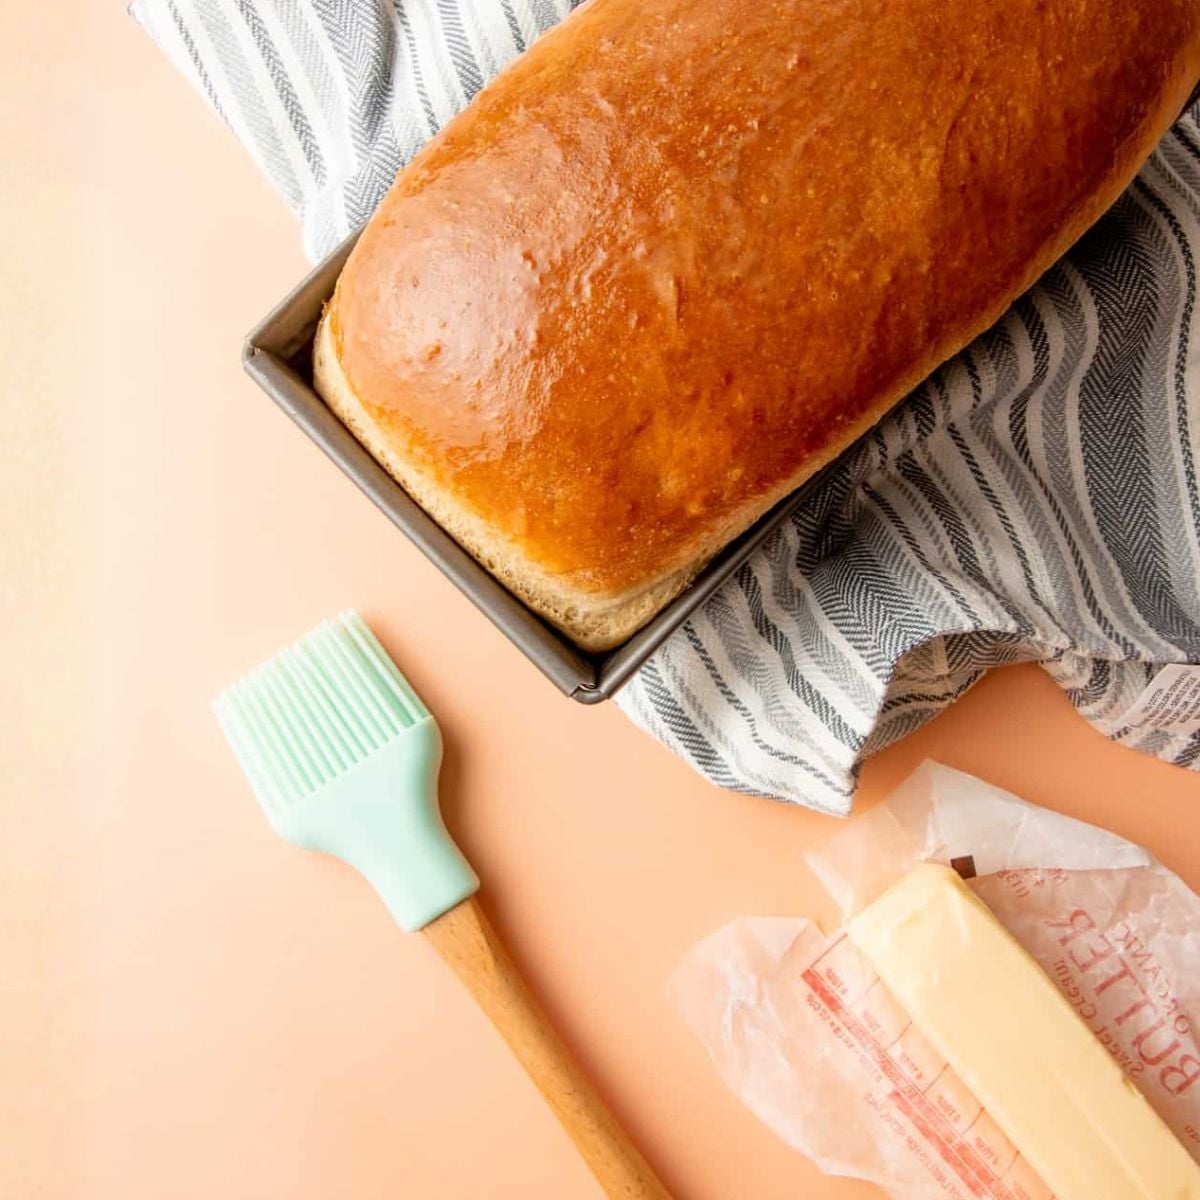
Step 11: Soften the crust (optional). Homemade bread has a crispier crust than store-bought, which is great alongside soup but less ideal for a PB&J. You can either use butter or wrap the loaf in a damp tea towel (more info on that below).
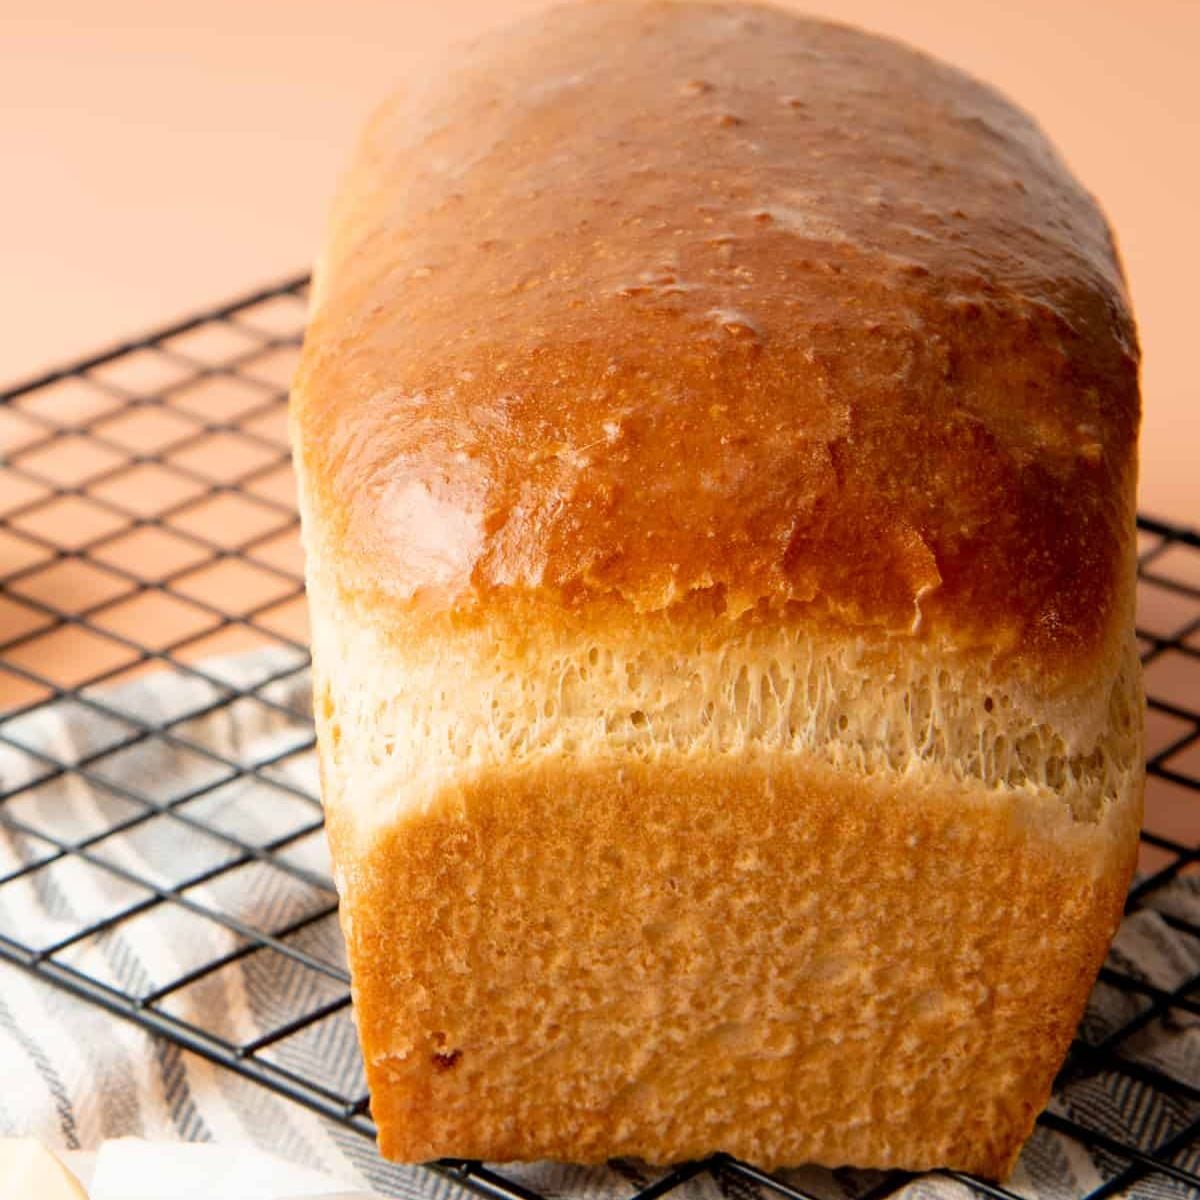
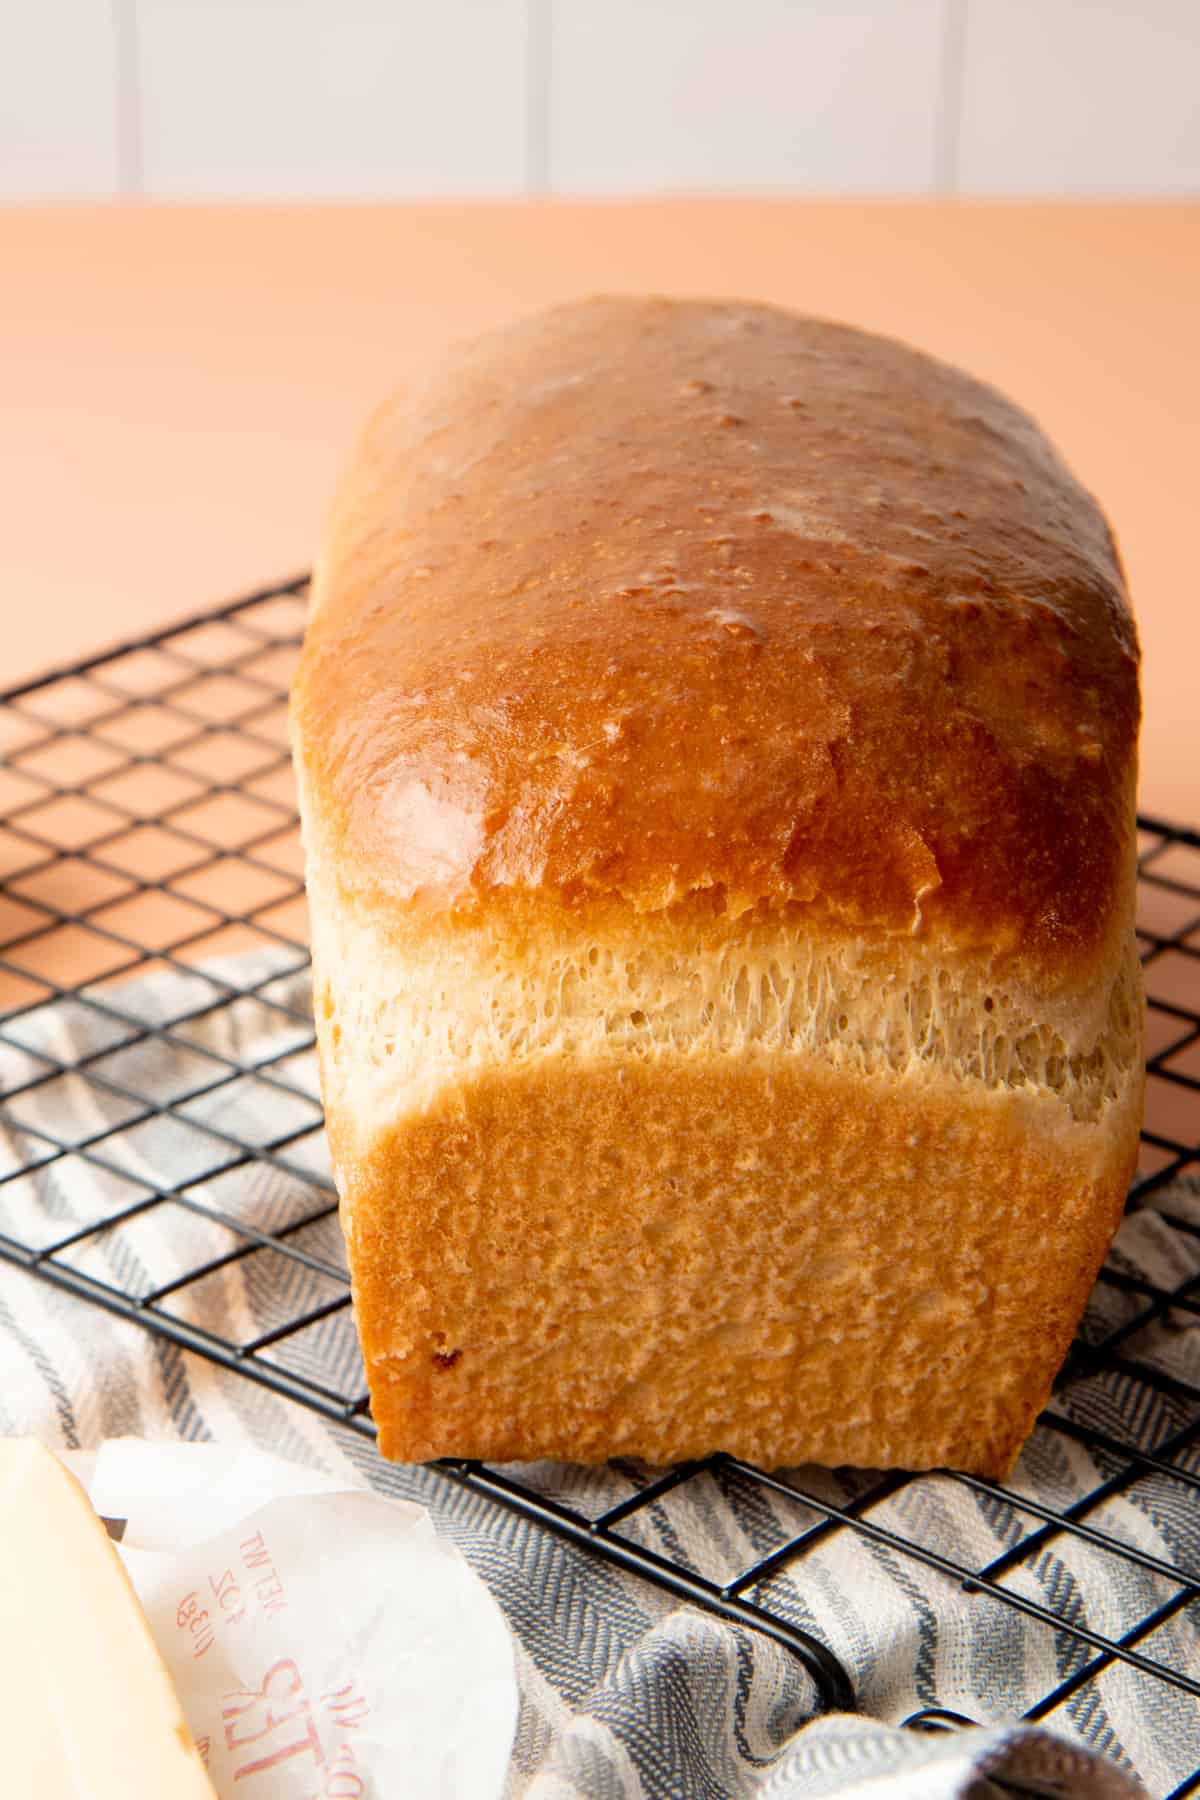
Step 12: Cool. Let the loaf cool in the pan for 15 minutes before removing, then transfer to a wire rack to cool completely before slicing. Homemade bread slices much better when fully cooled-though nobody would blame you for cutting in early.
Featured Review
"Mine was a thing of beauty! First bread recipe I ever made that didn't stress me out. All the tips you provided helped me make it perfectly! Turned out perfect and actually looking like store bought bread! Seriously, nailed it. My new go to recipe.
- Sarah -
🌡️ Create a Warm Spot for Rising
It may be that room temperature isn't quite warm enough to get your dough to rise. But no worries, you can easily manufacture a warm spot for your dough to rise. Here are a few options:
- Use the oven. Many modern ovens have a "proof" setting. Turn that on and place your covered dough in there to rise. If you don't have that setting, an oven light often pumps out enough heat too. Or, just turn your oven to a low temp (200°F or below) for a few minutes, then turn it off, and put the dough in the warm (but off!) oven.
- On top of a bowl of boiling water. This is my favorite tip, and one that consistently works for me. Boil water in a kettle. Pour into a large mixing bowl. Rest the covered pan/bowl of dough on top of the bowl of water. The heat from the steam does wonders to get dough to pop up fast!
- On top of a heating pad. This is a great trick! Pull out a heating pad, set it to medium, and place your pan on top of the heating pad.
- Use the fire/wood stove/furnace. Our fireplace hearth is an excellent place to let dough rise. Wood stoves, radiators, and other warm (but not too hot) sources of radiant heat are a good option, too. Just make sure to rotate the dough if the heat source is one-directional (like from a fireplace).
- Try the top of the fridge. The top of our refrigerator is nice and toasty! Yours might be, too. Try it.
- Try outside. This isn't applicable in November in Indiana, but in August? You better believe I'm putting my dough out in the 90-degree sun on the back deck to rise.
🧈 How to Soften the Crust
Homemade sandwich bread tends to have a crispier crust than store-bought sandwich bread, which is great for serving alongside soup, but less great when you want a PB&J. There are two ways you can soften your sandwich bread crust, and both work equally well!
The butter method: I learned this trick from my friend Melissa at Bless This Mess (who got it from her mom)-immediately after the bread comes out of the oven, brush or slather butter on the hot crust. The butter will absorb into the bread and create a soft (and buttery) crust!
The tea towel method: I've used this trick for years to soften homemade bread-if you're short on butter, you can also soften the crust by lightly (lightly!) dampening a tea towel, and then wrapping the entire warm loaf of bread in the tea towel as soon as it comes out of the pan. Let the wrapped loaf cool completely on a wire rack before unwrapping. The bread might feel slightly soggy immediately after unwrapping, but after a few minutes of air exposure, you'll have a soft bread ready for your favorite sandwiches.
Both methods work equally well. I usually go for the butter method because, well, butter.
👩🏻🍳 Cassie's Tips
- Skip the thermometer. Combine hot tap water with cold milk straight from the fridge and you'll hit the perfect temperature for yeast activation every time. No guesswork, no thermometer required.
- Test your yeast first. Some bread recipes skip the step of proofing the yeast, but I find that I get better, quicker results by activating the yeast first-plus, it helps me know early on if my yeast is sluggish. No wasting precious ingredients later on just to find out your yeast isn't active!
- Brewer's yeast and nutritional yeast will not work here. I know it sounds obvious, but they are completely different things from active baking yeast. You need active dry, instant, rapid rise, or bread machine yeast.
- Use a kitchen scale. This is the single biggest thing you can do for consistent results. A cup of flour can vary by 30 grams or more depending on how you scoop it. Weight measurements don't lie. If you must use cups, use the spoon and sweep method - never scoop directly from the bag.
- Watch the dough, not the clock. Rise times can range from 45 minutes to 3 hours depending on your yeast, your kitchen temperature, and about a dozen other factors. Use the landmarks - doubled in size for the first rise, poke test for the second - and ignore the clock.
- Don't punch down the dough. I know you've seen it on TV. Don't do it. The shaping process deflates the dough plenty, and punching it down risks knocking out too much air and ending up with a denser loaf.
- Trust the poke test. It's more reliable than any timer. Slow spring-back means ready to bake. Immediate bounce means more time. Collapse means over-proofed - reshape and start the second rise again.
- Start hot, then back it down. Preheat to 425°F, put the loaf in, then immediately drop to 375°F. That initial blast of heat creates oven spring - the rapid rise that gives you a tall, fluffy loaf. Baking at 425°F the whole time would burn the crust before the inside is done.
- Don't open the oven door. Especially in the first 10 to 15 minutes. Every time you open it, the temperature drops and you lose oven spring. Set a timer and walk away.
- Cool before you slice. I know it's hard. But warm bread compresses under the knife and you'll end up with squished, uneven slices. If you want really thin slices, pop the loaf in the fridge for 20 minutes first.
- Butter the crust straight out of the oven. If you want a soft sandwich-ready crust, brush butter on the hot loaf the second it comes out of the oven. It absorbs in fast and makes the crust tender enough for even the squishiest PB&J.
🙋🏻♀️ FAQs
If your loaf comes out dense, you may have overworked the dough. The more you manipulate the dough after the first rise, the more air bubbles get forced out, which can lead to a dense bread. Next time, don't spend too much time shaping your loaf (and remember, no need to "punch" down the dough!).
Keep in mind that the flour you use can affect the final fluffiness of your bread, too! A loaf made with whole wheat flour will be denser than one made with all-purpose flour, which will be slightly denser than one made with bread flour. But we promise, they will still all be delicious!
We store our homemade bread in an airtight container on the counter (we use these steel locking containers for our bread). Because we are a small family, we usually cut the loaf in half, and keep half in an airtight container in the freezer-when we've finished the half loaf on the counter, we bring out the frozen one. On the counter, the bread will last 4-5 days. In the freezer, it'll last six months or even longer.
Absolutely. Mix the dough by hand in a large bowl, then knead on a lightly floured surface for 7 to 10 minutes. It's a bit of a workout, but entirely doable and honestly satisfying. You'll know the dough is ready when it's smooth, elastic, and no longer sticks to your hands.
Yes, and I've tested it every way: 100% all-purpose, 100% whole wheat, and half and half. All three work. The 100% whole wheat version is slightly denser and needs a longer rise time, but it has a wonderful nutty flavor. The half and half version is the favorite in our house.
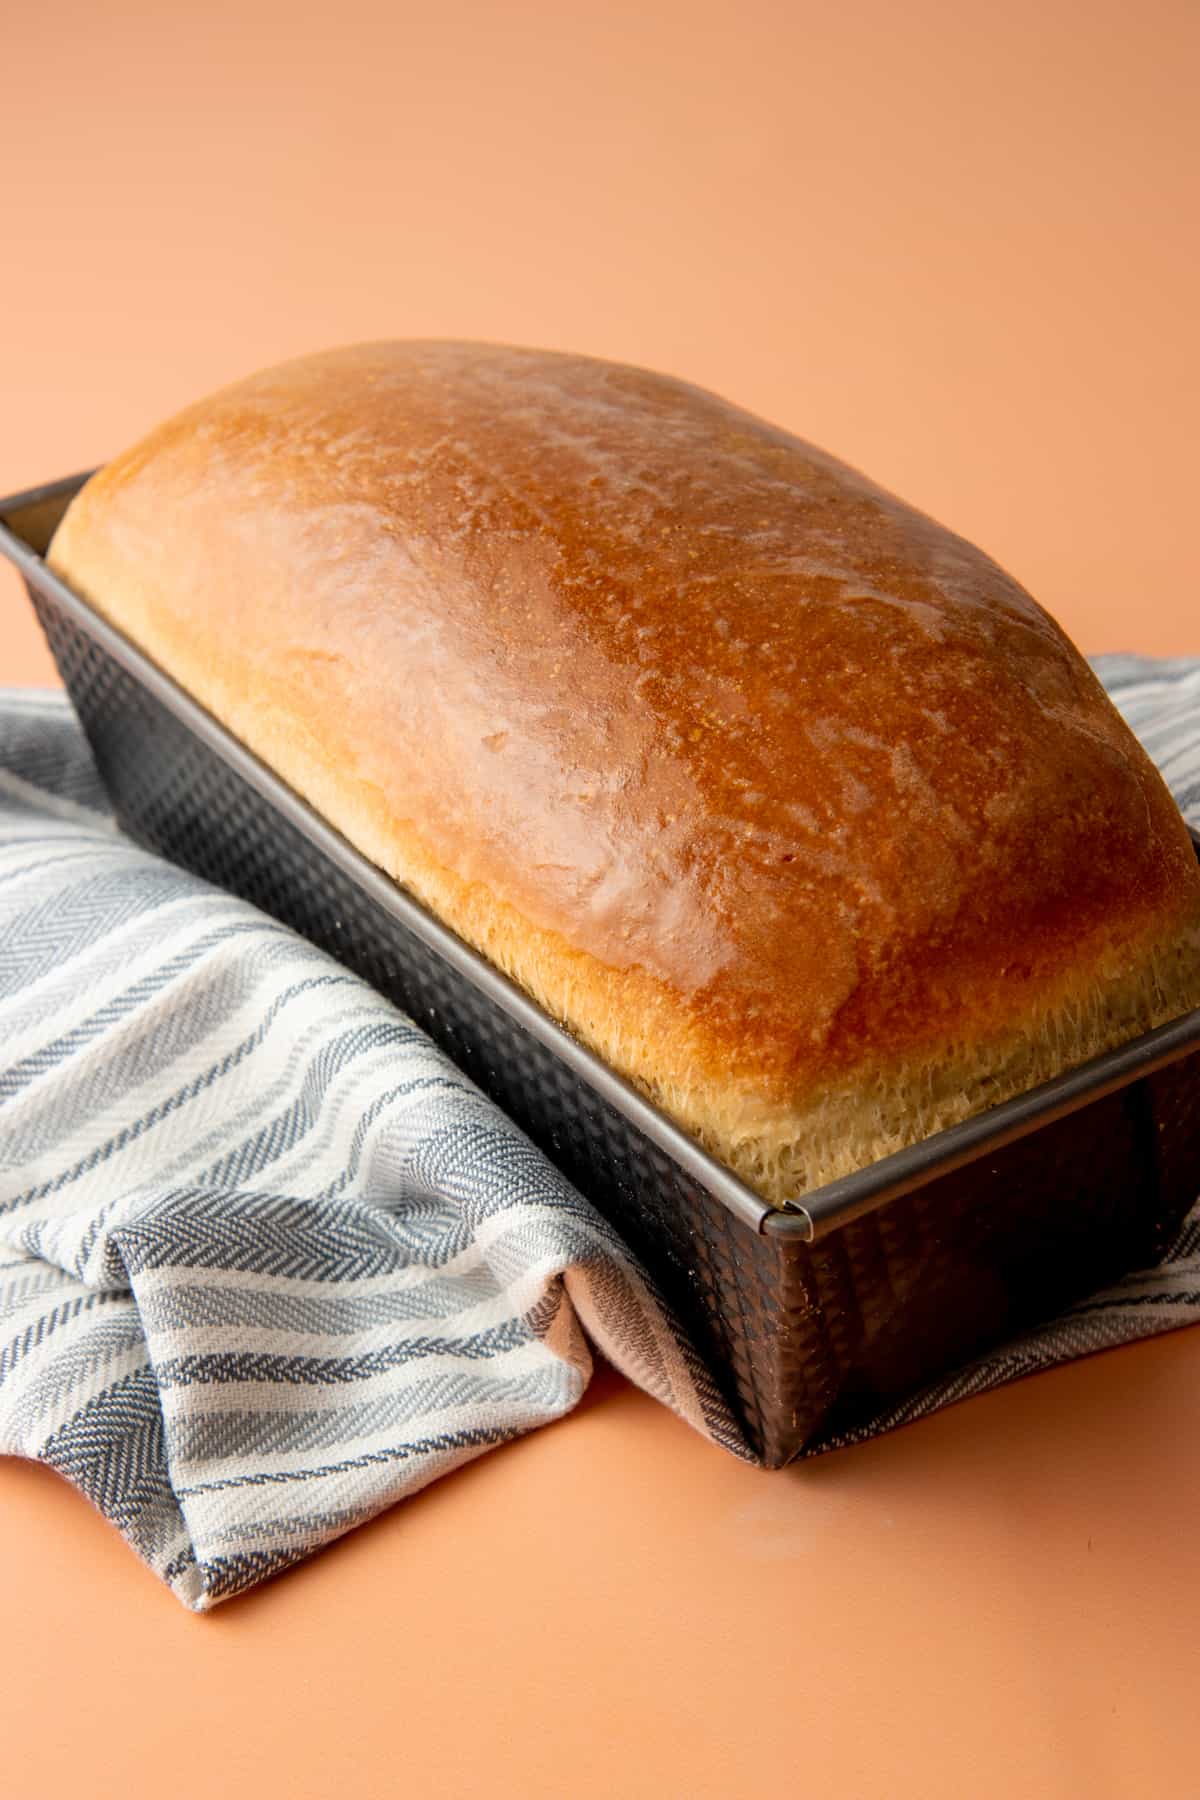
My favorite (and what you see in these photos) is a 10 x 4½ inch loaf pan, which gives you those tall, beautiful slices. A standard 9 x 5 inch pan works too and gives you wider, more traditional sandwich slices. I don't recommend going smaller than that or the dough will overflow.
I haven't tested it myself, but there's no reason it shouldn't work. If you try it, please let me know how it goes in the comments.
The greatest thing about beginning bread-making is that you get to eat your mistakes! Even sandwich bread that doesn't turn out perfectly is usually still quite delicious slathered with some butter and jelly (like my apple jelly recipe or my strawberry-rhubarb jam)-and even if it isn't, imperfect bread makes great croutons, breadcrumbs, bread for , or breakfast bakes (like my Denver omelet casserole or French toast breakfast bake). Making your own bread is a risk-free endeavor! So strap on the apron, get out the flour, and start bread baking. Enjoy!
🥖 More Yeast Breads To Try
If you tried this Homemade Sandwich Bread or any other recipe on my blog, please leave a 🌟 star rating and let me know how it went in the comments!
📖 Recipe
Easy Homemade Sandwich Bread
Ingredients
- 225 grams hot water hot from tap, not boiling
- 90 grams milk cold from the fridge
- 50 grams honey or 20g sugar
- 9 grams active dry yeast
- 55 grams melted butter or vegetable oil
- 10 grams salt
- 500 grams all-purpose flour, whole wheat flour, or a combination of both see notes
- Additional oil and flour for rising and forming the dough
- Butter for softening crust, optional, see notes
Instructions
- In the bowl of an electric stand mixer fitted with the dough hook, or in a large mixing bowl if making by hand, combine the hot water, cold milk, and honey or sugar, and whisk until combined. Add in the yeast and whisk until combined. Let sit for five minutes to prove. The mixture is ready when it's foamy.
- Add in the butter or vegetable oil, salt, and flour. Mix using the lowest setting on the mixer, or by hand, until it forms a soft and sticky dough, about 3 minutes
- Knead by hand on a floured work surface, or by turning up the mixer to medium-low for 5-7 minutes, or until the dough is smooth and elastic. It will still be slightly sticky.
- Oil the inside of a clean medium-sized mixing bowl. Place the dough ball in the oiled bowl, rotating to coat in the oil. Cover with plastic wrap, a bowl cover, or a damp tea towel, and set in a warm place to rise until doubled.
- Oil the inside of a loaf pan. I prefer a 10" x 4 ½" loaf pan to get very high loaves, but you can also use a standard loaf pan. Set aside.
- When the dough has finished its first rise, lightly flour a work surface and dump the dough onto it. The dough should appear light, stringy, elastic, and full of air bubbles/holes.
- Form into a loaf shape and place in the prepared loaf pan. Cover with oiled plastic wrap, a bowl cover, or a damp tea towel, and set to rise in a warm place until it passes the bread proofing poke test-poke in the bread with a knuckle or finger. If the indentation immediately bounces back, the bread needs to rise longer. If the bread collapses, the loaf is over-proofed, and if the indentation slowly fills in, it's ready to bake! The rise of the bread should also be approximately 1" above the loaf pan.
- In the last few minutes of the final proof, preheat the oven to 425°F. When proofing is finished, remove the cover, and place the loaf in the oven. Close the door, and immediately reduce the oven temperature to 375°F.
- Bake with the oven door closed for 25-30 minutes, or until the crust is golden brown and the bread sounds hollow when tapped. Remove from the oven and cool for 15 minutes before removing from the loaf pan, and transfer to a wire rack to cool completely before slicing.
Video

Notes
- We didn't include rise times here, because it varies widely based on the strength of your yeast, temperature of your home, and a million other factors. What takes three hours to rise in one home might take 30 minutes in another-you're better off following our landmarks for when the dough is ready.
- If you choose to measure using the volume measurements, make sure you use the scoop and sweep method for measuring the flour. If you just scoop the flour out of the container, you'll end up with a very dry dough/bread.
- The high initial temperature is to help give the bread an "oven spring," where the instant reaction of hitting the heat causes the mixture to expand rapidly, making for a tall loaf.
- Out of milk? No problems, just sub in cold water instead.
- We usually make this bread with avocado oil, because we always have it in the house. Melted butter is wonderful, too!
- We've tested this with all whole wheat flour, all all-purpose flour, and a mix of half and half-they are all wonderful! The 100% whole wheat version is a bit denser, but still delicious. The half and half version is the favorite in our house.
- For a soft crust: brush butter over the crust immediately after it comes out of the oven, or wrap the entire warm loaf in a slightly damp tea towel while it cools. Homemade bread tends to have a nice, crispy crust, which is great for serving alongside soup, but less great when you're going to make a PB&J.
- We've never tried this recipe in a bread machine, but there is no reason why it wouldn't work. Let us know if you try it out!
I followed the instructions exactly as it states. I used honey and all-purpose flour, and it has been the best sandwich I've ever tried. This recipe is perfection. You'll love it!
We are so glad you love it!! Enjoy!
Our favorite bread recipe! I do have one question though - if I’m using a 13x5 loaf pan (Goodcook XL pan from Target) what should I “tweak” to get a similar high rise? I’d love to achieve the same result!
Thanks so much!
Hi Amanda! We're so glad you love the recipe! The pan you're using holds a higher volume of dough, so you would need to scale the recipe up to achieve the same high rise in your pan. Unfortunately, we haven't made this recipe in a pan that size. I can't say exactly how much you would need to adjust the ingredient amounts or baking time for that pan. If you're up for experimenting, it'll most likely take a bit of research online and some trial and error to get things just right in your pan! If you give it a go, please let us know how it turns out for you!
For the second rise, can you put it in the fridge to let it rise? Or does it need to rise for both times out in a warm area.
Hi Angela! This recipe was developed for an easy, every-day style loaf with warm rises. But you're welcome to experiment with slower, cold rises! You'll want to pick either the first or second rise, not both. So, if you'd like your second rise to be in the fridge, you can definitely give it a go. Just keep in mind that the baking time and temperatures for this recipe were specifically developed for dough that's around room temperature when it goes into the oven. To get the oven spring we're after here, you'll want to make sure it sits at room temp for a bit before you bake it. It might take a bit of experimenting, but it's definitely doable! Please let us know how it works out for you. =)
Thank you for this recipe. It works great and is very simple to work with. Each time I make it it turns out great. It has become a staple in my kitchen.
Many Thanks !
Eddy 🙂
I have one quick question for you, what internal temperature would you aim for? I have been going for 195f. Thanks in advance.
Hi Eddy! We're so glad you love the bread recipe! We know our loaf is ready when the crust is golden brown and the bread sounds hollow when tapped. We don't usually measure the internal temperature to check if it's finished. We trust our eyes, ears, and baker's instincts! But if that internal temperature is working for you, we recommend you stick with it! =)
Really yummy! It was a long haul getting through the whole post but worth every second. I think it covered off everything you need to know and any questions one might have about bread making. Bookmarked! Many thanks.
Thanks, Sam! We're glad it was helpful. =)
Hi there! I am trying this recipe as my first ever bread recipe, and it's been going really well so far! I just had a question - my dough turned out really dry, and I had to add more water to it and knead it quite a bit to make it softer and more like the dough you had. I noticed another comment had said that the volume measurement for milk (1/4 cup) is not the same as the weight of milk needed (90g, while 1/4 cup milk is only 62g). If I try this recipe again, do you think that adding more milk initially would fix it? I don't have a kitchen scale, but I'm thinking that I should invest in one haha! Thank you!!
Hi Katey! This recipe was developed using a scale, so the weight measurements are the most accurate. 90g of milk is what the recipe needs! We'll double-check our conversions and update the recipe if needed. Thanks for helping make our recipes better for everyone!
Help! My bread during the rise IN the bread pan looks nothing like your pictures. Mine is full of bubbles and doesn’t look dry and smooth like yours. What am I doing wrong? I did the poke test and it deflated, so I reformed and am putting it back in the pan to rise again.
Hi Colleen! Thanks for your patience as our offices were closed for the end of the year. I hope reforming the loaf and putting it back into the pan to re-proof sorted everything for you! If you need to troubleshoot further, please reply to this comment or drop us an email. We're happy to help!
I am not sure if my yeast has proved or not. It was quite cold after mix, probably because my activated yeast was in the freezer. I set it on my living room furnace to warm up , but now I am worried it got too warm...
Hi Chris! We hope this worked out, and you're enjoying delicious bread right now. If you'd still like to troubleshoot, reply to this comment or send us an email. We're happy to help!
I tried this recipe for the first time (I am a beginner baker) but my dough was more like pizza dough... it wasn't sticky at all. I think the "sweep method" may have still given me too much flour??? Next time I will try and fully sift it. (It is very humid and cold where I am right now.) I have made no-knead breads before and this dough was more like my calzone dough than the bread dough. Maybe it'll be okay after it rises, we shall see.
Hi Sam! It doesn't sound like anything is necessarily wrong here. This dough requires kneading, so it's not as wet and sticky as the no-knead doughs you're used to. Please let me know how it turned out after the rise and bake!
You didn't punch down the dough in the recipe. Should we punch it down after the first rise?
Hi Judy! We talk about this in the post under the heading "Step 5: Form into a loaf." I'll copy it here to save you the search: "There is no need to “punch” down the dough as you see on TV a lot—the process of shaping the loaf will deflate it enough, and punching it down might remove too much air and make for a denser loaf." Happy breadmaking!
Can you use bread flour for this recipe as well?
Hi Gayle! You can definitely use bread flour for this recipe. In fact, we use King Arthur's Organic Bread Flour whenever we make it! We've tested it with high-end organic bread flour, store-brand all-purpose flour, and even whole wheat flour and it's always delicious. If you make it, please let us know how it turns out for you!
the best I have tried so simple anyone can do it.
I am a first-time bread maker. I have tried many recipes, and my breads always end up hard. I have not been able to get it right. Until now. This is the first recipe that my family drooled over. We ate it all in one night. 🙂 I will use your recipe over and over. Thank you so much for sharing your recipe. It's delicious!
Thanks so much, Carolina! We're so happy to hear that our recipe was a success for you. Thanks for coming back to tell us about it!
This recipe is fool proof! Perfect bread every single time.
YAY! We love hearing that, Sarah. Thanks so much for sharing your success with us!
Thank you for this recipe!! Your tips with the poke test and the oven spring are just what my bread has been missing. This is the best sandwich loaf I’ve been able to make. Thank you for helping my bread dreams come true 😀
YAY! We love hearing that, Alyssa. Thanks so much for coming back to share your success! Bread dreams are the best dreams—and we're glad we could help yours come true =)
A couple of things...
1) I use a 13 x 5 loaf pan so I added 1/3 to all ingredients. I use an app called Recipe Keeper (only a small, 1 time charge). Just change the "Servings" to what you want (18-24 in this case) and it automatically does the math for you.
2) I add these to all my breads (even hot dog rolls!!)
1 tbsp. Dried Basil
1 tbsp. Dried Oregano
1 tsp Onion Powder
1 tsp Garlic Powder
The quantities as small enough to not take over the flavor ... just enough to add that something "extra" to the taste.
If I use an 8" by 4.5" pan, will this be too much dough?
Hi Tammy! We haven't made it in a pan that size before, but having seen how full the 9x5 pan was, I do think it'll be too much dough. BUT! You could always make a smaller loaf in your pan and make a few individual rolls with the leftover dough. There are lots of resources online to help you figure out how much dough is right for your pan. Typically for smaller loaf pans, I think it's somewhere around 450-550 grams. But with a little bit of experimenting, you should be able to make this recipe work for your pan without needing to buy a bigger one! Let us know how it works out for you =)
I don't use vegetable oil or avocado oil. What oil could I substitute that won't alter the taste?
Hi Torey! Whatever neutral-flavored oil you typically cook with will be fine!