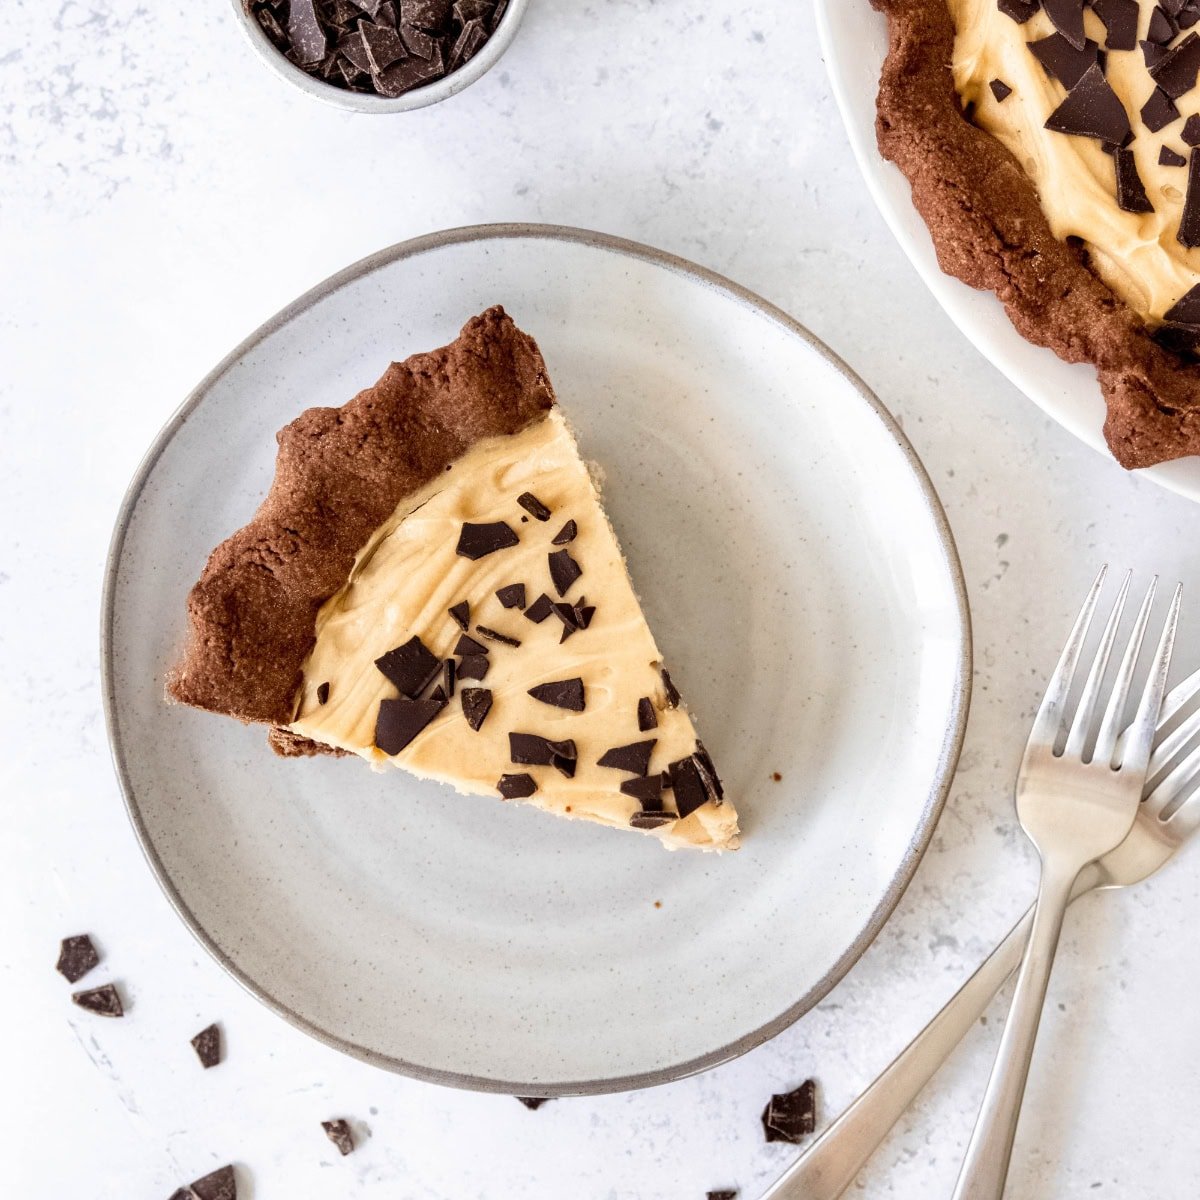
Chocolate Peanut Butter Pie

Two of the tastiest flavors in the world are chocolate and peanut butter. Put them together in an easy chocolate peanut butter pie, and you've hit the dessert jackpot...a no-bake jackpot, at that!
🔍 Recipe At-A-Glance: Chocolate Peanut Butter Pie
- 🕰️ Prep Time: 1 hour
- ⏰ Cook Time: 25 minutes
- 💛 Flavor Profile: Hey, you got chocolate in my peanut butter (or is it the other way around?)!
- 🍽️ Good For: A Thanksgiving pie recipe that is quick and easy enough to make any evening of the week!
- 🔄 Make Ahead: Make the crust up to months in advance, or the whole pie up to 3 days ahead of time.
- 🧡 Difficulty: If you can whip cream, you can make this pie filling! The crust takes just a bit more effort.
Summarize and Save this Recipe Using:
🧡 Why You'll Love This Recipe

Hi, friend: Chocolate and peanut butter make a superstar duo, and this pie is no exception. It oozes peanut butter goodness with every bite and is incredibly simple to toss together. Whether you're looking for a simple weeknight dessert or planning on wowing your family at Thanksgiving, this pie will have everyone begging for seconds.
Here's why you'll love this recipe:
- Match Made in Heaven: Peanut butter and chocolate are a match made in heaven (I'm looking at you, peanut butter buckeyes, chocolate peanut butter smoothie, and chocolate peanut butter overnight oats!) This peanut butter pie uses an easy-to-make chocolate cookie crust that adds the perfect base for the mouth-watering peanut butter filling.
- Make-Ahead: You can make the crust or even the whole pie in advance, saving you major time on Thanksgiving or the day of your dinner party. (Want more make-ahead Thanksgiving dishes? Try my cornbread and sausage dressing or sweet potato casserole with pecans!)
- That Crust: If you have the time, I highly recommend making the chocolate pie crust from this peanut butter pie recipe because it'll take the whole dessert up a notch!
🍫 The Ingredients You Need
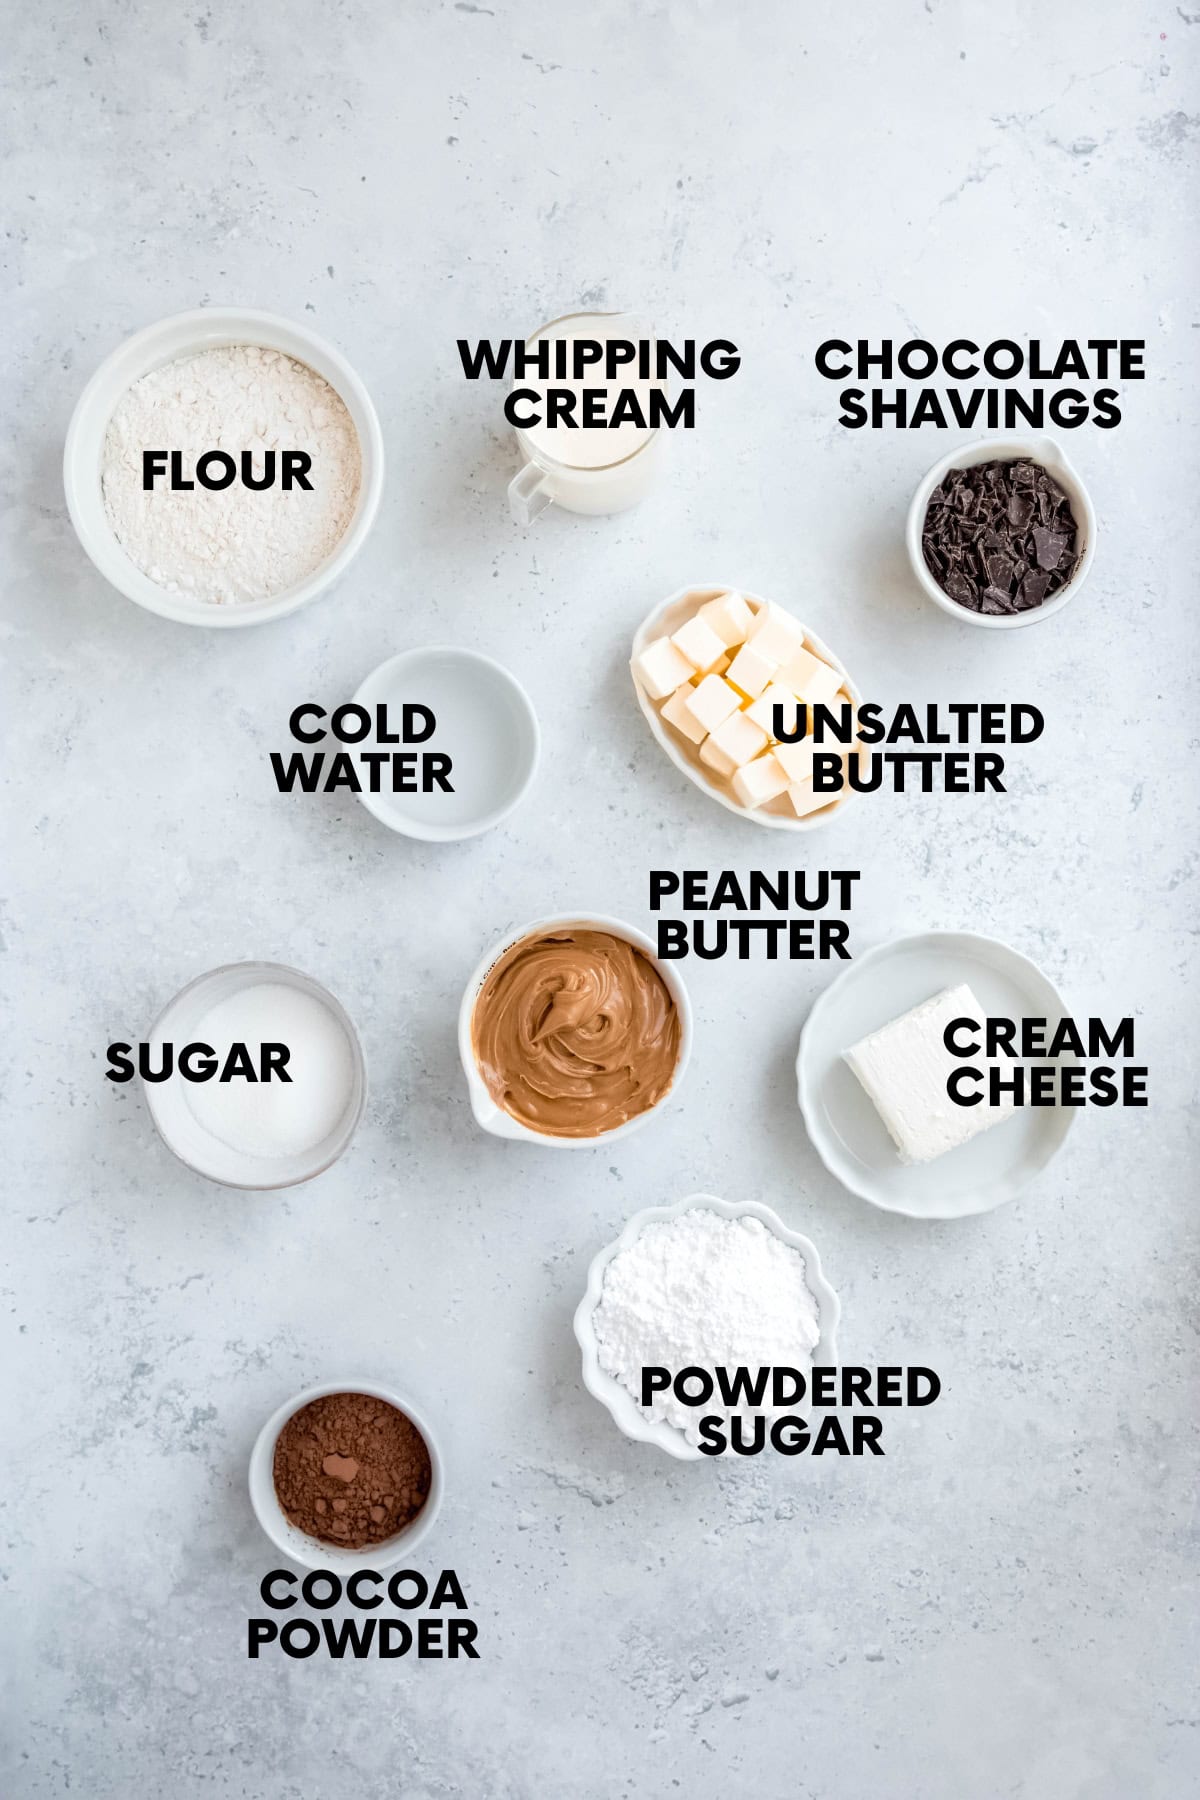
- Unsalted butter: Just like with my food processor pie crust and my gluten-free pie crust recipe, you want the butter to be cold when you make the chocolate crust. Cold butter = delightfully flaky crust. Warm butter = greasy, tough pie crust. I know which one I prefer!
- Heavy cream: You may also see this called whipping cream, and there's no subbing in a lower fat alternative here. Whipping heavy cream into soft peaks will give the pie filling a lot of volume and a beautiful airy texture.
- Cream cheese: Make sure your cream cheese is fully softened and at room temperature before blending it into the filling, or you'll end up with little lumpy pockets of cream cheese.
Make sure to check the recipe card below for the full ingredients list, along with quantities and my expert tips and tricks.
🔁 Variations & Substitutions
- Change the crust: You can use any store-bought or homemade crust you'd like for this chocolate peanut butter pie; I just prefer the chocolate pie crust. If you want to experiment with a pre-made chocolate cookie crust or one made with graham cracker crumbs, feel free to try it out. This no-bake chocolate peanut butter pie is such an easy dessert because you can take the time to make the crust yourself or toss the filling in a store-bought crust, and it'll still come out tasting amazing!
- Change the toppings: You can get creative with the toppings on this pie. Try using variations on the chocolate chips such as mini Reese peanut butter cups, chocolate syrup, whipped cream, or peanut butter syrup to take the flavor of your peanut butter chocolate pie up a notch.
- Chocolate only: Want to break up the famous duo and make a chocolate-only pie?Chocolate chess pie is your answer.
- No chocolate: Or go the other route, and lean into the nuttiness. Try keeping the filling the same, but use the almond crust from my cranberry curd tart.
🥣 Chocolate Peanut Butter Pie How-To
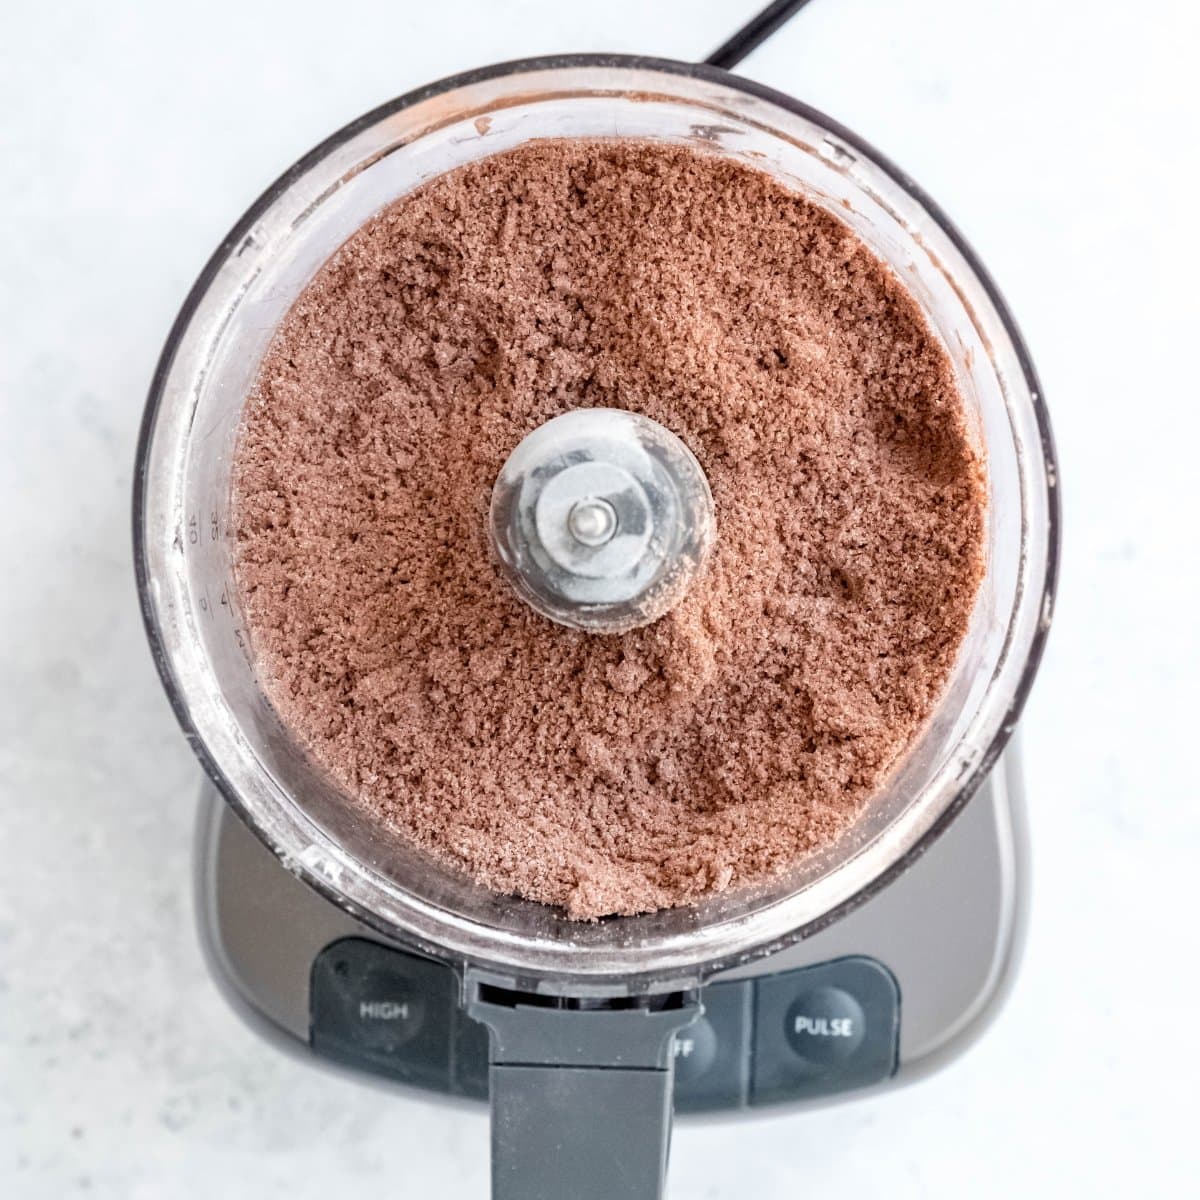
Step 1: Cut the cold butter into cubes, then pulse the butter with the flour, sugar, and cocoa powder in a food processor. If the butter gets soft while you're cutting it into cubes, stick it back in the fridge before adding to the food processor.
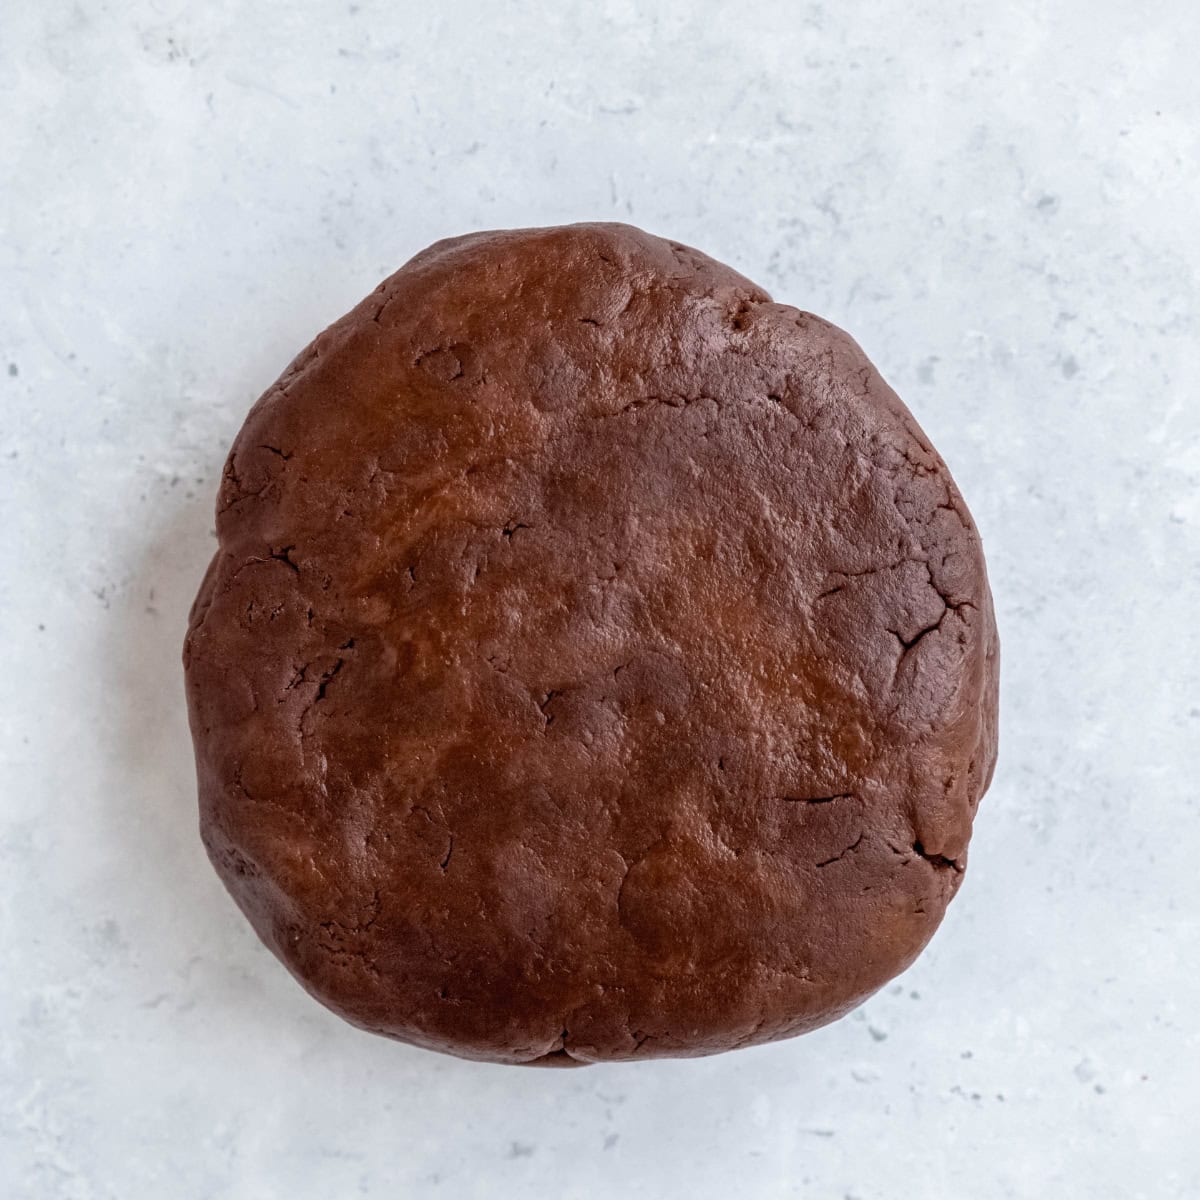
Step 2: Add 2 tablespoons of cold water and pulse again. You'll see a dough start to form-if you squeeze a handful of crust, it should stick together. Shape the dough into a disc and wrap in plastic wrap. Refrigerate for one hour.
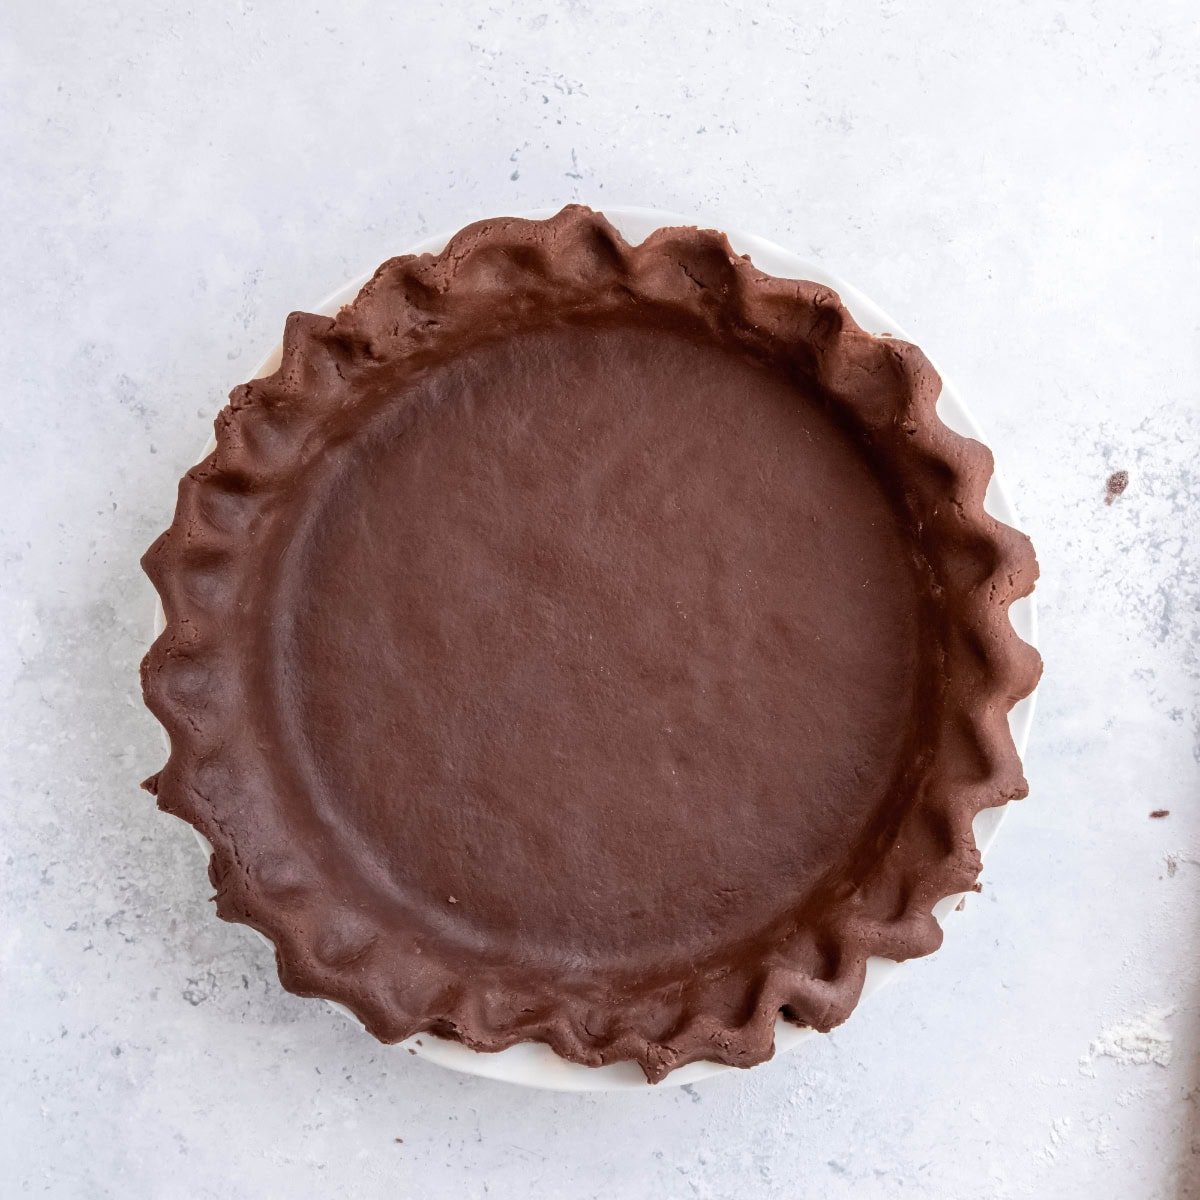
Step 3: Dust your work surface with cocoa powder, and roll out the pie dough to ½-inch thick. Carefully transfer the crust to a greased pie plate (I like to drape the dough over my rolling pin to help with the transition). Stick the bottom all over with a fork so that it doesn't bubble up, and freeze for 20-30 minutes. This is a great time to start preheating your oven to 400°F.
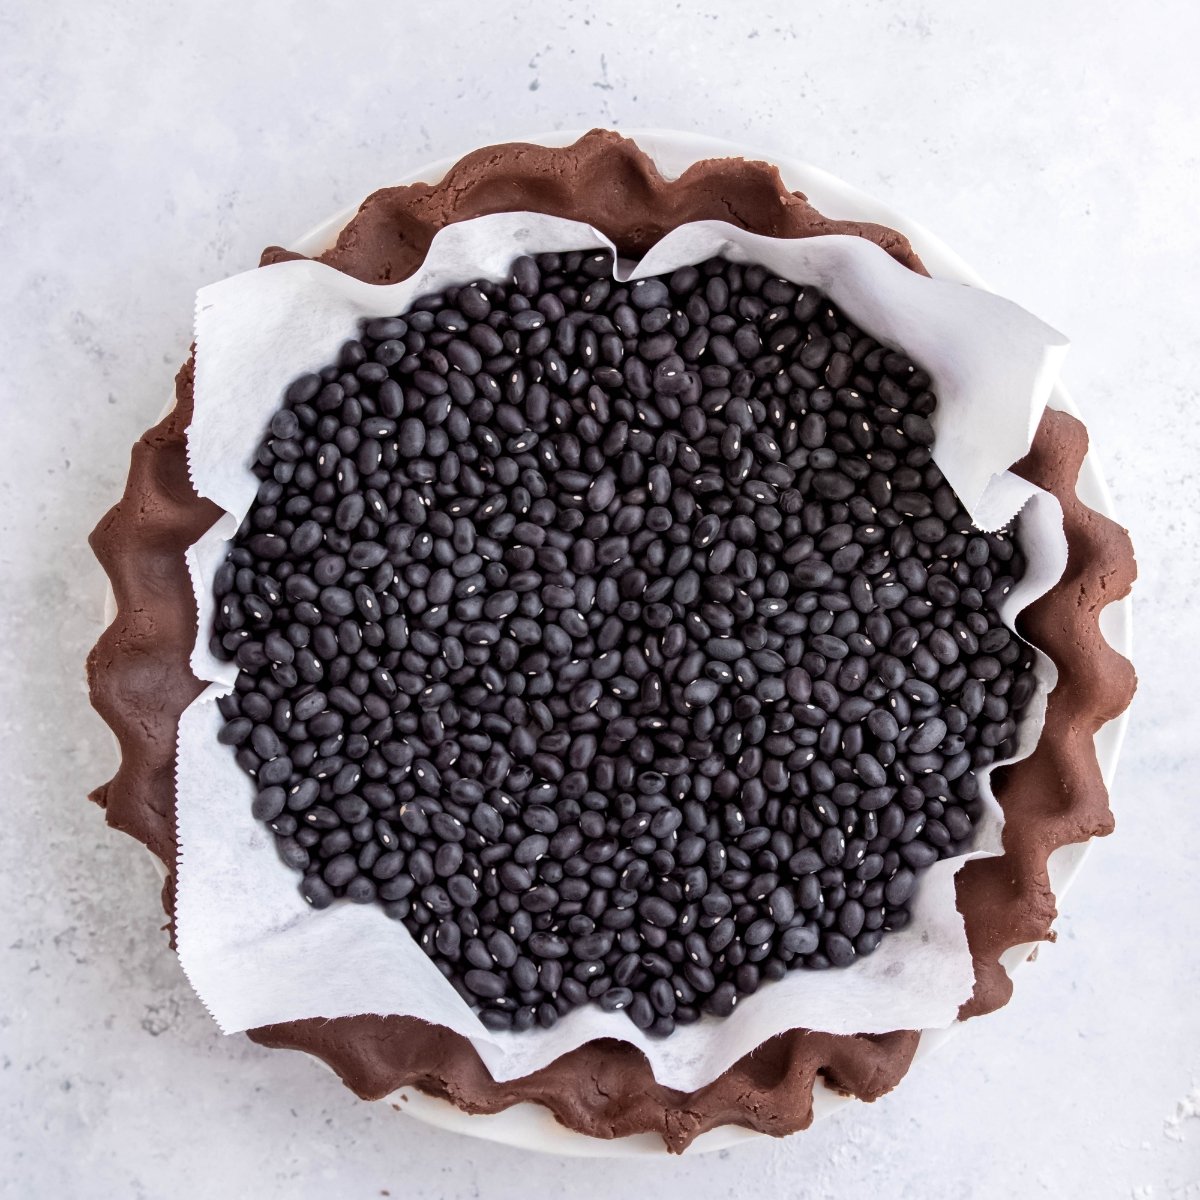
Step 4: Set a piece of parchment paper into the pie crust, and fill it with pie weights. If you don't have pie weights (I don't!), you can use dry beans instead. Bake for 20 minutes.
Remove the parchment paper and beans, and bake for another five minutes. Cool completely before adding the peanut butter filling, or the filling will melt into a mess!
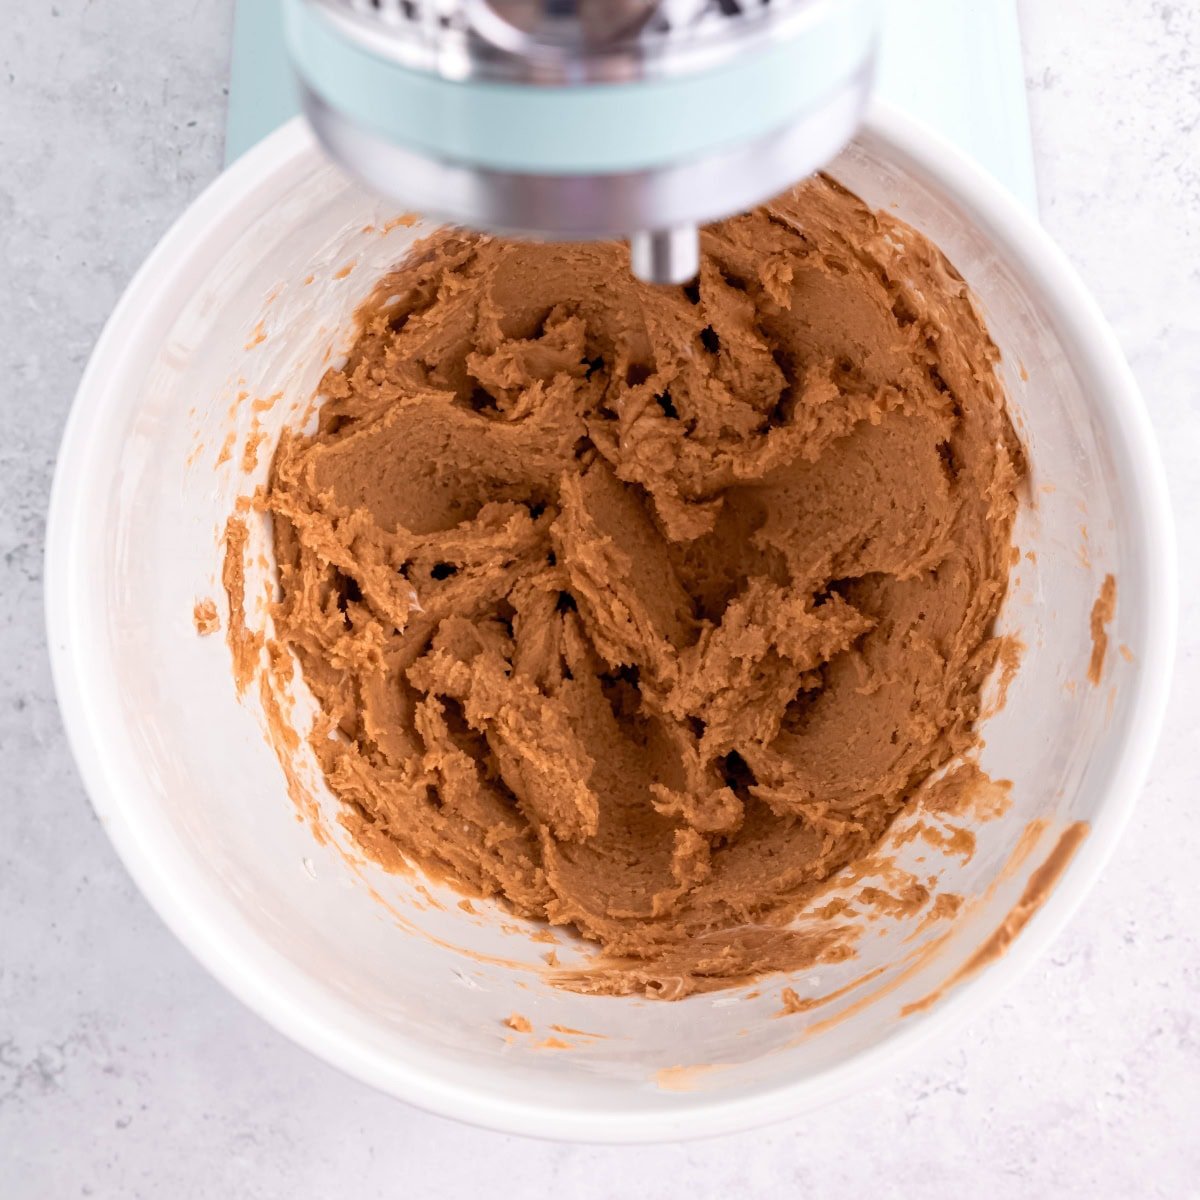
Step 5: Whip the peanut butter with the cream cheese and powdered sugar. Get all the lumps out, but the filling will still be pretty thick and sticky.
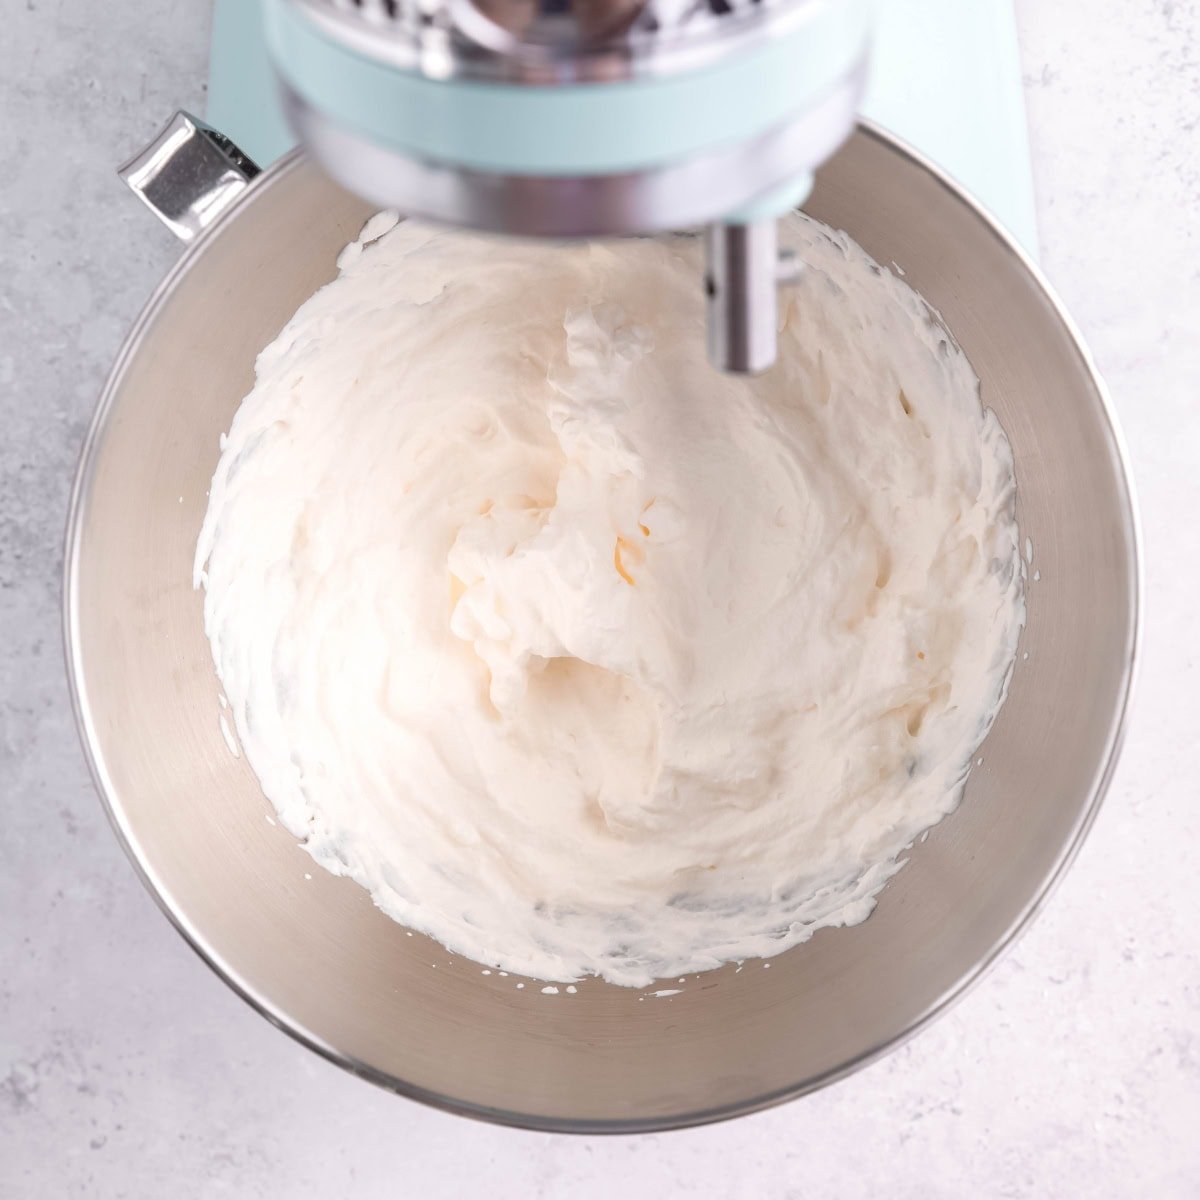
Step 6: Using a stand mixer or hand mixer, whip the cream into soft peaks. That means that when you lift the beater out of the cream, it will make a little mountain that immediately starts to droop down.
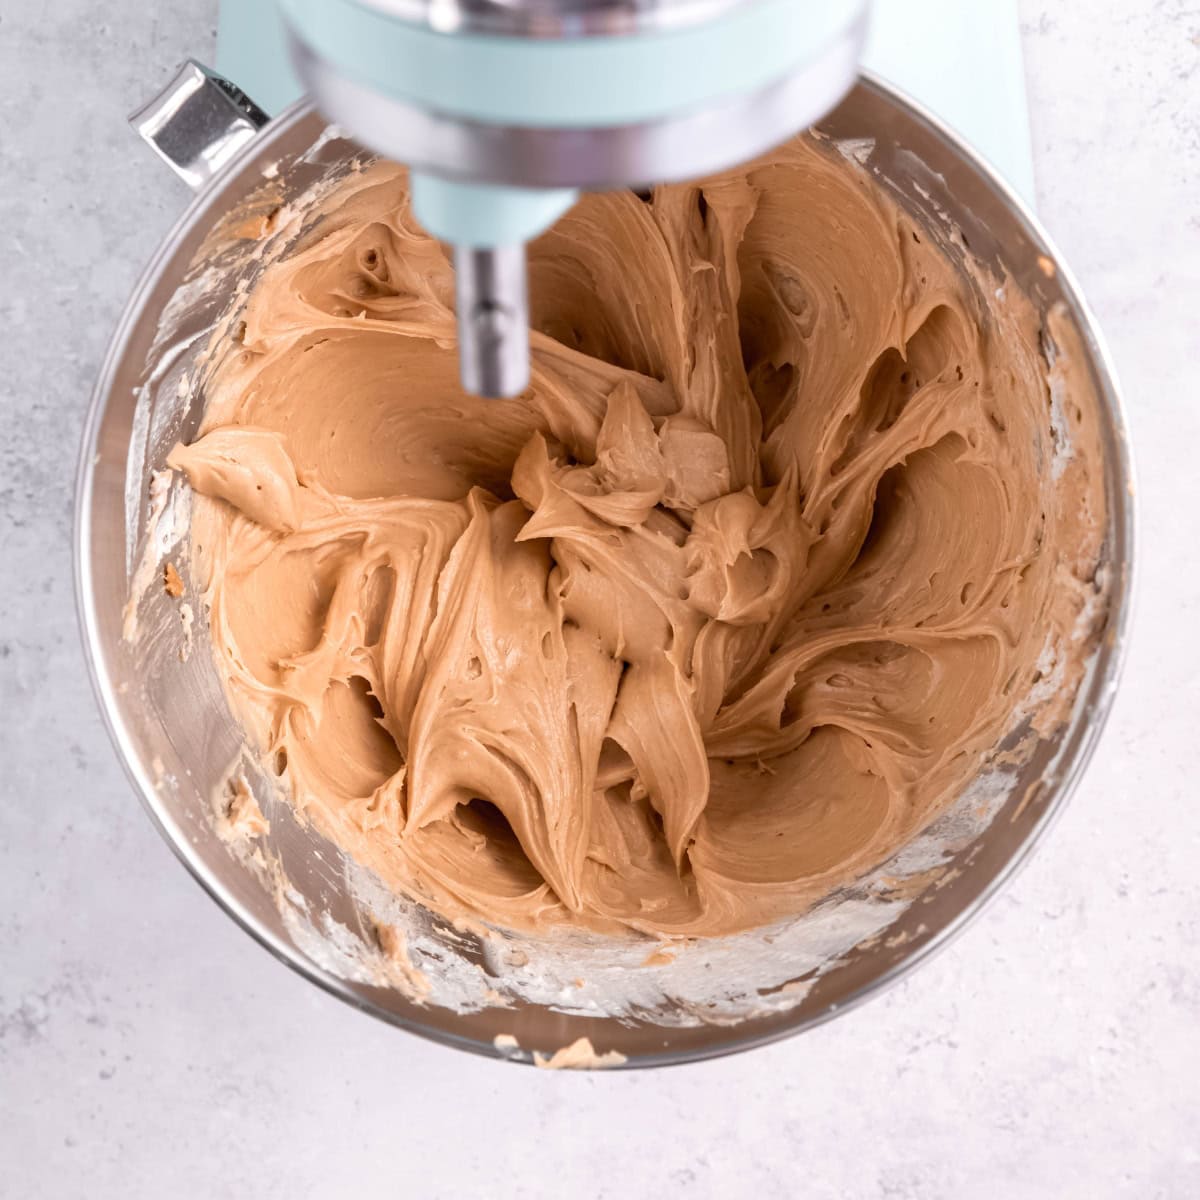
Step 7: Mix the peanut butter mixture with the whipped cream until the filling is fluffy and mousse-like.
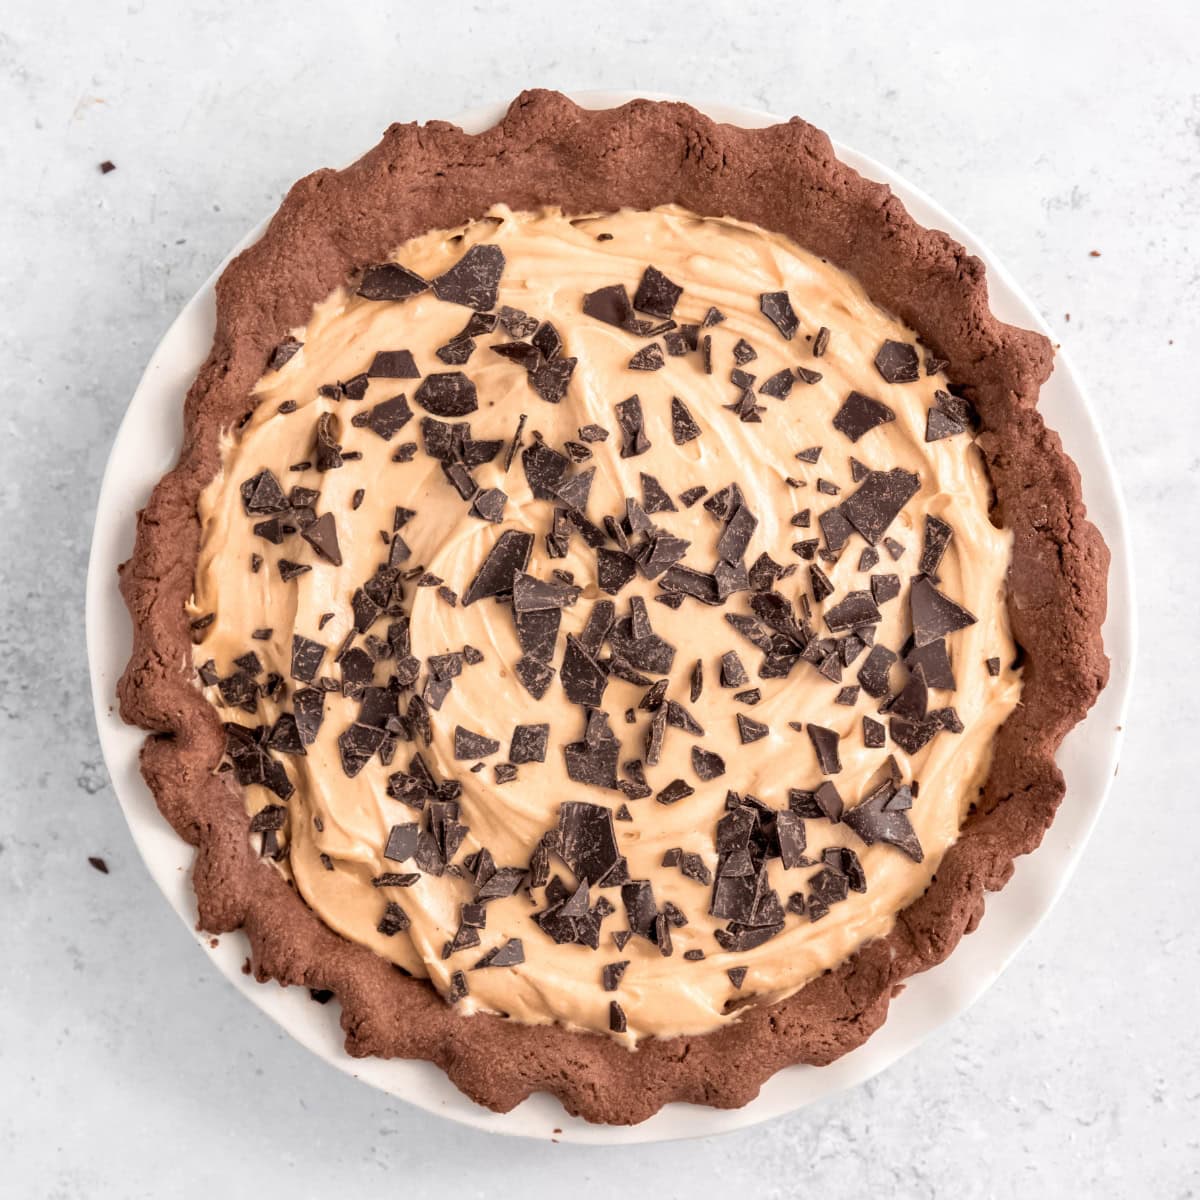
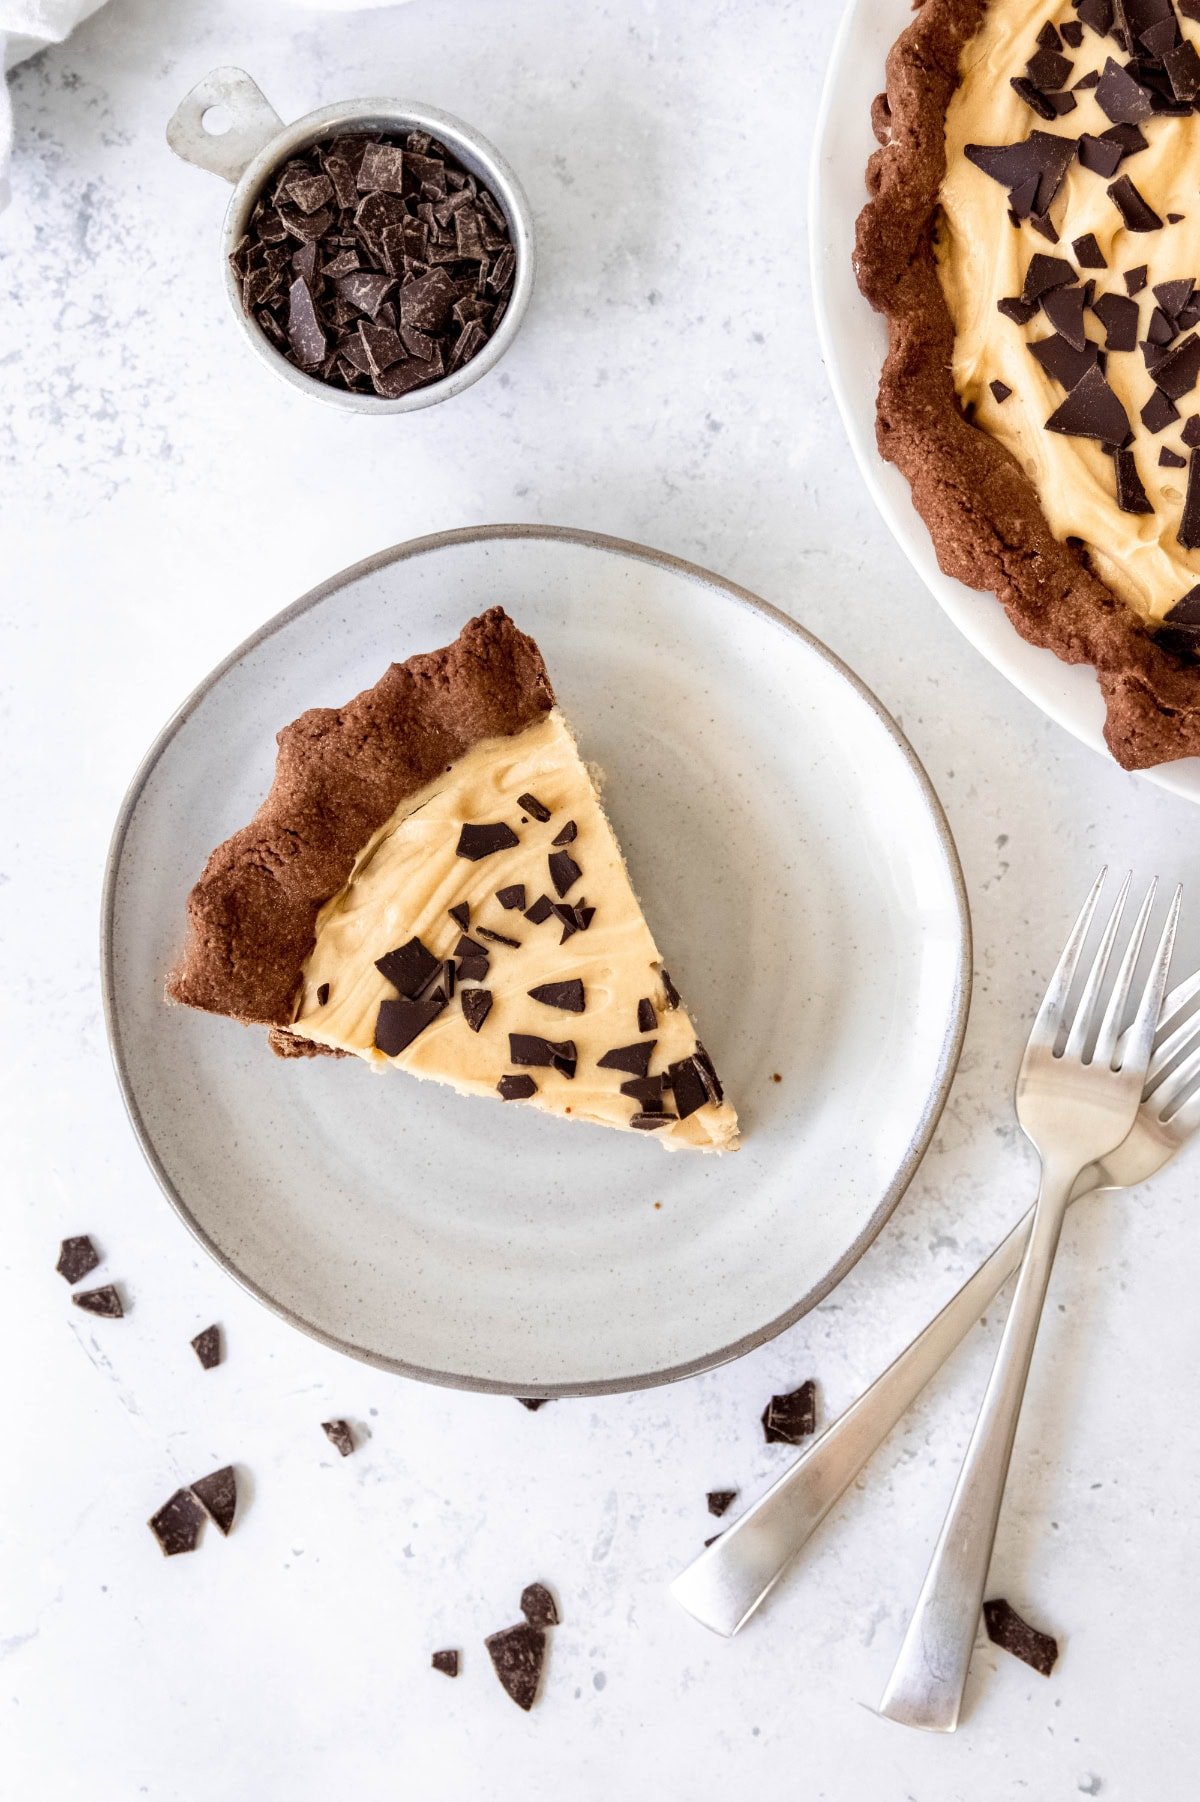
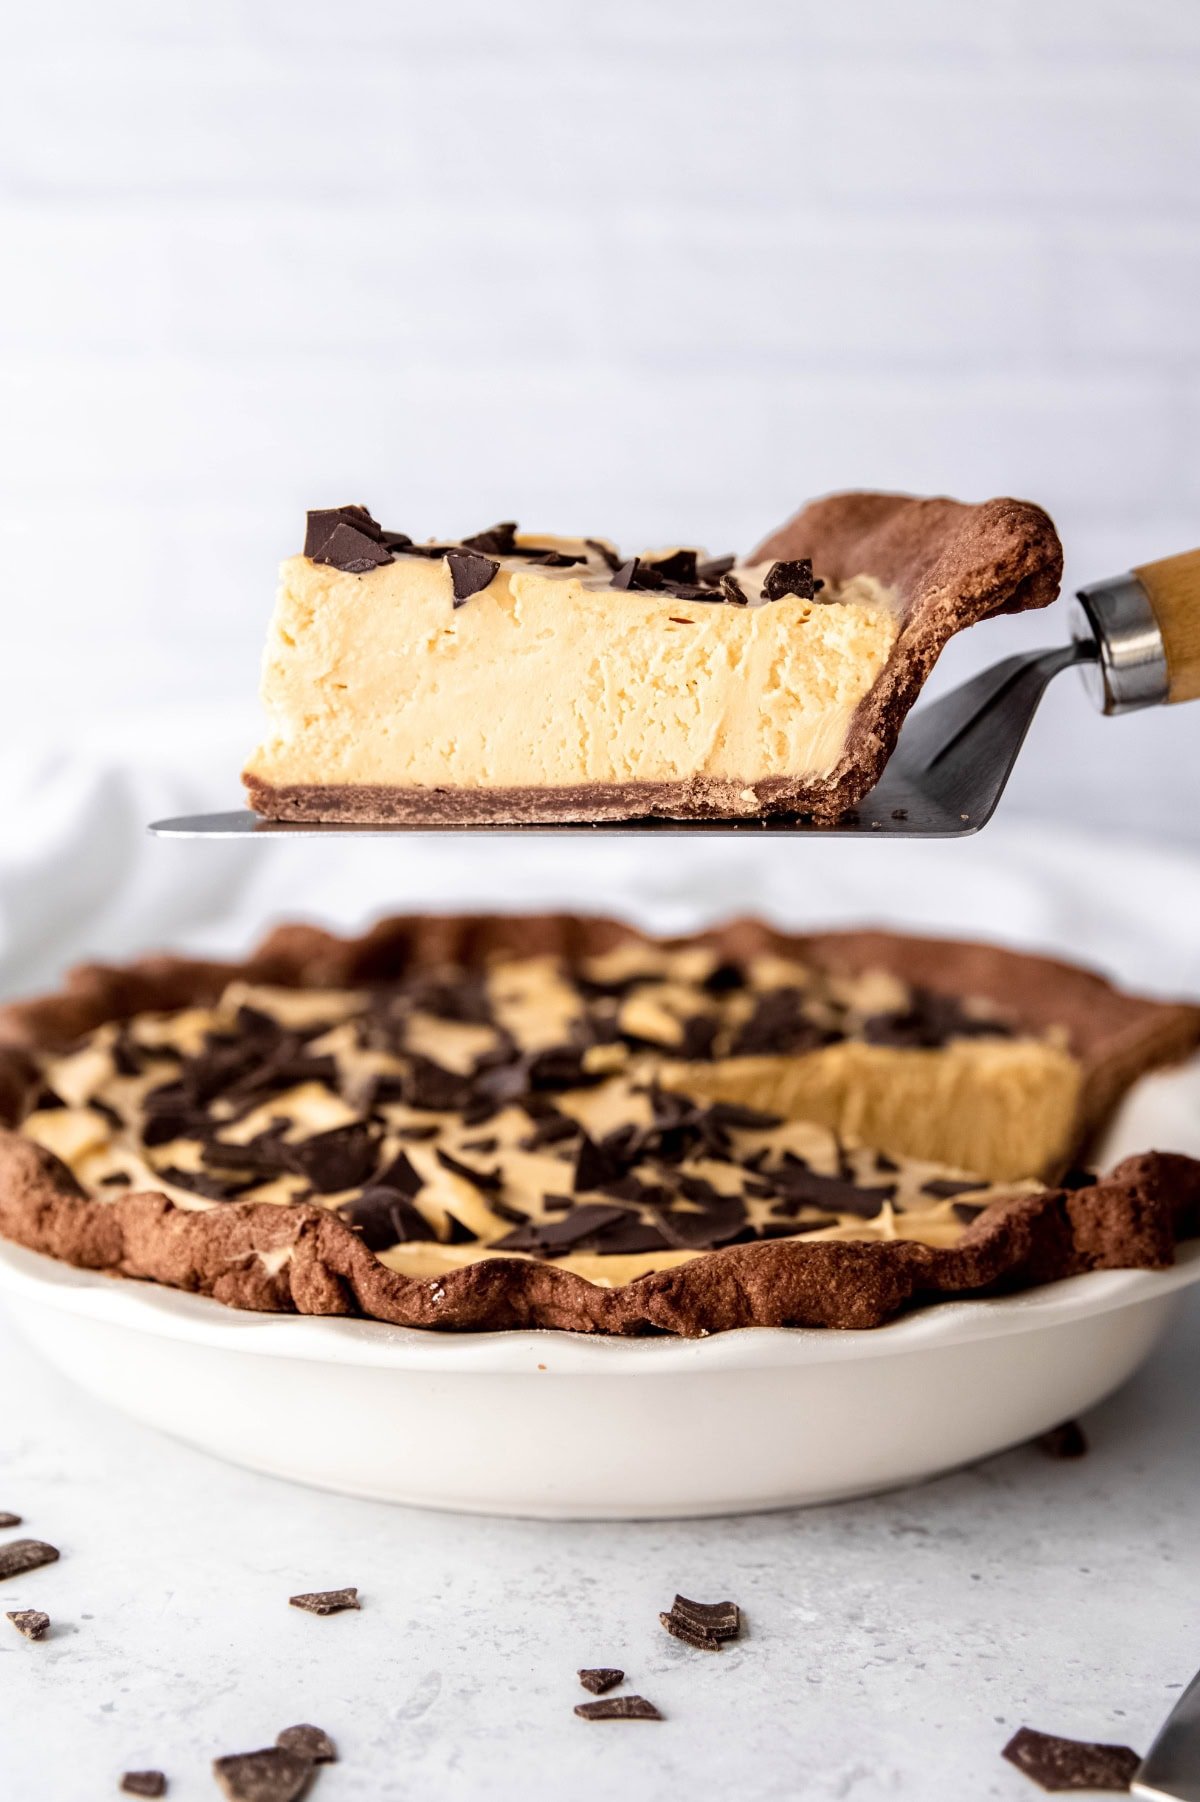
Step 8: Scoop the filling into the cooled pie crust, and garnish with chocolate shavings. Chill for four hours before slicing.
🙋🏻♀️ Chocolate Peanut Butter Pie FAQs
You can make both the crust and the whole pie in advance. If you plan on freezing the pie crust, follow the crust recipe up to step seven, then freeze it solid in a metal pie plate. Wrap the frozen pie crust in several layers of plastic wrap, and it'll last in the freezer for several months.
If you decide to make the entire chocolate peanut butter pie in advance, you can keep it in the fridge for up to three days as long as it's well-wrapped in plastic wrap.
If you're storing the whole pie, wrap it in several layers of plastic wrap and keep it refrigerated until you're ready to serve so the filling doesn't soften. Stored this way, it'll last up to three days in the fridge.
If you're storing slices or a partial pie, you can place them in an airtight container and store in the fridge for up to three days.
Yes! You can freeze your pie by wrapping it well in plastic wrap and storing it in the freezer. It's best to serve frozen chocolate peanut butter pie as close to frozen as possible; the texture will change if you allow it to thaw too much before serving.
👩🏻🍳 My Expert Tips & Tricks
- Follow the crust recipe: Homemade pie crusts are remarkably simple to make, and you can make them in advance. But for this chocolate crust, it is super important to follow the baking instructions to the letter-this will give you a perfectly-cooked, even crust. If you veer off from the recipe, you could end up with a shrunken, shriveled crust instead.
- Reduce the stick: When preparing your surface for rolling out the dough, try using cocoa powder or a mixture of cocoa powder and flour to prevent the pie from sticking while maintaining that delicious chocolaty flavor!
- When it's ready: When you add the filling to your pie crust, it'll be soft and fluffy. At this point, it's not possible to slice into it and serve it, which is why it needs to chill in the fridge. Your pie will be ready to serve after chilling for four hours. If you want to take it out sooner, touch the top with a finger softly. It should feel firm enough to slice.
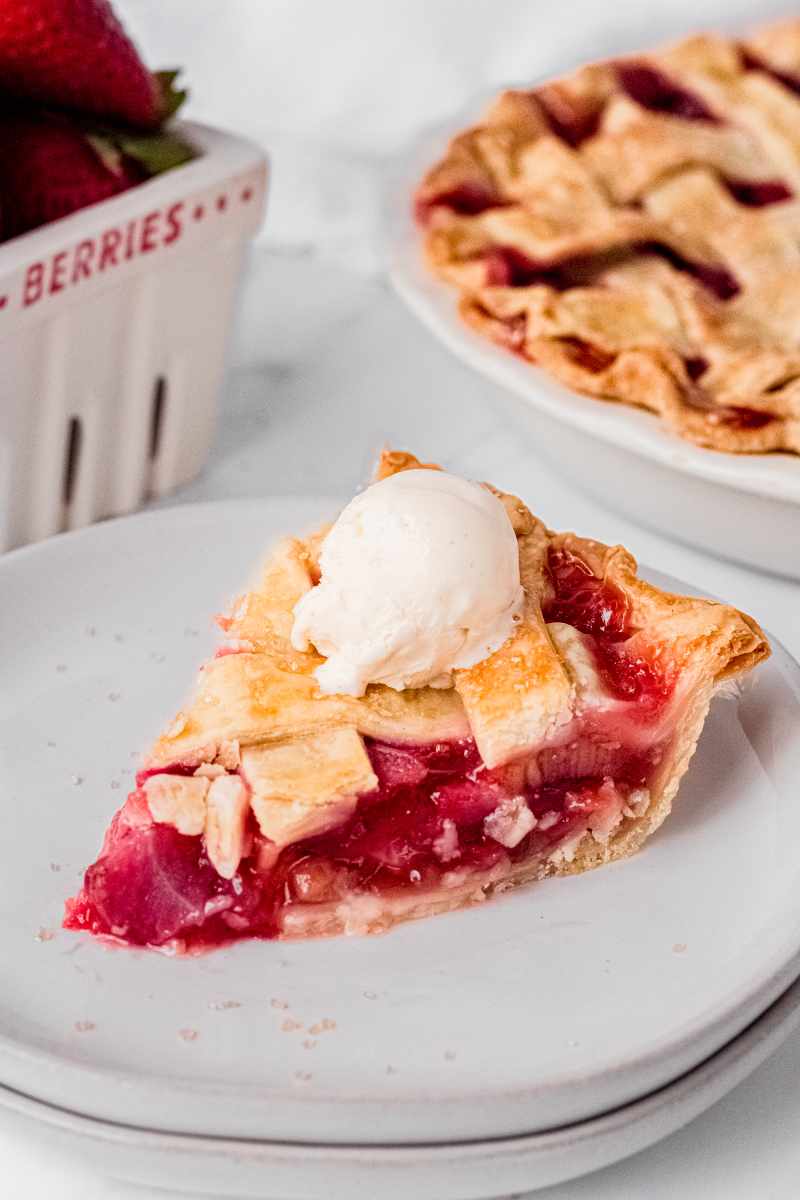
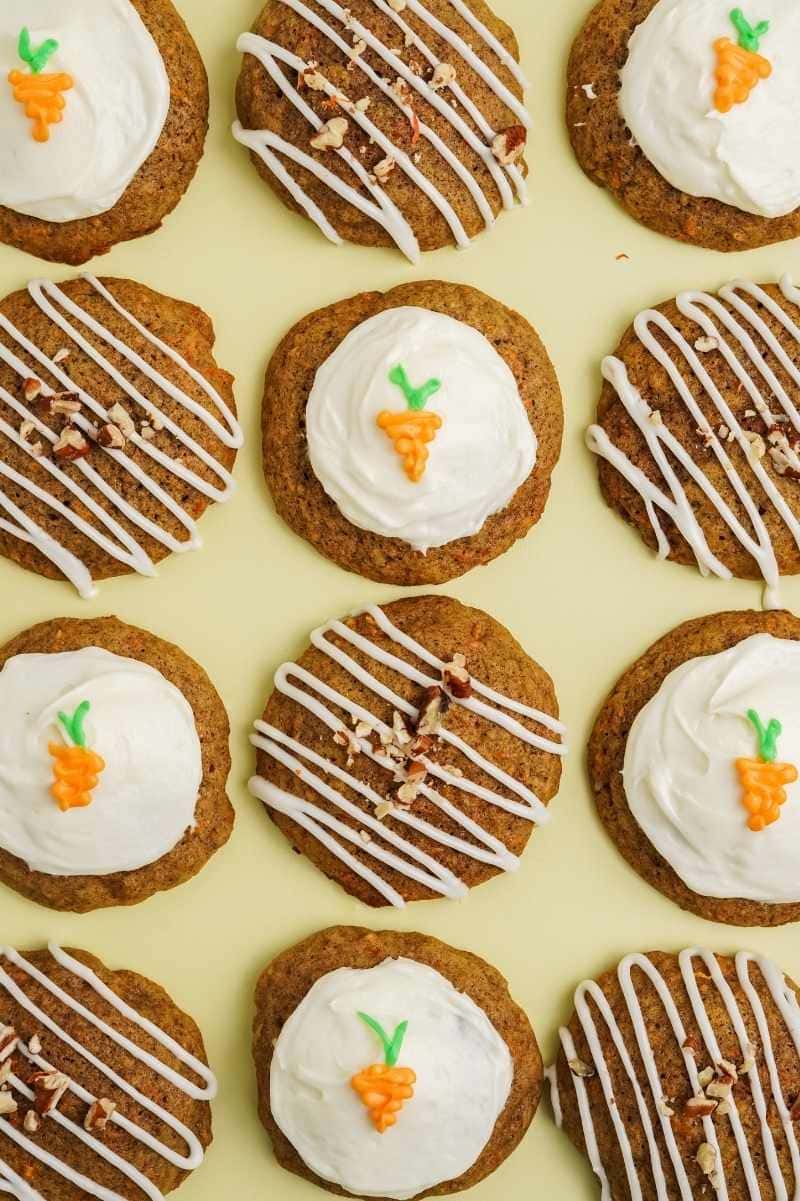
🥧 More Easy Pie Recipes:


If you tried this chocolate peanut butter pie or any other recipe on my blog, please leave a 🌟 star rating and let me know how it went in the comments!
📖 Recipe
Chocolate Peanut Butter Pie
Ingredients
For the Crust:
- 1 ⅓ cup all-purpose flour
- ¼ cup granulated sugar
- 3 tablespoon unsweetened cocoa powder
- ½ cup cold unsalted butter cut into cubes
- 2-3 tablespoon cold water
For the Filling:
- 1 cup creamy peanut butter
- 6 ounces full-fat cream cheese softened
- 1 cup powdered sugar
- 1 ¼ cup heavy whipping cream
- ¼ cup chocolate shavings or mini chocolate chips
Instructions
- In a food processor, combine 1 ⅓ cup all-purpose flour, ¼ cup granulated sugar, 3 tablespoon unsweetened cocoa powder, and ½ cup cold unsalted butter. Pulse until combined and small crumbs form.
- Add 2 tablespoon cold water, and pulse until a dough forms. If the dough seems too dry at this point, add another tablespoon and combine into a dough.
- Wrap the dough in plastic wrap and refrigerate for 1 hour.
- Transfer the cold dough to a floured surface, and roll until ½-inch thick. Transfer to a greased pie plate, and pierce the bottom several times with a fork to avoid bubbles. Place in the freezer for 20-30 minutes until frozen solid. Preheat your oven to 400°F while the crust is in the freezer.
- Once frozen, remove the pie crust from the freezer and place a square of parchment paper onto the crust. Fill with dry beans or pie weights. Bake the pie crust for 20 minutes in the preheated oven.
- Remove the parchment and beans, and bake for an additional 5 minutes. Allow to cool before filling with peanut butter filling.
- Make the peanut butter filling: In a large mixing bowl, whip together the 1 cup creamy peanut butter, 6 ounces full-fat cream cheese, and 1 cup powdered sugar until well combined, then set aside.
- In a separate bowl and using the whisk attachment on your stand mixer or a handheld electric mixer, whip the 1 ¼ cup heavy whipping cream until soft peaks form (about 2-3 minutes).
- Combine the peanut butter filling with the whipped cream until smooth and fluffy.
- Transfer the peanut butter filling into the cooled pie crust, top with ¼ cup chocolate shavings or mini chocolate chips, and then chill for at least 4 hours. Serve!
Notes
- To save time, you can buy a pre-baked pie crust or graham cracker crust and just make the peanut butter filling instead.
- If you do make the chocolate crust (which we really recommend because it's delicious!), be sure to follow the instructions closely so that it bakes properly and doesn't shrink on you!
- Peanuts, peanut butter chips, or mini chocolate chips are all great toppings for this pie. Chocolate sauce is also a good option!
- Use cocoa powder or a blend of cocoa powder + flour to roll out the pie dough for better chocolate flavor!
- You'll know your pie is ready to slice when the top feels firm.


For anyone who isn't big on fruit pies or pumpkin pies, this chocolate peanut butter pie makes a great alternative! Just try to resist eating all the filling with a spoon before it makes it to the crust!