
Caramel Apple Pie

Think of this caramel apple pie as what happens when your favorite caramel apple decides to get dressed up for a dinner party. Tart apples, buttery homemade caramel, and a flaky crust-it's fall's best flavors all in one forkful.

🔍 Recipe At-A-Glance: Caramel Apple Pie
- ⏰ Prep Time: 45 minutes
- 🕰 Cook Time: 1 hour 20 minutes
- 🍏 Flavor Profile: Homemade caramel plus tart fall apples. Simple ingredients and cozy flavors-that's my kind of pie.
- 🍁 Good For: Fall dinner parties and Thanksgiving spreads
- ↪️ Make Ahead: Make and freeze this pie up to three months in advance.
- 🧡 Difficulty: Easy. From the food processor pie crust to the homemade caramel sauce to the perfect apple filling, we'll show you our tips and tricks for every pie component!
Summarize and Save this Recipe Using:
Jump To
🧡 Why You'll Love This Recipe
Apple pie is one of those desserts that never lasts long, but add buttery homemade caramel, and it vanishes before the plates even get to the sink. Anyone who's ever had homemade caramel apples will know how well these two flavors go together.
Here's why you'll love this recipe:
- Easy as Pie: This pie looks like a showstopper, but it couldn't be easier. This caramel apple pie recipe is so easy that even if you're new to baking, you're sure to whip up a pie that will impress all your friends and family!
- Homemade Caramel: We'll show you how to make a foolproof silky caramel sauce, no thermometer required! The gooey, creamy caramel enhances the natural flavor of the tart apples, in the best way possible.
- Make Ahead: This pie can be fully baked and frozen up to three months in advance. Doesn't that make Thanksgiving pie duty so much easier?
🍏 The Ingredients You Need
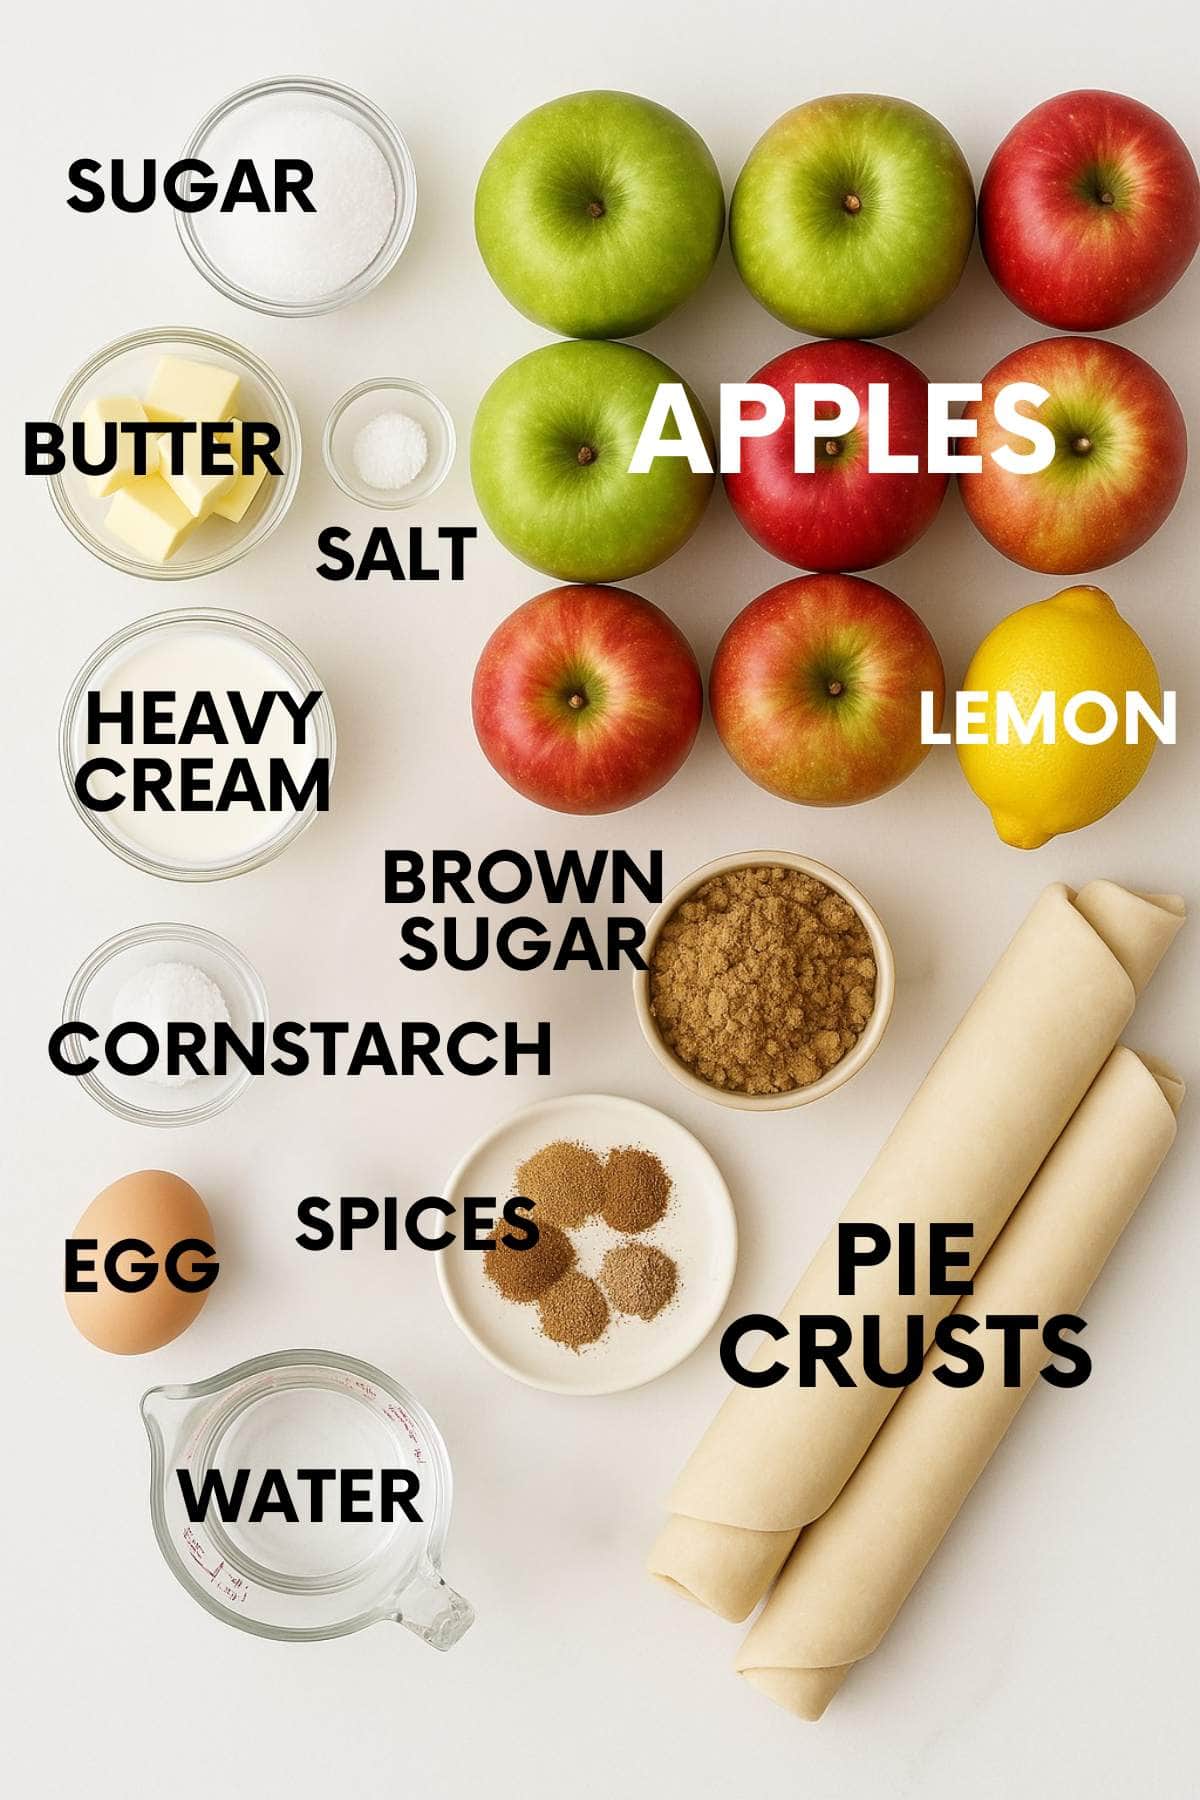
- Apples: Tart apples like Granny Smiths are the heroes here-they provide a nice contrast to the rich caramel, so every bite is bright and flavorful. If you can't find Granny Smith apples, McIntosh, Pink Lady, and Empire apples are great substitutes. Your slices should be roughly ¼-inch thick-the sweet spot between melting and too-crisp.
- Pie crusts: I recommend checking out my all-butter pie crust recipe. It only takes 10 minutes to prepare, and it makes an easy, flaky crust that will take your caramel apple pie to the next level.
- Cornstarch: The cornstarch (or tapioca starch) is absolutely key. Don't skip it-it's the secret weapon for perfect filling and a non-soggy crust.
Make sure to check the recipe card below for the full ingredients list, along with quantities and my expert tips and tricks.
🔁 Variations & Substitutions
- Make it gluten-free: Gluten-free friends, it's time to celebrate. Our recipe for gluten-free pie crust is so good, nobody will know it doesn't have any wheat in it! In fact: that's the pie crust we used in these photos!
- Store bought crust: If you're in a pinch or pressed for time, you can use store-bought crust. It just might not have the same buttery layers as homemade crust!
- Change the caramel sauce: The homemade caramel sauce in the recipe is simple; however, you can also use store-bought sauce.
- Canned pie filling: One of my favorite apple pie shortcuts is canning apple pie filling or making bourbon apple pie filling in the fall for easy pies later.
🥧 How to Make a Caramel Apple Pie
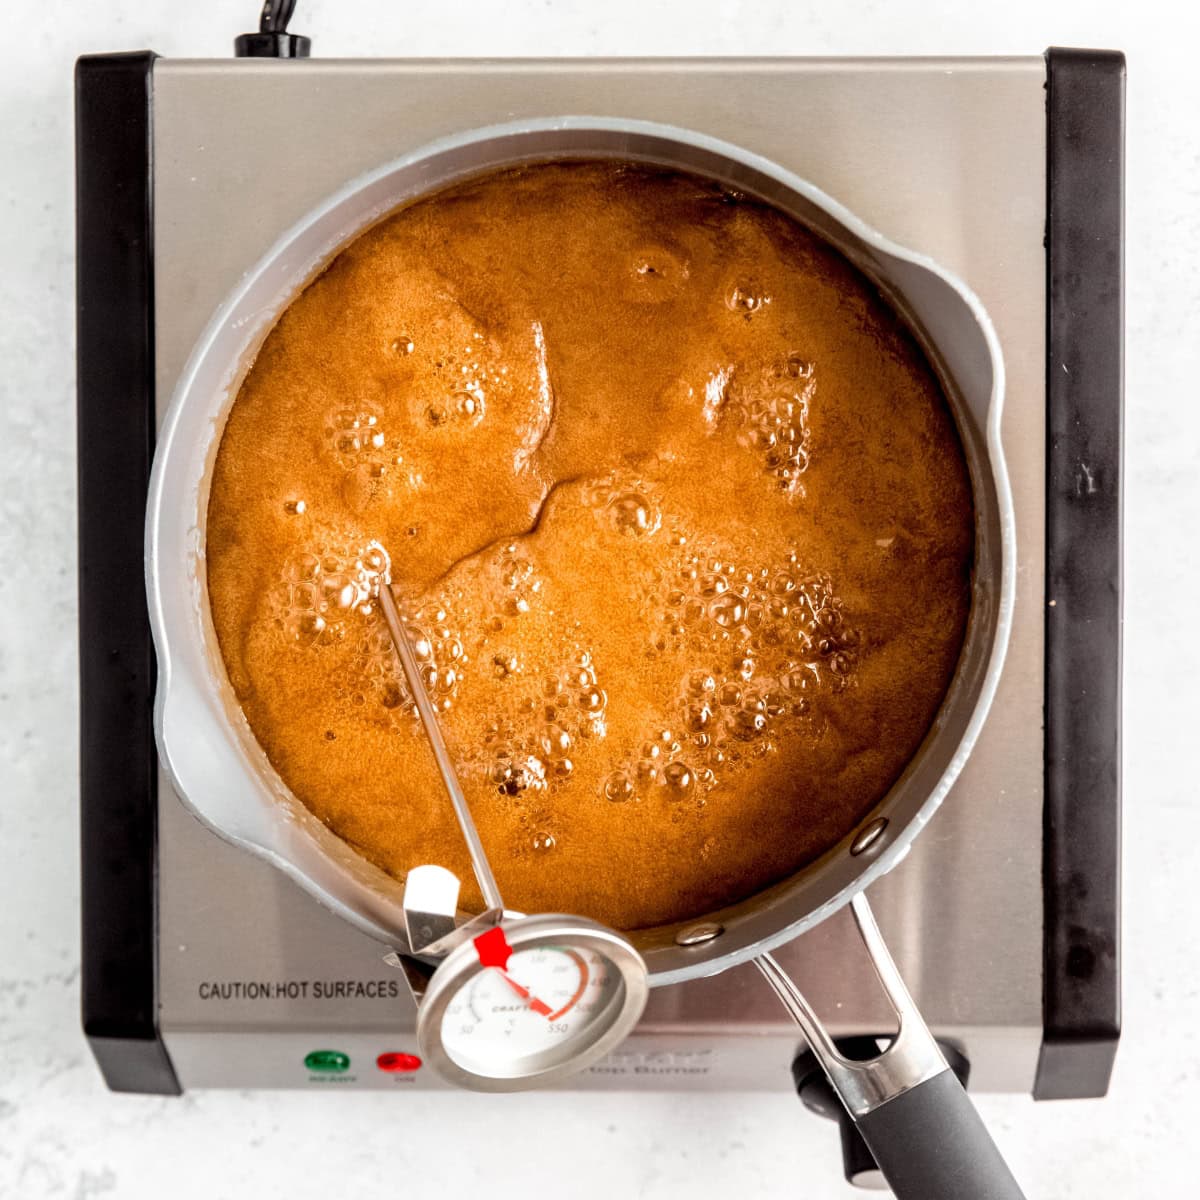
Step 1: Make the caramel sauce-melt the sugar, swirling the pan often so that it doesn't burn. Remove from the heat and stir in the butter. Add the cream and salt, and stir until it makes a silky, creamy caramel sauce.
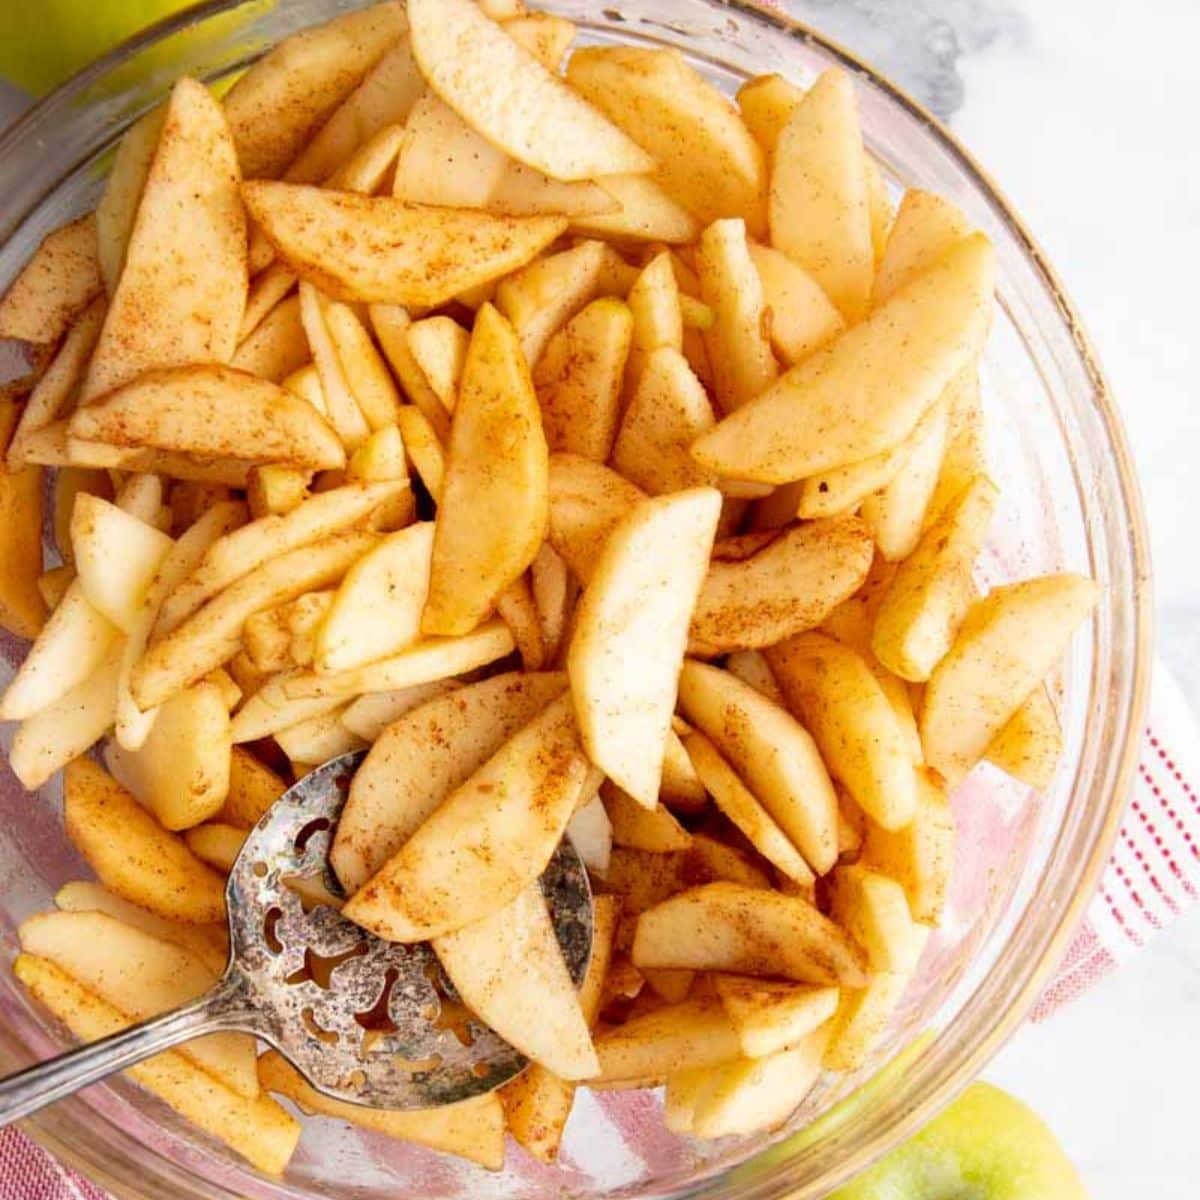
Step 2: Toss peeled and sliced apples with lemon juice (to prevent browning). Add brown sugar, spices, and salt, and toss to combine. Let the filling sit for at least 30 minutes (but no more than 2 hours).
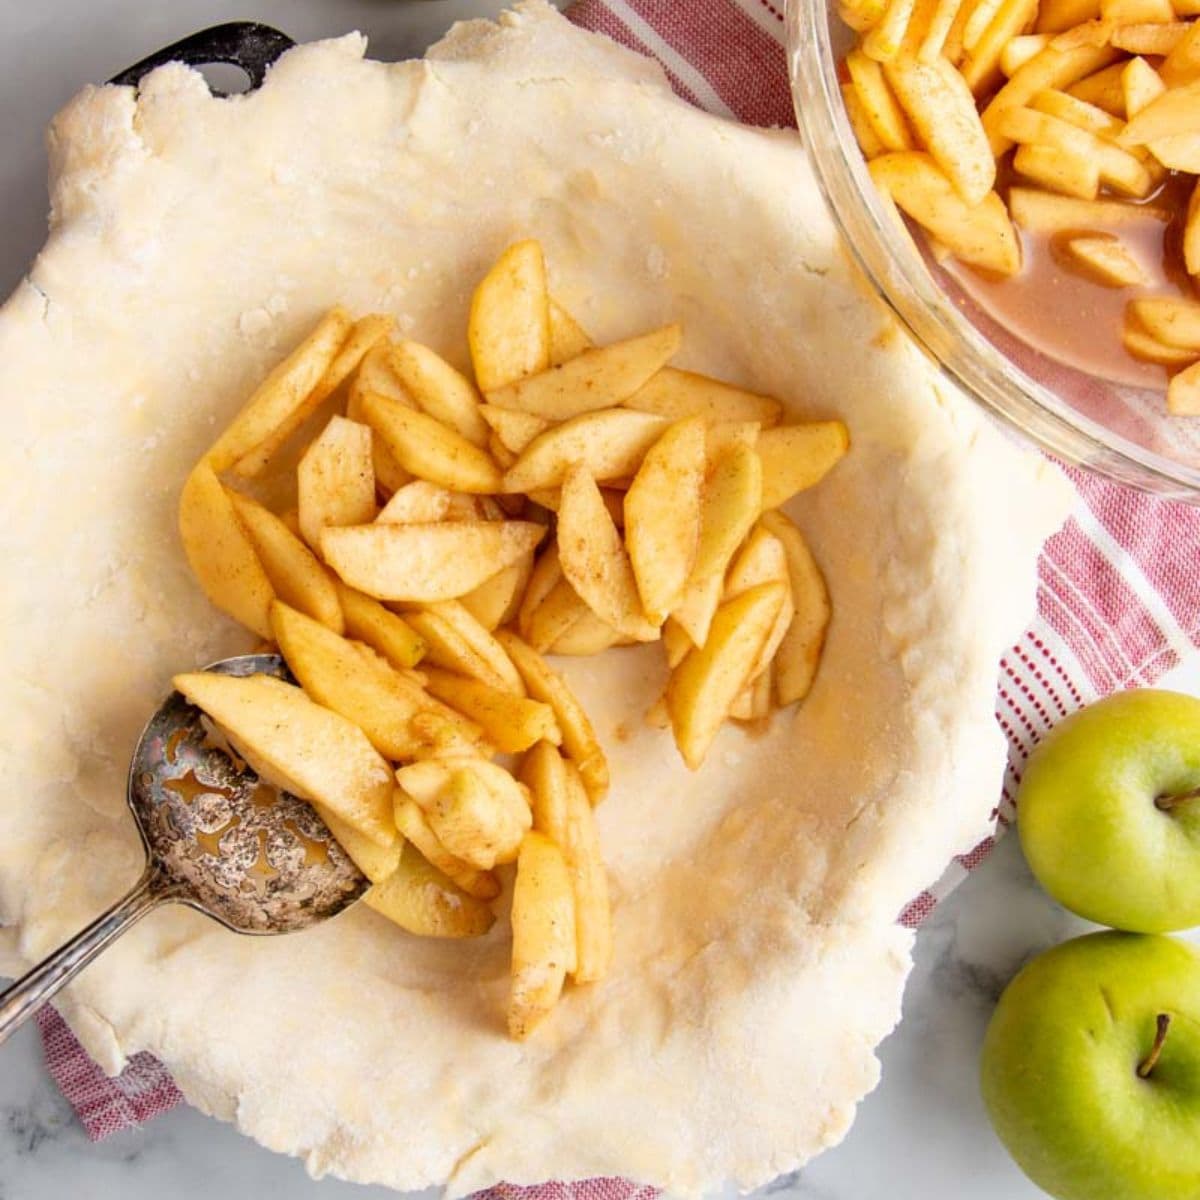
Step 3: Roll out a pie crust and fit it to a greased pie plate. Toss the apples with starch, and add them to the pan. Pile the apples high. You'll think you've overfilled the crust, but the apples will collapse as they cook, so you'll end up with the perfect amount.

Step 4: Pour ½ cup of caramel sauce over the apples. Refrigerate while you make your lattice top.
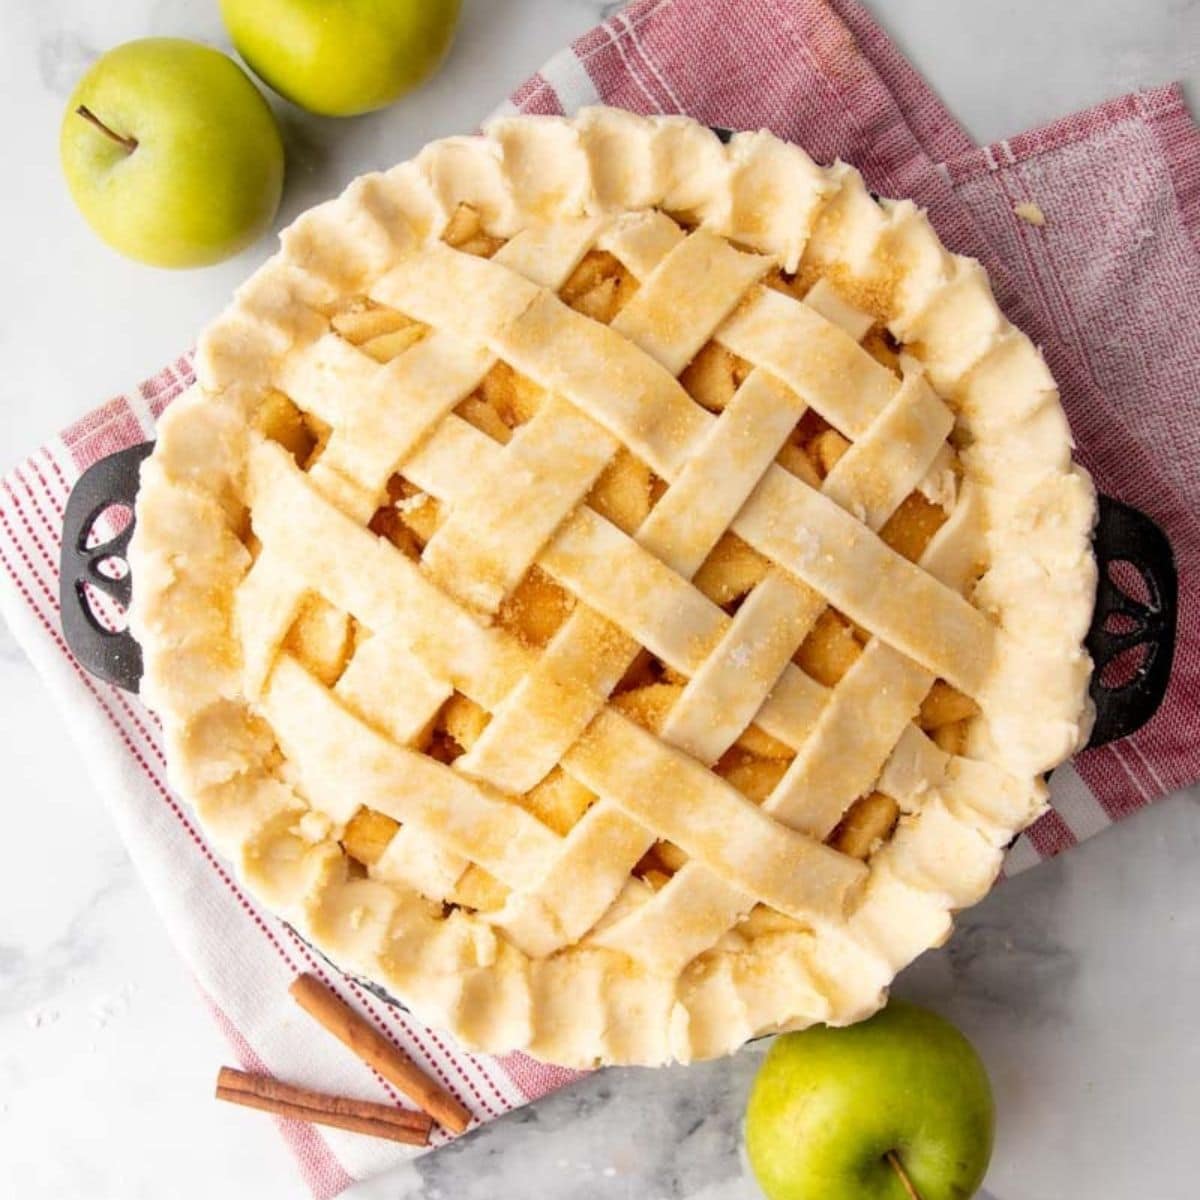
Step 5: Roll out the second pie crust and cut into ½-inch strips; weave into a lattice and place on top of the pie. Trim the ends of the strips, and fold up the bottom crust overhang-crimp closed.
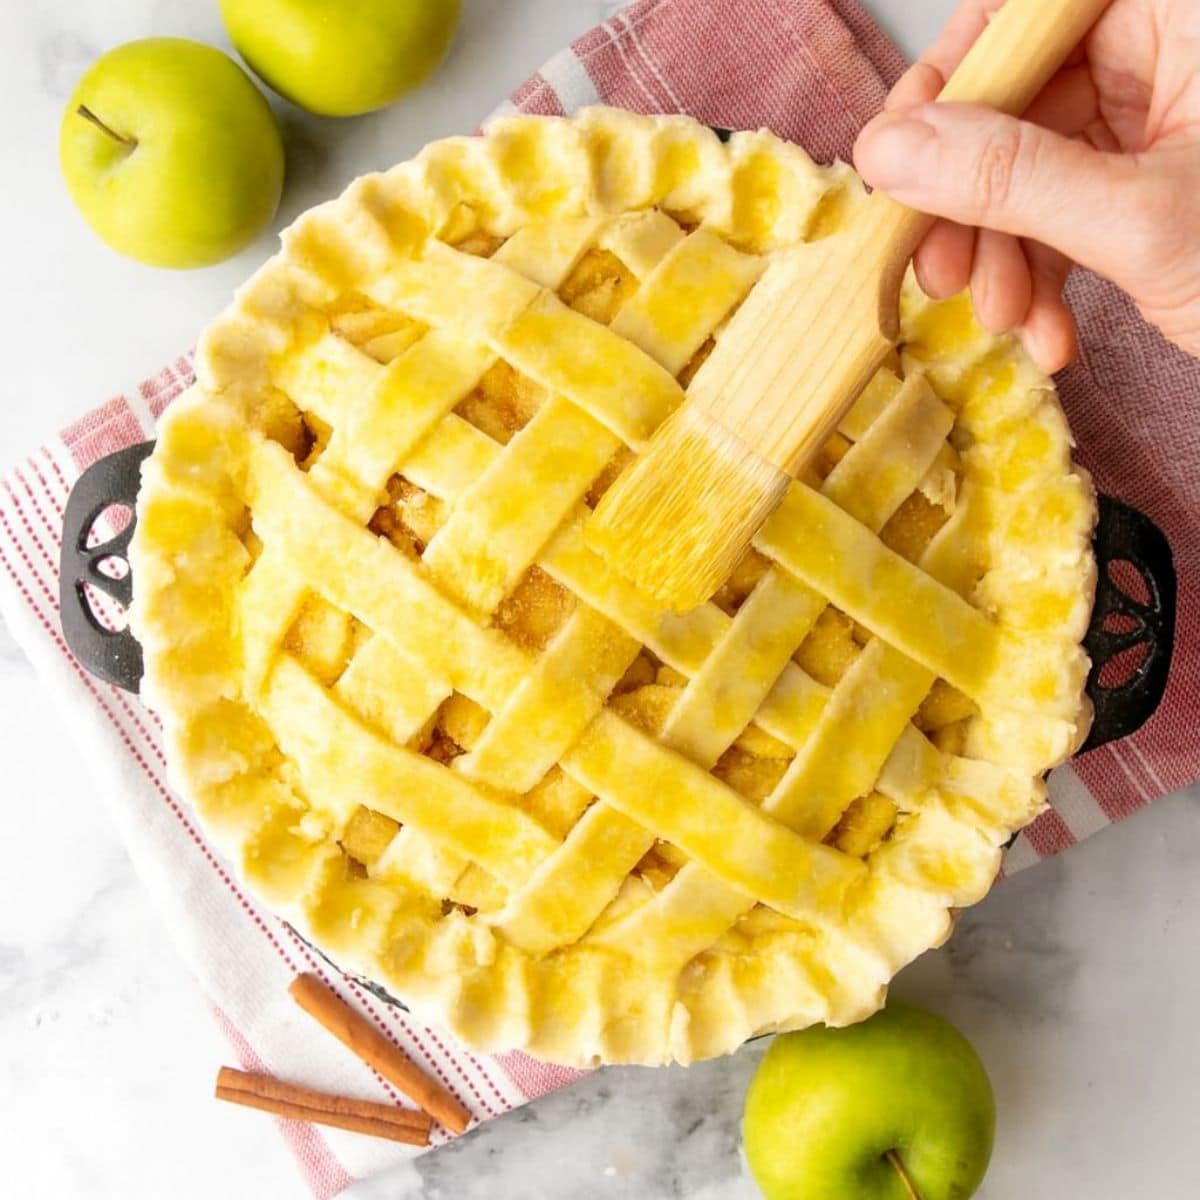
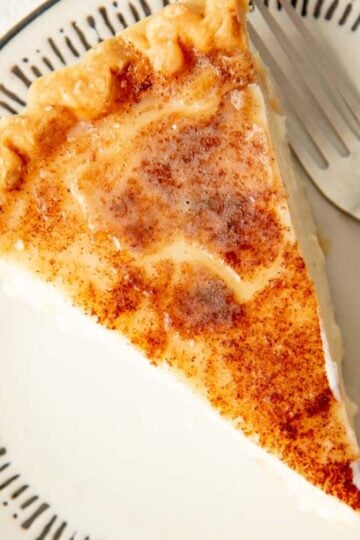
Step 6: Brush the top crust with egg wash, sprinkle with raw sugar, and let the oven work its magic for 70 minutes. If the crust is getting too dark, too fast, tent it with foil while the pie finishes baking. Cool for an hour before serving.
🙋🏻♀️ Caramel Apple Pie Recipe FAQs
Absolutely! There's nothing better than having a homemade pie ready to go when an impromptu guest shows up. They'll be wondering where you found the time to bake such a delicious dessert. Once the pie is fully cooled, wrap it up tight-plastic wrap first, then a layer of foil. Your pie will be good for up to three months in the freezer. Allow your pie to thaw in the fridge overnight before serving.
No need! But you do need to let them sit in the lemon juice, sugar, and spices for at least 30 minutes so that they release all their juices. Then mix the apples with cornstarch or tapioca starch before scooping them into the crust-that will thicken the juices. That's how you get the perfect apple pie filling texture!
If you've allowed the apples to release their juices and added a thickener like cornstarch (see the question above!), the next most common mistake is slicing into the pie too soon! Waiting is the hardest part of making this pie, but slice too soon, and you'll have caramel apple soup instead of pie slices.
👩🏻🍳 My Expert Tips & Tricks
- Apple slicing: It's important to make sure that your apple slices are roughly the same size. If you have a mixture of thick and thin slices, you'll end up with an unappealing mix of apple mush and firm slices in your pie. Aim for roughly ¼-inch thick.
- Peel the apples: While it might be tempting to take a shortcut and leave your peels on, apple peels tend to get tough in the oven-which isn't great eats!
- Put your patience pants on: I know it feels impossible, but walk away for an hour! When you cut into a hot apple pie, it tends to look more like soup and less like pie. Letting the pie sit until it has reached room temperature allows the pie filling to thicken as it cools down. This way, when you slice it, you're left with a thick, gooey serving of caramel apple pie.

🎉 More Pie Recipe Ideas

If you tried this caramel apple pie recipe or any other recipe on my blog, please leave a 🌟 star rating and let me know how it went in the comments!
📖 Recipe

Caramel Apple Pie
Ingredients
For the Caramel Sauce (or use purchased caramel sauce)
- 1 cup granulated sugar
- 6 tablespoons unsalted butter softened
- ½ cup heavy cream
- ¾ teaspoon fine sea salt
For the Pie
- 7 cups peeled and sliced tart apples (like Granny Smith) about 3 ½ pounds or 7-8 whole apples
- Juice of 1 lemon
- ½ cup packed light brown sugar
- 1 teaspoon ground cinnamon
- ¼ teaspoon ground ginger
- ¼ teaspoon ground cardamom
- ¼ teaspoon freshly grated nutmeg
- ¼ teaspoon fine sea salt
- 2 tablespoons cornstarch or ¼ cup tapioca starch
- 2 pie crusts gluten-free pie crust works, too, kept chilled until right before use
- ½ cup caramel sauce from above plus more for serving
- 1 egg
- ¼ cup water
- Raw sugar for dusting
Instructions
- To prepare the caramel sauce, in a heavy-bottomed saucepan, heat the sugar over low heat until melted. Swirl the pan every 30 seconds to prevent burning, but do not stir.
- Once the sugar is melted, remove the pan from the heat and stir in the butter-the mixture will bubble aggressively.
- Pour in the heavy cream and salt, and stir until everything is combined. Pour into a bowl or measuring cup to cool while you prepare the rest of the pie.
- To prepare the pie: toss the peeled and sliced apples with the lemon juice in a large bowl. Then sprinkle in the brown sugar, cinnamon, ginger, cardamom, nutmeg, and salt. Toss to combine. Let sit for at least a half hour or up to 2 hours so the apples can release their juices.
- Preheat oven to 400°F. Grease a 9" pie plate. Line a baking sheet with parchment paper, set aside.
- Roll out one of the pie crusts and fit to the pie plate, allowing the extra crust to overlap the edges by at least an inch. Set aside.
- Toss the apple slices with the cornstarch or tapioca starch. Pile the apples into the bottom crust of the pie plate. It will seem like there are too many apples, but really pack them in and pile them up to the very top of the pie plate. Pour ½ cup of the caramel sauce over the apples. Place the unfinished pie in the fridge while you work on your lattice pieces.
- Roll out the other crust. Cut into ½-inch strips. Bring the pie out of the fridge, and weave the lattice strips on top. Trim the ends of the lattice strips, then fold over the overhang crust from the bottom crust over top. Crimp closed.
- Whisk together the egg and water, brush the top of the crust with egg wash, and then sprinkle with raw sugar. Place pie on a parchment-lined baking sheet. Bake for 70 minutes, tenting with aluminum foil about halfway through baking time to avoid burning the crust.
- Let pie cool for at least an hour before slicing, but preferably cool until room temperature. Drizzle with more caramel sauce before serving.
Notes
- Our food processor pie crust will give you the easiest flaky crust-but our gluten-free pie crust is just as delicious if you need a gluten-free pie (it's the pie crust in these photos!).
- You'll want the apple slices to be around the same thickness for even cooking. Roughly ¼-inch thick is ideal.
- Do not skip the "let the apples sit in the sugar and lemon juice" step, and definitely don't skip the starch. Both of these are key for thickening the pie filling so that it doesn't come out soupy.
- You really do need to wait an hour for the pie to cool before slicing into it. If you cut it too early, you'll end up with runny pie filling.
I love a good caramel apple, which is why I love this pie. All of the flavors of my favorite fall treat in pie form? Yes, please!