How to Make an Awesome Cheese Board in Minutes
featured review

"I made a BEAUTIFUL cheese board all thanks to this helpful article. Thank you so much!"
- ANA -
I'm a big fan of dishes that have a high oooh-and-ahhh to elbow grease ratio, and cheese boards are the epitome of a great return on time investment. They take just a few minutes to put together, and man, do they ever look sharp. It might seem intimidating to get a cheese board to look "right," but I promise with my easy steps, you can have a fancy charcuterie board in just a few minutes.
Why You'll Love This Recipe

It can't really be this easy to make a good cheese platter, can it?
Oh my dear friend, it sure can! Seriously, I promise you can't mess this up. Here's why my cheese board tricks work for everyone (even those without a creative bone in their body):
- It's so simple. We're basically just going to pile layers of food onto a platter. You can handle that!
- No cutting required! Save yourself a step by not cutting your cheese into slices and instead using pretty (and affordable) cheese knives.
- Infinitely customizable. Pick your family's perfect cheese, crackers, and other yummies! That means this cheese board works great for all diets and tastes-I've even made a board using nut cheeses for the vegans in my life.
- The tastiest, easiest dinner ever. Throw together a cheese board and crack open a bottle of wine (like our strawberry wine) and you've got one of my favorite easy dinners. Especially for a Friday after a long workweek. Ahhhhh. Pure relaxation.
Of course, if you want to make a fancier cheeseboard (maybe for a holiday like these Halloween charcuterie boards, Thanksgiving cheese boards, or Christmas charcuterie boards) you can, but no need! A cheese board is inherently special, and after I teach you my tricks, you'll be able to make them in less time than you ever imagined.
Step-by-Step how to Make a cheese board
1
Choose your board
I have a large slate board that I love. Don't have a specialty cheese board? Ain't no thang. Use a big cutting board (I have this bamboo one that is perfect), a serving platter, or even a cookie sheet works-it looks all rustic and cute-like. Any large flat surface will work. Remember: it's going to be 90% covered by cheese, so don't stress about it too much.
2
Layer on your cheeses
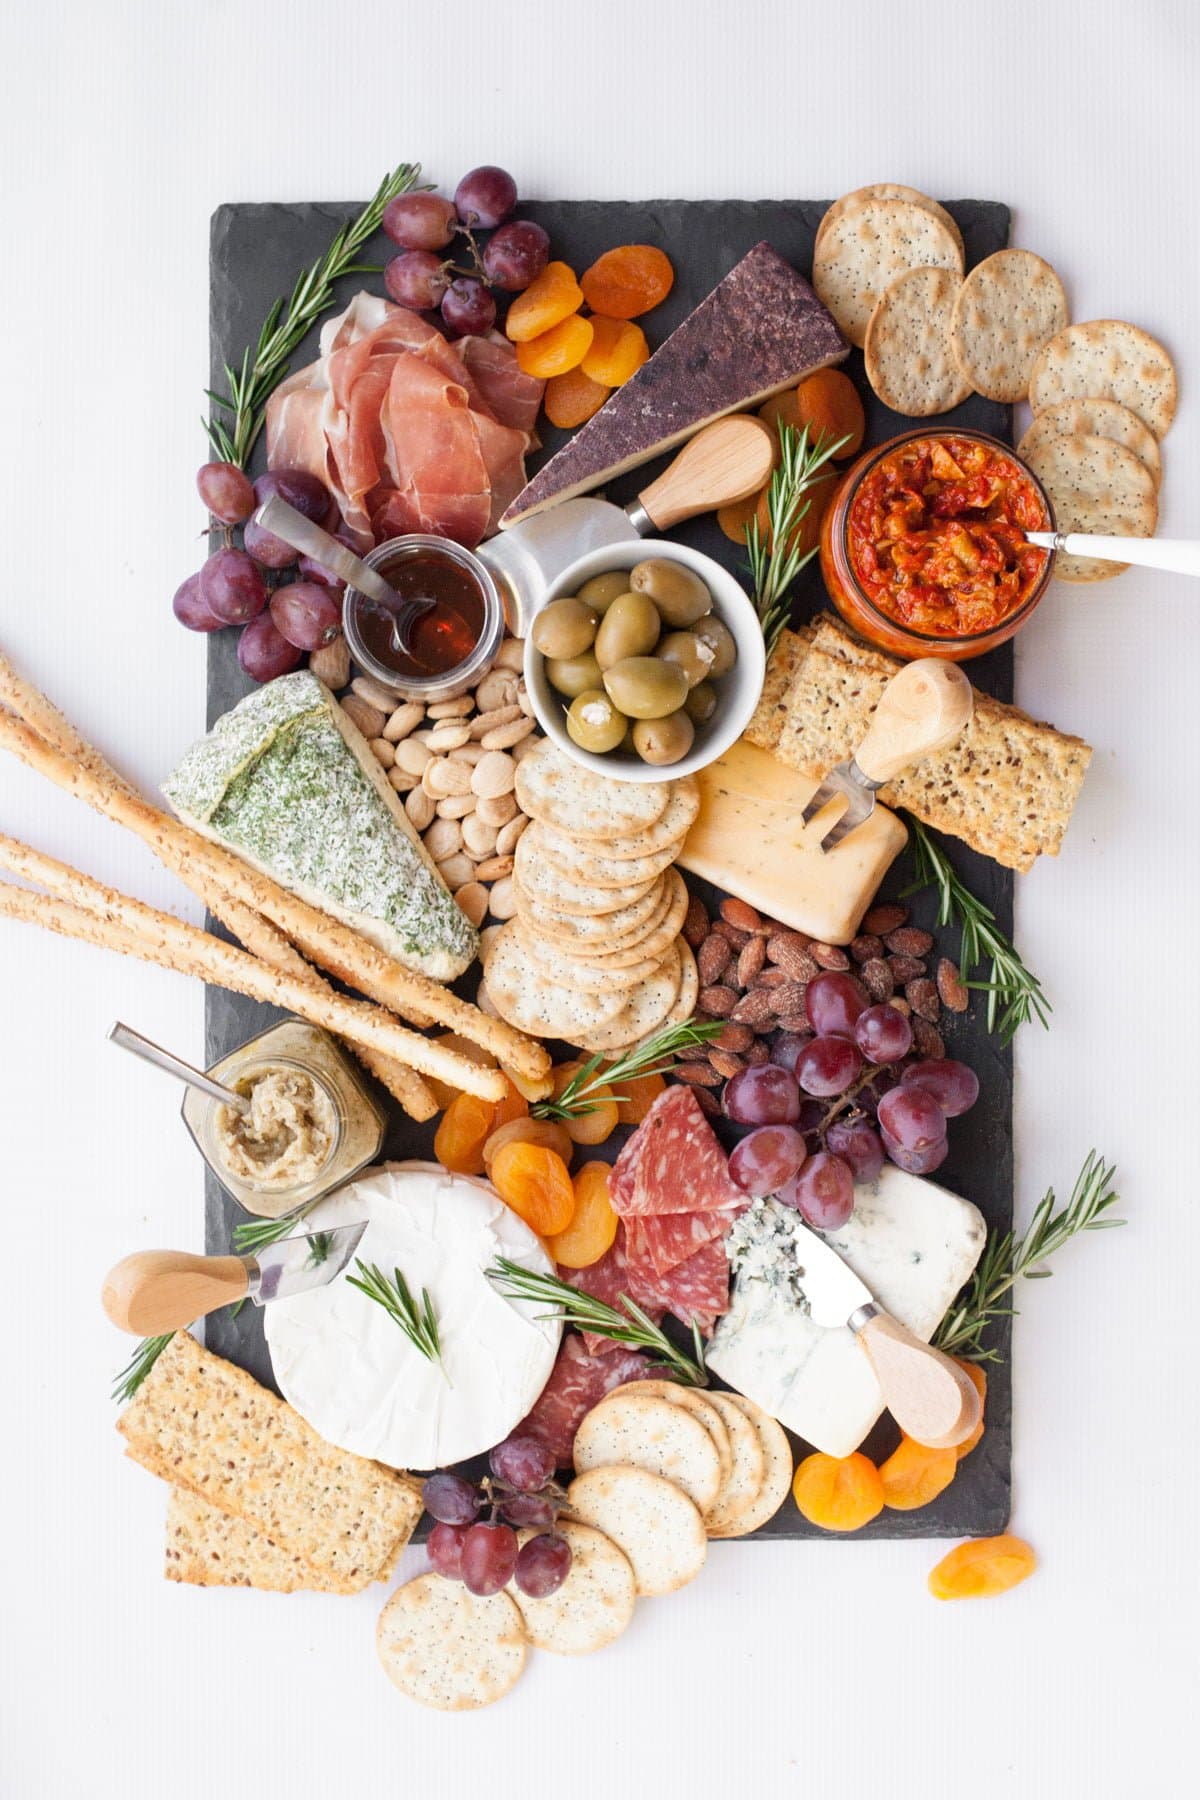
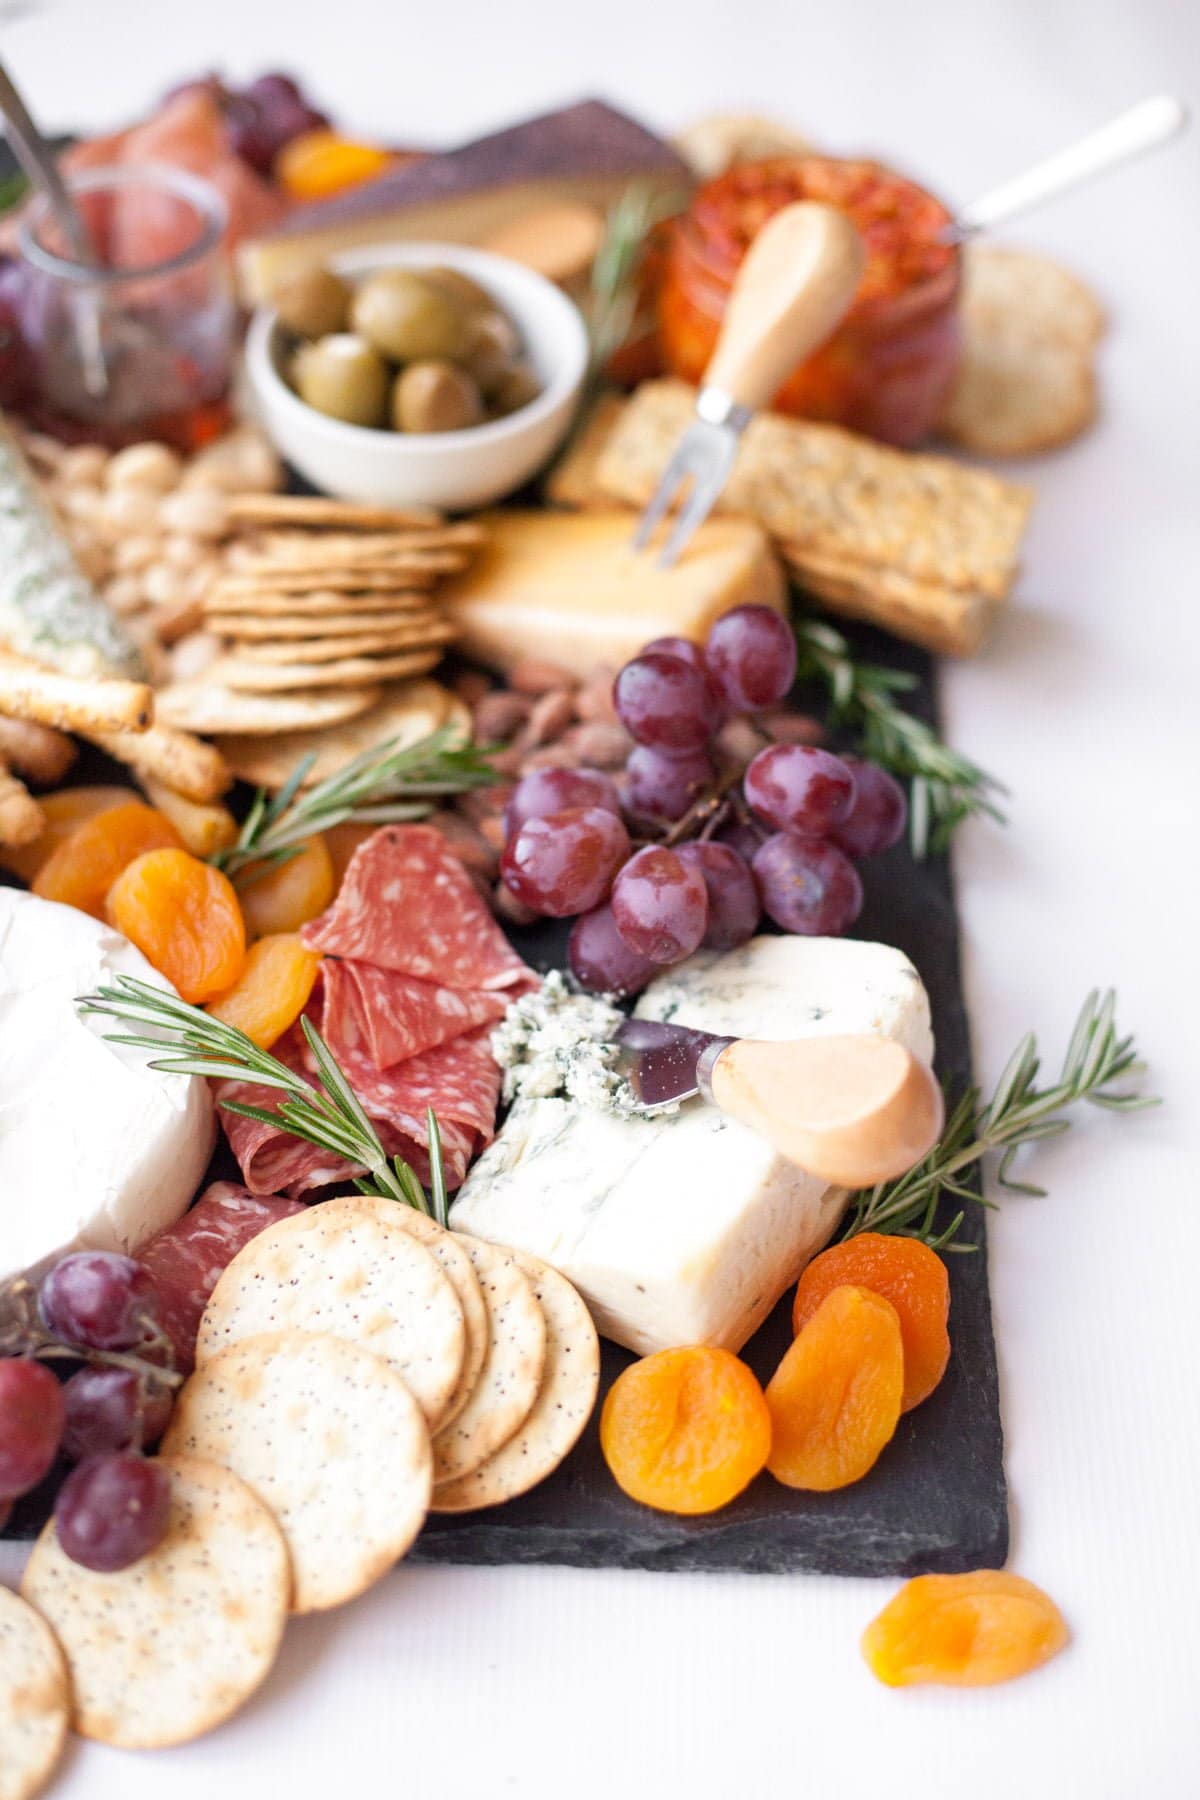
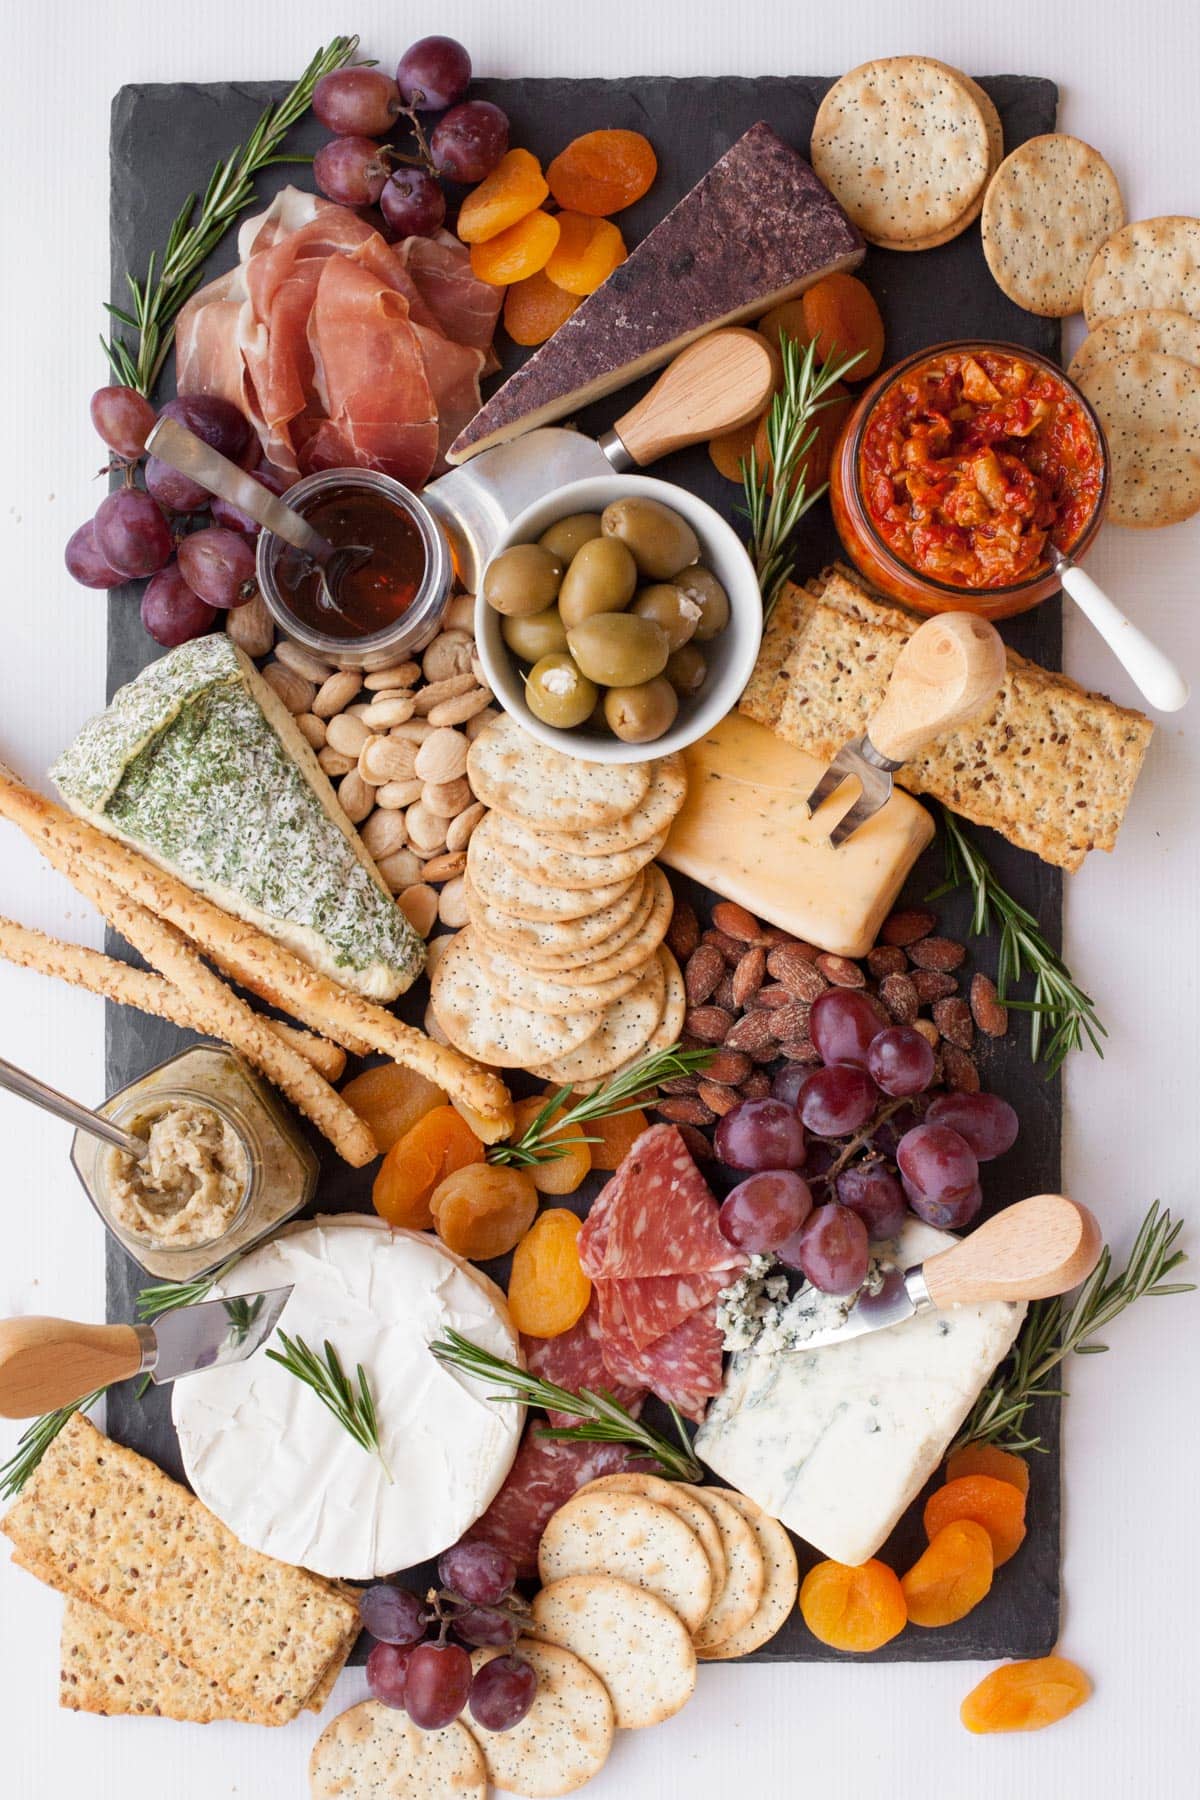
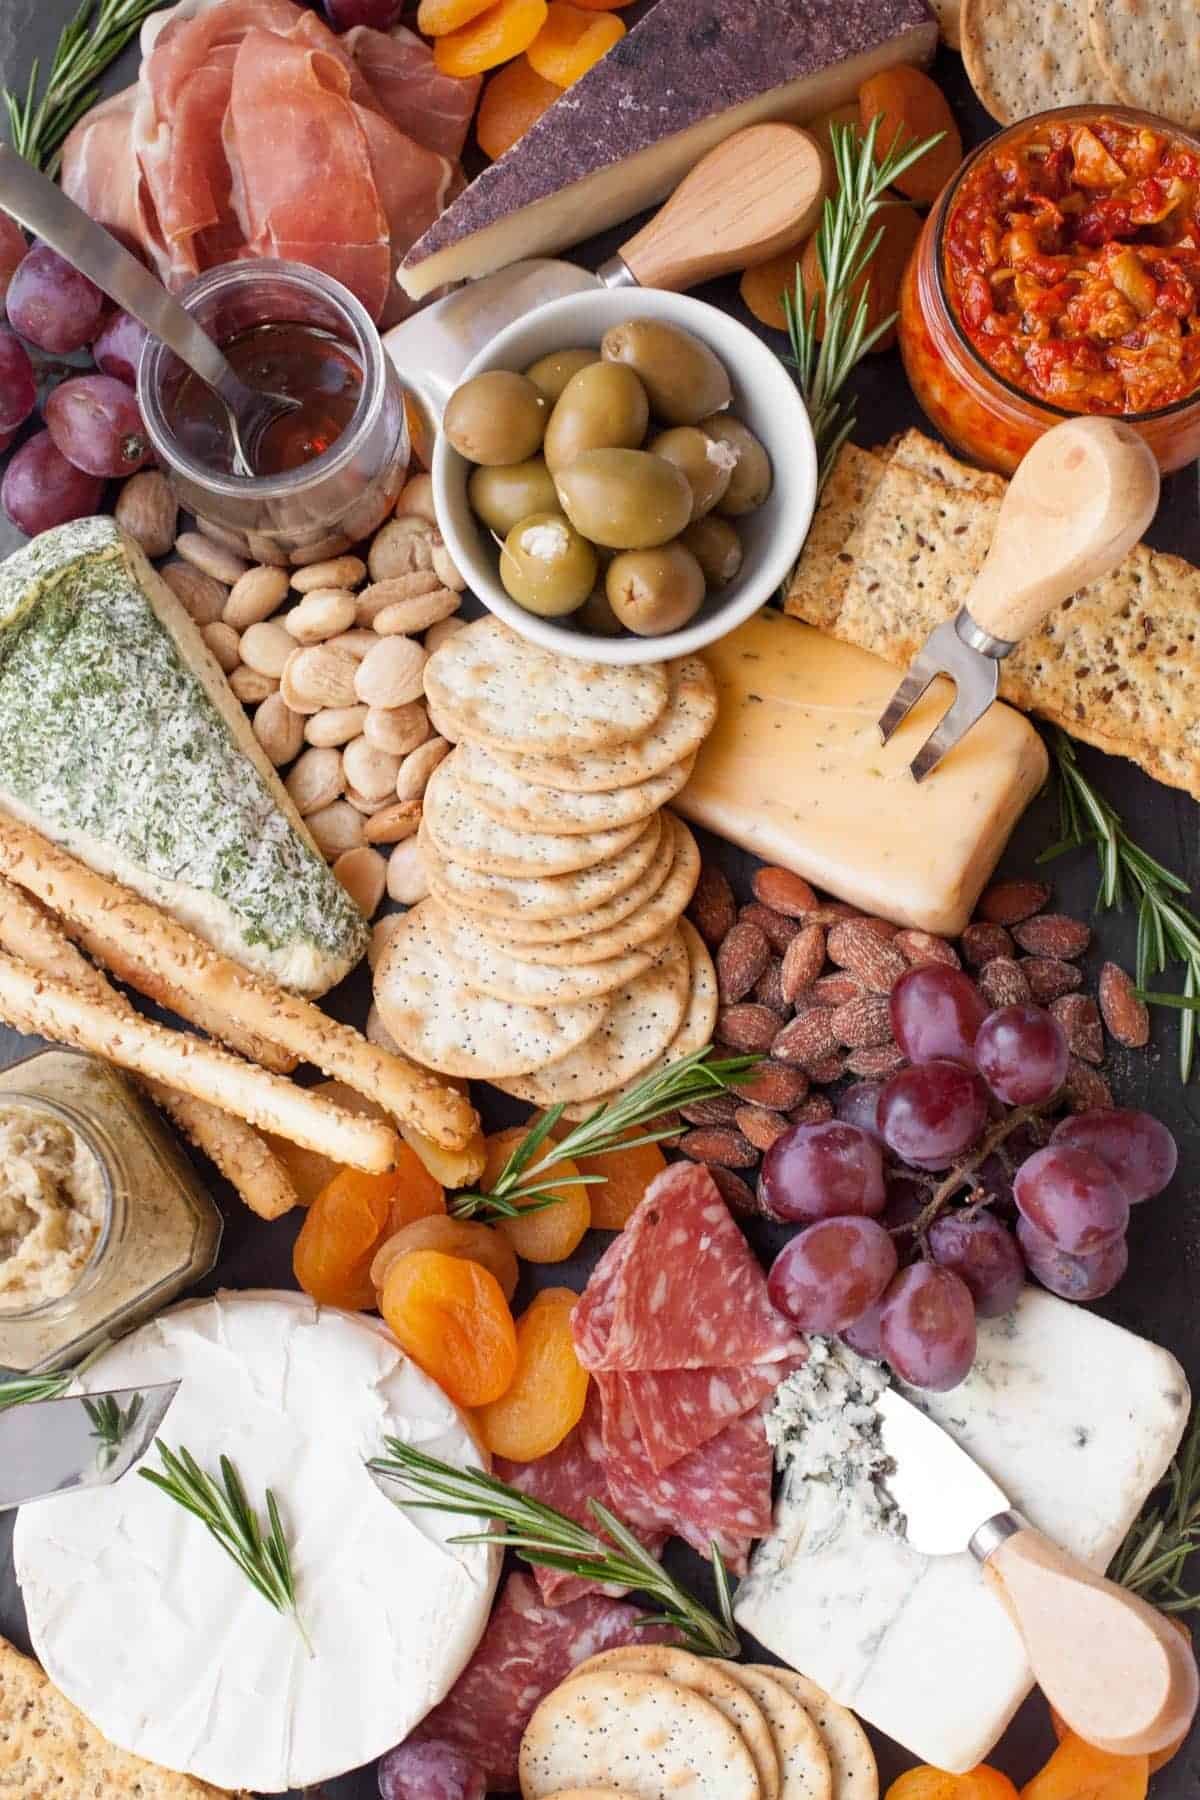
I put my cheeses on first, spread evenly throughout the open space of the board. The cheese wedges are the "hubs" of the board, so I like to get those on first. I generally recommend picking 3-5 cheeses for your cheese platter. For most cheese boards, you'll want to select varieties that cover the whole cheese spectrum in terms of texture and flavor. Here is a general idea of what kinds of cheeses to get:
- A variety of colors and shapes-This is just to make the board look more visually interesting and pretty!
- A mix of cheese textures-Get at least one soft cheese (like brie), one hard cheese (like Parmesan or cheddar), and one crumbly cheese (like bleu cheese).
- A mix of strengths-Not everyone loves stinky cheese, so make sure one or two of your options are mild or buttery.
3
Add the salty (but not crackers) things on next
Now, I start using the cheese wedges as the center and build out from there. I pile meats, nuts, and olives around. Sometimes I use small bowls (especially for roly-poly olives), but more often than not, I just pile.
4
Add sweet things to fill the gaps
You don't need a ton of fresh or dried fruit here, but a little bit can be a nice thing to bite on between cheese tastes. Pieces of chocolate or candied nuts are also great options.
5
Layer on piles of crackers
I like to use a mix of crackers, just because it's fun, but use whatever makes you happy. I just pile them on the cheese board wherever there are openings. You can always restock if you run low on crackers. I also like to include some crunchy breadsticks. They look pretty and they're fun to snack on!
If you want to keep it simple...
...stop here, and you'll still have an amazing cheese board! Read on to take your cheese platter over-the-top.
6
Add condiments
Condiments are a really fun addition to a cheese board. Some of my favorite options: honey, fancy mustards, jams (like my blueberry jam), jellies (like my apple jelly or pomegranate jelly), and preserves (like my gingered pear preserves). You can add sauces and chutneys and whatever else makes you happy.
If the bottle the condiment comes in is small enough, I just take off the lid, stick a spoon in it, and call it day. If I need to transfer it (like with honey), I move it into a small jar or bowl to save space.
7
Fill in the gaps
This is what will help make your cheese board look really amazing-fill in all the empty spaces. I like to do this with little clusters of grapes. They fill in all the nooks and crannies nicely, and they're the perfect size for someone to grab and just eat a few grapes. Another good option: cherry tomatoes. Both grapes and tomatoes help add some really beautiful color!
8
Garnish
Finally, garnish that baby. For the holiday season, I love just adding a few sprigs of fresh rosemary-it looks a lot like a Christmas tree, and it smells amazing. I also tend to use fresh sage a lot, too. Is this step important? Heck, no. Does it look good? Absolutely! And it takes about 10 seconds.
Cheese board protips
Want to save this recipe?
WATCH Me Make a cheese board
📖 Recipe
How to Make an Awesome Cheese Board in Minutes
Equipment
Ingredients
- Various cheese get a mix of flavors, textures, shapes, and colors
- Salty items meats, nuts, olives, etc.
- Sweet items fruit, dried fruit, chocolate, etc.
- Crunchy items crackers, pita chips, breadsticks, etc.
- Condiments honey, mustards, chutney, etc.
- Space-filling items grapes, cherry tomatoes, cherries
- Garnish fresh herbs
- Cheese board can use a cheese board, cutting board, serving platter, tray, or cookie sheet
- Cheese knives
Instructions
- Begin by spreading the cheese wedges, logs, and wheels evenly throughout the cheese board surface. Add cheese knives.
- Next, fill around the cheese with the salty items.
- Then, add a few piles of sweet items.
- Pile in the crunchy items and the condiments in small jars or bowls.
- Next, fill in any empty spaces with space-filling items like grapes, cherry tomatoes, or cherries.
- Finally, garnish the cheese board with fresh herbs.
Video
Nutrition
Frequently Asked Questions about cheese boards
more cheese board ideas

Our favorite Halloween night dinner? This spooktacular Halloween cheese board! It's easy to put together, festive, and great to nibble on while you're helping with costumes and handing out candy.

If you're looking for something easy to contribute to Thanksgiving dinner, try our Thanksgiving cheese board. No one has to know it only took you 10 minutes to put together.
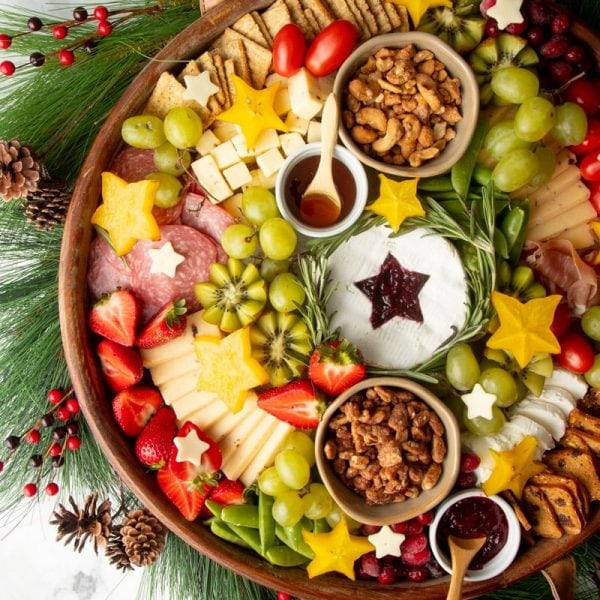
Our Christmas cheese board is a great option for an office holiday party or neighborhood potluck.

Awesome tips that everyone can follow through and they look delicious. Thanks for sharing.
We made this for our dad for Father’s Day using your tutorial and it turned out amazing!! Thank you for this post!
Looks so pretty! Cheese boards are one of my favorites to make when entertaining. Such helpful tips!
This is amazing
Thank you for these ideas. the cheeseboard went down so well at a gathering, everyone was very impressed!
Cassie, this is SUCH a great post! I'm going to send readers to your site for these great instructions in my every-day-of-the-week email celebration; this time for June 4, National Cheese Day! Yay! Nice work. Now I'm hungry.
Thank you!
What cheeses did you use here? I read this post and then cruised by the cheese section at Whole Foods and was overwhelmed. I don’t know much about cheese so soft, hard, mild, strong, etc....I’m still like huh?! Sorry for being cheese-ignorant.
I don't exactly remember what I used here, but I do know there is a Brie wheel, Bellavitano Merlot from Sartori cheese, and a blue cheese. And I think there is some sort of herb-covered soft cheese up there, too. Honestly, you can't go wrong with cheese! (And the
people at the Whole Foods's cheese counters are very helpful and knowledgable!)
Thank you!
Great post!! Super awesome recipe. I just loved it. I will definitely try this as soon as possible. Thanks for making and sharing such a great post with all of us. Keep sharing. I appreciate your work.
I always thought this looked like such a fun idea when you originally posted it, and when I got assigned appetizers for our Christmas/New Years celebration I knew I wanted to make a cheese board! Yum!
THIS. IS. AWESOME. THANK YOU!!!
Thank you!!!
Loved your post... will use my grandmother's bread board from the early 1900's as the base and vintage Carnival glass for spreads this Thanksgiving.
My way to honor someone I never had the opportunity to meet. Thanks for the inspiration!!