
Halloween Cheese Board
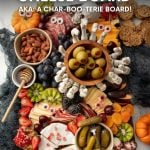
Spooky season calls for spooktacular food! My Halloween Cheese Board is the perfect char-BOO-terie tray to serve at your Halloween parties or before trick-or-treating. Follow my easy tips to make this charcuterie board extra creepy!
🔍 Recipe At-A-Glance: Halloween Cheese Board
- ⏰ Prep Time: 5-10 minutes
- 👯 Serves: 2-20! Make it big or small.
- 🎃 Good For: Pre-trick-or-treating (get some food in those bellies before the candy deluge!), pumpkin carving parties, Halloween parties, book club, Fall festivals, horror movie marathons, a random October evening you don't feel like cooking
- 🧡 Difficulty: If you can make piles on a board, you can make this!
Summarize and Save this Recipe Using:
Jump To
🧡 Why You'll Love This Recipe
Hey boo! Themed holiday charcuterie boards are my jam (see my Thanksgiving charcuterie board and my Christmas cheese board), and this creepy and tasty Halloween cheese board is my fave for sharing with friends and family during spooky season.
Here's why you'll love this recipe:
- Looks fancy, but it's so easy: It's literally just piles of stuff. You can do this even if you don't have a creative bone in your body!
- Perfect for pre-trick-or-treating: I started making a spooky cheese board for my family on Halloween afternoon to get something solid in our bellies before we go hog wild on candy, and it works GREAT! It's easy to grab nibbles while you help kids with their costumes.
- Simple props make it festive: No need to spend a bajillionity dollars on a fancy cheese plate and knives you'll only use once a year. This cheese board uses simple, affordable props to increase the creepiness.
🎃 The Ingredients You Need
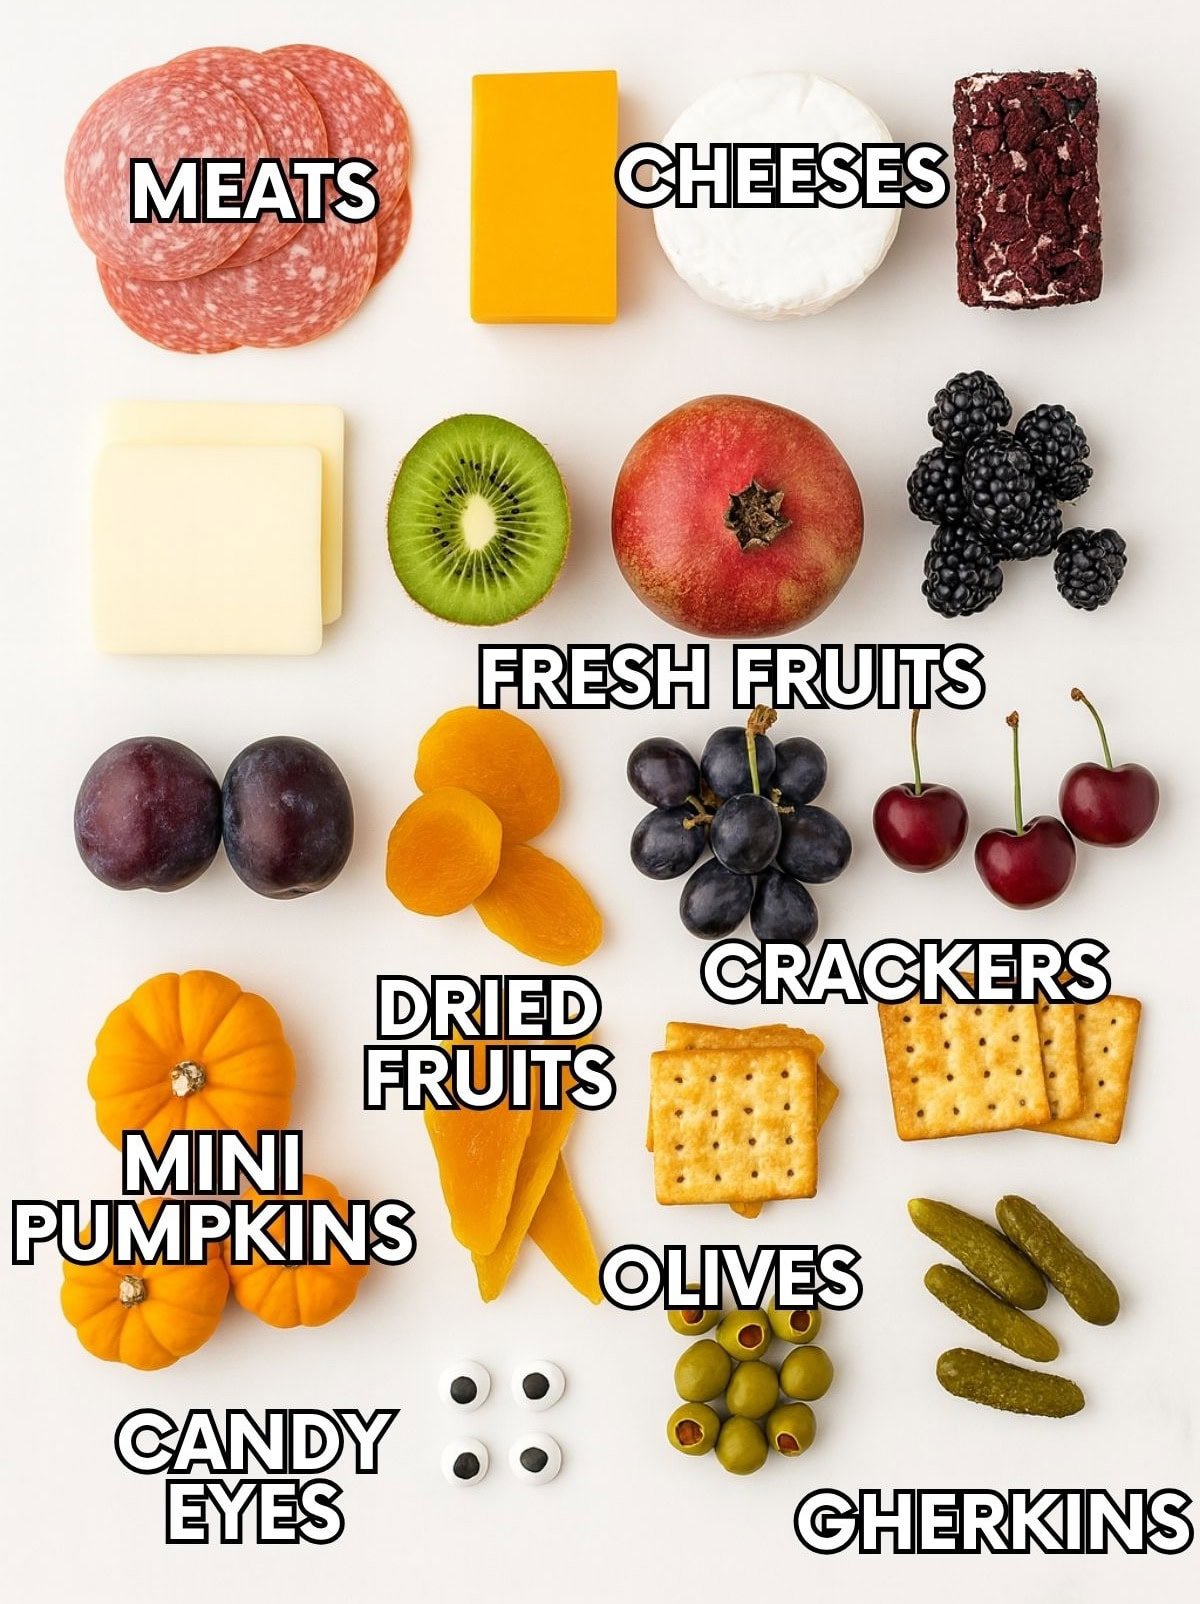
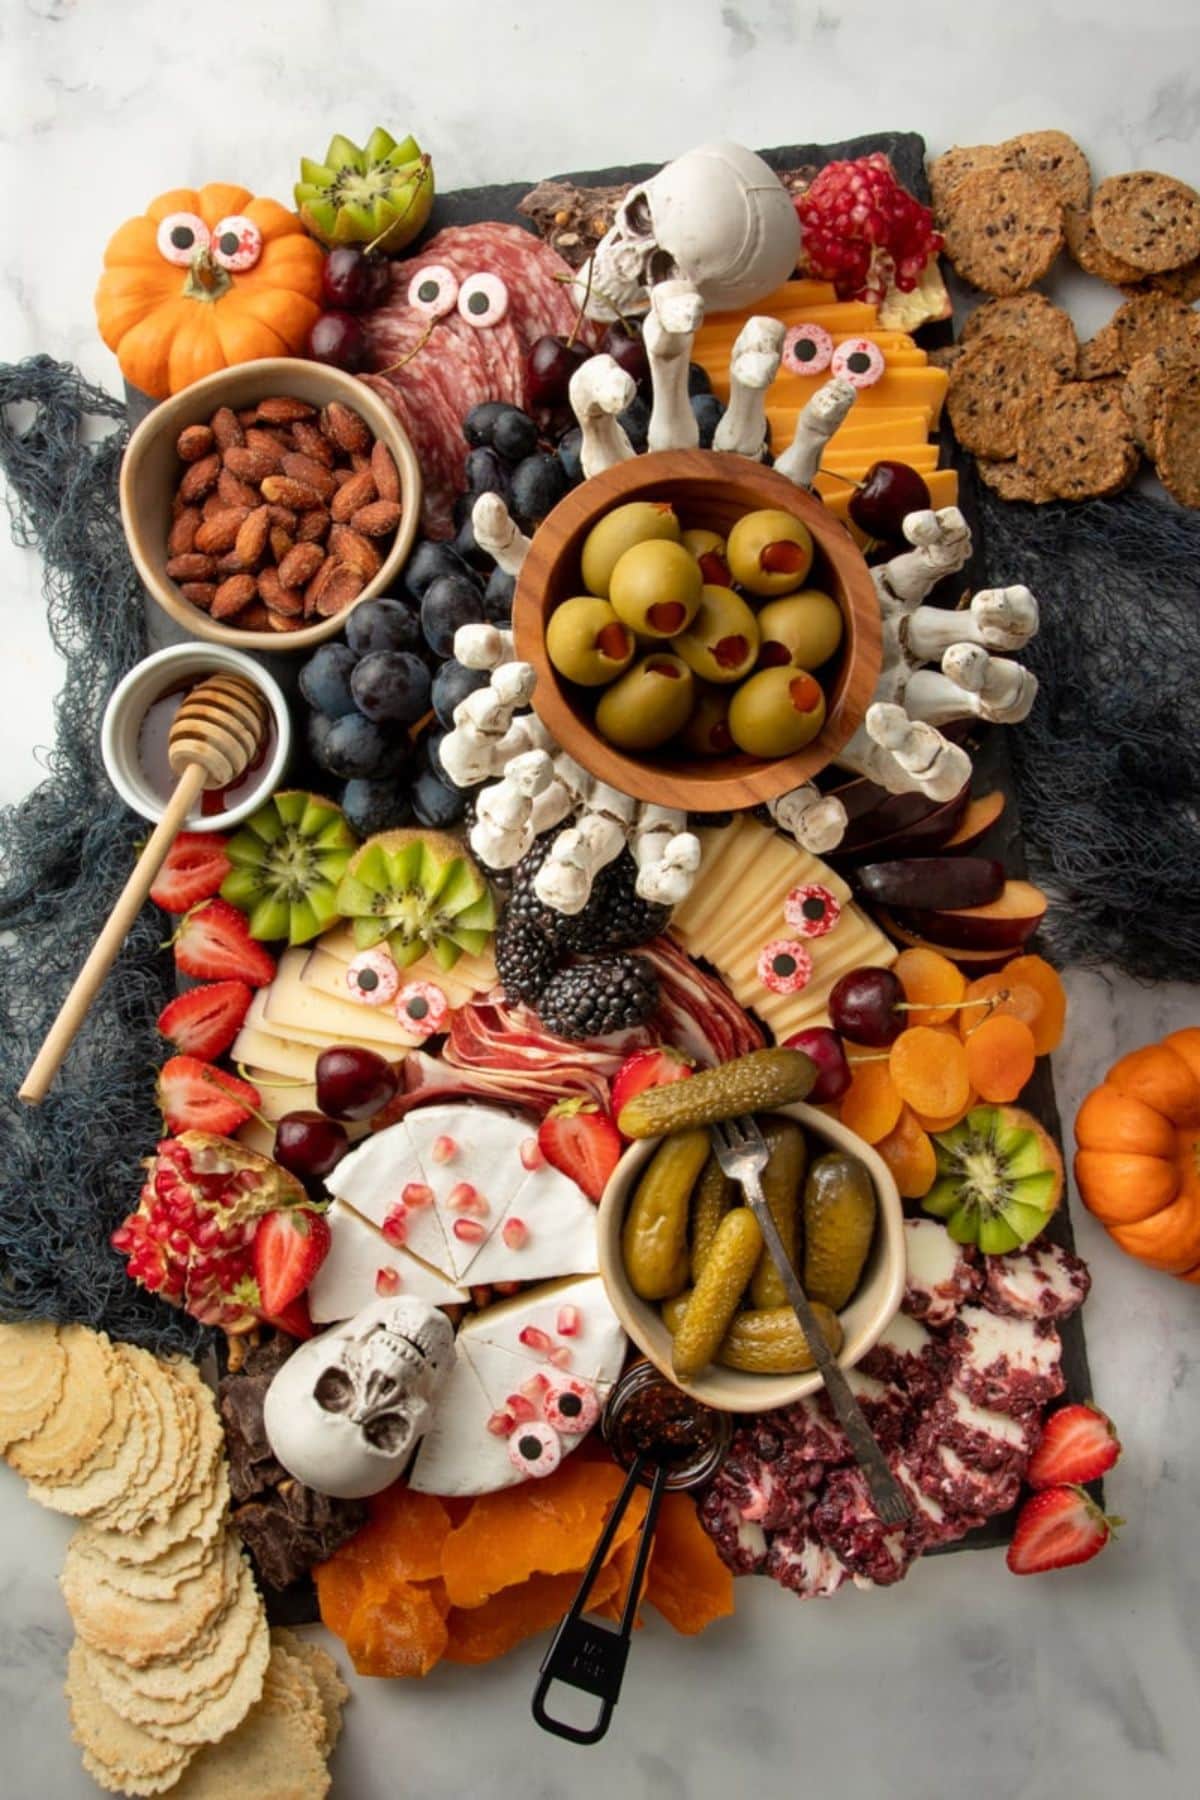
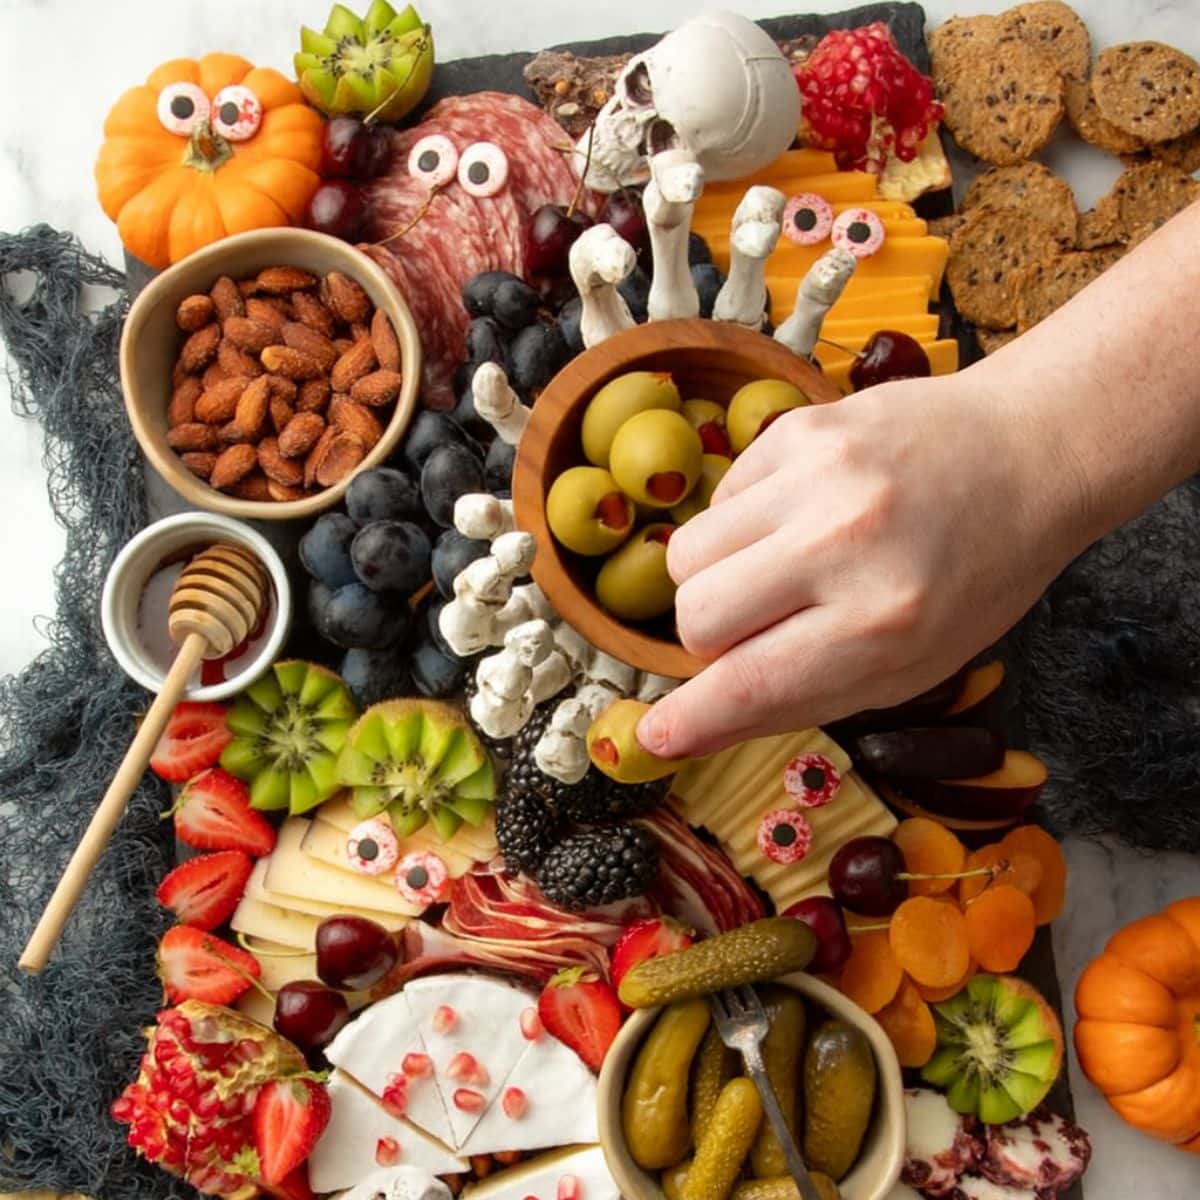
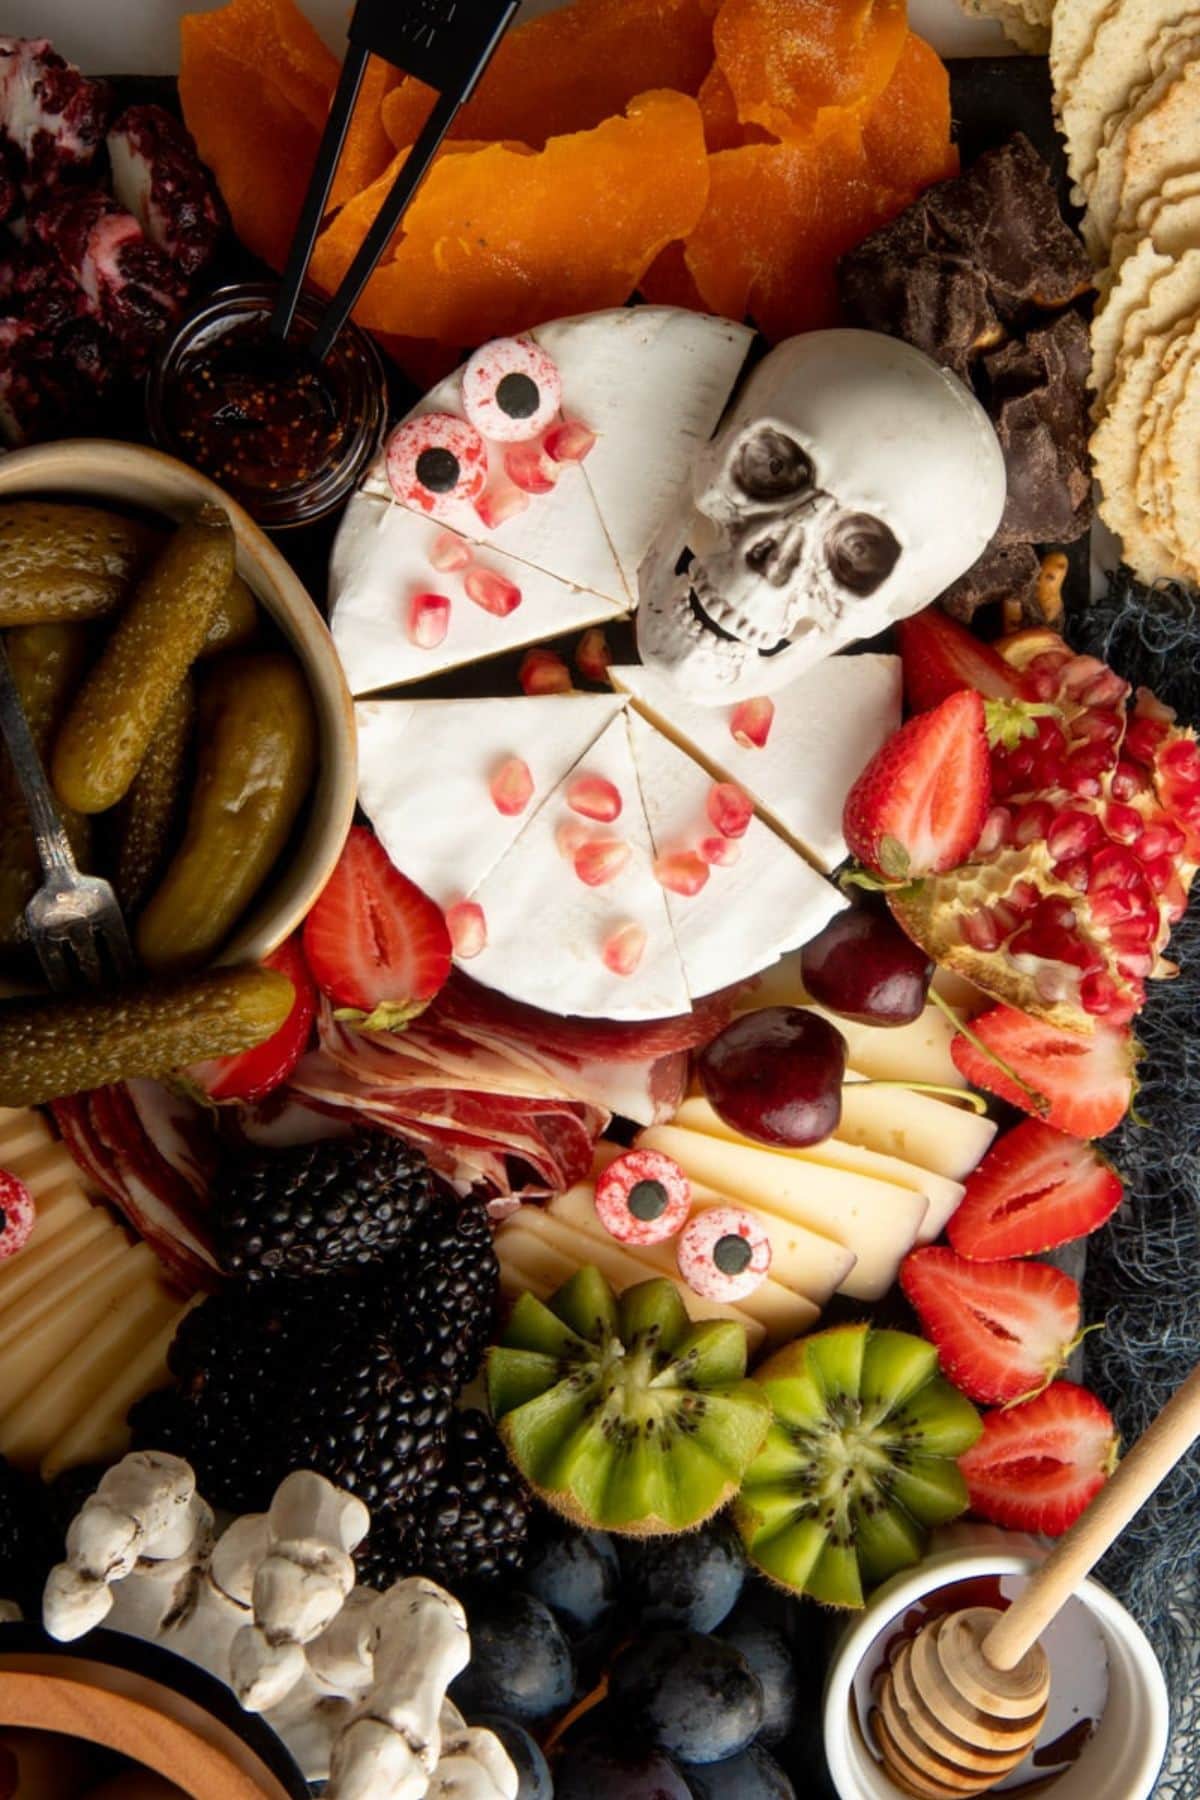
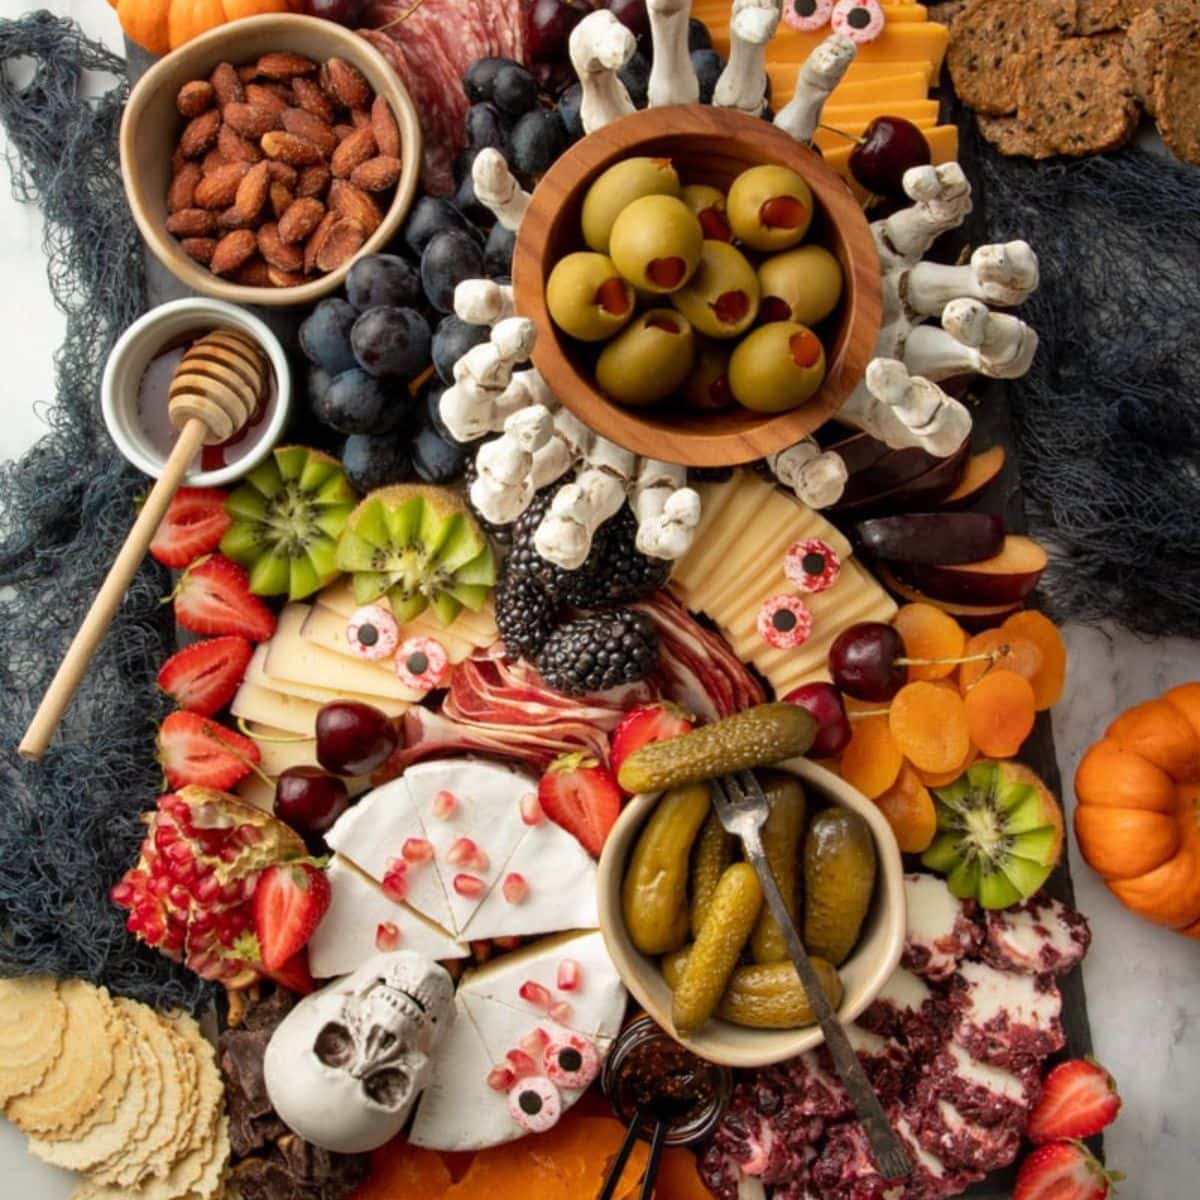
- Cheeses: You'll want to choose variety of textures, flavors, and colors to add visual and flavor interest. I recommend at least one soft cheese (like Brie or goat cheese), one hard cheese (like Parmesan, gruyere, or cheddar), and one crumbly cheese (such as blue cheese or feta). To add to the spooky theme, look for cheese that has festive colors like pumpkin orange cheddar, black garlic gouda, cranberry goat cheese, or wine-infused port cheddar.
- Fruits: I like dark fruits for a Halloween charcuterie board-think: plums, black grapes, blackberries, dark cherries. I also like to include kiwi for some green and blood red pomegranate! Dried fruits like dried apricots and dried apple slices are great additions, too.
- Savory Snacks: I like little gherkin pickles (they look like creepy shriveled fingers) and pimento stuffed green olives (they look like eyeballs). I also usually throw in a bowl of seasoned nuts like my mixed nuts recipe.
Make sure to check the recipe card below for the full ingredients list, along with quantities and my expert tips and tricks.
🔁 Variations & Substitutions
- Make it vegetarian: Leave off the meat, and voila! A vegetarian cheese board.
- Make it vegan: Leave off the meat and sub in nut cheeses. You can find these at some larger super markets and most health food stores.
- Make it bigger or smaller: Cheese boards scale up and down beautifully. I have some tips below in the FAQs for how much cheese to have per person.
🧀 How to Make a Halloween Cheese Board
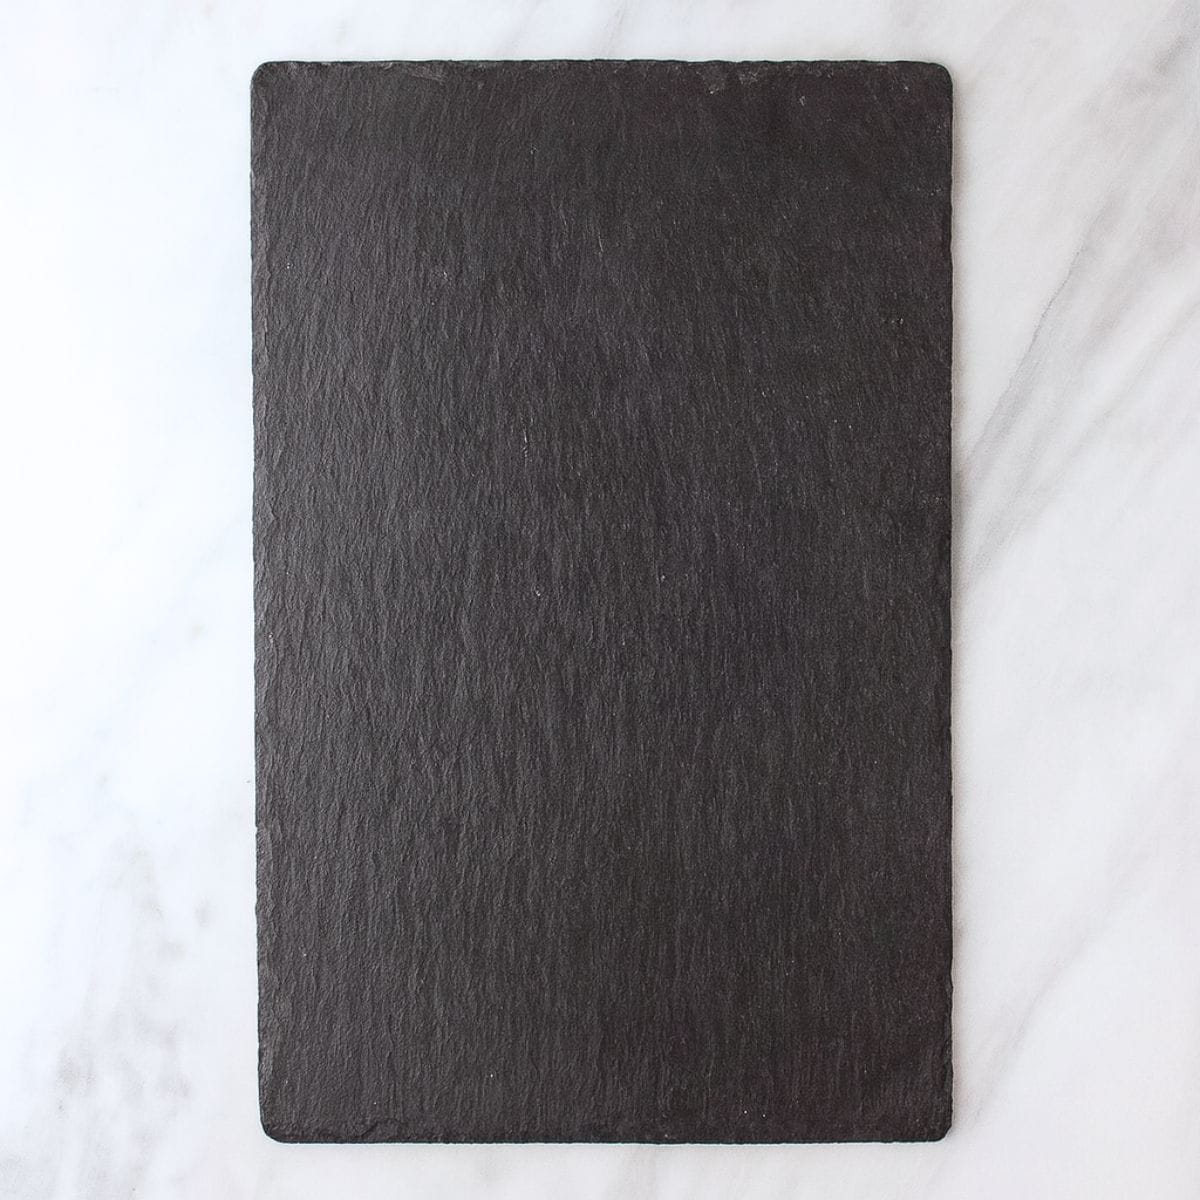
Step 1: Grab your board. Any large flat surface will work: a big cutting board, a serving platter, or even a baking sheet can do the trick! For Halloween, a large slate board is my favorite.
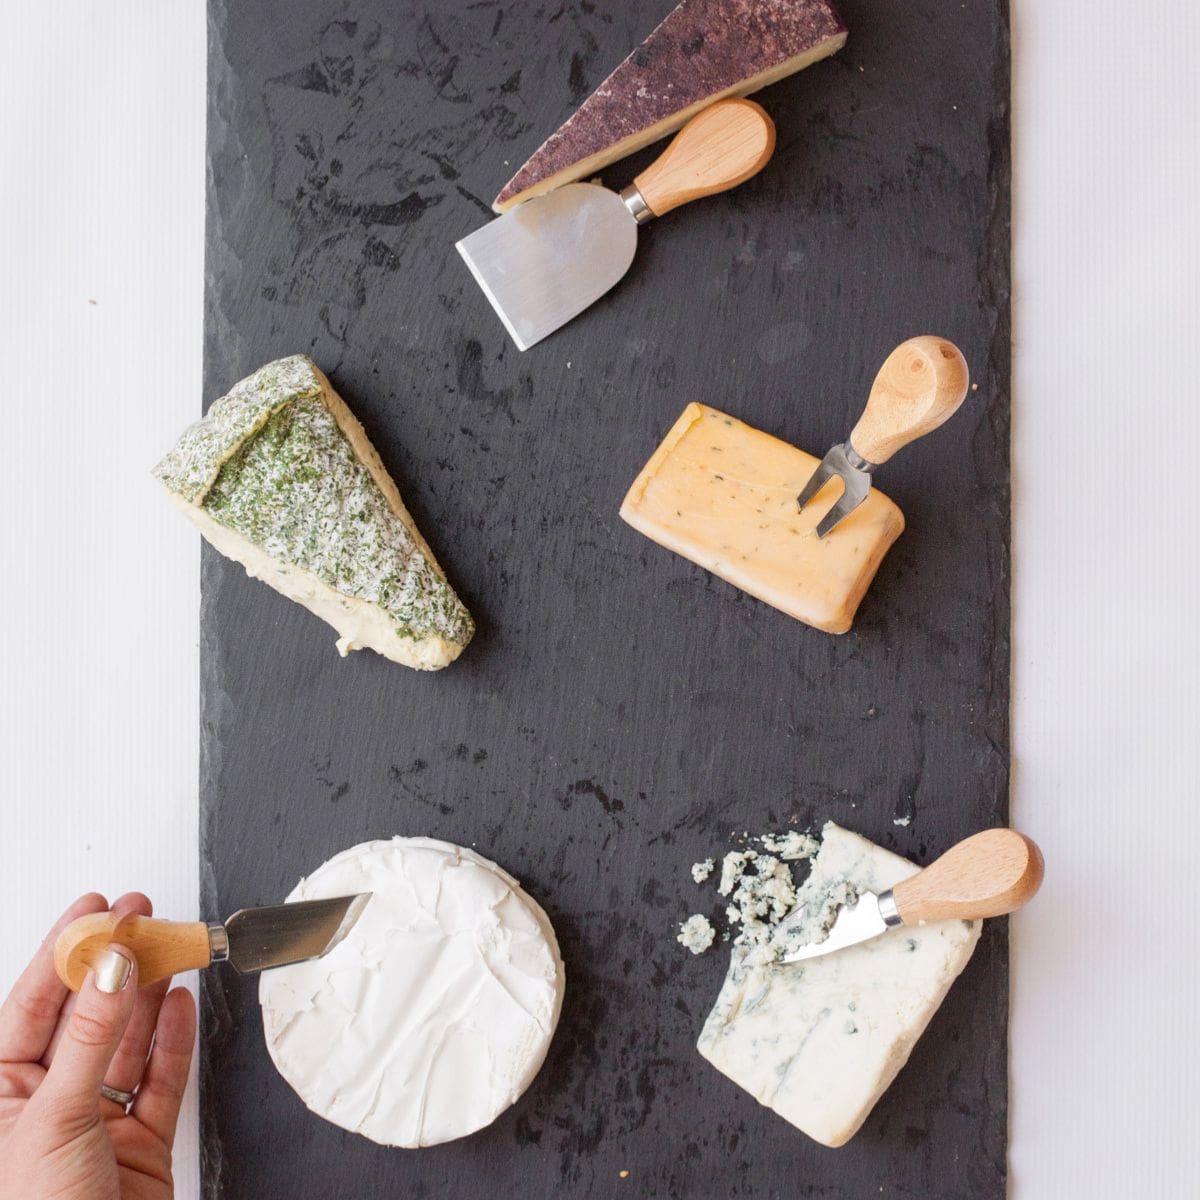
Step 2: Place the cheeses. Space the cheeses evenly throughout the board. You'll want to choose a wide variety of textures, flavors, and colors to add visual and flavor interest.
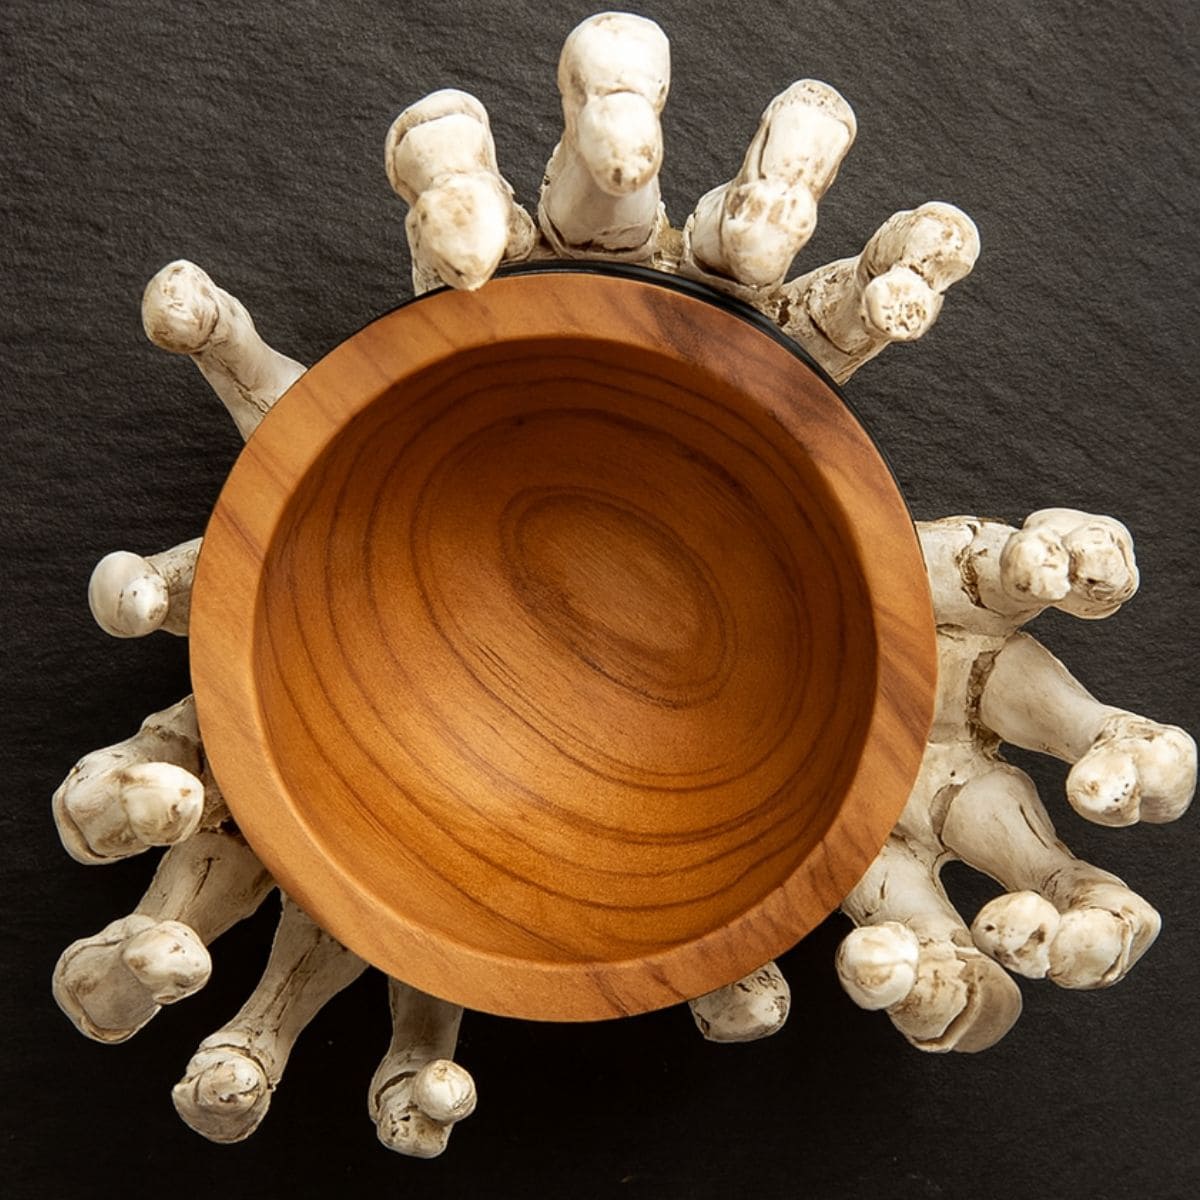
Step 3: Add any big decorations. If there are any large decorations you want to incorporate (like the skeleton hand holding the bowl in my board), put them down now so you don't run out of space for them!
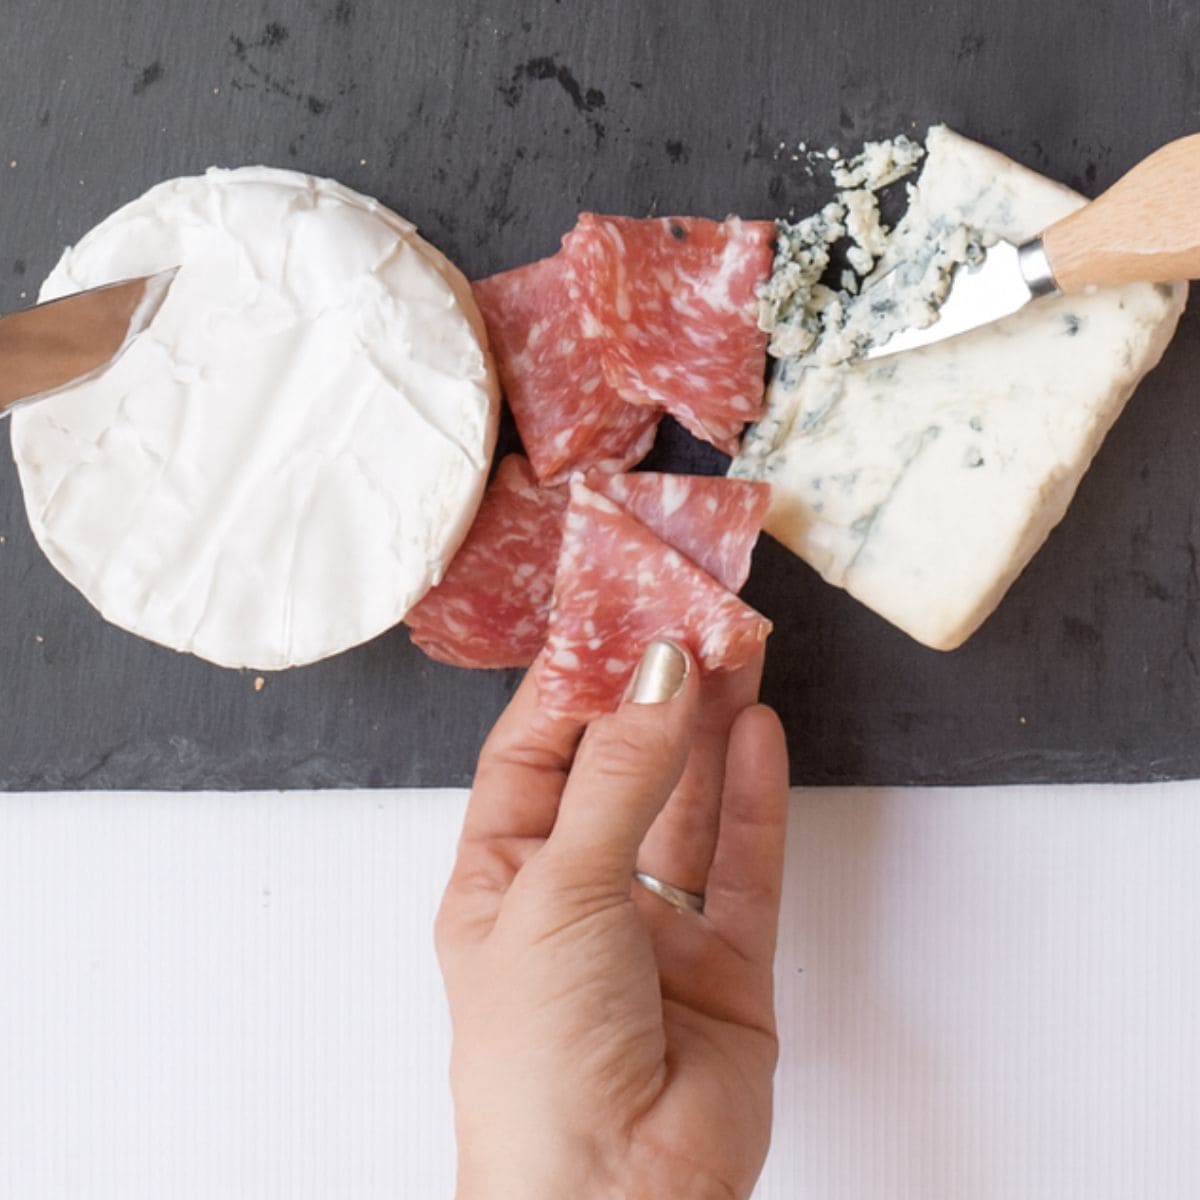
Step 4: Pile meats around the cheeses.
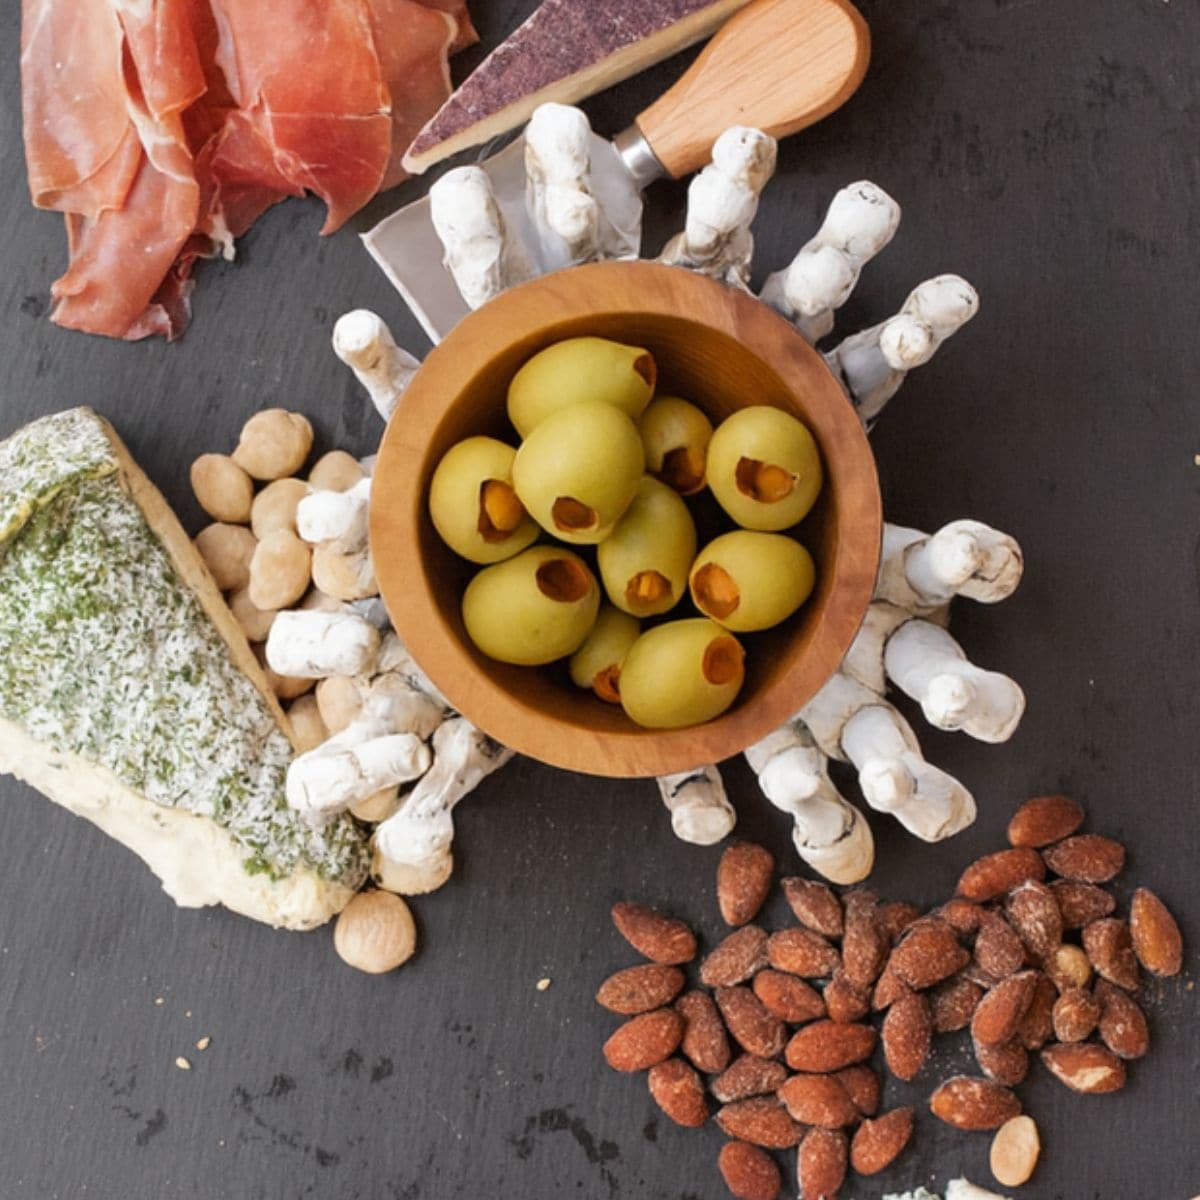
Step 5: Add salty items. Using the cheese wedges as focal points, arrange the nuts, olives, and other savory items around the cheeses and meats. For items that tend to roll away like olives, use small bowls to keep them corralled.
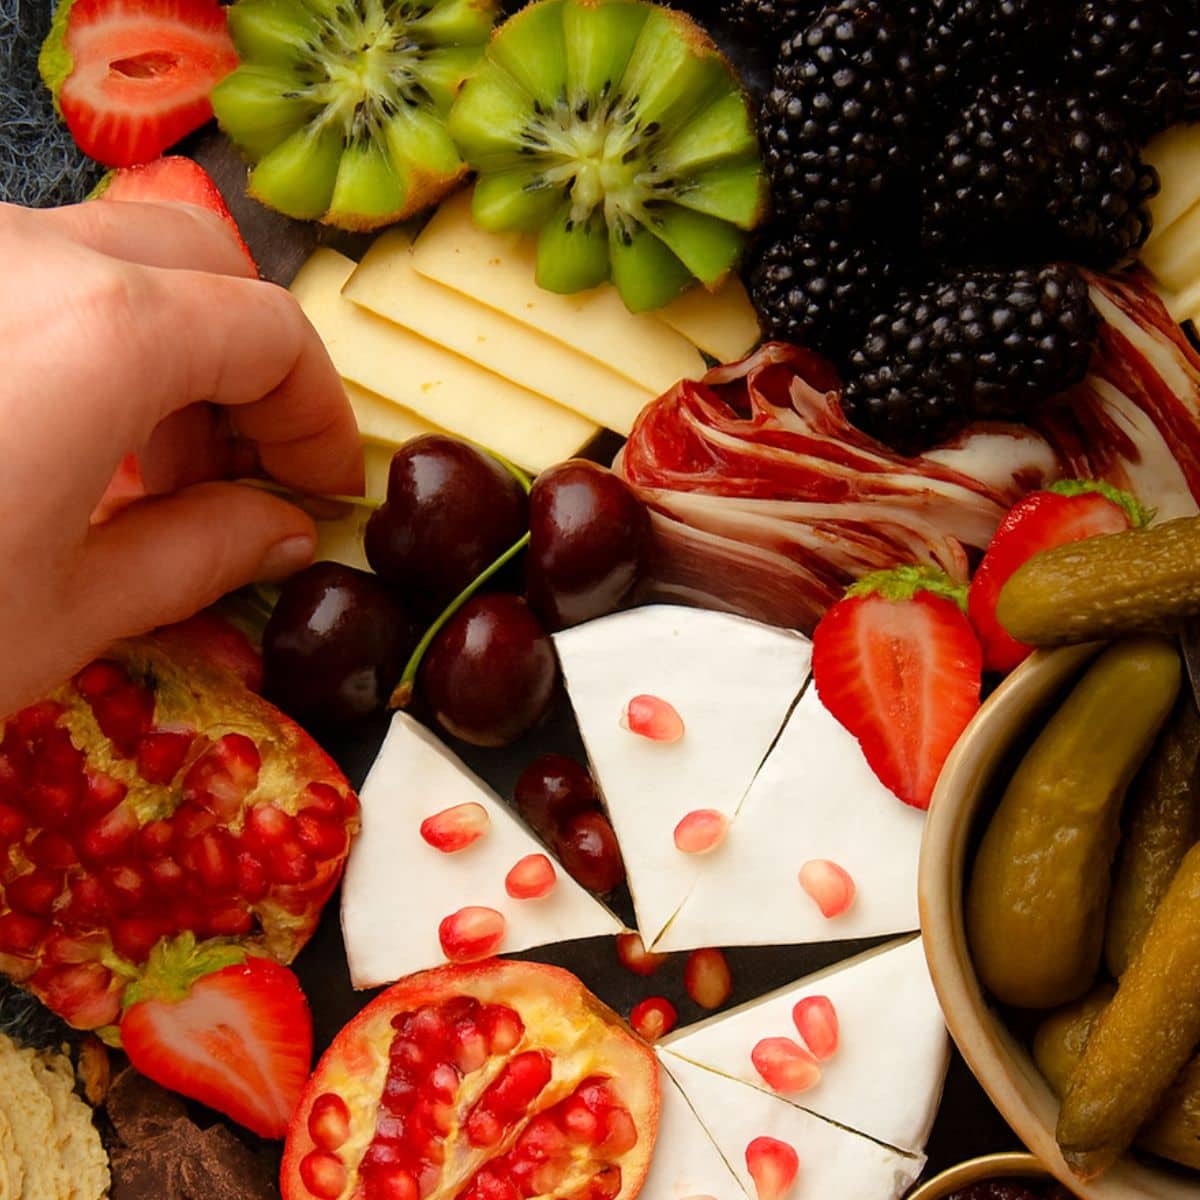
Step 6: Nestle fruits and sweets in among the savory items. Here is where you'll start filling in the holes. Where you see a gap, stick some fruit. It's as easy as that!
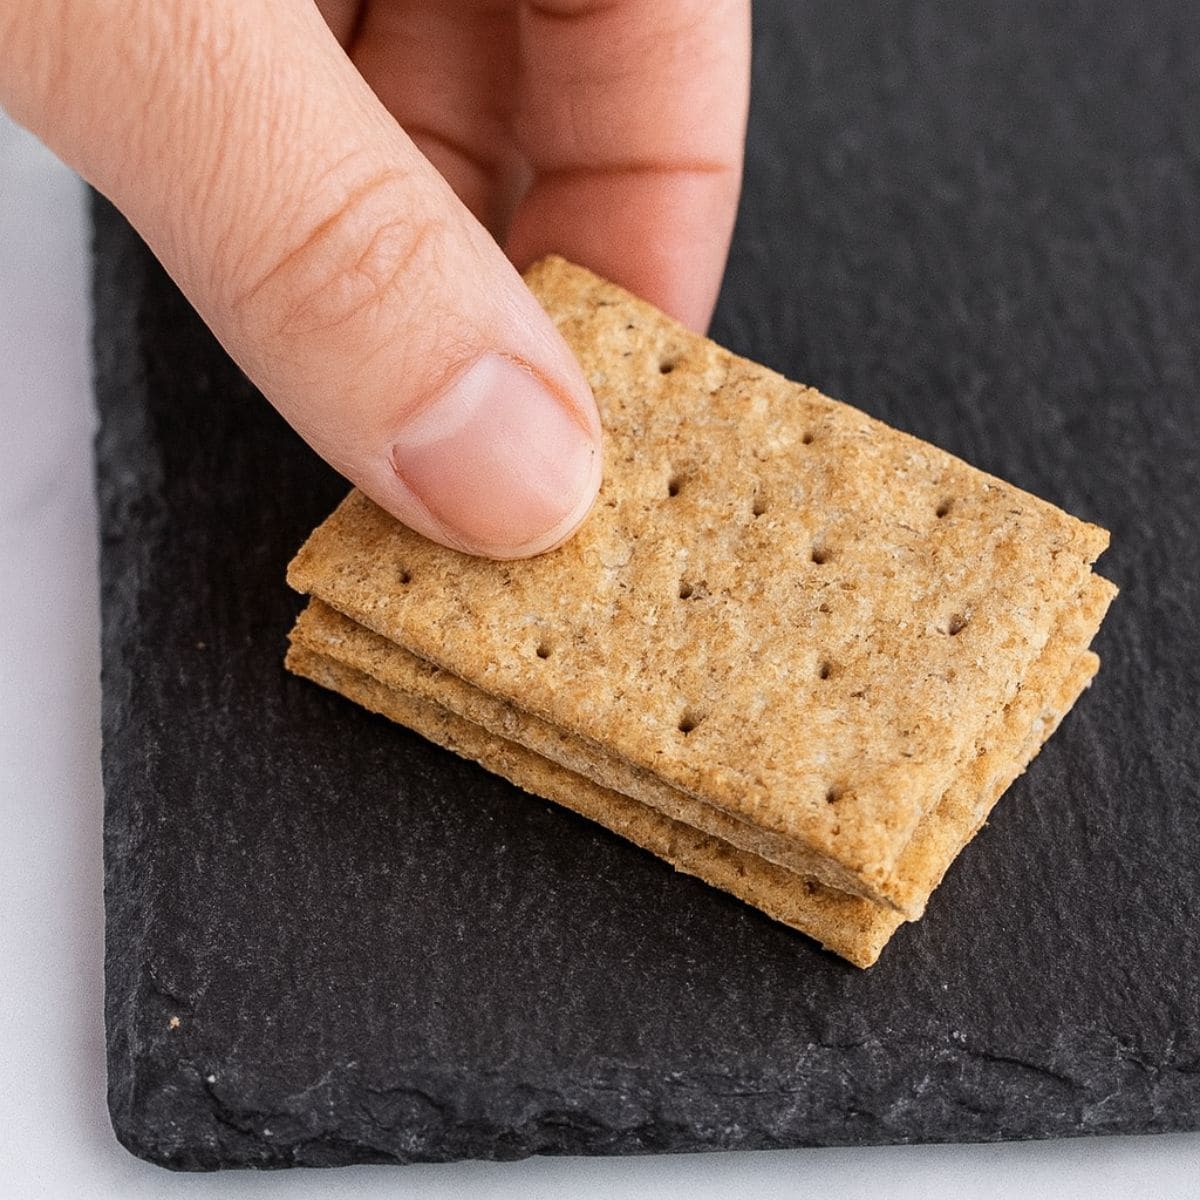
Step 7: Add piles of crackers. Rice crackers, water crackers, cheese crisps, bagel chips, crunchy breadsticks, and pita chips are all favorites. If you didn't leave room for these, you can serve them in a separate bowl or basket off to the side.
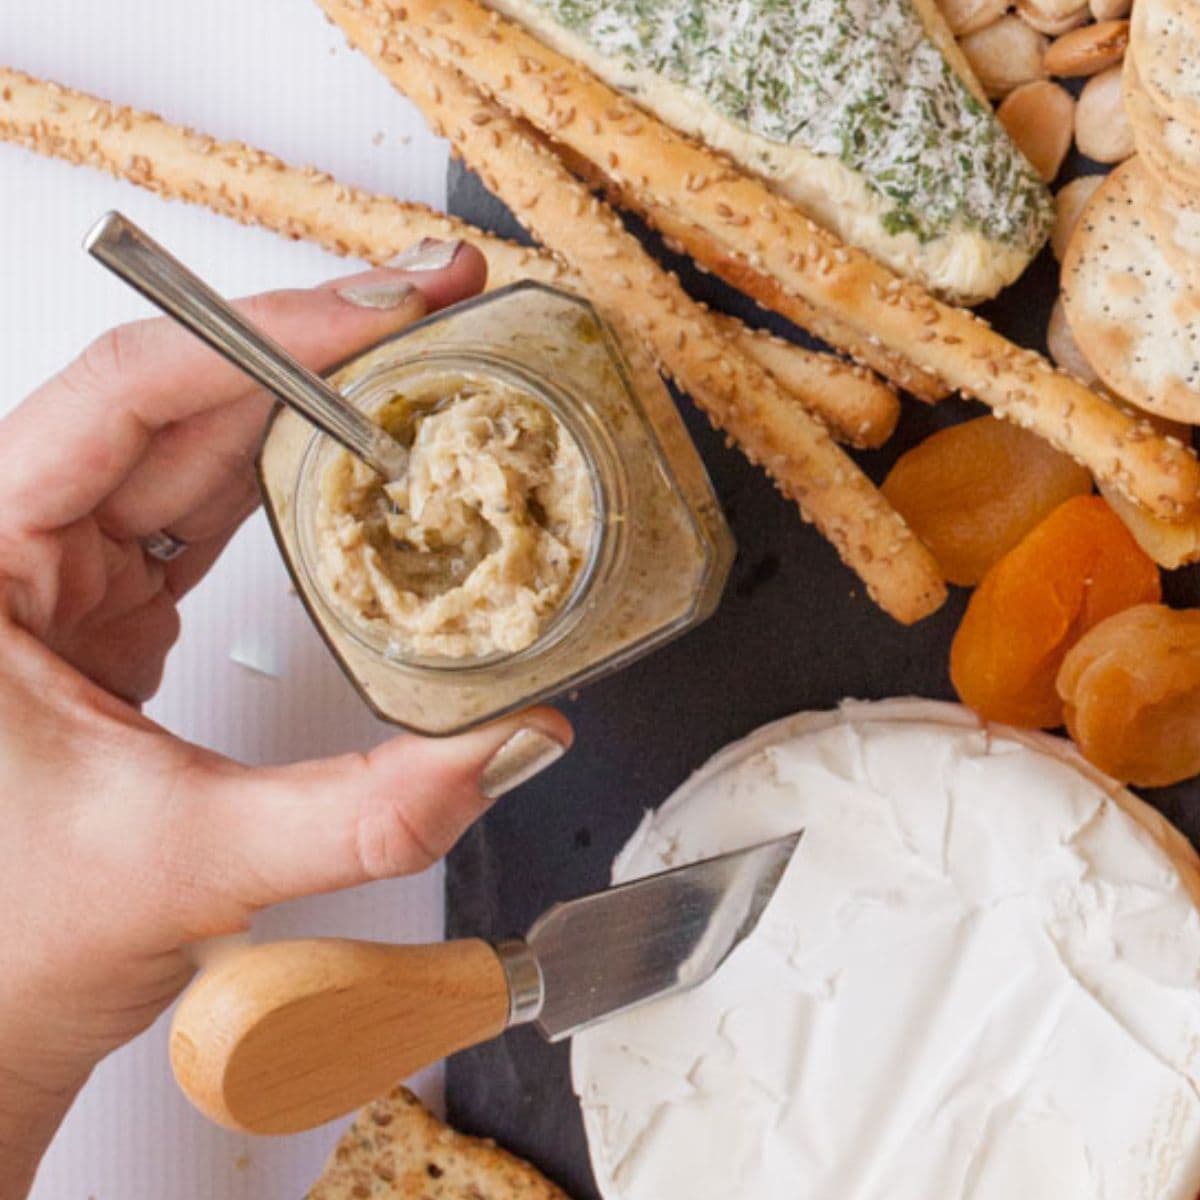
Step 8: Add condiments. Some things I add to small bowls, but others that come in small cute jars, I just nestle in. Check the list below for tons of condiment ideas.
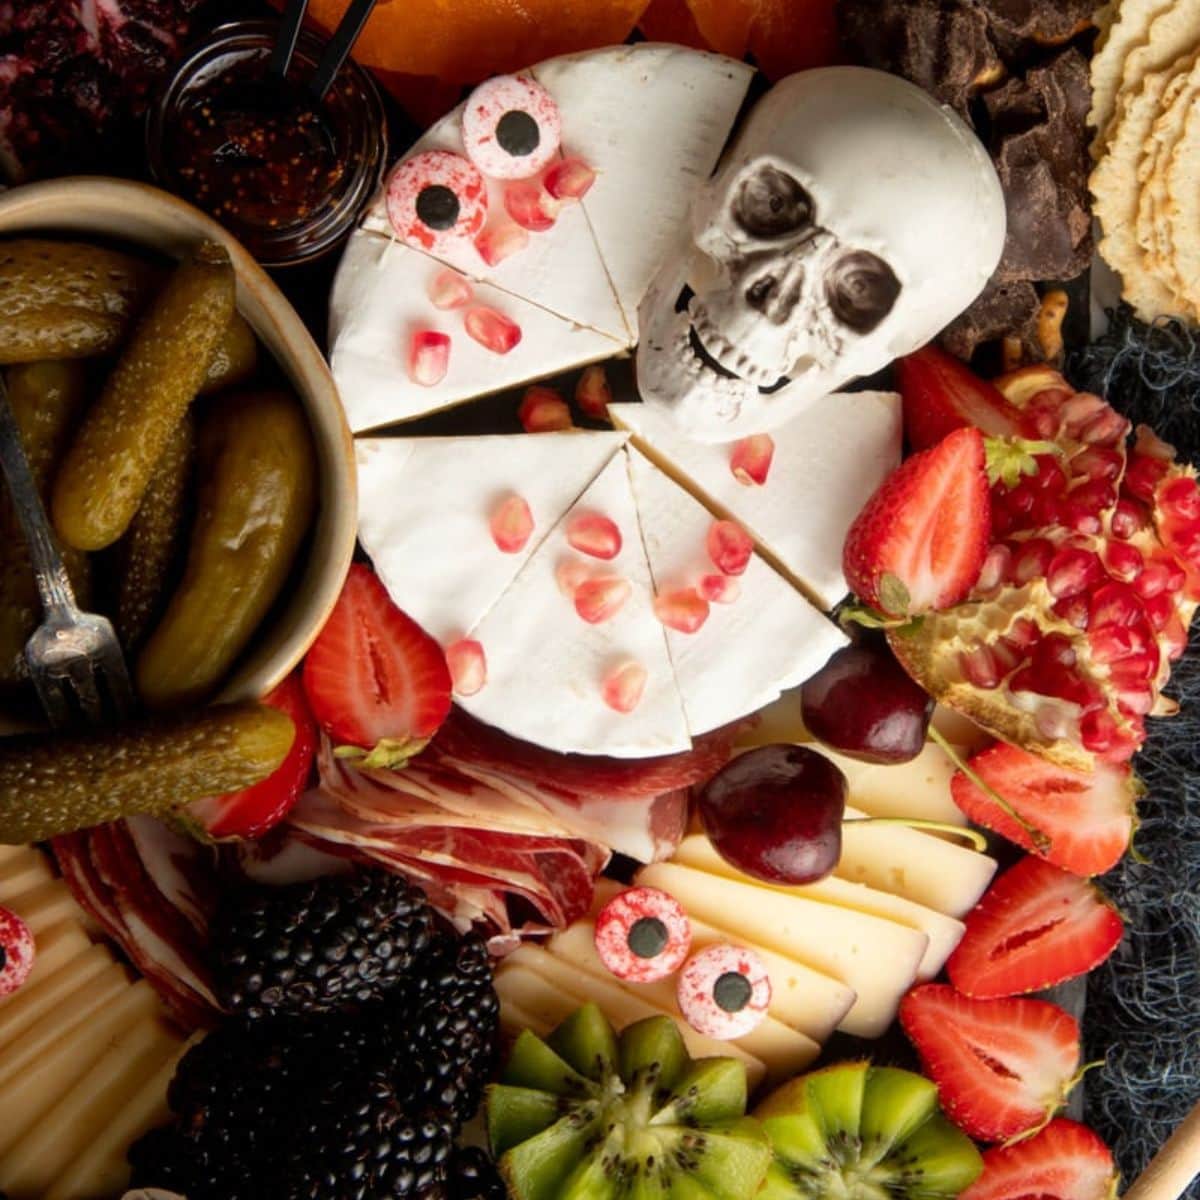
Step 9: Garnish with spooky decorations. I used bloodshot candy eyes (available in the Halloween baking aisle at your supermarket), mini pumpkins, and small plastic skulls. Small plastic spiders, gummy worms, or candy corn would also be a great addition.
Step 10: Serve and enjoy! Make sure folks know which decorations are not edible.
🍯 Condiment Options
Adding condiments to your cheese board takes it to the next level! Here are some good options:
- Fancy mustards
- Sweet jams and jellies (bourbon peach jam, apple jelly, simple blueberry jam, pomegranate jelly)
- Savory jams and jellies (jalapeno pepper jelly, red onion jam)
- Preserves (gingered pear preserves)
- Sauces (cranberry orange sauce, kale pesto, homemade hot sauce, roasted red pepper sauce)
- Honey
- Chutney
🙋🏻♀️ Halloween Charcuterie Board FAQs
If you are serving the cheese board as an appetizer: One standard-size wedge/piece (4-6 ounces each) of cheese per three people served.
If you are serving the cheese board as a main: One standard-size wedge/piece (4-6 ounces each) of cheese per two people served.
But if you want a great mix of textures and flavors, you may need more than this. When in doubt, err on the side of more meat and cheese.
Assembling a charcuterie board should only take a few minutes, but if you want to do some prep in advance, you can. Just wait to put on crunchy items like crackers and nuts until right before serving so they stay as crisp as possible. You can assemble the rest of the charcuterie board up to a day in advance. Wrap tightly in plastic wrap and refrigerate until serving.
If you're short on time (or serving mostly adults), you can get away with not pre-slicing your cheese and just putting cheese knives out with the board. If you are serving a mixed crowd with children, you might want to pre-cut your cheese so little hands can quickly grab their snack without having to ask an adult to help with the knife.
👩🏻🍳 My Expert Tips & Tricks
- Choose the right board: I like my slate cheese board for this char-boo-terie tray, but anything dark and weathered will work. Have a metal baking sheet that's seen better days? That patina is perfect for a spooky cheese board! Check out my full how to make a cheese plate article for full run down of board options (some cost $Free.99!)
- Save $$ on cheese: If you're at a higher-end grocery store with a cheese counter, look for a bargain bin. Many will have a basket of cheese ends that were too small for people to order, and these can be the perfect size for a cheese board (and will cost considerably less). It's a great way to get a lot of variety and to try something new!
- Shop your Halloween decorations: No need to buy speciality cheese board props! I used plastic skulls, mini pumpkins, and a spooky skeleton candle holder from my stash of Halloween decorations. Use what you have!
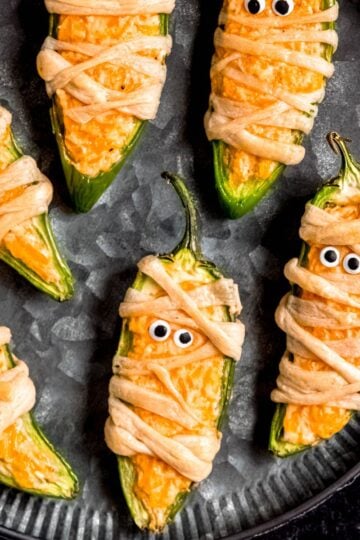
- Candy eyes for the win: Want to make something spooky? Add eyeballs to it! My stash of candy eyes get put on almost everything in October (hello jalapeño popper mummies). They are an easy way to make this board spooky in a flash.
- Pick a color scheme: for a cohesive-looking board, it helps to keep color in mind when you are picking out your ingredients: do you want to go spooky with dark red, dark purple, and black? Or bright and fun with oranges and yellows? Check out my Thanksgiving charcuterie board for a fun example of what a difference color makes!
👻 More Halloween Recipes to Try

If you tried this Halloween Cheese Board or any other recipe on my blog, please leave a 🌟 star rating and let me know how it went in the comments!
📖 Recipe
Halloween Cheese Board
Equipment
- Cheese board (can use a [cheese board], cutting board, serving platter, tray, or cookie sheet)
- [Cheese knives]
- Spooky holiday themed decorations (plastic spiders, candy eyeballs, skeleton hands, mini plastic skulls, mini pumpkins, etc.)
Ingredients
- Various cheeses get a mix of flavors, textures, shapes, and colors
- Salty items meats, nuts, olives, etc.
- Sweet items fruit, dried fruit, chocolate, etc.
- Crunchy items crackers, pita chips, breadsticks, etc.
- Condiments honey, mustards, chutney, etc.
- Space-filling items grapes, cherry tomatoes, cherries
Instructions
- Space the cheeses evenly across the surface of your board.
- Place any large decorative pieces (like the skeleton hand holding the olive bowl) to make sure you have enough room for them.
- Pile your salty items like meats, nuts, and olives around the cheeses. Use small bowls for things that want to roll away!
- Nestle sweet items like fruits and candies in among the savory items.
- Add piles of crackers, or serve them in a separate bowl or basket off to the side.
- Nestle in small jars or bowls of condiments such as jams and mustards.
- Fill in any empty spaces with grapes, cherries, cherry tomatoes, or Halloween decorations like small plastic skulls or spiders.
Notes
- If serving as an appetizer, I recommend one standard-size wedge/piece (4-6 ounces each) of cheese or meat per three people served.
- If serving as a main, I recommend one standard-size wedge/piece (4-6 ounces each) of cheese or meat per two people served.
- If you're short on time (or serving mostly adults), you can get away with not pre-slicing your cheese. Instead, we put the uncut pieces of cheese on the tray with cheese knives so that guests can slice to whatever thickness they'd like.
- If you are serving a bunch of little goblins, you might want to pre-slice or pre-cube your cheese so little hands can quickly grab their snack without having to ask an adult to help with the knife.
A big struggle in our house used to be getting dinner on the table each Halloween before trick-or-treating. I wanted something in our tummies before the candy deluge, but who has time to cook when you're helping with wigs, costumes, and makeup? A few years ago I came up with the solution of a Halloween cheese board, and it has been a GAME CHANGER! I whip up the cheeseboard mid-afternoon, sit it out, and we all nibble and snack while getting ready. This festive cheeseboard is also awesome for Halloween parties!