
Dilly Beans Recipe

When you think of pickles, your first thought may be of classic cucumber pickles, but the joy of pickling is that you can use the same treatment on almost any veggie to get a wonderful, crunchy, tangy treat! Pickling is one of the easiest canning methods for first-time canners-and dilly beans are maybe the easiest of all!
These dilly beans have all the wonderful crunch and flavor that you'd expect from a dill pickle, but they are a great way to put up a bounty of green beans from the garden or farmers' market. Dilly beans are great to snack on or enjoy as a side dish, and they're also beautiful on a cheese board (learn how to make a charcuterie board). Let us show you how to make them!
What are dilly beans?
Dilly beans are simply pickled green beans. You know your favorite dill pickle spears? With all their tangy, garlicky, dill flavor? Now imagine that same flavor and crunch but on perfectly poppable, bite-size green beans. That's a dilly bean! Dilly beans are a classic vegetable pickle and a staple of many farmhouse cellar shelves. They are a great way to use up a bumper crop of green beans and oh-so-easy to make!
What ingredients do I need for dilly beans?
Like most pickles, the ingredients to make dilly beans are super simple:
- Beans: Of course!
- Vinegar: You'll want to use regular white vinegar.
- Water
- Ball® Salt for Pickling and Preserving: Pickling salt is specifically produced without any additives that may cause your preserves to go cloudy.
- Garlic cloves: You'll want one clove for each jar you're canning.
- Sprigs of dill: Dill seed heads have the most flavor, but if you can't get those, just a piece of the herb itself does the trick-again, you'll need one per jar.
- Crushed red pepper flakes (optional): If you want to kick up the heat, a pinch of red pepper flakes in each jar will do that for you!
- Ball® Pickle Crisp® (optional): Dilly beans don't tend to need anything to help them crisp up, but if you want to ensure a good crunch, Pickle Crisp® is a simple, all-natural additive that will make sure you have crispy pickles.
What kind of beans do I need?
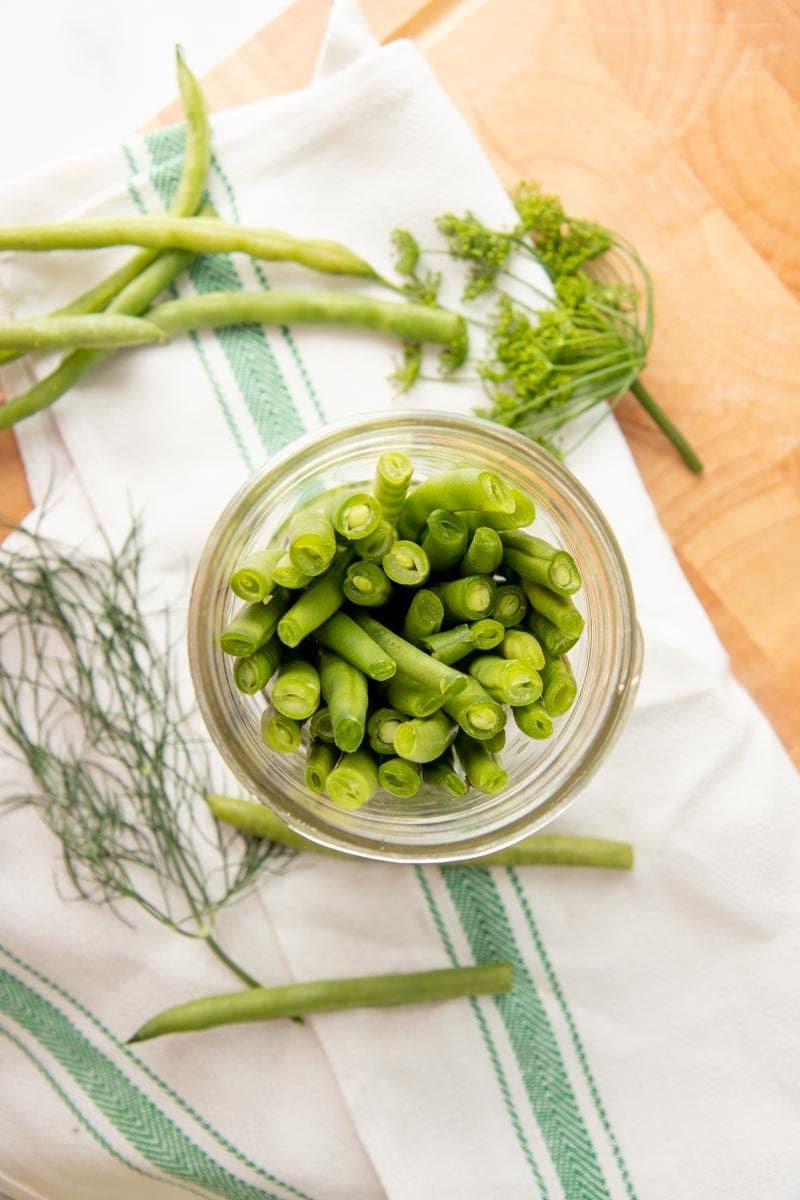
Classic green beans or yellow wax beans are what you are looking for. The straighter the better-just because they'll snuggle into the jar better. If you're harvesting beans yourself or picking through them at the farm stand, look for beans that are about the length of the jar you're using. Anything longer than that and you'll have to cut them down, which is more work for you!
Protip: Keep them small
Depending on the variety, green beans tend to get a little tough and woody after about 5-6" in length. A bean around 4" long is perfect for this Dilly Beans recipe!
Can you use dried dill in this recipe instead of fresh dill?
You are going to get the best flavor with fresh dill, and we highly recommend you seek it out (or grow it yourself!) before making dilly beans. If you're in a pinch though, you can use dried at a rate of 2 teaspoons of dill seeds per pint jar.
Protip: For the best flavor
Dill seeds (both fresh seed heads and dried seeds) are much more potent in their dill flavor than dill leaves and stems.
How do you make dilly beans?
If you've made our Dill Pickles before, the process for making these dilly beans will be pretty familiar:

- Prepare your boiling water canner, jars, lids, and bands per the instructions listed in this Water Bath Canning Guide.
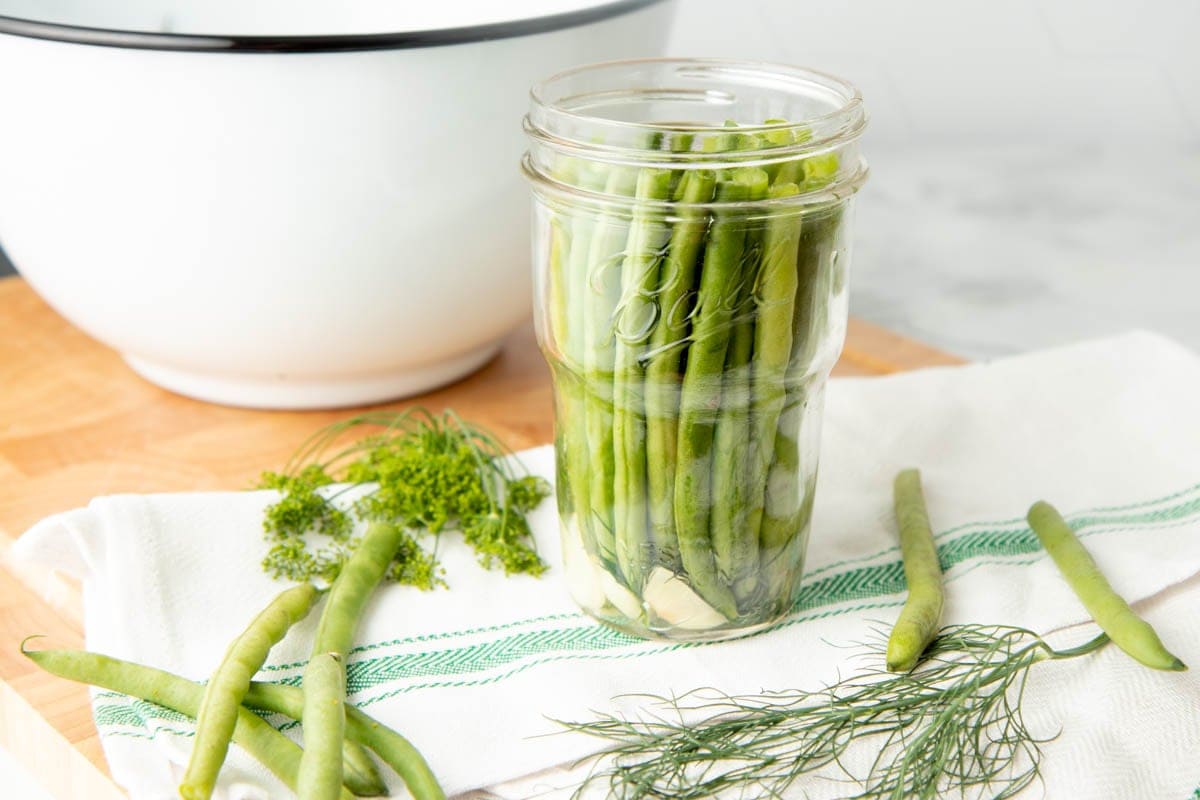
- Wash and trim the ends of the beans, cutting them into jar-sized pieces if need be.
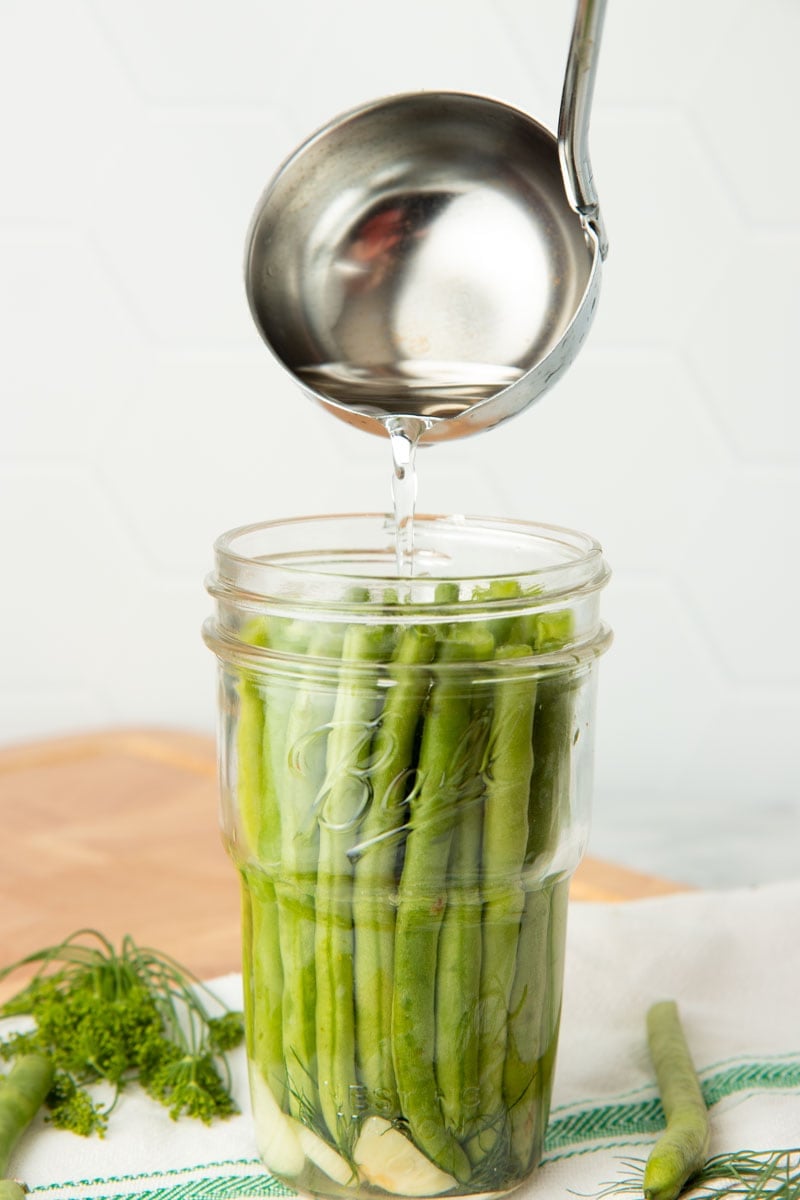
- Make the brine by combining vinegar, water, and salt in a large saucepan over high heat.
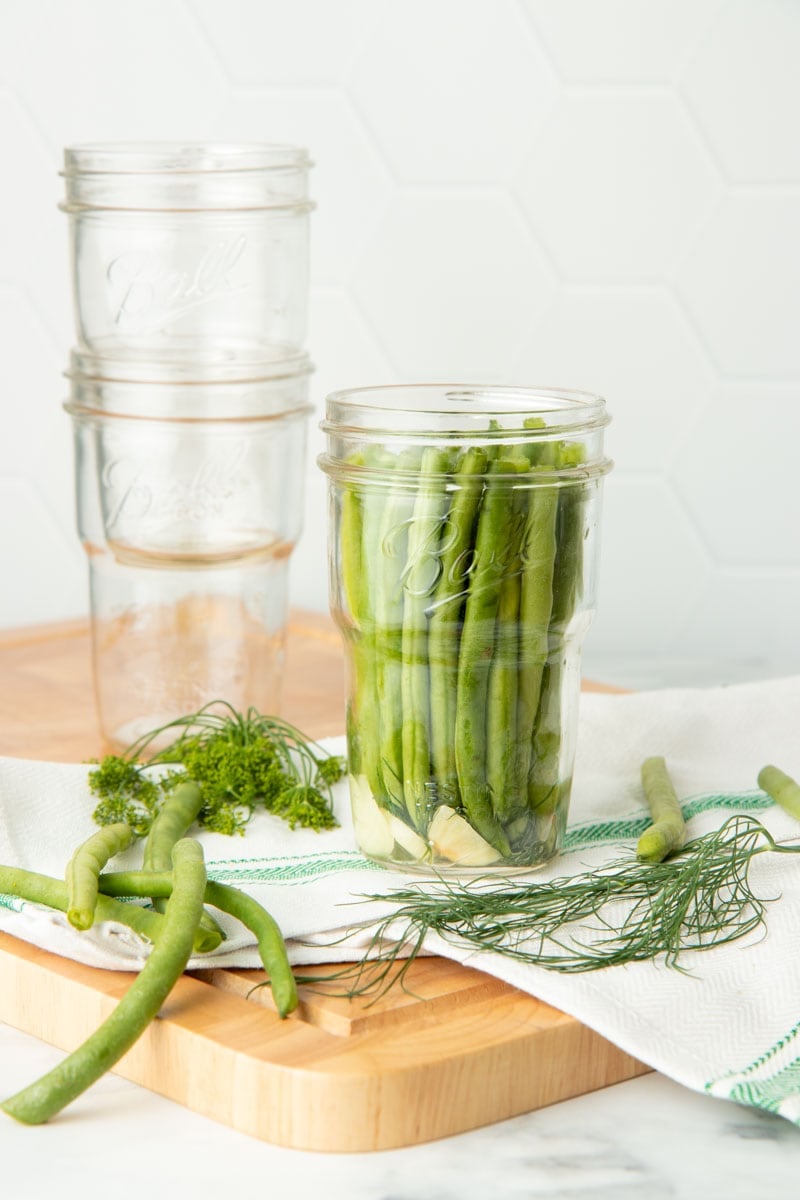
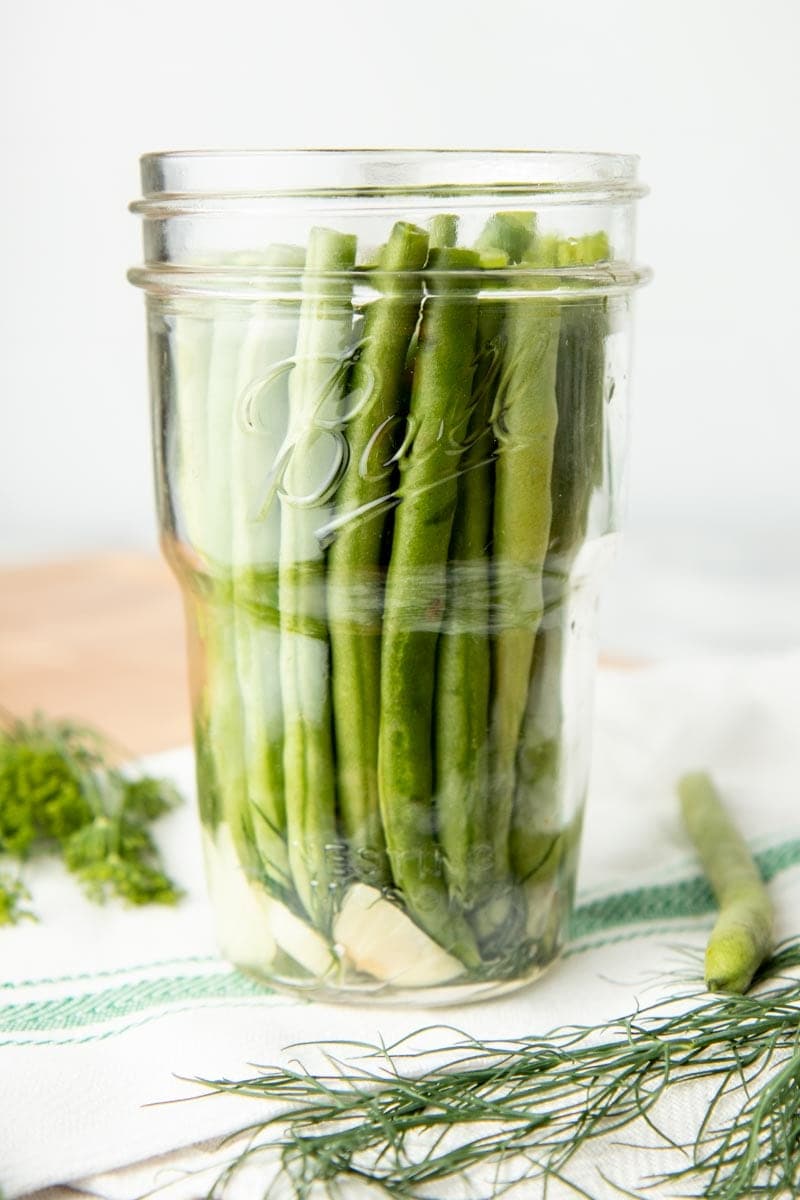
- Pack each clean, hot jar with garlic, dill, and red pepper flakes, if using.
- Pack the jars tightly with the beans.
- Ladle the hot brine over the beans, leaving a ½" headspace.
- Close the jars, process, and check for seal per the instructions listed in this Water Bath Canning Guide.
- Store in a cool dark place for at least 1 week before enjoying, preferably 3-4 weeks.
Protip: Avoid jar breakage!
If your beans were in the refrigerator before canning, make sure they come up to room temperature before packing them into your jars to avoid jar breakage.
What are the best jars to can dilly beans in?
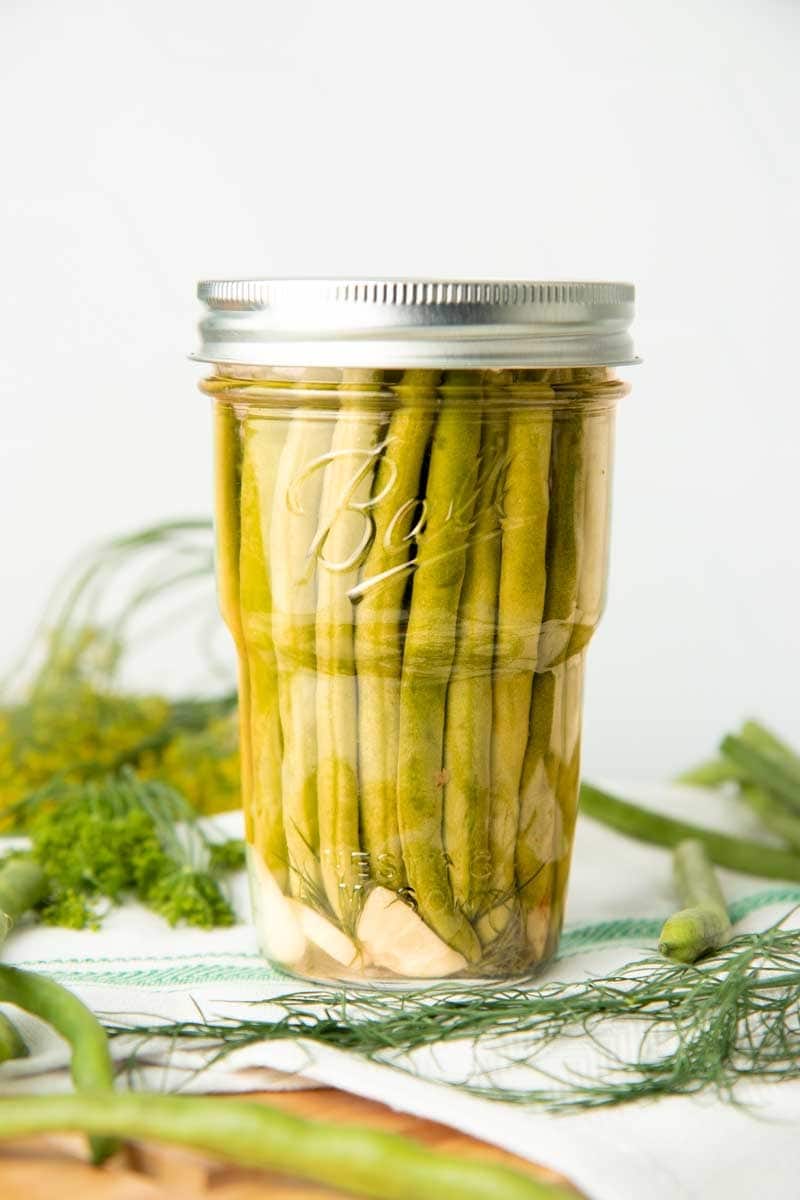
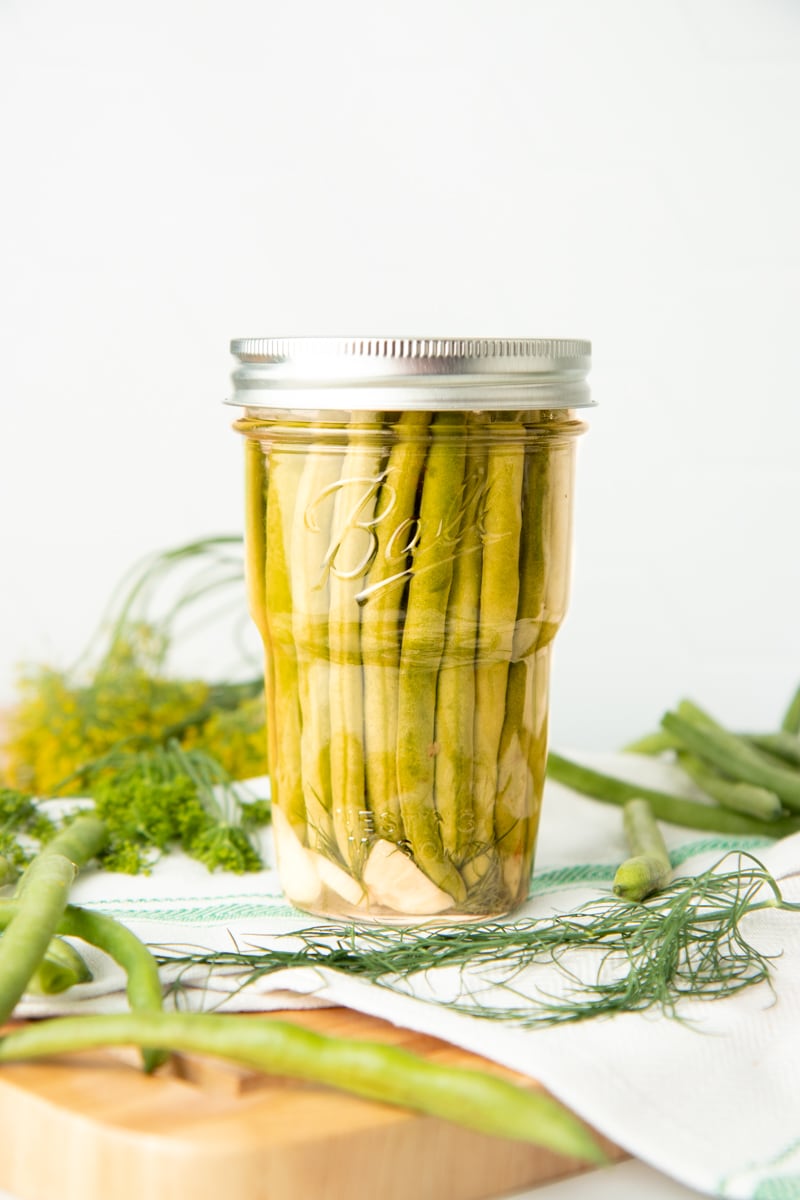
We recommend any Ball® Wide Mouth Pint Jar for Dilly Beans-the wide mouth makes the jars easy to pack, and the pint size is the perfect height for most green beans. In these photos, we're using the Ball® Nesting Jars. We love these jars because they are standard pint size with the standard wide mouth opening, but their tapered design makes them easy to store when empty!
Do I need to blanch the beans first?
No need! This is a raw-pack recipe. You'll pour hot brine over the beans, and then process them in a boiling water bath canner for 15 minutes.
Are dilly beans fermented?
This recipe we're sharing here is for canned dilly beans, not fermented. Waterbath canning makes these dilly beans shelf-stable.
However, if you are interested in making fermented dilly beans, check out this recipe from FreshPreserving.com and the Ball® Fermentation Kit.
Can you make refrigerator dilly beans?
Sure can! Instead of processing after you've filled and closed your jars, pop them in the fridge. For the best flavor, let them rest in the fridge for at least a week-but preferably closer to three weeks-before enjoying. Enjoy them within about 6 weeks.
How do I make dilly beans crisp?
Dilly beans tend to hold up to the processing much better than their cucumber counterparts. Fresh beans tend to be crisp even after processing.
However, if you want to ensure crispness, you can add Ball® Pickle Crisp® (aka calcium chloride) to keep them crispy. Add ⅛ teaspoon Pickle Crisp® to each pint jar before packing with beans.
How long do dilly beans need to sit before eating?
Like all pickles, the flavor of dilly beans improves after a few weeks of rest in a dark spot. We recommend waiting at least a week before enjoying, although you'll start to have the best flavor 3-4 weeks after canning.
How long do dilly beans last?
Properly sealed preserves are best used within 18 months. However, as long as the jar still has a good seal, canned goods can be stored almost indefinitely. The quality of the food might decrease (you might lose flavor, color, or texture), but it will still be safe to eat.
How long do pickled beans last after opening?
We recommend enjoying them within a month of opening them-and always keep them stashed in the fridge once you've opened a jar.

Why are my pickled beans floating?
Canned foods float because of air pockets trapped in the food. No worries, the beans will eventually sink to the bottom as the jars rest in a cool, dark spot in your pantry or cellar.
Protip: Pack 'em tight.
You can help avoid pickle float by packing the beans tightly in the jars.
Why are my dilly beans wrinkled?
A few things can cause beans to wrinkle after processing. You could have left them in the canner a little too long, you could have missed the vinegar or salt ratios, or it could just be the type of bean you are using! Make sure to follow the recipe below to the letter, and if your beans are wrinkled out of the canner-no worries, they'll plump back up nicely as they absorb the brine on the shelf.
How do you eat dilly beans?
You just...eat them! Just like cucumber pickles, you can snack on them, eat them as a side dish, or put them during the condiment or salty step in my how to make a cheese plate tutorial. Trust us, these little beans are incredibly addictive-you'll have no problem going through them!
📖 Recipe
Dilly Beans Recipe
Ingredients
- 3 pounds green and/or yellow wax beans trimmed and cut into jar-length pieces (about 4 inches)
- 3 ¾ cups vinegar
- 3 ¾ cups water
- ⅓ cup Ball® Salt for Pickling and Preserving
- 6 cloves garlic crushed or thinly sliced
- 6 sprigs of dill
Instructions
- Prepare boiling water canner. Heat jars in simmering water until ready to use, do not boil. Wash lids in warm soapy water and set aside with bands.
- Combine vinegar, water and salt in a large saucepan and bring to a boil over high heat, stirring to dissolve salt.
- Place 1 clove crushed garlic and 1 dill sprig into a hot jar. Pack beans cut side up, leaving a ½ inch headspace.
- Ladle hot brine into a hot jar, leaving a ½ inch headspace. Remove air bubbles. Wipe jar rim. Center lid on jar and apply band, adjust to fingertip tight. Place jar in boiling water canner. Repeat until all jars are filled.
- Process jars 15 minutes, adjusting for altitude. Turn off heat, remove lid, and let jars stand 5 minutes. Remove jars and cool 12-24 hours. Check lids for seal-they should not flex when center is pressed.
Video

Probly should remove the ring after processing, not the lid....
Hi Jennifer! In step 5, when we say, "Process jars 15 minutes, adjusting for altitude. Turn off heat, remove lid, and let jars stand 5 minutes," we mean the lid of the canner, not the lids on the jars!