
How to Make Instant Pot Coconut Yogurt
I first started making this dairy-free coconut yogurt back in 2014. When my daughter was born, she had a Milk and Soy Protein Intolerance (MSPI, for short), meaning that even the slightest bit eaten by me would come through my breastmilk and cause her incredible stomach upset. It only lasted six months, but in that time, I discovered that my body functions better without dairy. It was confirmed later when I did my time on the AIP diet to find food intolerance.
That's how I discovered the amazing versatility of cashew cream. And that's when I started making my own dairy-free Instant Pot coconut yogurt. It's such a great AIP breakfast option (or any dairy-free diet).

Why should I make this coconut yogurt recipe?
Making yogurt in the Instant Pot (dairy-free or otherwise) is so incredibly fool-proof. If you've ever been intimidated by making your own yogurt before, the Instant Pot is your answer. It makes it so hands-off and so simple-it's honestly almost easier than just going to the store to buy premade coconut yogurt.
And my gosh, can you save some serious cash by making your own yogurt at home-especially the dairy-free stuff. At our local grocery store, a five-ounce cup of coconut milk yogurt runs about $1.99. You can make an entire quart-32 ounces worth-of Instant Pot coconut yogurt for less than $4. It'd cost you $12.74 to buy that much pre-made! And when you go through as much yogurt as we do, that adds up fast.
Another (huge) added benefit: you can control everything about your yogurt-the thickness, the tanginess, and most importantly to me, the probiotic levels. Most store-bought yogurts are barely fermented at all-some sources say that yogurt from the store can be fermented for as little as one hour! One hour does not get you much healthy bacteria, but you know what does? Using your Instant Pot to ferment for 24 hours or more. Yogurt that is fermented for 24 hours has more healthy probiotics per cup than any over-the-counter probiotic pill-we're talking billions of good guys helping to keep your gut happy! And it's way more delicious than popping a pill.
Are there any drawbacks to making Instant Pot coconut yogurt?
The one caveat with Instant Pot coconut yogurt-it's never going to get as thick as cow's or goat's milk yogurt without some help. That's because coconut milk just doesn't have the lactose and proteins that transform the texture when fermented.
How do I make thick, creamy homemade coconut yogurt?
If you love good thick yogurt like I do, I highly recommend using any or all of these three ways to get there:
- Use the right coconut milk. Full-fat coconut milk from the can (not "Lite" coconut milk or the coconut milk from the refrigerated cartons) is going to give you the thickest, creamiest yogurt. In fact, if you can find straight-up coconut cream (this is what I usually use), you're going to get the best results.
- Go for a long ferment. Yes, coconut milk won't thicken like cow's milk during fermentation, but it will thicken some. The baseline time I recommend to turn your milk into yogurt is eight hours-but that's not going to thicken your yogurt at all. If you set your fermentation time for closer to 24 or even 36 hours, you're going to get a naturally thicker yogurt.
- Use a thickener and chill. This is absolutely optional, but I usually thicken my yogurt using unflavored beef gelatin (I've also had good results using agar agar for a vegan version). I just add enough to give it a little bit of body-and not turn it into yogurt Jello-and then I chill until completely cold.
It might take you a bit of experimentation to figure out the right combo that makes your family happy. But once you land on it, you'll never go back to buying yogurt again!


What kind of starter do I need for this coconut yogurt recipe?
When you're making your yogurt, you will need to inoculate your batch with either yogurt starter culture or pre-made plain yogurt from the store. I've done both, and they both turn out beautifully. If you choose to use a yogurt starter, this Yogourmet starter is my absolute favorite*. It has very specific strains of bacteria that are great for your tum-tum-my naturopath has actually recommended I eat yogurt only when it's made with the strains in this yogurt starter to protect my gut health.
(*Please note: this starter contains skim milk powder. If you're looking for a completely dairy-free way to start your batch of coconut yogurt, you'll want to use a different starter or a dairy-free yogurt with live active cultures like we mention below!)
The way easier (and cheaper) route is to use premade yogurt as your starter. Just take three tablespoons of whatever plain yogurt you'd like (dairy, soy, coconut, almond-all fine) that has live, active cultures in it-and whisk that in to innoculate your batch of yogurt. Then, when your batch is done, reserve about ¼ cup of it to make your next batch. You'll never have to buy yogurt again! It's the gift that keeps on giving.

What if I don't have an Instant Pot?
Of course, you absolutely don't have to have an Instant Pot to make yogurt. You can do it in the slow cooker or on a heating pad (my preferred method pre-Instant Pot) or even under the light in your oven-basically, any way you can consistently keep your yogurt around 100°F for 8-36 hours while it ferments will do the trick. The Instant Pot just makes keeping the temperature there SO FLIPPING SIMPLE. It removes all the variables and just makes for perfect yogurt every. single. time. Happy yogurtmaking!
How do I flavor or sweeten homemade coconut yogurt?
When the yogurt is finished and cooled is a great time to stir in any sweetener, jams, fruit butters or flavoring like vanilla extract to add flavor. Here are some good options:
- homemade pumpkin butter
- homemade apple butter
- simple blueberry jam
- strawberry jam
- strawberry-rhubarb jam
You can also obviously use this yogurt in any recipe that calls for yogurt. Here are some good places to try out your new batch of yog:
- healthy overnight oats
- strawberry chia pudding
- yogurt with fruit on the bottom
- fruit and yogurt parfaits
📖 Recipe
Instant Pot Coconut Yogurt
Ingredients
- 1 quart full-fat canned or boxed coconut milk I get best results from this coconut cream, but any full fat coconut milk will work
- ¼ cup maple syrup do not sub in honey-it has its own bacteria that will fight the yogurt culture
- 3 tablespoons plain yogurt with live active cultures dairy, soy, coconut, almond-all fine OR one packet of freeze dried yogurt culture (I like this one)
- OPTIONAL THICKENER: 1 to 2 teaspoons unflavored grass-fed beef gelatin OR ½ to 1 teaspoon powdered agar agar
Instructions
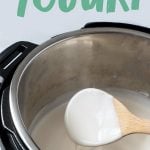
- Pour the coconut milk and maple syrup into the pot of the Instant Pot. Whisk well, then press the "Yogurt" button, and then adjust the setting until you see "boil." Let the Instant Pot run through the process (it's getting the milk up to a temperature of around 185°F), whisking occasionally. No need to place the lid on the Instant Pot during this stage.
- When the Instant Pot beeps that it is finished, allow the milk to cool until it is between 100ºF and 110ºF. This can take upwards of an hour.
- If using starter yogurt: When the milk is at the correct temperature, ladle out about ½ cup of the warm milk into a small bowl, and whisk with the 3 tablespoons plain starter yogurt until smooth. Pour the mixture back into the Instant Pot and whisk well.
- If using freeze-dried yogurt culture: When the milk is at the correct temperature, sprinkle on one packet of the starter culture and then whisk very well to combine.
- If using a thickener, sprinkle on top of the warm milk, and then whisk very well to combine.
- Close the lid of the Instant Pot (no need to seal), and press the "Yogurt" button. Adjust the setting until you see the time display. Set for the desired amount of fermentation time. Eight hours is bare minimum, but I *much* prefer yogurt that has been fermented closer to 24-36 hours. This results in a naturally thick and tangy yogurt-very like regular Greek yogurt. Plus, it has more probiotics! (See notes for more info about time and temp)
- When the fermenting time is up, transfer the yogurt to a glass storage container (I use a wide mouth quart jar) and keep in the fridge. It will thicken up considerably as it cools.
Video

Notes
- If you like thicker, Greek-style yogurt, I recommend using either the gelatin or the agar agar. However, if you want to leave those our, the longer you ferment, the thicker the yogurt gets naturally.
- If you do use the thickeners, the upper range will get you a thicker, Greek-style yogurt, while the lower will just thicken to a "normal" yogurt consistency.
- Since coconut milk doesn't have the same kind of sugars that cow's milk has, the added maple syrup is to give the bacteria a jump-start meal-they eat almost all the sugars and the resulting yogurt isn't sweetened at all.
- My favorite starter (linked in the post and the recipe above) contains skim milk powder. If you're looking for a completely dairy-free way to start your batch of coconut yogurt, you'll want to use a different starter or a dairy-free yogurt with live active cultures.
- Some people recommend using opened probiotic capsules as yogurt starter, and it can work-depending on your probiotic. Proceed with caution though, as some can make yogurt taste really not good.
- When you spoon your yogurt into a container for storage, make sure to reserve a little bit for the next batch of yogurt in a small jar (I just fill one of these quarter-pints). That way, you'll never be without yogurt starter.
- I love my Thermapen for yogurt-making (and honestly, everything else in the kitchen), but if you don't have a thermometer, it's not a big deal. Another trick is to place a (clean!) finger in the milk-when you can hold your finger in the milk while counting to ten, it's cool enough to pitch in the yogurt starter.
- Some folk in the comments mentioned that their Instant Pot only maintained the desired yogurt fermentation temperature (around 110°F) when set for up to 8 hours. Set for longer than 8 hours, their IP used a lower temperature (around 88°F). Our IP doesn't adjust the temperature in this way, so please check your owner's manual before choosing your time setting!
Mine was a flop too. Very liquidy. I wish I would have read the comments first. Seems like this is pretty common.
Have you ever tried adding vegan protein powder to the yogurt? Would you add it before or after fermentation?
I haven't, but I'd add any mix-ins after fermentation.
In case you haven't noticed, the Yogourmet start contains dairy! It isn't vegan...
I just got my yogurt starter and realized the same thing! The first ingredient is Milk powder! I'm allergic to dairy. That's the main reason I was making this. I'm really disappointed.
Is there a way to make flavored coconut yogurt, like Vanilla, strawberry or blueberry in the cooking process? Or does that have to be added at the end?
I'd recommend adding it in the end after fermentation.
Hi, I am trying this recipe right now - seems so easy. I'm really excited. Do you have nutritional info? like how many calories?
I accidently let my yogurt mixture cool for 1.5 hours after boiling, it was 100 degrees. Is it ok or did I leave it for too long?
100° is just perfect!
HELP! I was so excited to use your recipe and it flopped, but I'm sure the problem was on my end. I used a Trader Joe's full fat coconut cream and probiotic capsules. When the 24 hours ended, my yogurt smelled good and looked fairly thick and i thought it would thicken up to a very nice consistency once chilled. When I got back to it in the morning, the cream had separated into a thick block on top and it was nothing but water on the bottom. Nothing that could be stirred together. What went wrong?
Sometimes coconut milk yogurt will separate, you can put it through the blender to get a nice creamy yogurt. 🙂
Thanks so much for this! I’m excited to try it out. Question... I noticed the freeze dried yogurt starter you posted has skim milk as the first ingredient- is there a vegan option you recommend?
As far as an actual vegan starter, I'm not sure about that, but I've used plain coconut, almond, or soy yogurt from the store as a starter with good results.
Just curious if I could replace some of the coconut milk with heavy whipping cream? Would that help thicken it up? When I make cows milk yogurt, I put in heavy whipping cream in place of some of the milk and my yogurt gets so thick that I don't even have to strain it and there is very little whey. I'm not necessarily looking to be dairy free..just trying to cut out as my carbs as I can... that's why I was looking at the coconut milk option.
Mine came out liquid. Did I do something wrong or is it just that runny?
It's pretty runny by nature! You can thicken it up with some gelatin or agar agar.
I just made my first batch and it is DELICIOUS! However, my yogurt separated. The top layer is this beautiful thick, cream but about half of it is still liquid and clear underneath the cream layer. Has this every happened to anyone? I didn't use a thickening agent this time. Wondering if that would keep it all mixed together?
I've had it happen before (different coconut milks perform differently!) and a quick go-round in the blender solved the problem for me.
Have you made the yogurt using almond milk before? I bought almond milk from Trader Joe's thinking I recalled a recipe for Instant Pot almond milk yogurt but I'm being told I can only use homemade almond milk in that commercial almond milk is too watery. Thoughts?
I haven't!
My yogurt is still sweet, which it sounds like was maybe because the starter didn't take off- I'm wondering if I could add more plain yogurt and re-ferment the whole batch? It doesn't taste rancid, just still sweet
Is there an easy way to make this coconut yogurt without the yogurt button?
My instant pot is making my first batch as we speak :-). I was reading at the bottom of the recipe where it says the yogurt will not be sweet. Is there specific method or recommendation you have for sweetening the finished product? Thanks!
I haven’t tried making coconut yogurt yet only cows milk yogurt. But I sweeten that with some melted honey and then pop it in the refrigerator and it thickens up good.
Oh man what clear instructions! You and I have the same mind! I saw a lot of other confusing recipes for this out on the web but this was the best & beautifully written! And now I will finally try it with your clear guidance...❤️
I used 1 can of Aroy-D coconut milk and 1 can of Natural Value coconut cream which is about 4 oz less than a quart so I reduced the amount of maple syrup slightly. I only had 1.5 tbsp of a good quality store bought coconut yogurt so I supplemented with the powder of 3 probiotic capsules. The end result definitely smelled and tasted tangy but it's also a little sweet. Did the probiotics just not eat all the maple?
I added the gelatin at the end and blended it in my Vitamix. After refrigerating overnight it was super thick!
Yup, it sounds like all the maple syrup didn't get eaten away. It'll still be good to eat!
Tay, I've had the same problem.... and I've tried this 4 different times! Two of them I used gelatin AND agar agar powder! I have no idea how to make it thick. I just posted another comment to ask if the aurthor has any ideas for what I can do.
CB, I'm curious: when you say you added the gelatin at the end, do you mean AFTER it fermented? and that worked? I've been having trouble getting my yogurt thick enough. Would you recommend doing what you did?
Can xanthan gum be used at the thickener?
We've never worked with it before, so I'm not sure. If you try it, let us know how it goes!
Hi! Thank you for this recipe. I've been looking for an IP coconut milk yogurt recipe for a long time. When you reserve some of the final product to save for the next batch -- how long does it keep in the fridge? Thanks.
You'd be good keeping it for up to two weeks!
Have you tried making coconut yogurt without an instant pot? I'd love to make this but don't have one.
I have, but I have the most consistent results using my IP.
I just made this recipe and the coconut fat did not stay incorporated. It tastes like yougurt but the fat pieces make it unenjoyable to eat. What did I do wrong?
Different brands of coconut milk work a little differently. You can probably just blitz it for a bit in a blender to get it all whirled back together and be good!