Gluten-Free Pie Crust Recipe


No crumbly disappointments here-this gluten-free pie crust recipe is tender, buttery, and behaves like the real deal, full-flour version. Fill it up with whatever gluten-free pie filling you want for a pie that any gluten-free baker would be proud of.
🔍 Recipe At-A-Glance: Gluten-Free Pie Crust Recipe
- 🕰️ Prep Time: 45 minutes
- ⏰ Cook Time: 35 minutes
- 💛 Flavor Profile: Buttery and flaky, just like any good pie crust should be.
- 🍽️ Good For: Meeting your guests' (or your own) dietary needs at Thanksgiving. You shouldn't have to miss out on pie just because you're gluten-free!
- 🔄 Make Ahead: Refrigerate this pie dough for up to 3 days, or freeze for up to 3 months to save yourself time on Thanksgiving!
- 🧡 Difficulty: Varies depending on the gluten-free flour used (pro tip: Cup 4 Cup Multipurpose Flour makes the easiest pie crust!).
Summarize and Save this Recipe Using:
Jump to:
🧡 Why You'll Love This Recipe

Hi friend: Nothing says comfort quite like a homemade pie fresh from the oven. But what if you or someone you love can't eat gluten? Have no fear! I took to the kitchen and tested dozens of batches of gluten-free pie crust to find a pie crust recipe that's so good, people don't even notice it is wheat-free.
Here's why you'll love this recipe:
- Simple recipe: If you're on the fence about making your own flaky gluten-free pie crust, you should take a leap of faith. Homemade pie crust is a million times more delicious than store-bought varieties. And you'll be amazed at how easy (and delicious) your pies will be!
- Undercover gluten-free: This pie crust recipe is so good, I've had guests not even realize it is wheat-free! This + my gluten-free stuffing recipe will guarantee that nobody is left out at Thanksgiving!
- Thoroughly tested: This crust recipe is the result of months of work, and I'm so proud of it! It's flaky, buttery, crisp, and 100% gluten-free.
🥧 The Ingredients You Need
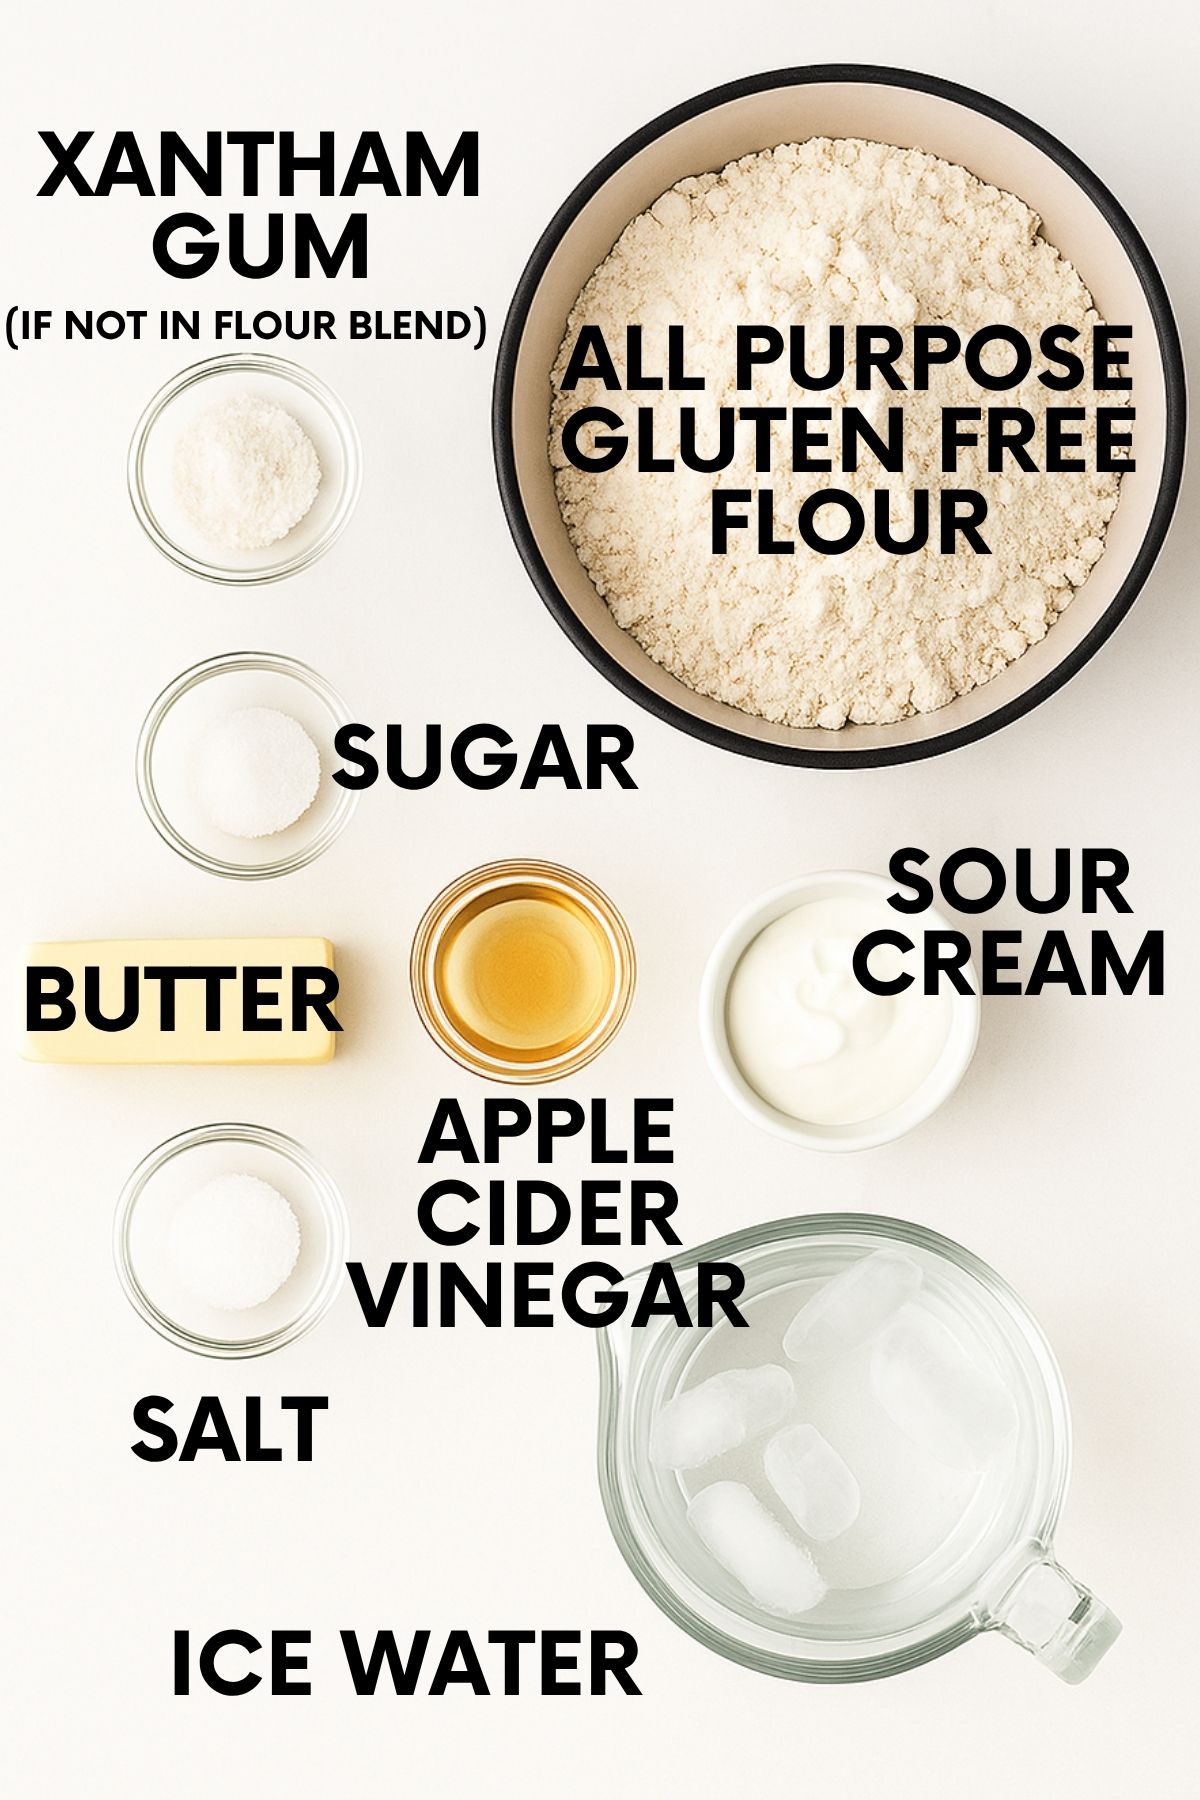
- Gluten-free flour: Cup 4 Cup Multipurpose Flour is my favorite gluten-free flour blend for ALL gluten-free baking. I haven't found anything it can't do yet!
- Butter: I would definitely recommend using butter instead of margarine in your pie crust. One of the reasons is that butter is hard when it's cold, which allows it to form crumbles in your flour, so your dough is a perfect consistency. Margarine is softer and won't produce those pea-sized crumbles you're looking for. The other reason to choose butter is taste. If you're in a pinch, you can use margarine, but you might sacrifice on the flavor and texture.
- Sour cream: Yup! I know it seems strange, but the acidity of the sour cream helps with leavening, and the fats help add tenderness and flakiness to the gluten-free pastry. You'll love it!
Make sure to check the recipe card below for the full ingredients list, along with quantities and my expert tips and tricks.
🔁 Variations & Substitutions
- Not gluten-free: I have a all-butter pie crust recipe you're bound to love if you don't have any dietary restrictions. It's been tested and loved in thousands of homes!
- Make it savory: If you're opting for a savory pie (think chicken pot pie or Mediterranean quiche), make sure you omit the sugar in the crust.
- Go nuts: Want a nutty pie crust? Try my cranberry curd tart, which is naturally gluten-free, down to the almond crust.
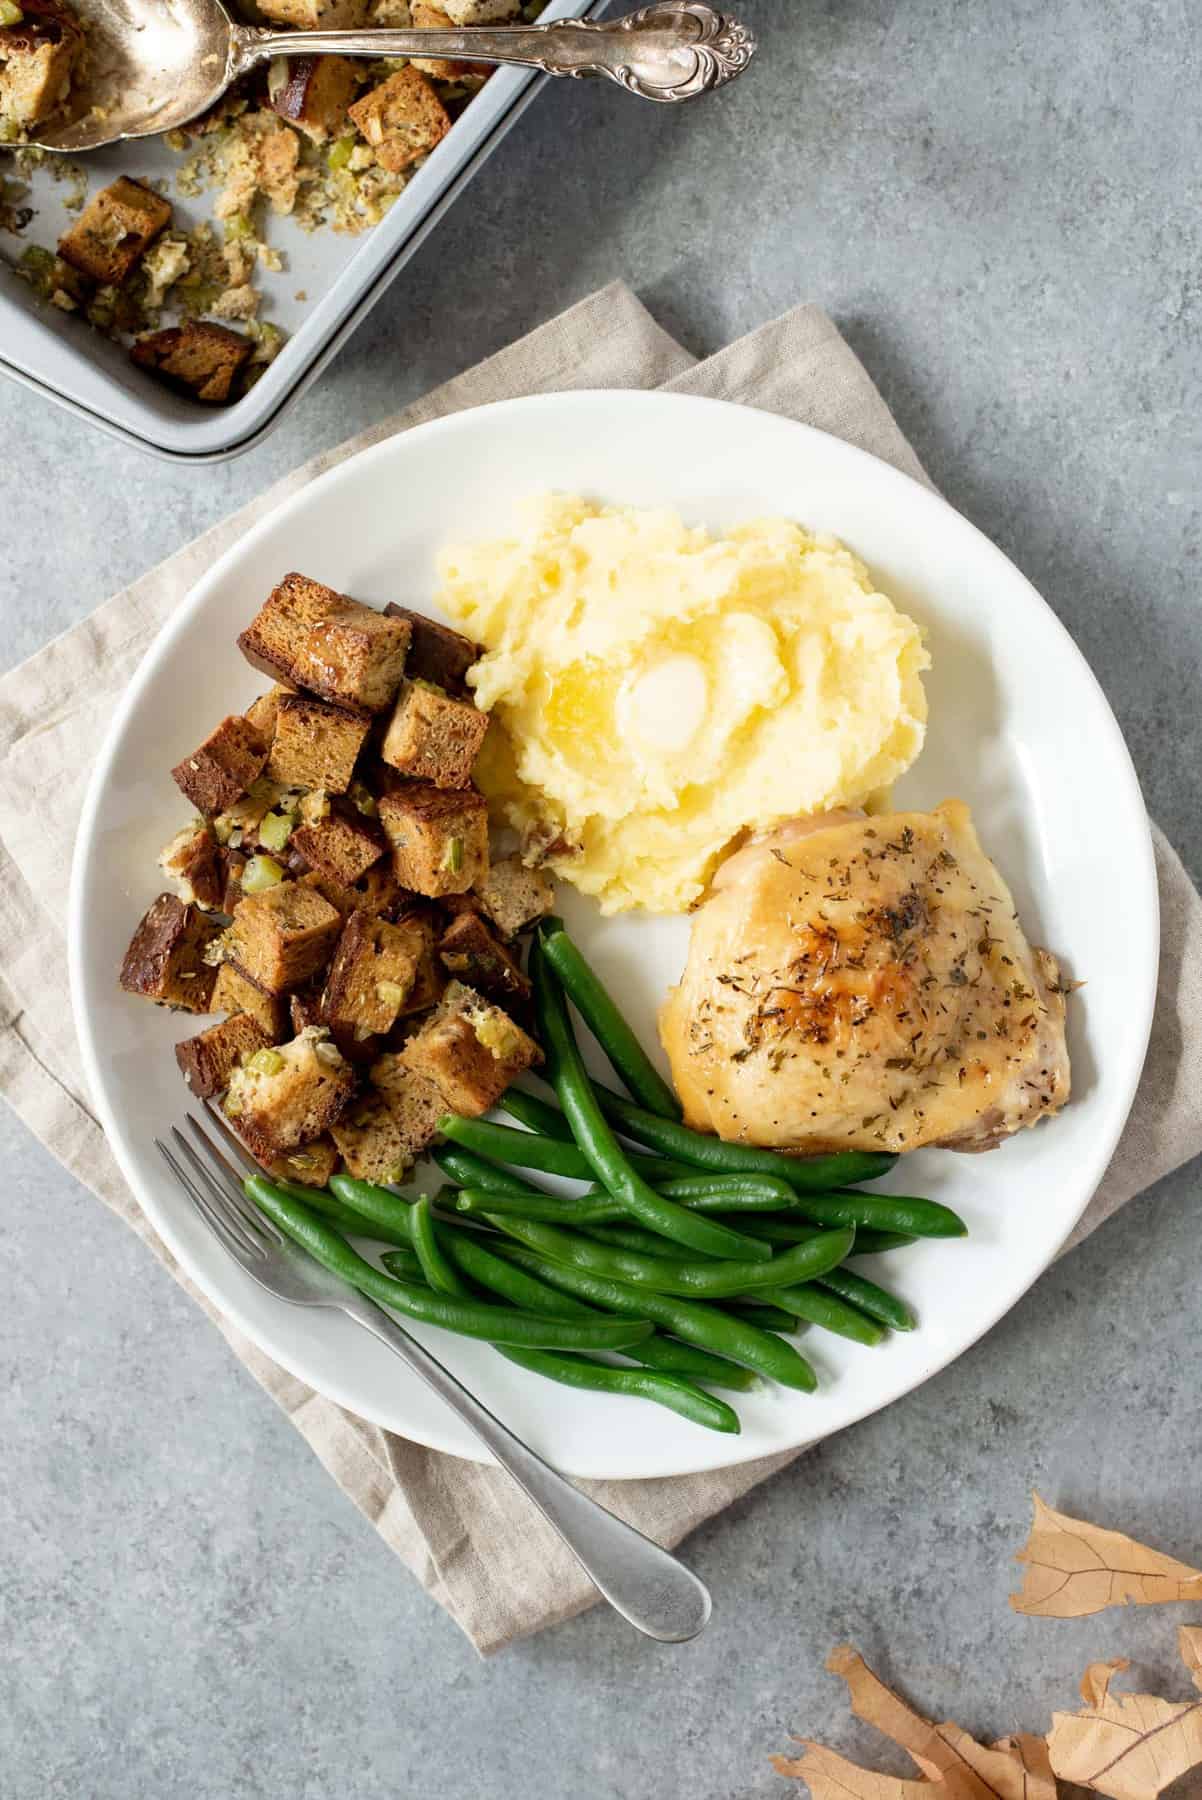
- Perfect gluten-free pies: Once you have a gluten-free pie crust, the pie world is your oyster. Try using this crust with my canned apple pie filling for the best-ever apple pie, or use it to make my sugar cream pie recipe, sweet potato pie, or my derby pie recipe (use GF flour in the filling).
🥣 Gluten-Free Pie Crust Recipe How-To
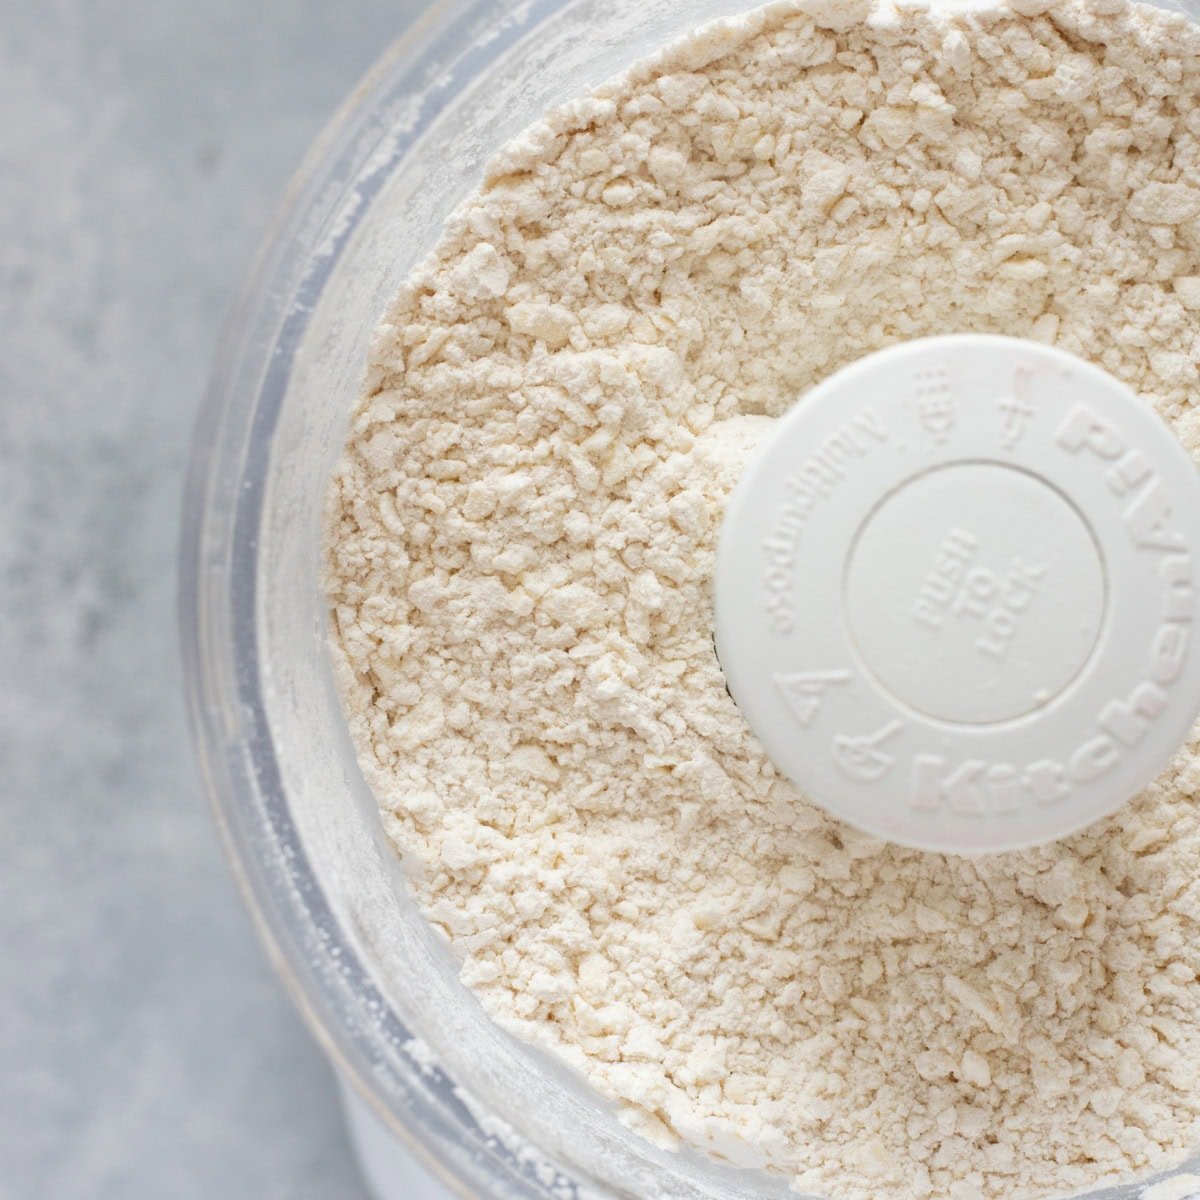
Step 1: Pulse the dry ingredients together in a food processor, then add the butter, vinegar, and sour cream and pulse again. The butter chunks will be about pea-sized when it is blended enough.
Give a handful of the dough a squeeze-if it sticks together, you're ready for step 2. If it is crumbling apart, pulse in a tablespoon of water at a time until the dough holds together better.
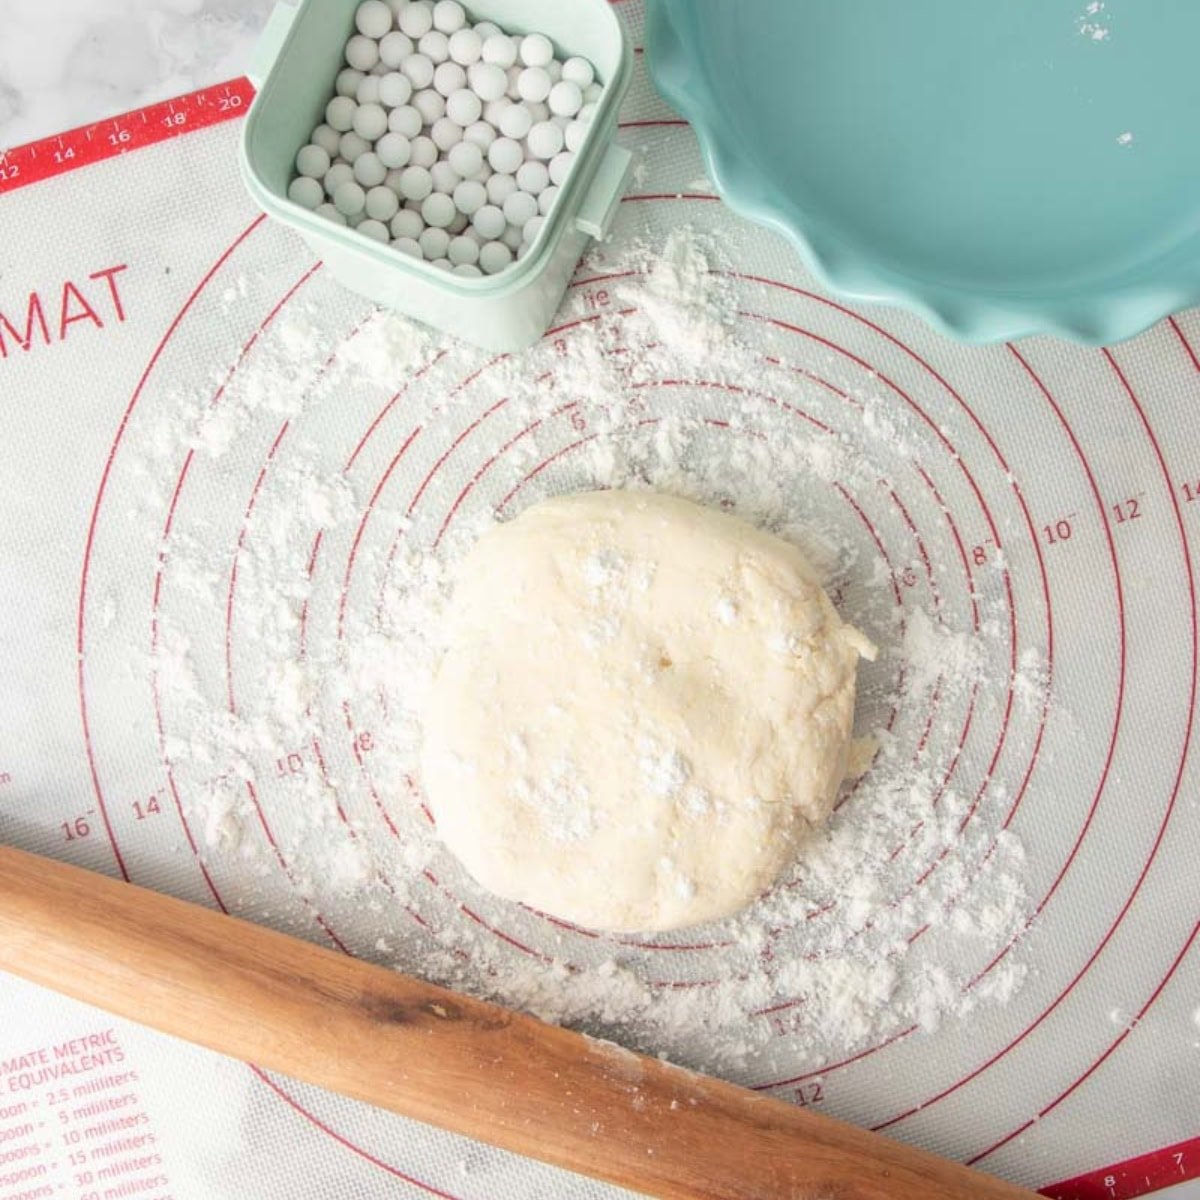
Step 2: Shape the dough into a disc, wrap it in plastic wrap, and refrigerate for 20 minutes.
Set the dough on a floured surface and let it warm up for about 5 minutes.

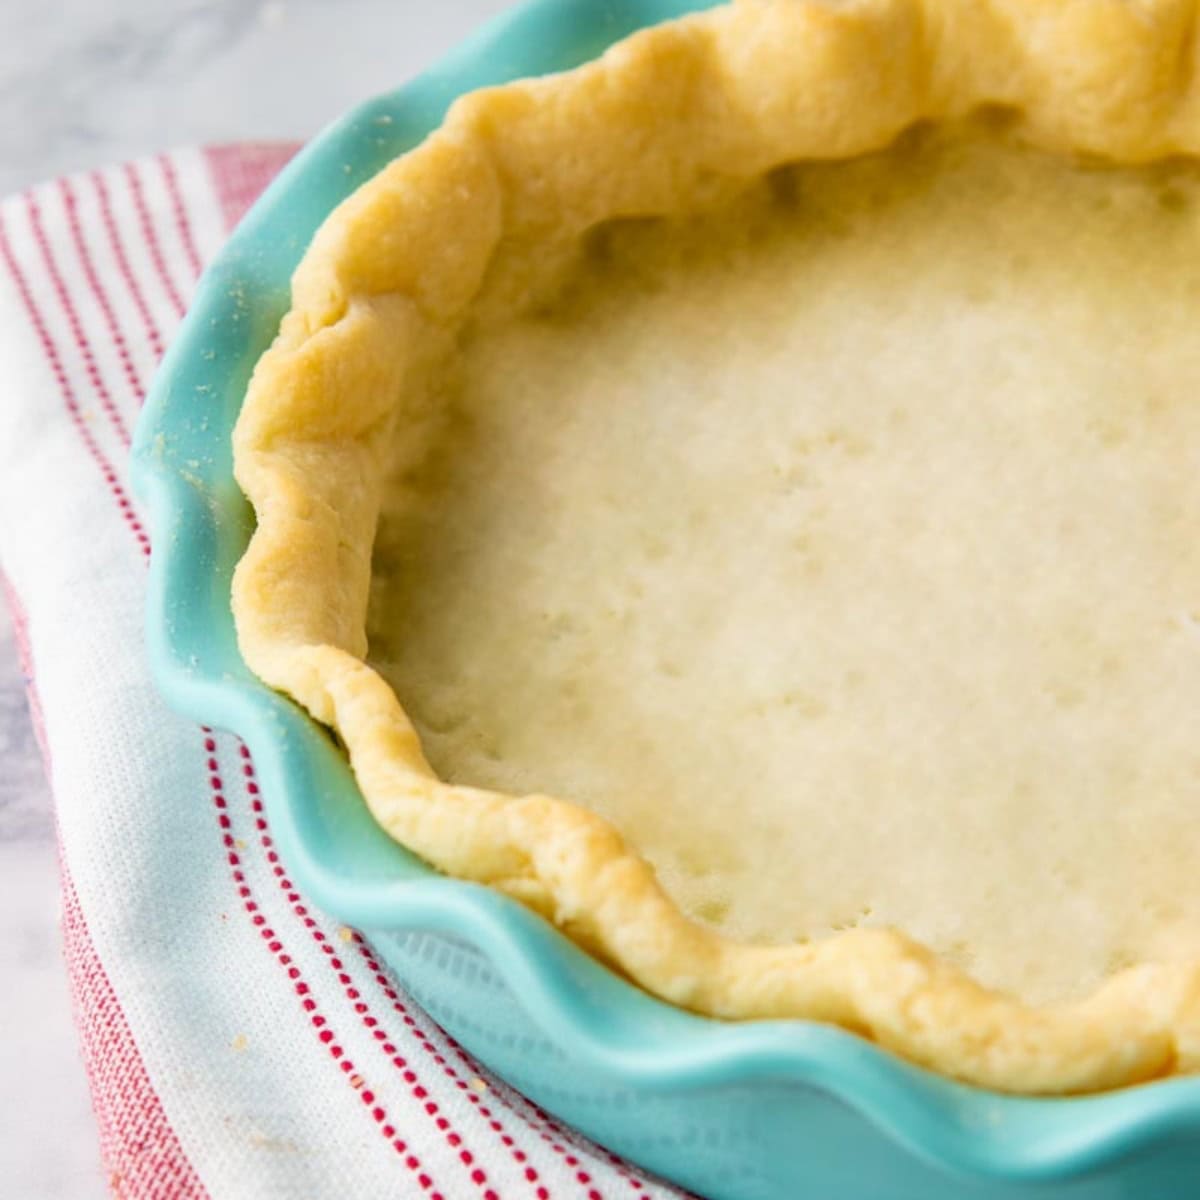
Step 3: Use a rolling pin to roll the pie crust about ⅛" thick-that's about the height of two quarters.
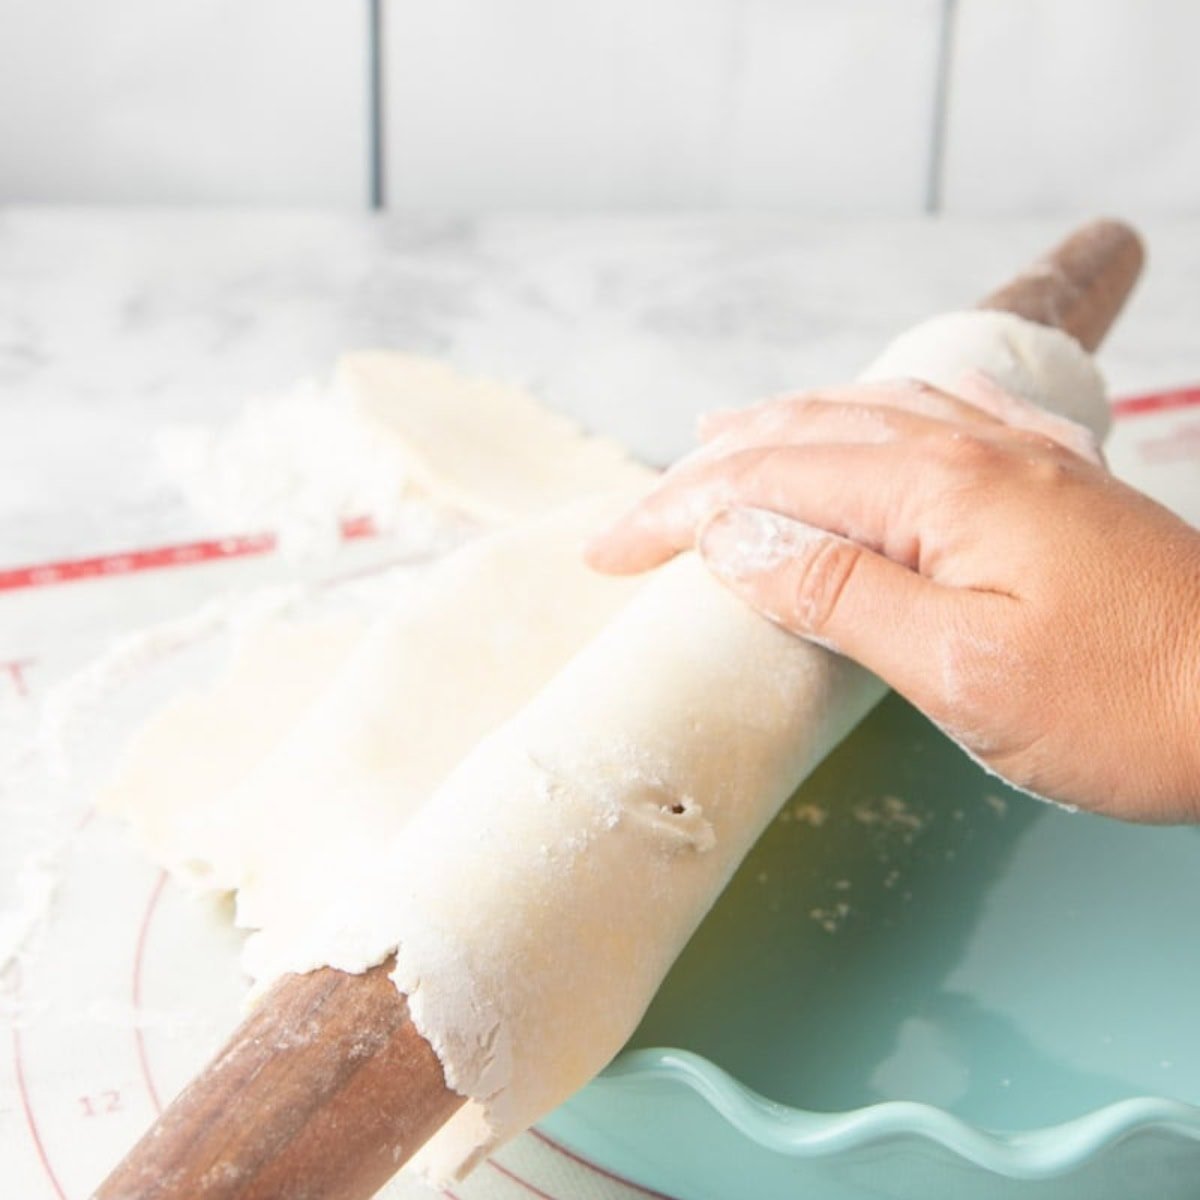
Step 4: Drape the pie crust over a rolling pin to transfer the crust to a 9-inch pie pan. Use your hands to gently press the crust into the pan-you'll have about 1" of crust hanging over the edges.
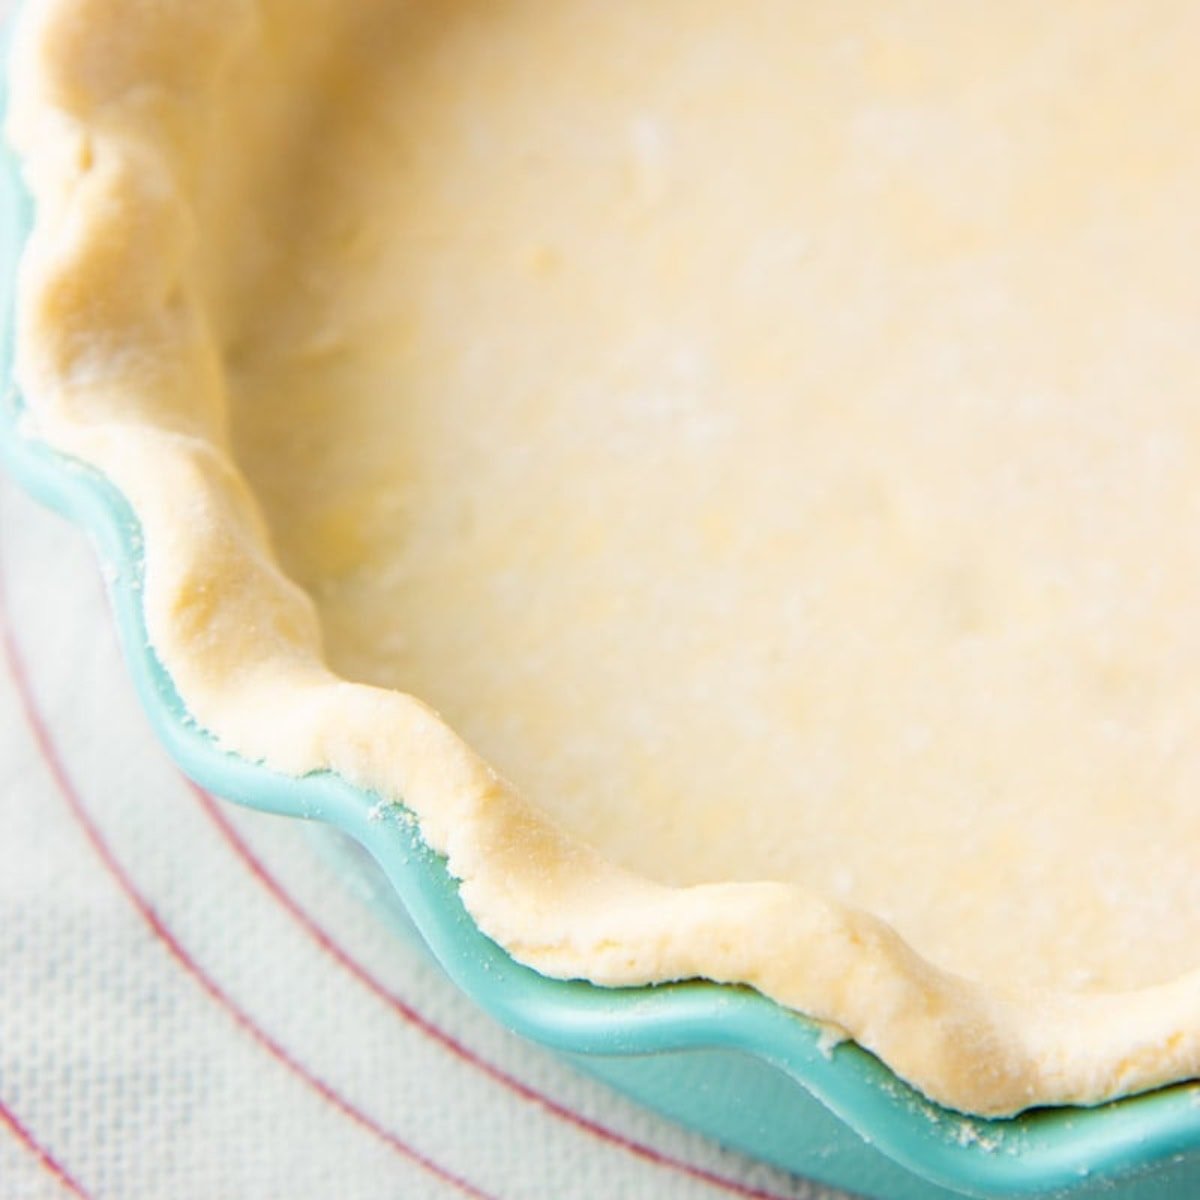
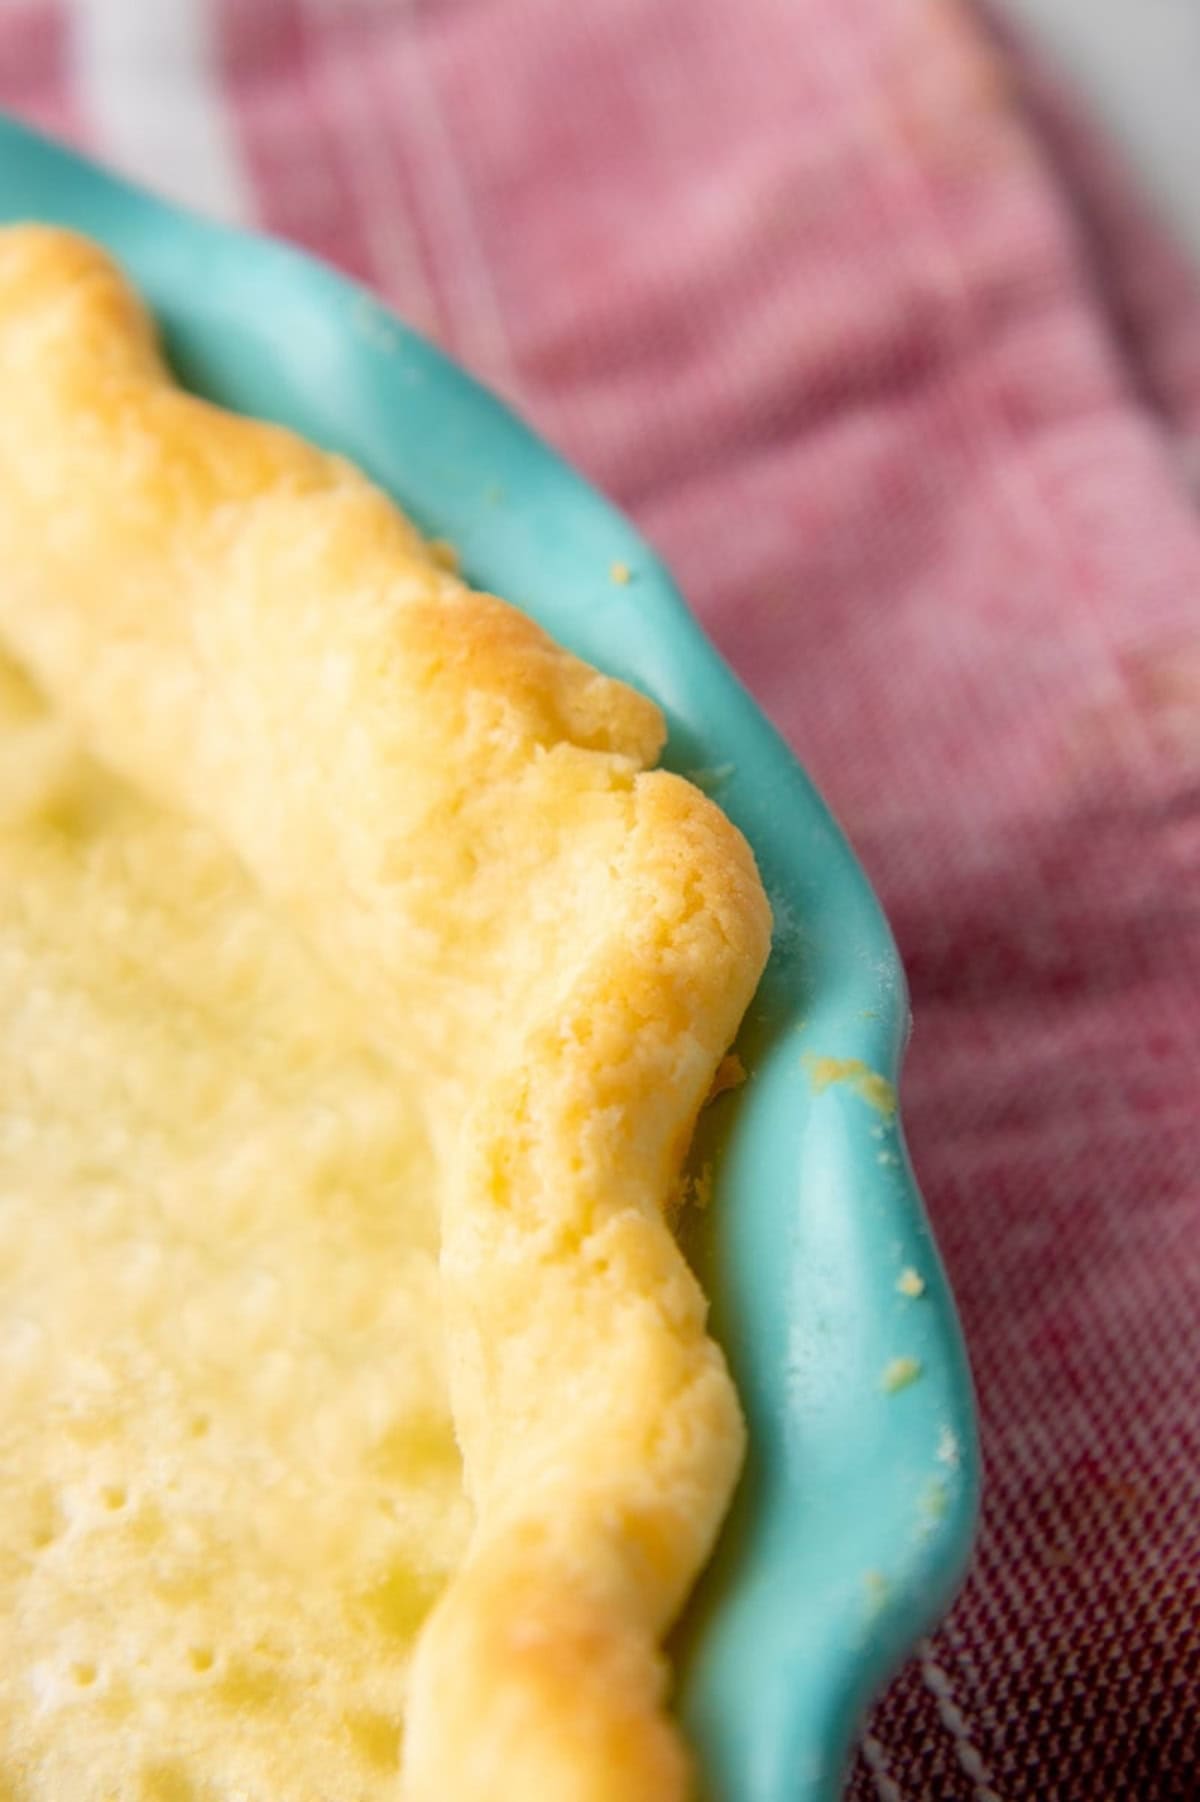
Step 5: Pretty up the edges of the crust-trim the overhang, flute it, or crimp it. Now you're ready to either add your pie filling or blind bake, depending on the type of pie and your pie recipe!
🙋🏻♀️ Gluten-Free Pie Crust Recipe FAQs
The main complaint you hear about gluten-free pastry is that it is too crumbly! There are a couple of reasons this might happen:
1. You might just need a little bit more water. Try dipping your fingers in some water and working it into the dough. You don't want to add too much water, so add just a sprinkle at a time.
2. You didn't let your crust rest in the fridge. Not only does this time chill the butter in the crust, but it also gives the flour time to absorb the moisture, making it less crumbly. No skipping the chill time!
3. Your crust might be too cold. Yes, we want the crust chilled before rolling, but not too chilled! Let the crust warm slightly before trying to roll again.
4. You might have used the wrong kind of gluten-free flour (see more below). Not every gluten-free flour is created equally, and some are harder to work with than others.
When you head to the grocery store, you're looking for a gluten-free "cup to cup" or "all-purpose" flour blend. These flours are a mixture of gluten-free flours and starches. I wish it was as easy as that, but even those mixtures have some pretty big disparities. I tested this recipe with six different brands of gluten-free flour, and here are the results:
My favorite option is Cup 4 Cup Multipurpose Flour. The flavor and texture of the crust was top notch, and everything I've made with this blend has been easy to roll out and work with.
Better Batter Original Blend Flour, Bob's Red Mill 1-to-1 Baking Flour, Simple Truth All-Purpose Gluten Free Flour, and King Arthur Measure for Measure all made crusts with good flavor and texture, but the doughs were slightly harder to work with. They crumbled easily during rolling and forming the crust, and they also required more water to bring them together.
Pillsbury Gluten Free All Purpose Flour Blend was very difficult to work with during rolling and forming the crust-so much so, I ended up just tossing the whole batch!
👩🏻🍳 My Expert Tips & Tricks
- Full-fat sour cream: Make sure to grab full-fat sour cream here. The sour cream adds moisture and flavor to your gluten-free pie dough. The higher the fat content, the more flavor and tenderness there will be.
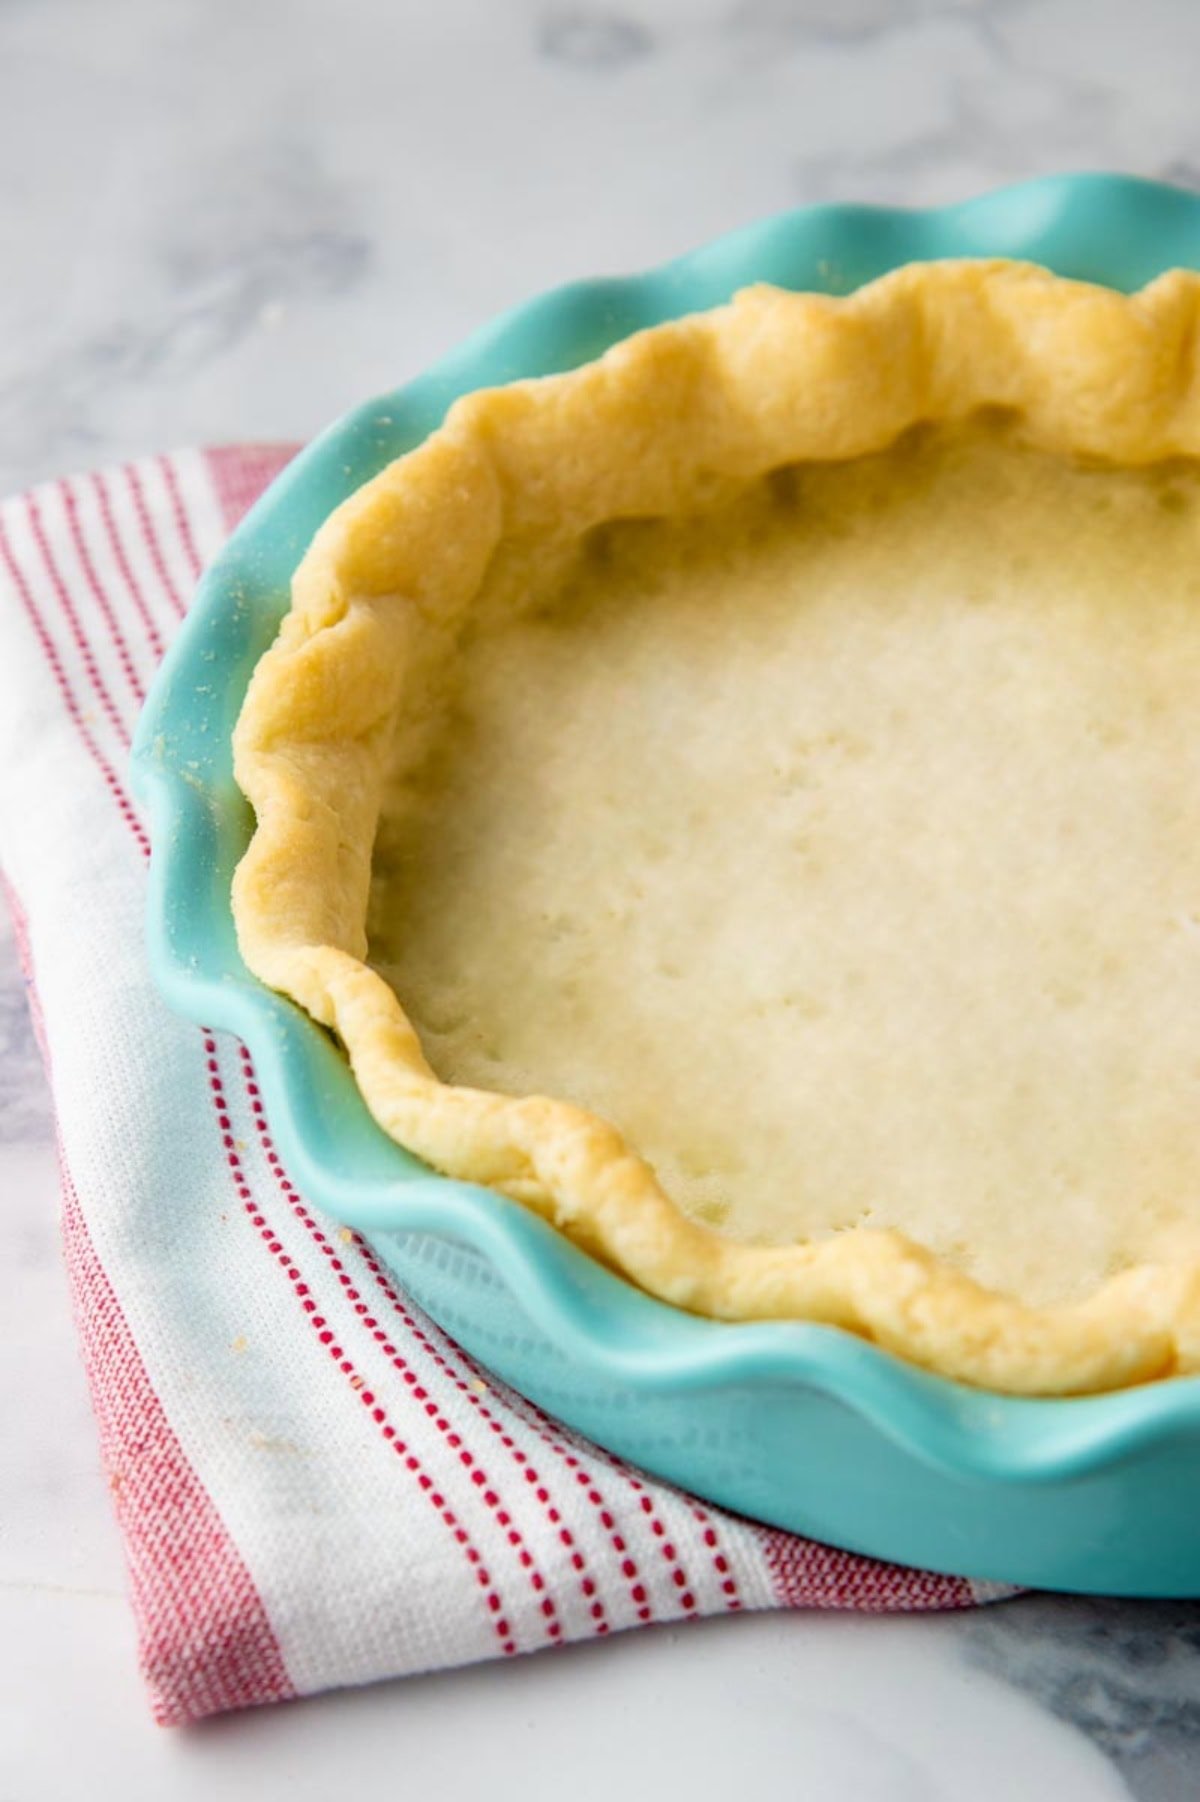
- Pre-bake your pie crust: You may have come across a pie recipe that calls for a blind-baked crust, and this means it needs one that's been pre-cooked. To do this, place the dough in a pie dish and line the crust with parchment paper or aluminum foil. Fill the pie crust with pie weights or dried beans, and then stick it in the fridge for half an hour before baking it for 20 minutes in an oven preheated to 375°F. Remove the pie from the oven and take the weights and parchment paper out. Use a fork to prick a few holes in the crust and bake for another 15 minutes.
- Freeze it: This recipe will last up to three days in the fridge, but to freeze it, all you have to do is double-wrap the balls of dough in plastic wrap and place them in a zip-top freezer bag for up to three months in the freezer. Let the dough thaw overnight in the fridge before rolling it out.
- Second freezing option: Alternatively, you could roll out the pie crust ahead of time, place it on a tinfoil pie plate, and freeze the crust right in the dish. When you bake your pie, there's no need to thaw it-instead, add two to three additional minutes to your cooking time.
Want to save this recipe?
🦃 More Gluten-Free Thanksgiving Recipes:


If you tried this gluten-free pie crust recipe or any other recipe on my blog, please leave a 🌟 star rating and let me know how it went in the comments!
📖 Recipe
Easy Gluten-Free Pie Crust
Ingredients
- 1 ½ cups all-purpose gluten free flour (see notes about GF flours)
- ¾ teaspoon xanthan gum omit if your gluten free flour already contains it
- 2 teaspoons sugar omit if using for a savory pie
- ¼ teaspoon fine sea salt
- ½ cup unsalted butter cut into ½-inch slices
- 1 teaspoon apple cider vinegar
- ⅓ cup sour cream full fat
- 0-5 tablespoons ice water
Instructions
Food Processor Instructions (preferred method)
- In the basin of a food processor, combine 1 ½ cups all-purpose gluten free flour, ¾ teaspoon xanthan gum (if using), 2 teaspoons sugar, and ¼ teaspoon fine sea salt. Pulse to combine.
- Add in ½ cup unsalted butter, 1 teaspoon apple cider vinegar, and ⅓ cup sour cream. Pulse until the mixture comes together, and the butter is chopped into about pea-sized chunks.
- Grab a handful of the mixture and squeeze it together. If it forms well into a solid mass, you're ready to move to the next step. If the mixture is still a little too crumbly, add in the ice water, a tablespoon at a time, pulsing after each addition, until it holds together in a ball when squeezed.
- Dump the mixture onto a flat surface, and form into a disc. Wrap the disc in plastic wrap, and stash in the fridge for at least 20 minutes before rolling out, or until ready to use, up to 3 days.
Mixing Bowl Instructions
- In a medium-size mixing bowl, combine the flour, xanthan gum (if using), sugar, and salt. Stir to combine.
- Add in the butter. Using two forks, a pastry blender, or your fingers, combine the butter and flour mixture until the butter is chopped into about pea-sized chunks.
- Add in the apple cider vinegar and sour cream. Stir until well combined.
- Grab a handful of the mixture and squeeze it together. If it forms well into a solid mass, you're ready to move to the next step. If the mixture is still a little too crumbly, add in the ice water, a tablespoon at a time, stirring after each addition, until it holds together in a ball when squeezed.
- Dump the mixture onto a flat surface, and form into a disc. Wrap the disc in plastic wrap, and stash in the fridge for at least 20 minutes before rolling out, or until ready to use, up to 3 days.
To Roll Out and Bake
- After chilling time, remove the pie dough disc from the fridge, and allow to warm for 5 minutes.
- Unwrap dough and place on a floured surface, and then roll using a rolling pin until about ⅛" thick. Protip: two quarters stacked on top of each other is about ⅛"-which is an easy way to measure your pie crust thickness.
- Roll the pie crust onto the rolling pin, and then unroll onto a 9-inch pie pan. Gently push to fit the pie crust to the plate-there should be about a 1" overhang.
- Trim, flute, crimp or otherwise seal the edge of the crust. Fill with filling and bake according to pie recipe, or blind bake: To blind bake, line the crust with parchment paper or aluminum foil. Fill the pie crust with pie weights or dried beans, and then stick it in the fridge half an hour before baking it for 20 minutes in an oven preheated to 375°F. After the 20 minutes are up, remove the pie and take the weights and parchment paper out. Use a fork to prick a few holes in the crust and bake for another 15 minutes.
Notes
- We have tested this recipe with six different gluten-free flour blends:
- Our favorite option is Cup 4 Cup Multipurpose Flour-the flavor and texture were top notch, and it was easy to roll out and work with.
- Better Batter Original Blend Flour, Bob's Red Mill 1-to-1 Baking Flour, Simple Truth All Purpose Gluten Free Flour, and King Arthur Measure for Measure all had good flavor and texture, but were slightly harder to work with. The crusts were all workable, but they crumbled easily during rolling and forming the crust and required more water to bring them together.
- Pillsbury Gluten Free All Purpose Flour Blend was very difficult to work with during rolling and forming the crust-we ended up just tossing the whole batch!
- Use full-fat sour cream for the best results.
- Freeze the dough balls for up to three months, or shape the pie crust in a foil pie plate and freeze it there.
Gluten-free pastry is so often dry, crumbly, and grainy...but not this pie crust! It's so buttery and flaky that you can hardly tell it is gluten-free!
Hi...if you use salted butter...do you omit the salt?
Hi Lorie! Since it's hard to predict how salty your salted butter will be, we recommend reducing or omitting the salt when using salted butter. You can always add more the next time if you find it's less salty than you'd like!