
Super Easy Homemade Cinnamon Ornaments
I don't know what it is about Christmas that brings out the raging craft monster in me, but it's pretty much guaranteed that I'm covered head to toe in glitter and glue for the entire month of December.
There are so many craft projects that I could never "find time" for during the rest of the year that magically bubble up to the top of the priority list come Black Friday. Suddenly my brain is like, "Oh yeah, I know you have a deadline for an article, but the most important thing right now is for you to drink eggnog, listen to Christmas music, and use lots of glitter. It's vital. The world will end if there isn't glitter."
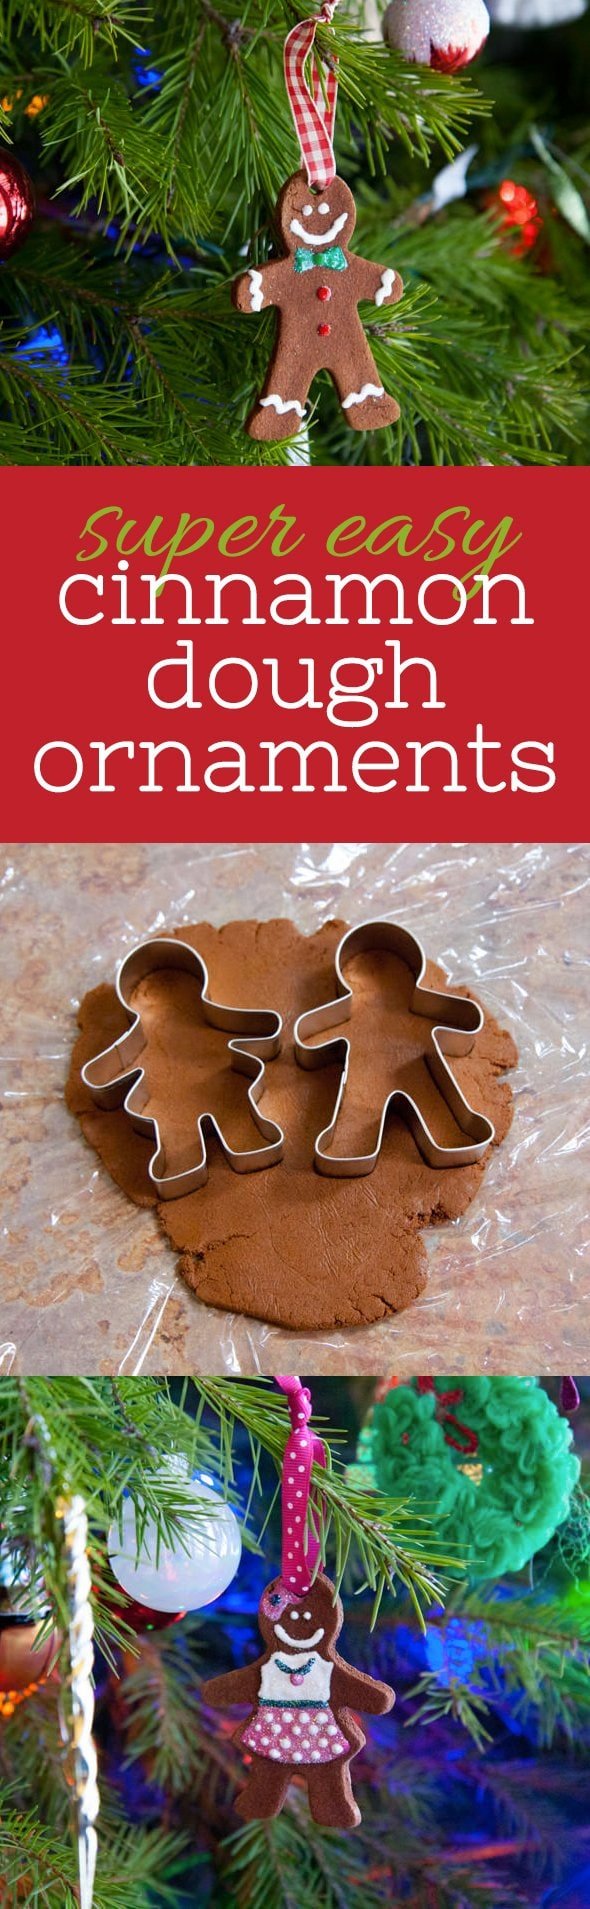
One of the fun craft projects I took on this past weekend was making cinnamon ornaments. If you've never made cinnamon ornaments, they're super easy, smell amazing, and last pretty much for forever.
They're meant to look like gingerbread, but unlike the regular cookie version with sugar and butter and eggs and all that perishable stuff, these ornaments are made from only three ingredients-ground cinnamon, unsweetened applesauce, and craft glue-which helps them last for ages. You mix it all together into a dough, cut it out just like regular cookies, dry, decorate, and hang. And you have a bunch of amazing smelling ornaments that will last for years and years!


Making these is a super fun project with kids (keep in mind: although the dough isn't toxic, it also isn't edible, and keeping little fingers from nibbling might be tricky-you can leave out the craft glue if you want). Juni really got into making these this year, and it's nice to have some fun homemade keepsakes on our tree that we can look back on and say, "Hey, remember that snowy afternoon when we learned how to make snow ice cream and brought out the puffy paints and glitter glue for cinnamon ornaments?"
There are a million different recipes and processes out there for how to make cinnamon ornaments, but let me show you how we did ours. Let's get to crafting! I'm going to do a full tutorial first, but you can scroll to the bottom of the post for a printable version if you prefer.
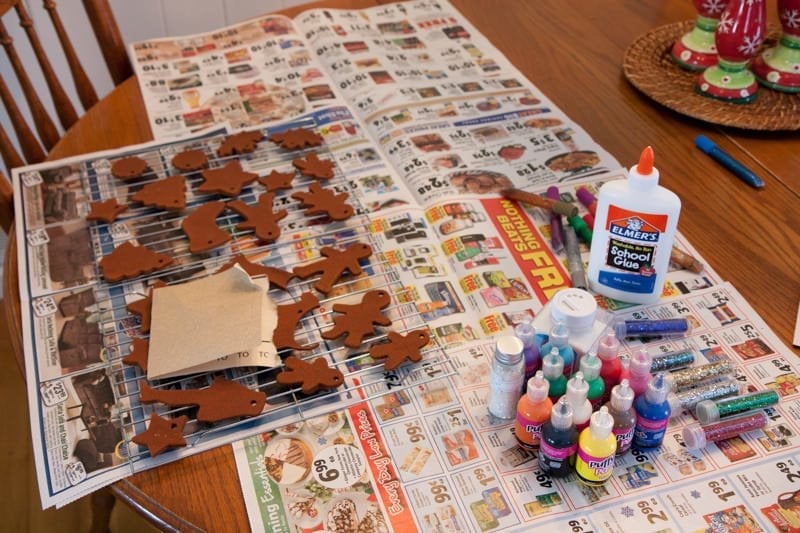
First up, as any good crafter knows, gather your stuff. You probably have just about everything you need already in the house.
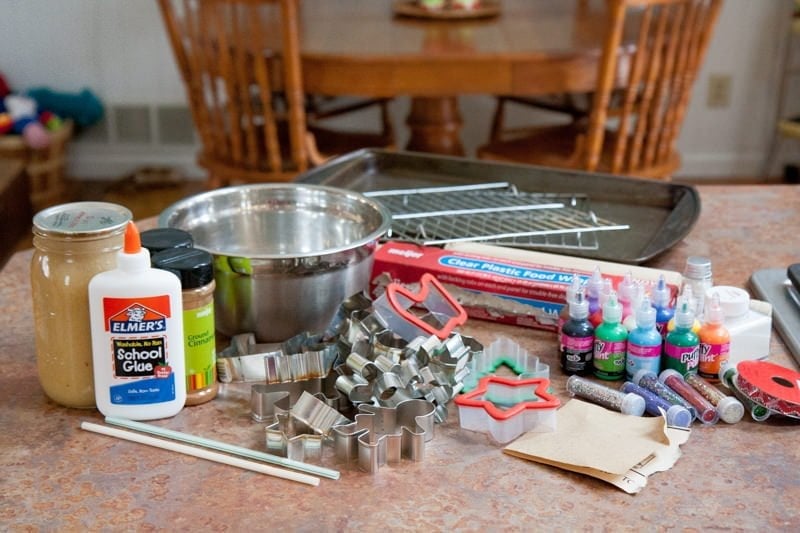
You'll need:
- 1 cup unsweetened applesauce
- 1 ½ cup ground cinnamon (look for the cheap, off-brand stuff-save the good stuff for your cinnamon rolls)
- 2 tablespoons craft glue, optional (I think this makes the ornaments a bit more sturdy, but you can do without it)
- Mixing bowl
- Drinking straw
- Plastic wrap
- Rolling pin
- Baking racks and baking sheets
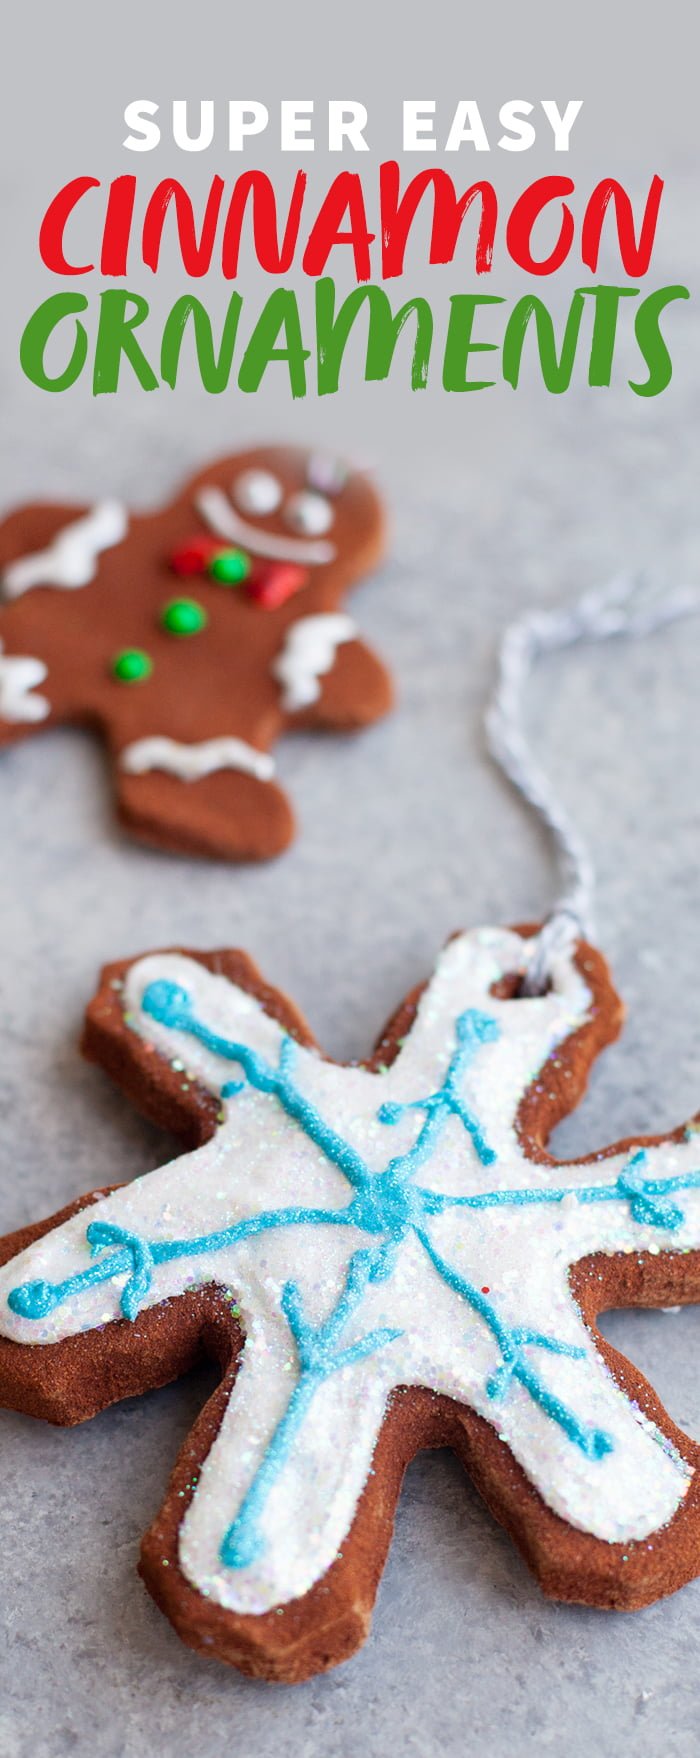
- Cookie cutters
- Sandpaper
- Oven, food dehydrator, or just an out-of-the-way spot (for drying)
- Glitter, puffy paints, rhinestones, etc. for decorating, optional
- Ribbon or hooks for hanging
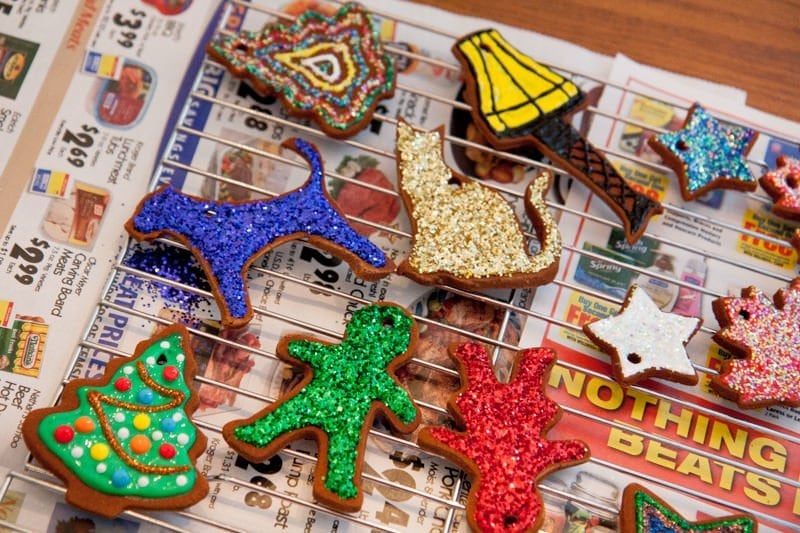
As far as decorations go, these cinnamon ornaments can really be as simple (just plain dried dough on a pretty ribbon) or over-the-top (GLITTTEERRRRR!) as you'd like. I really like the use of puffy paint, because I think it looks like big, thick, creamy frosting when dried.
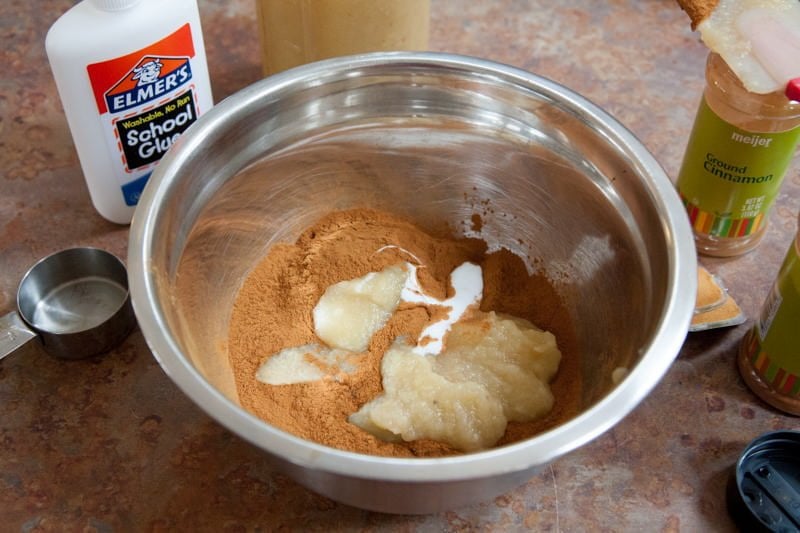
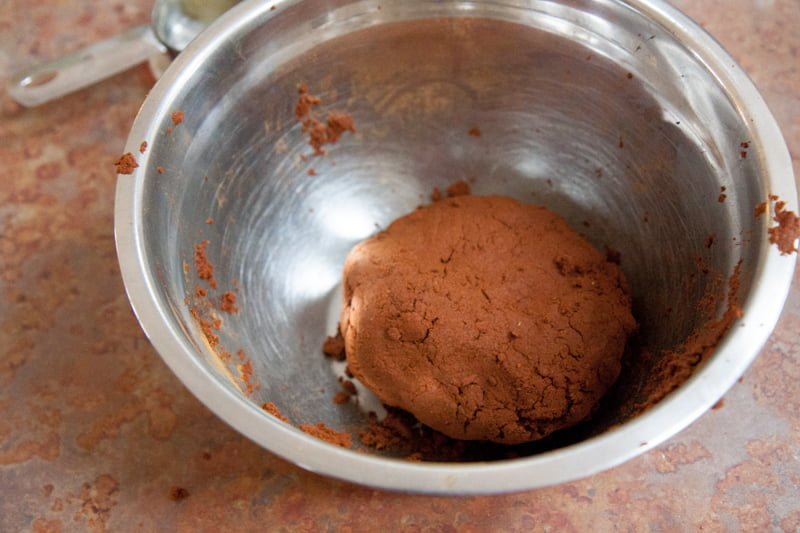
Alright, onto making the dough. First step: the applesauce, cinnamon, and glue go into a mixing bowl.
And then dig in there with your hands. This really isn't the job for a spoon- you're gonna need your fingers to get it all mixed in.
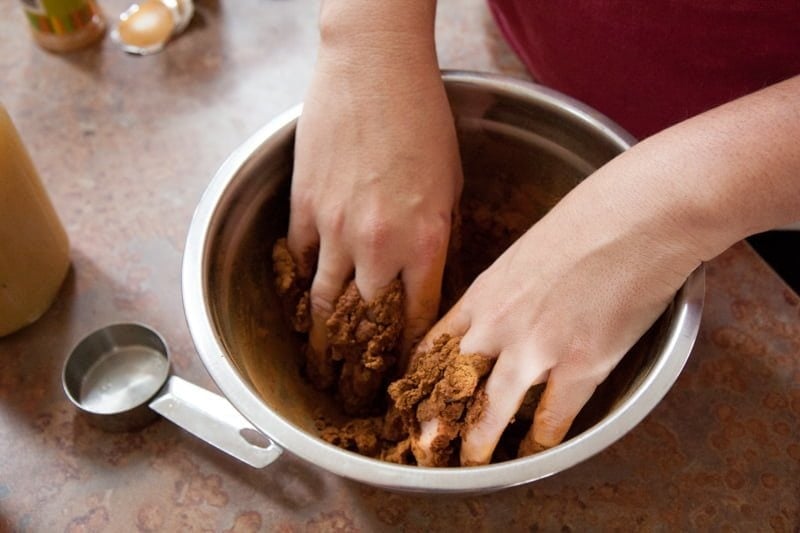
Depending on a number of factors (wetness of applesauce, humidity, etc.), you might need to add more applesauce or more cinnamon to make the dough come together. You want it to be just a touch dry (because it'll dry faster), but you also want it to hold together enough to roll and cut.
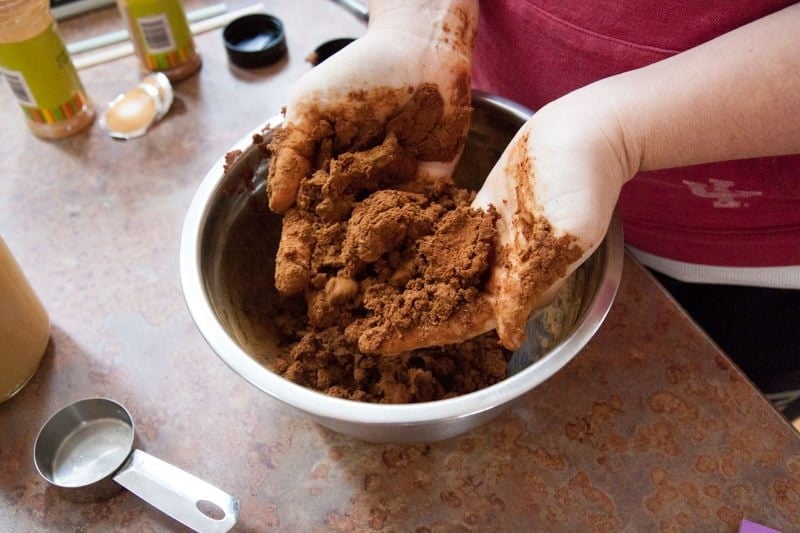
When you can form it into a big ole ball, you're done mixing. Go wash your hands.
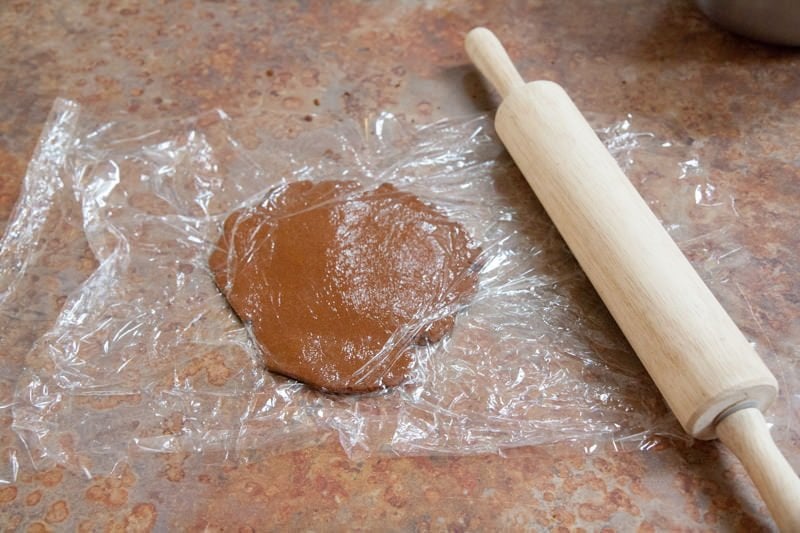
Now it's time to roll. To keep things clean and easy, I just take a hunk of dough (maybe ⅓ of the whole ball) and place it between two sheets of plastic wrap.
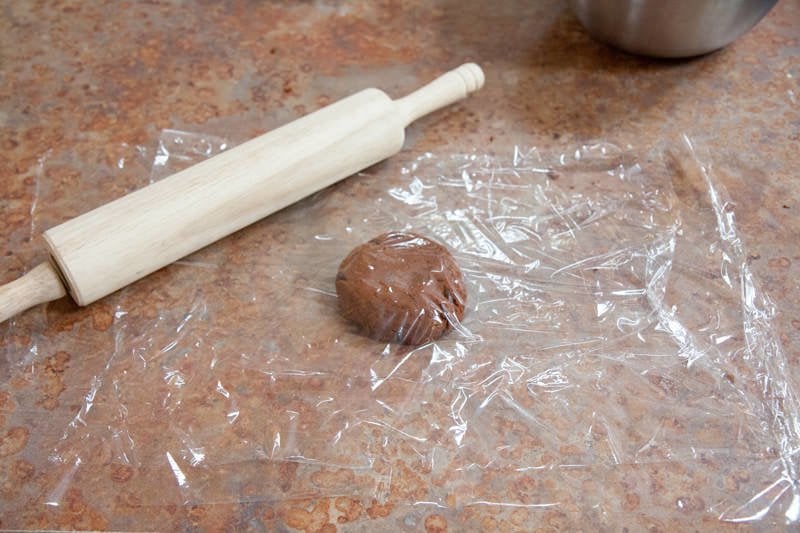
Now roll. You're looking for a thickness between ⅓" and ½". The thinner you go, the quicker it will dry and the more ornaments you can get out of a batch, but it also makes them more fragile and less likely to last from year to year. They also tend to curl the thinner they are. I prefer a thicker ornament (even though it takes longer to dry-whomp).
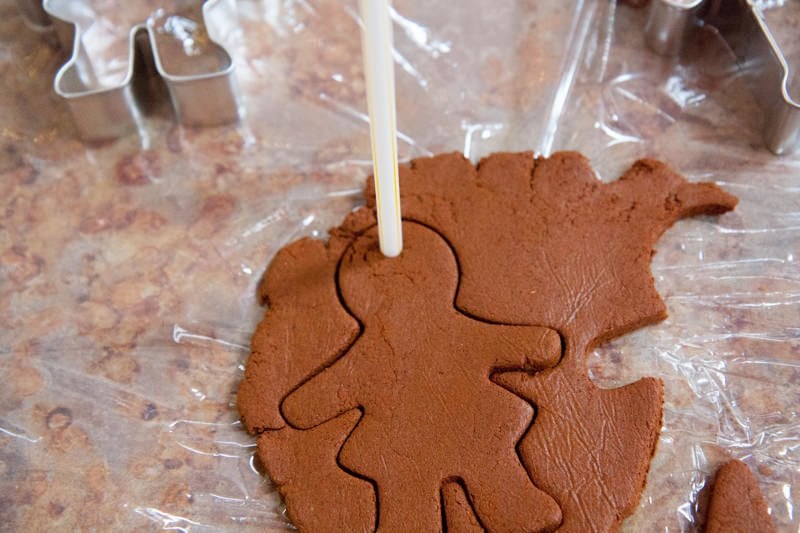
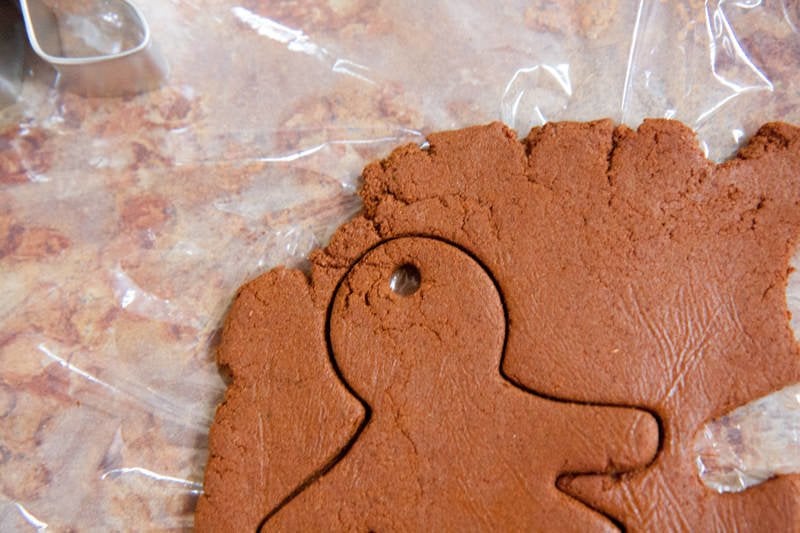
Remove the top layer of plastic wrap (set it aside to use on the next batch of dough), and then go at it with your cookie cutters.
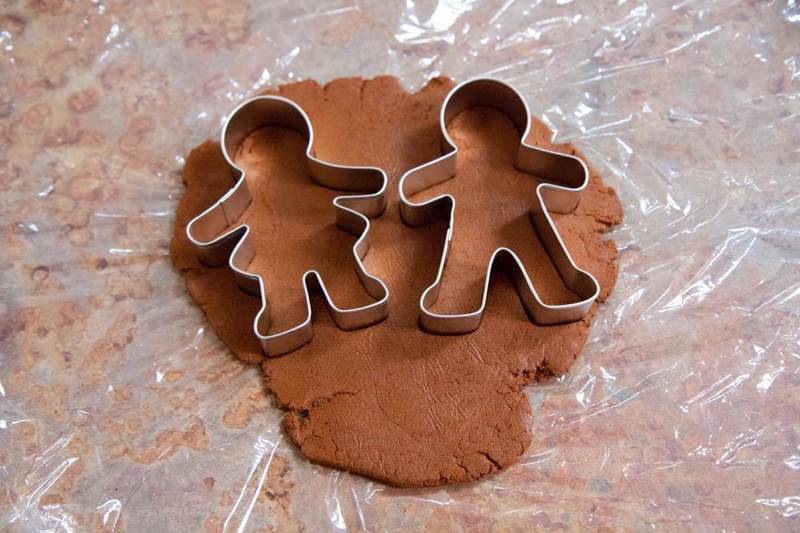
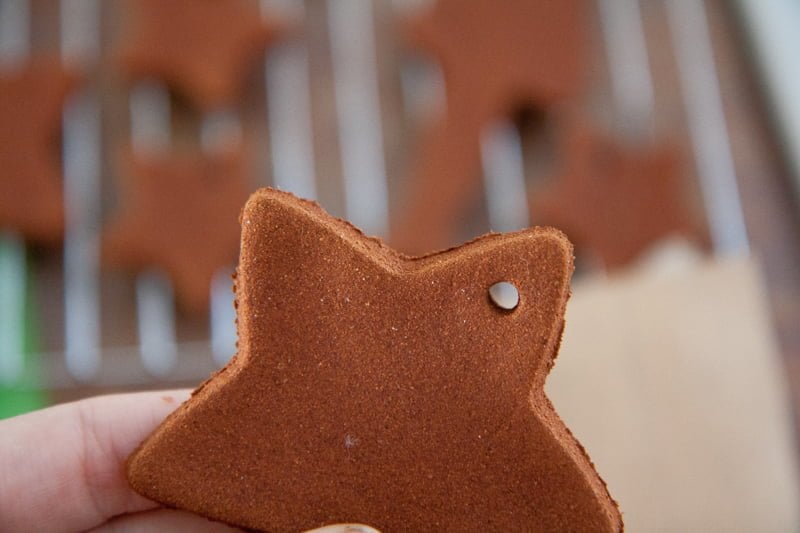
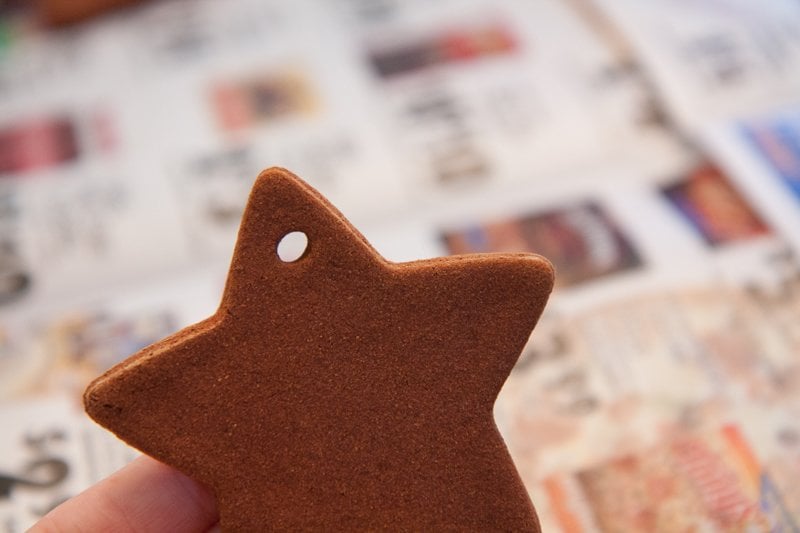
Before you transfer your ornaments to baking racks, take the straw and poke holes where you want them to hang from.
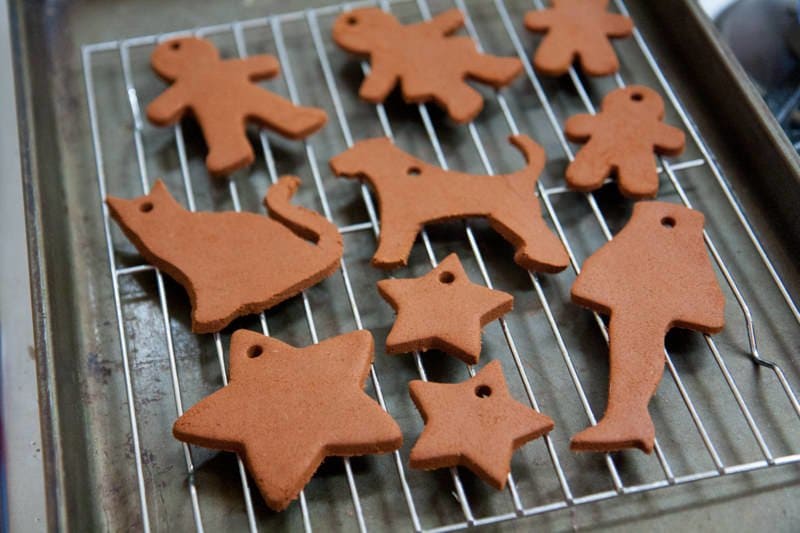
Once all the ornaments are cut out, they go onto a baking rack on a cookie sheet, if you want to bake them to dry them.
There are three methods that work for drying the ornaments:
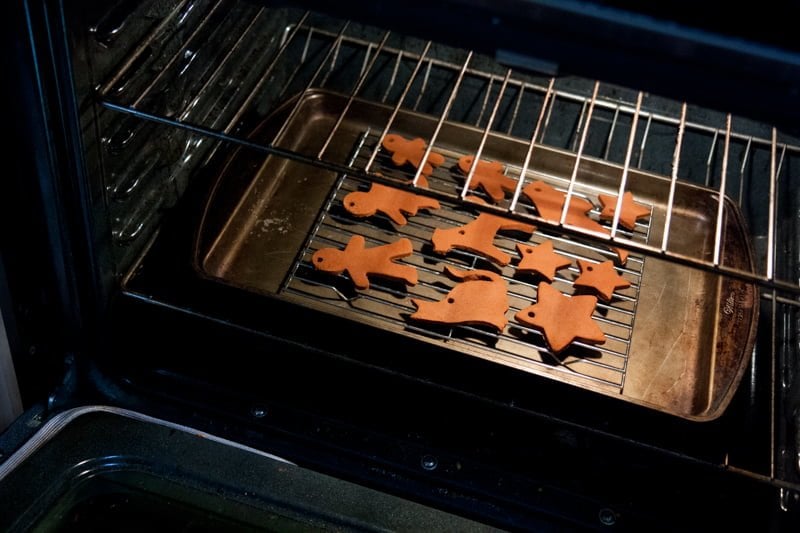
- Baking: Pop the ornaments on a baking rack on top of a baking sheet in a 200°F oven for about 2 ½ hours, until the ornaments are dry and hard. This is the fastest method, but it also results in a little bit of curling and bubbling.
- Food Dehydrator: Place the ornaments on the racks of a food dehydrator, and dry at the highest setting for about 6 hours.
- Air Dry: You can just put these ornaments on baking racks and dry them in an out-of-the-way place. This method takes a few days, and obviously works best in dry climates (I wouldn't try this method at the beach house in Florida). We can get our ornaments dry in about three days on top of the fridge.
I'm usually pretty impatient, so we almost always bake them.
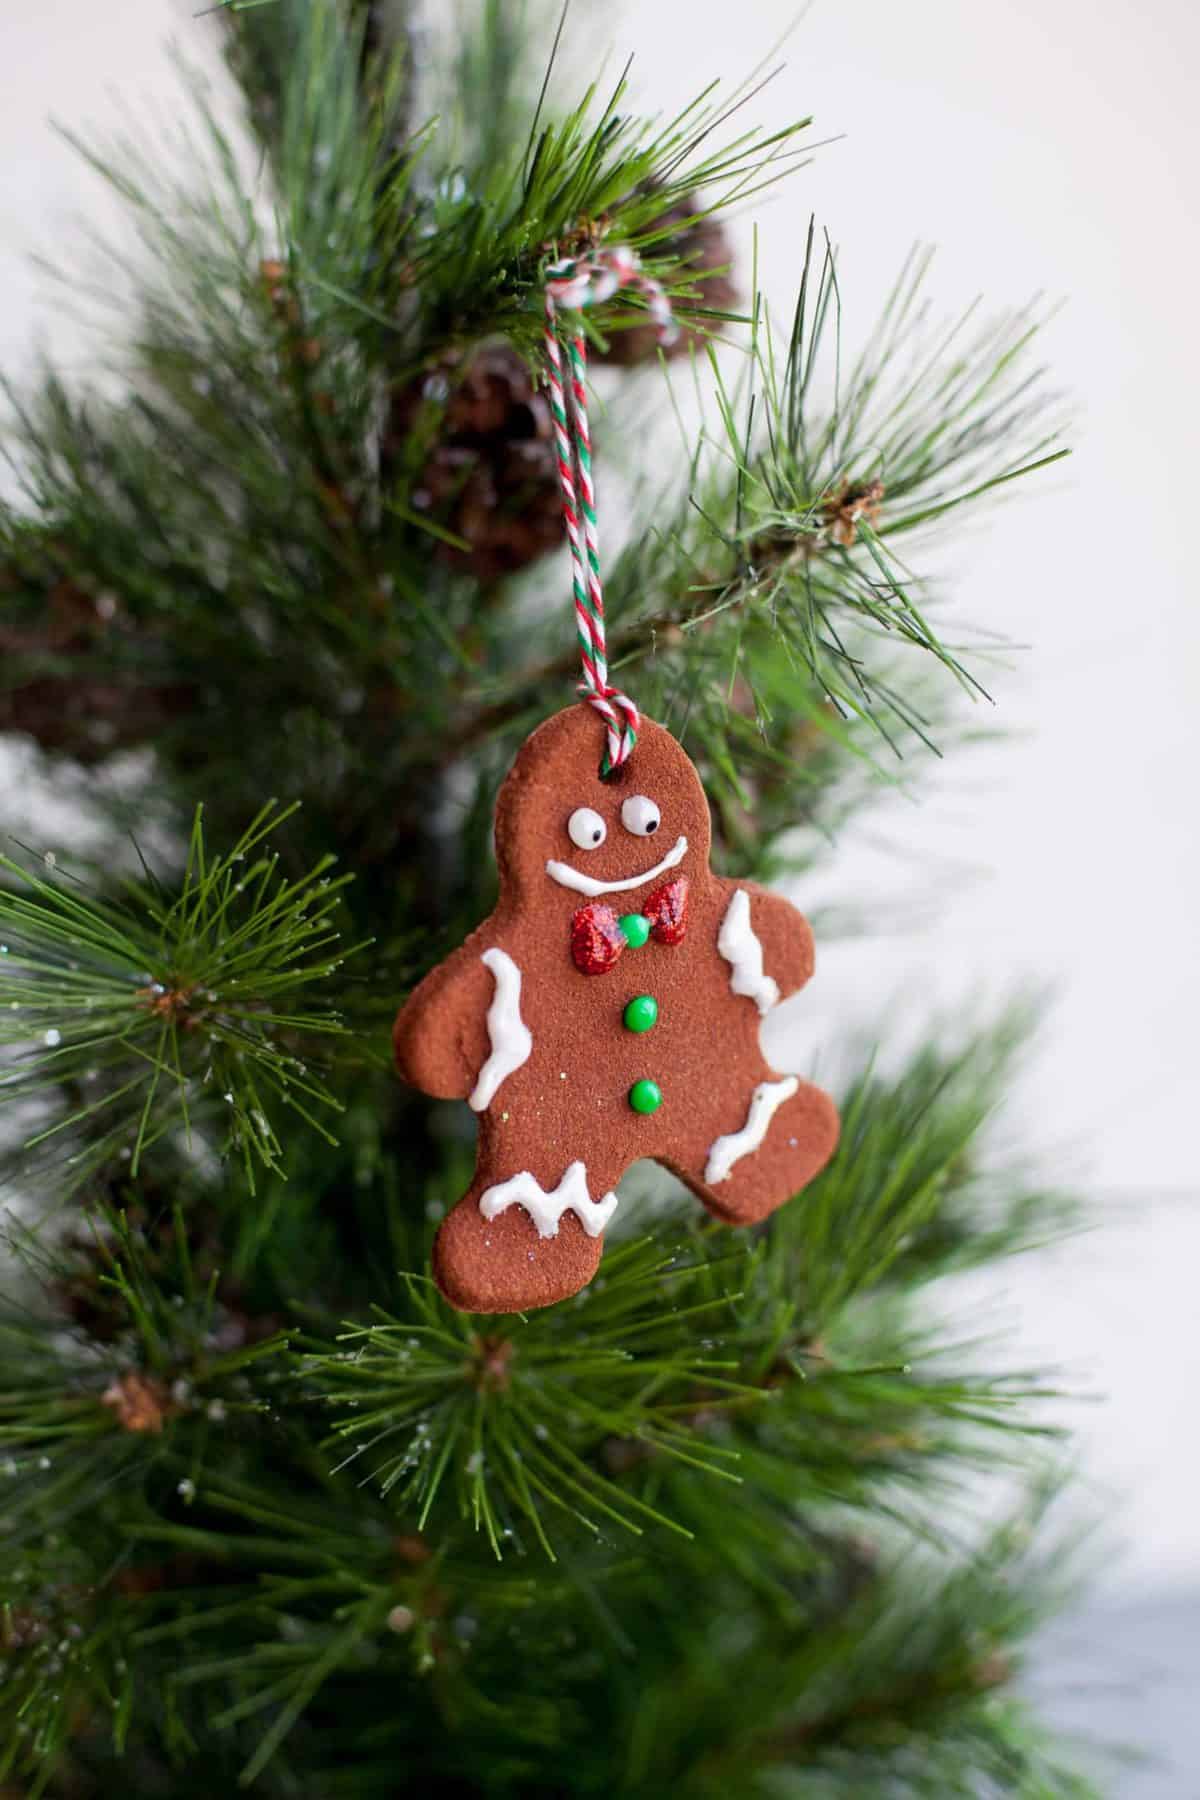
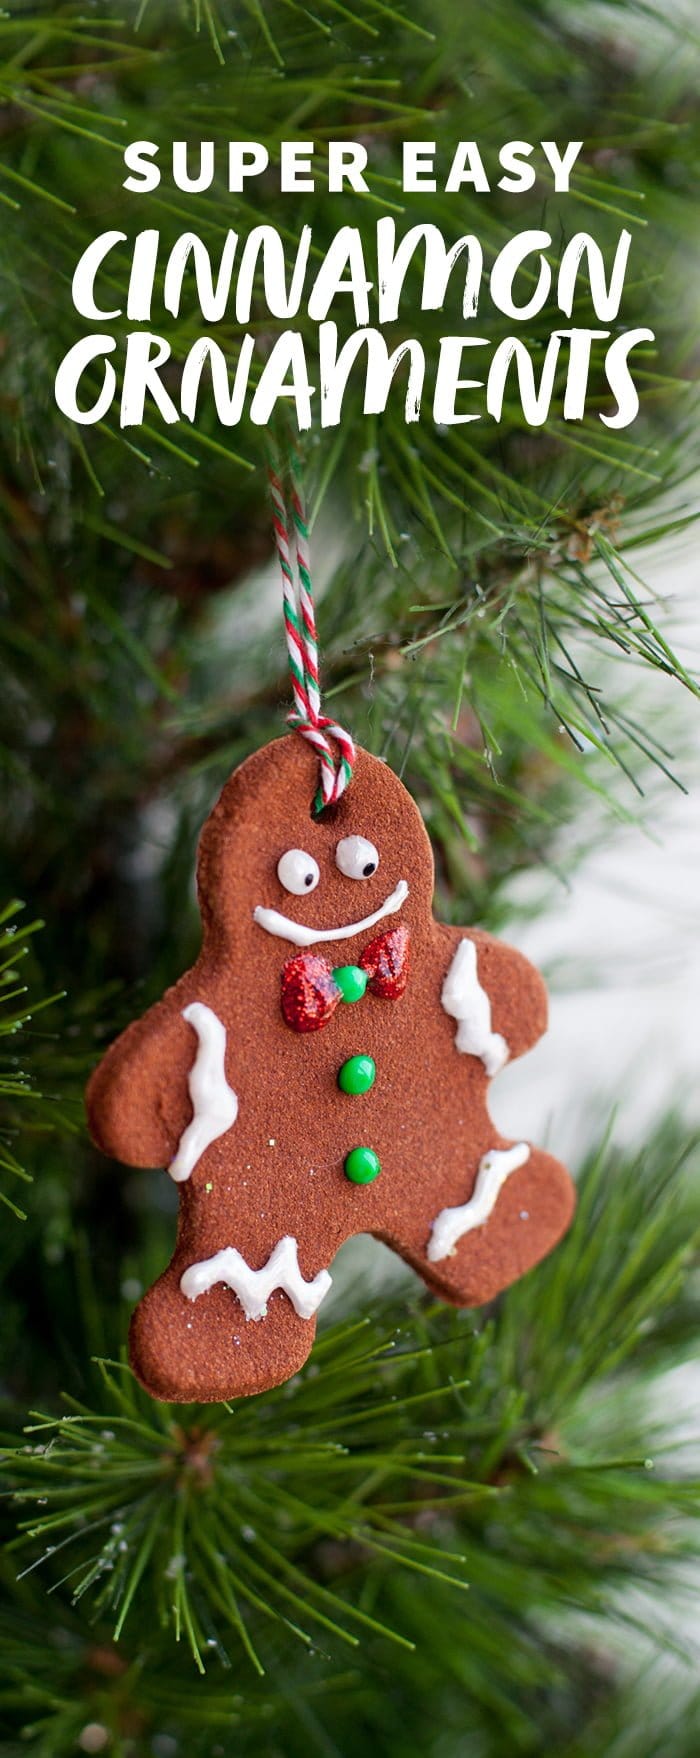
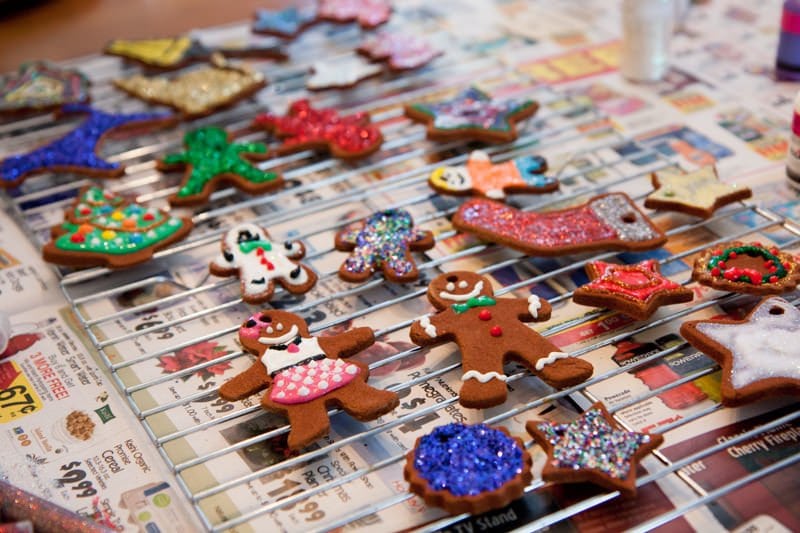
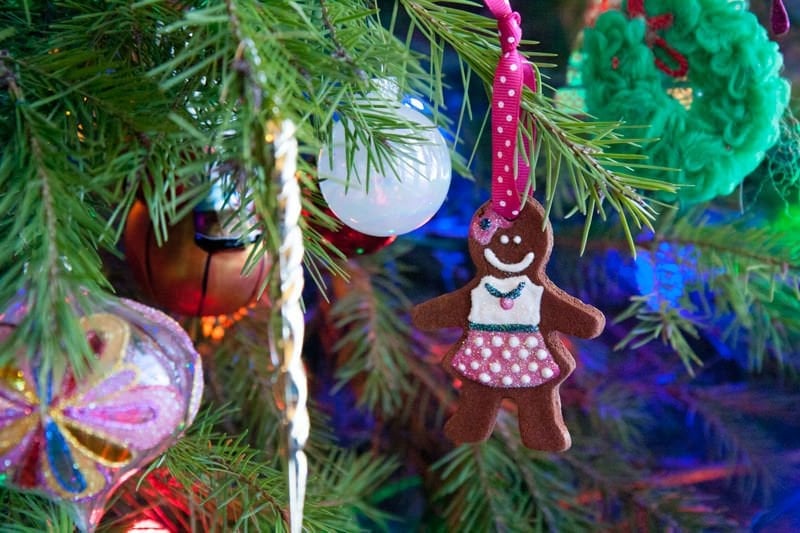
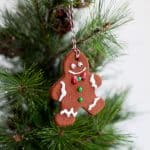
After a glorious, snowy day nap with the scent of cinnamon wafting around, these ornaments were ready to get glammed up. Just let them cool out of the oven, and then you can start decorating. Or, if you prefer, you can just tie a pretty ribbon through the hole now and hang them.
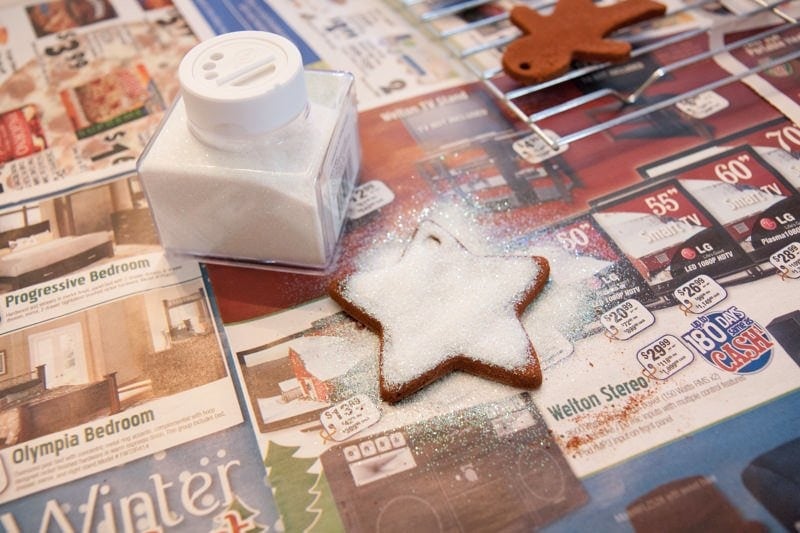
But we glittered the heck of these guys.
You might notice that the edges of the ornaments look a little rough.
Nothing a quick buff with a fine-grit sandpaper won't cure.
Then let your creativity go wild. If you like the shimmery, snow-fallen look, I highly recommend picking up an extra fine translucent glitter to go over everything. It makes everything look like it was kissed by a sunny snowy day.
This recipe makes about 20 or so medium-sized ornaments.
Because we were heavy-handed with the glitter glue and puffy paints, we let them dry out on the kitchen table overnight.
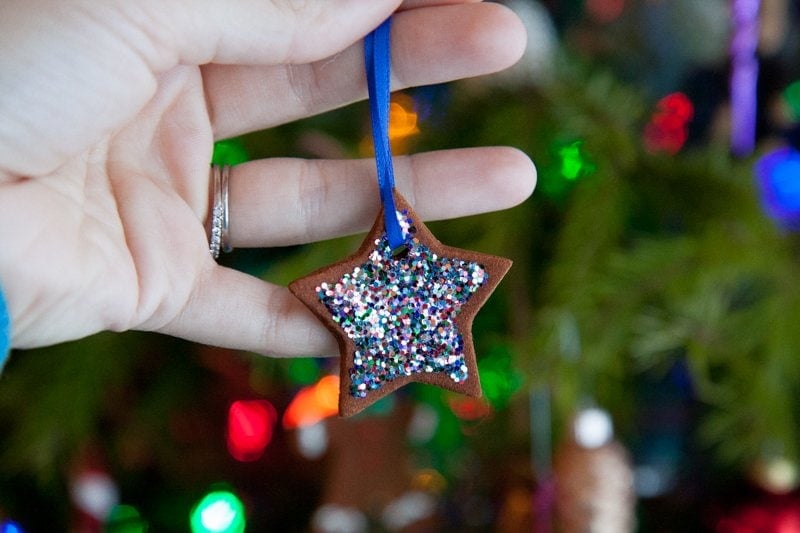
And then we strung the cinnamon ornaments with coordinating ribbon the next morning.
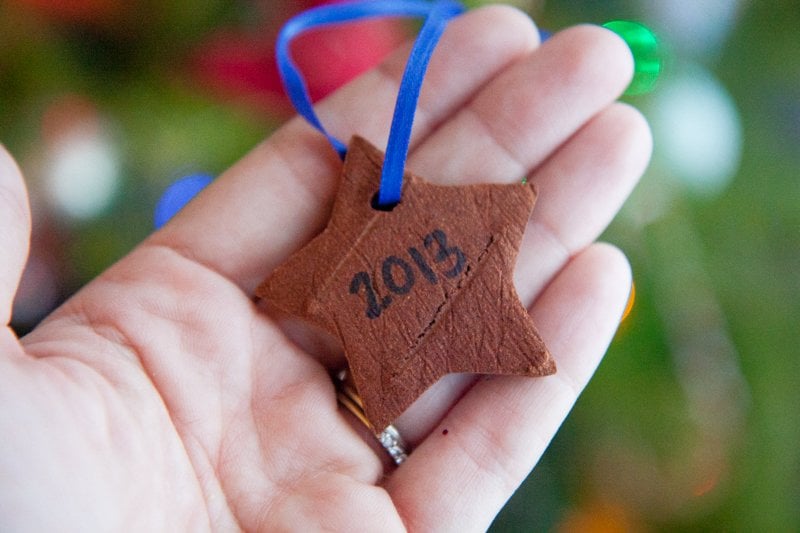
And wrote the year on the back with a Sharpie. Because it's always nice to know when something handmade was handmade. I have a handmade ornament on our tree that I made in Kindergarten, and I always get a kick out of seeing the year "1989" on the back.
And up on the tree they all went.
Making these was so fun and so delicious smelling that this might have to be a new yearly tradition for us. Although our 9' tree is so packed with ornaments (as you can see), that we might have to get a second one just for a cinnamon ornaments!
Super Easy Homemade Cinnamon Ornaments
Equipment
- Mixing bowl
- Drinking straw
- Plastic wrap
- Rolling Pin
- Baking racks and baking sheets
- Cookie cutters
- Sandpaper
- Oven, food dehydrator, or just a spot out-of-the-way (for drying)
- Glitter, puffy paints, rhinestones, etc. for decorating, optional
- Ribbon or hooks for hanging
Materials
- 1 cup unsweetened applesauce
- 1 ½ cup ground cinnamon look for the cheap, off-brand stuff, you aren't gonna eat it
- 2 tablespoons craft glue optional (I think this makes the ornaments a bit more sturdy, but you can do without it)
Instructions
- Mix the applesauce, cinnamon, and glue in a mixing bowl. You'll probably need to stir with your hands, as a spoon won't get the job gone. Add more applesauce or cinnamon if needed - you want the dough to be a touch dry, but it still needs to hold together when you roll it out. When the dough can be formed into a ball, you are done mixing. Wash your hands.
- Place ⅓ of the dough between two sheets of plastic wrap, and use the rolling pin to roll the dough to ¼" - ⅓" thick.
- Remove the top layer of plastic wrap and use cookie cutters to cut out ornaments. Repeat with the remaining dough.
- Use the straw to poke holes for hanging in each ornament.
There are three methods that work for drying the ornaments:
Baking:
- Pop the ornaments on a baking rack on top of a baking sheet in a 200°F oven for about 2½ hours until the ornaments are dry and hard. This is the fastest method, but it also results in a little bit of curling and bubbling.
Food Dehydrator:
- Place the ornaments on the racks of a food dehydrator, and dry at the highest setting for about 6 hours.
Air Dry:
- You can easily just put these ornaments on baking racks and dry them in an out-of-the-way place. This method takes a few days, and obviously works best in dry climates (I wouldn't try this method at the beach house in Florida).
To Finish:
- When the ornaments are completely dry and cooled, buff the edges with fine-grit sandpaper (optional). Decorate however you'd like, then string the ornaments on a ribbon. Write the year on the back with a Sharpie.
Video

Want more fun holiday activities to do with kids?
- Salt dough ornaments are also super easy and fun!
- Birdseed ornaments
- Cut-out sugar cookie recipe
I tried this but the dough was very crumbly and difficult to roll. I added more water with little effect. What did I do wrong? Thanks!
Next time, I'd try adding just a touch more applesauce and see if it helps.
I had the same issue, even after adding more applesauce, glue, and water. It never quite came together nicely and I’m
Hoping the ones I made stay together. Next year, will be sure to use less cinnamon to start and add as needed.
A food dehydrator is BRILLIANT! Thanks for the great tips!
I made these yesterday they smelled good while in the oven but once they cooled off they lost the cinnamon smell. I followed the directions so i don't know what went wrong. They still look pretty but no longer have the cinnamon smell to them. I am going to get some cinnamon oil to put on them and see if that helps.
I had a blast making a batch for gifts.....stuck them in the dehydrator at 145....it probably ran for 18 hours...I was also drying some dog biscuits at the time. They may have been done earlier, who knows, I don't worry about it....you can't over-dry dry! My house smells amazing! Thanks for the fun recipe! Merry Christmas !!!
Do you need to spray the finished ornaments with anything so they keep for future years?
Nope! They last for years (decades!) even on their own.
Does the recipe call for 1 and 1/2 cups or 1 to 1/2 cup of cinnamon?
1 and 1/2 cups 🙂
They were perfect! I did have to add about another 1/2 cup of applesauce. I used sweetened because that's what i had. I also added 1 tsp cloves and 1 tsp nutmeg and a drop of cinnamon oil
Could you use sweetened applesauce in this recipe?
I've never tried it, but I don't see why it would be a problem. Let me know if you try it!
What kind of puffy paint did you use
This recipe worked great! Not too sticky even with the added glue. We used glitter glue to decorate with instead of puffy paint and found it to be a good choice for us.
This is a very good way to make cheaper ornaments
Hello do you know where I can find a female gingerbread Cookie cutter I have a male would love a female
Amazon sells family sets of gingerbread people. Just list gingerbread cookie cutters and several sets will pop up. Wilton has a dad, a son, a daughter, and a mom set.
I have these in the oven today!! Going to make a beautiful addition to my primitive christmas tree this year. I am making all the ornaments for it.
I'm trying to print this recipe...please help.
Thanks!
I'm wondering if these would dry if left out on parchment paper instead of on a baking rack?
I’ve made these before and dried them on waxed paper, so parchment should work fine. It does take longer, though.
Does the glitter stick to the dry ornament or did you have to go over it with glue first?
Those are beautiful ornaments!! Was the leg lamp a cookie cutter or did you make it yourself?
A cookie cutter! We got it from here: http://amzn.to/2fxxNNc
Fantastic way to make permanent cookies
These are so lovely & rustic, I am totally making them with my daughter this weekend, can't wait!
Our favourite craft to make & gift is the clothespeg 'snowflakes' & then the stars made with the hinges. We glue them together, paint them, then glitter them up, both the wooden part & the metal hinge stars, & then string them & hang them, they look amazing! I'm sorry I don't have a picture for you on this computer, but they are on Pinterest & you can find if you google too. All the components are from the dollar store, so it fits in our budget, & we have loved to have a unique teacher/co-worker/hostess gift. We started by just paint & glittering in snowflake colours but then we decided to kind of go nuts, so we've done them in turquoise, green, burgundy, silve & gold, you name it. The white looks beautiful, but the colours have been so much fun to put together!
I have been making these for years. Became a family tradition to send them to school with my kids for their classmates. Now, we do it with grand kids. However, I never used glue in mine and they last forever.
Yes, we made them with our kids 12 years ago with just cinnamon and applesauce, no glue, and they still smell wonderful each year when we open the box!!