Homemade Turkey Gravy

Learning how to make homemade turkey gravy from turkey drippings is the final boss of Thanksgiving dinner, and I'll show you my foolproof, no-fail method. Get ready to elevate your Thanksgiving dinner with the most luscious gravy ever-no lumps here!
🔍 Recipe At-A-Glance: Homemade Turkey Gravy
- ⏰ Cook Time: 15 minutes
- 💛 Flavor Profile: Rich, savory sauce that complements all the herby, buttery Thanksgiving dishes.
- 🍽️ Good For: Pouring over a plate piled with dry brine turkey or Instant Pot turkey breast, slow cooker mashed potatoes, and cornbread sausage dressing.
- 🧡 Difficulty: It's a breeze!
Summarize and Save this Recipe Using:
🧡 Why You'll Love This Recipe
Hiya friend: Making gravy might sound intimidating, but trust me, it's a breeze. In this simple guide, I'll walk you through the steps to create velvety, flavorful gravy that will have your guests begging for seconds. So, roll up your sleeves, grab that turkey drippings pan, and let's dive into the world of delicious, homemade turkey gravy.
Here's why you'll love this recipe:
- Smooth as silk: Good gravy really comes down to just two things: intense savory flavor and velvety smooth texture. No lumps here! I'll show you how to get both of those things down pat so your holiday meal is perfect.
- Finishing touch: Get ready to elevate your Thanksgiving dinner with the most luscious and no-fail turkey gravy recipe ever! Whether it's drizzled onto Instant Pot mashed potatoes, gluten-free stuffing, or juicy roast turkey (here's the best dry brine recipe for turkey!), this gravy is the final dressing that takes your feast to the next level!
🦃 The Ingredients You Need

- Turkey pan drippings: This is all the fat and juice that collects at the bottom of your turkey roasting pan while roasting your bird. In a pinch, you can make gravy without drippings (we'll show you how below).
Make sure to check the recipe card below for the full ingredients list, along with quantities and my expert tips and tricks.
🔁 Variations & Substitutions
- No turkey drippings? No problem: Substitute ¼ cup butter for the turkey fat and 2 cups of store-bought or premade turkey or chicken broth in place of the broth to make a shortcut gravy.
- If you're short: Don't panic if your drippings don't quite measure up to the amounts in the recipe-you can still save it! Just top off with turkey or chicken stock for the broth, or melted butter or olive oil for the fat.
- Add herbs as needed: If you make turkey gravy using pan drippings from my Dry Brine Turkey Recipe, the drippings will already that dreamy herby aroma. But if you'd like more, add small amounts of dried parsley, thyme, sage, or rosemary (starting with ¼ teaspoon) to add more flavor.
- Flavor booster: The flavor of your turkey gravy will rely heavily on the quality of the drippings you use! If yours tastes a bit flat, add half a chicken bouillon cube (or the equivalent amount of powdered bouillon or paste) to the gravy. Start small-you can always add more, but you can't take it back out!
🥣 How To Make Homemade Turkey Gravy
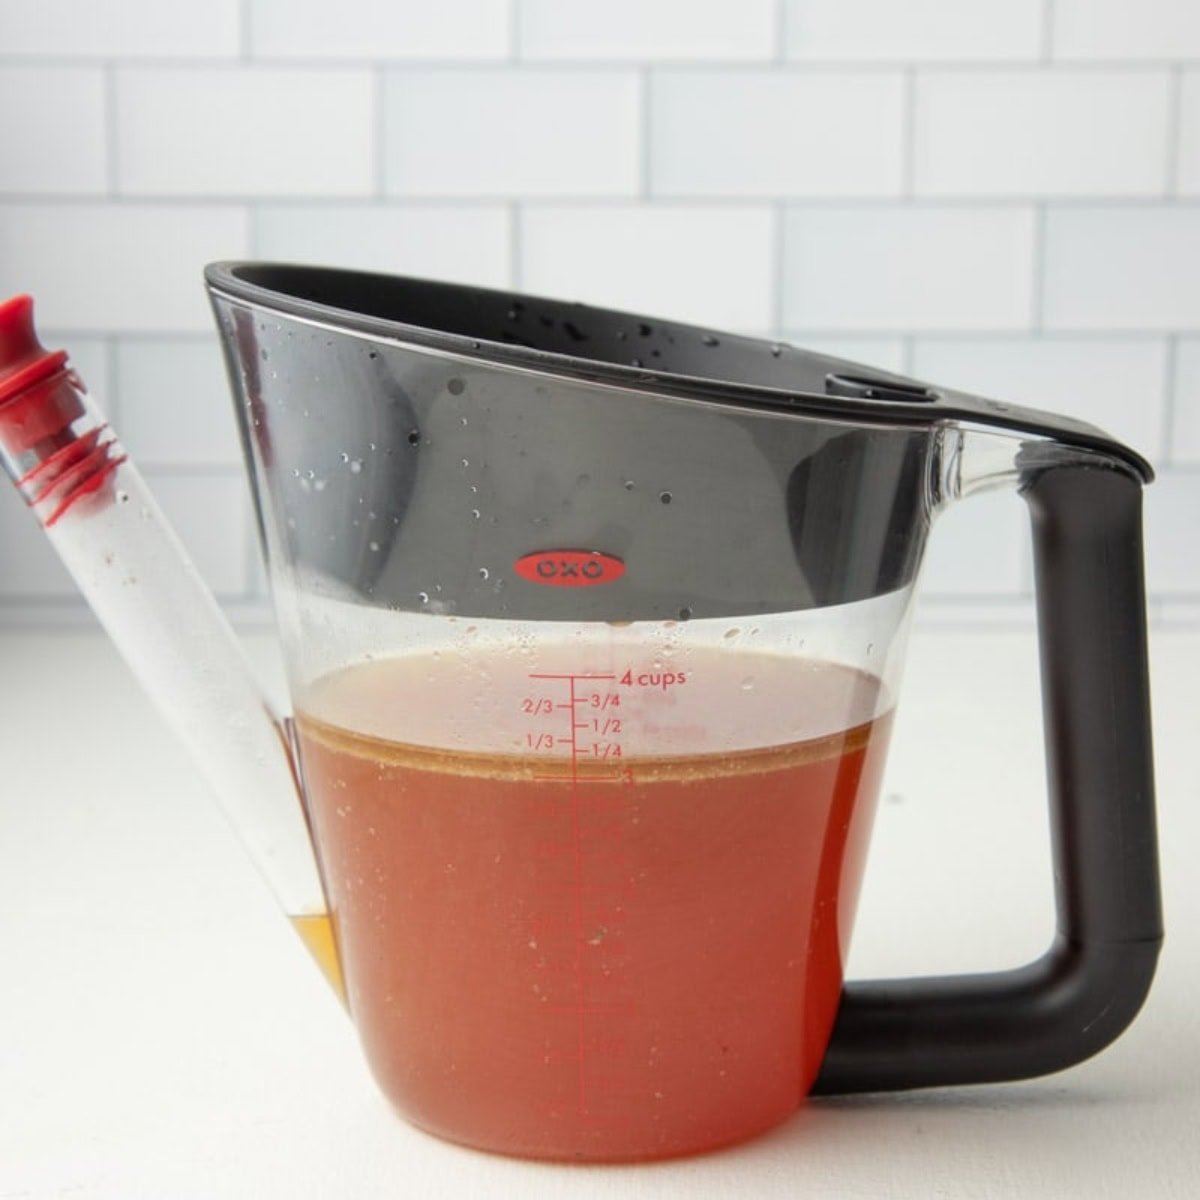
Step 1: Pour the pan drippings-juices, fat, and the little browned bits-through a strainer into a fat separator or a glass measuring cup (something heatproof is important!). Allow the drippings to rest until the fat floats to the top and the rich broth settles below. I highly recommend a fat separator-it will make Thanksgiving cooking so much easier. But if you don't have a fat separator, no worries. You can still make gravy!
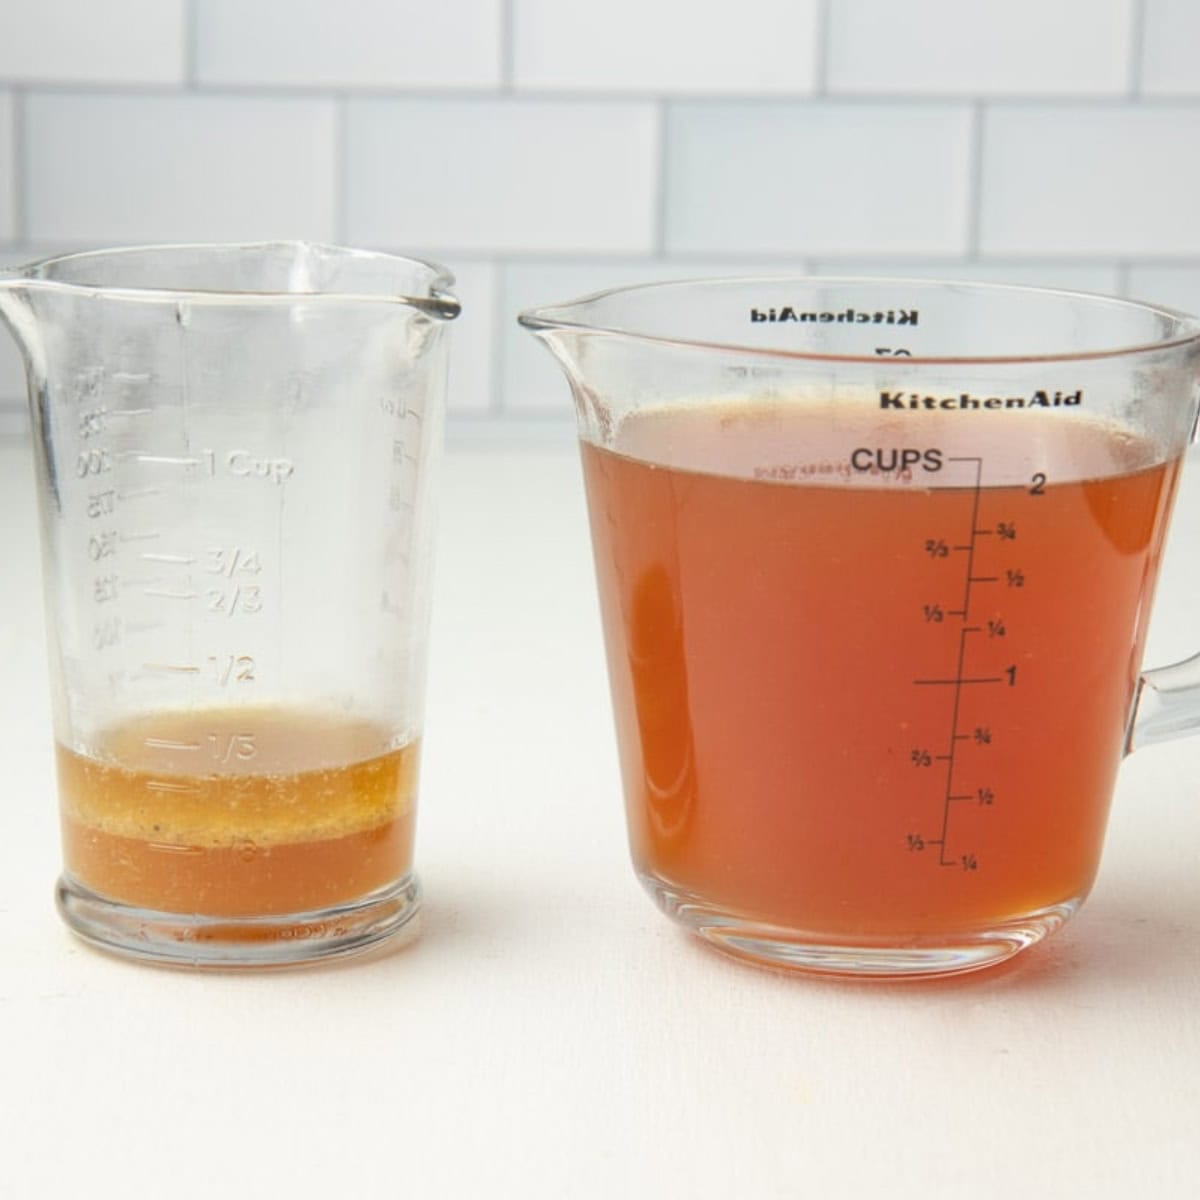
Step 2: If using a fat separator, pour the broth into a separate bowl and reserve the fat. If using a glass measuring cup, use a ladle or kitchen spoon to scoop out the fat layer into a separate bowl or glass measuring cup. Measure out ¼ cup of fat-if you're a little short, topping it off with melted butter works beautifully. Measure out 2 cups of broth, and save any extra for the best turkey vegetable soup!

Step 3: Whisk ¼ cup of fat and ¼ cup flour in a saucepan over medium heat. Cook while stirring constantly for 2-3 minutes, or until the mixture starts to brown and smells a little toasted and nutty. This is your roux!
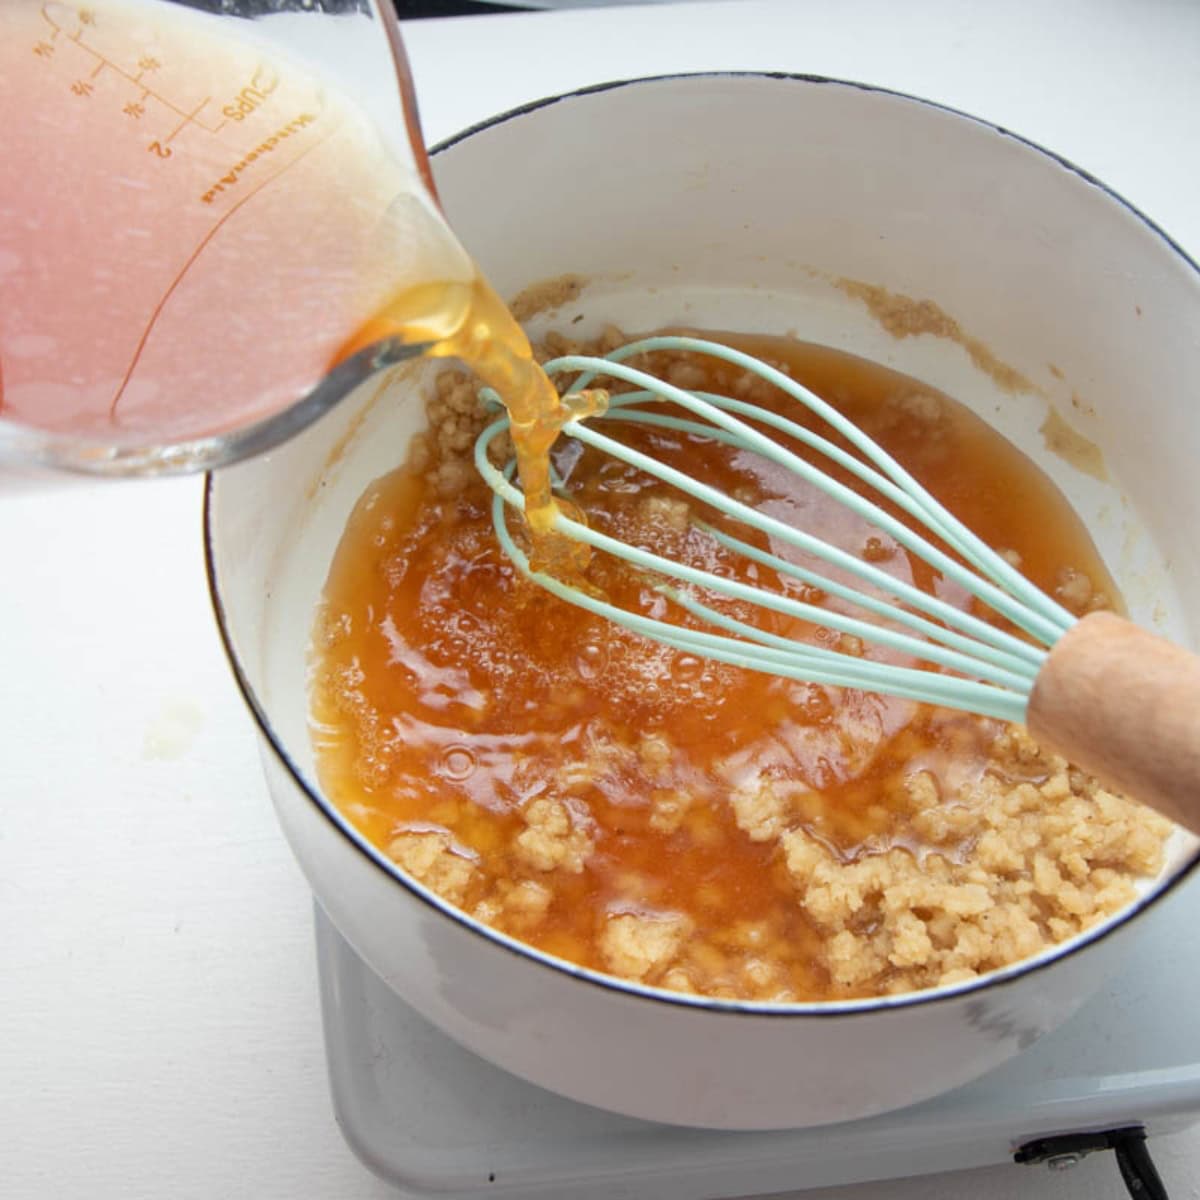
Step 4: Slowly pour in the broth, whisking like you mean it as you pour. It may look a little lumpy at first, but just keep whisking after each addition of broth before adding more-this will smooth out all the lumps.
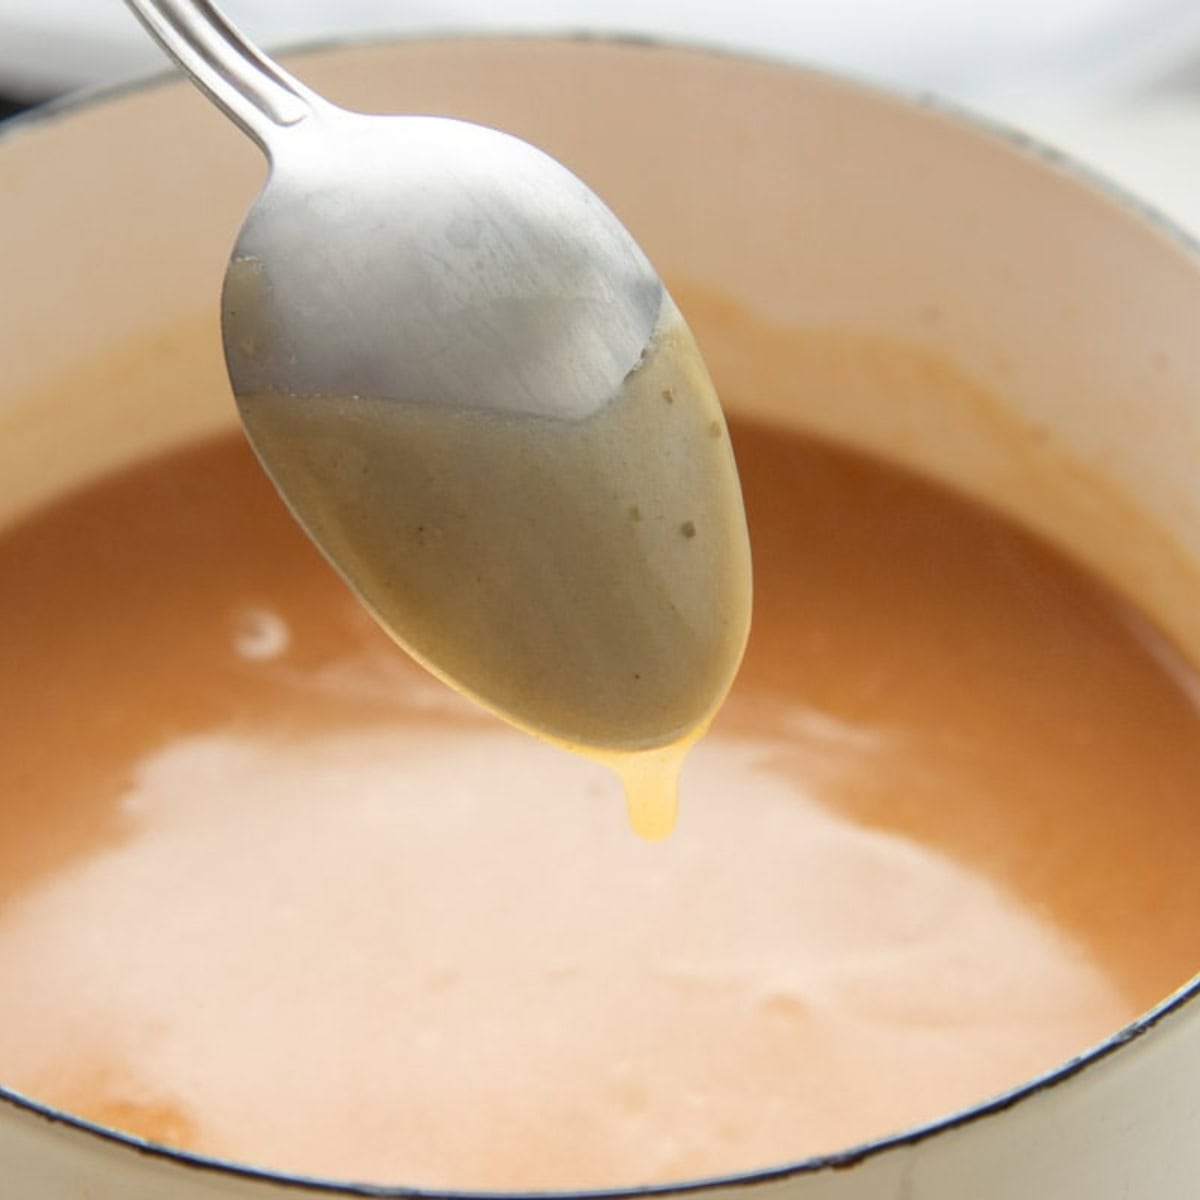
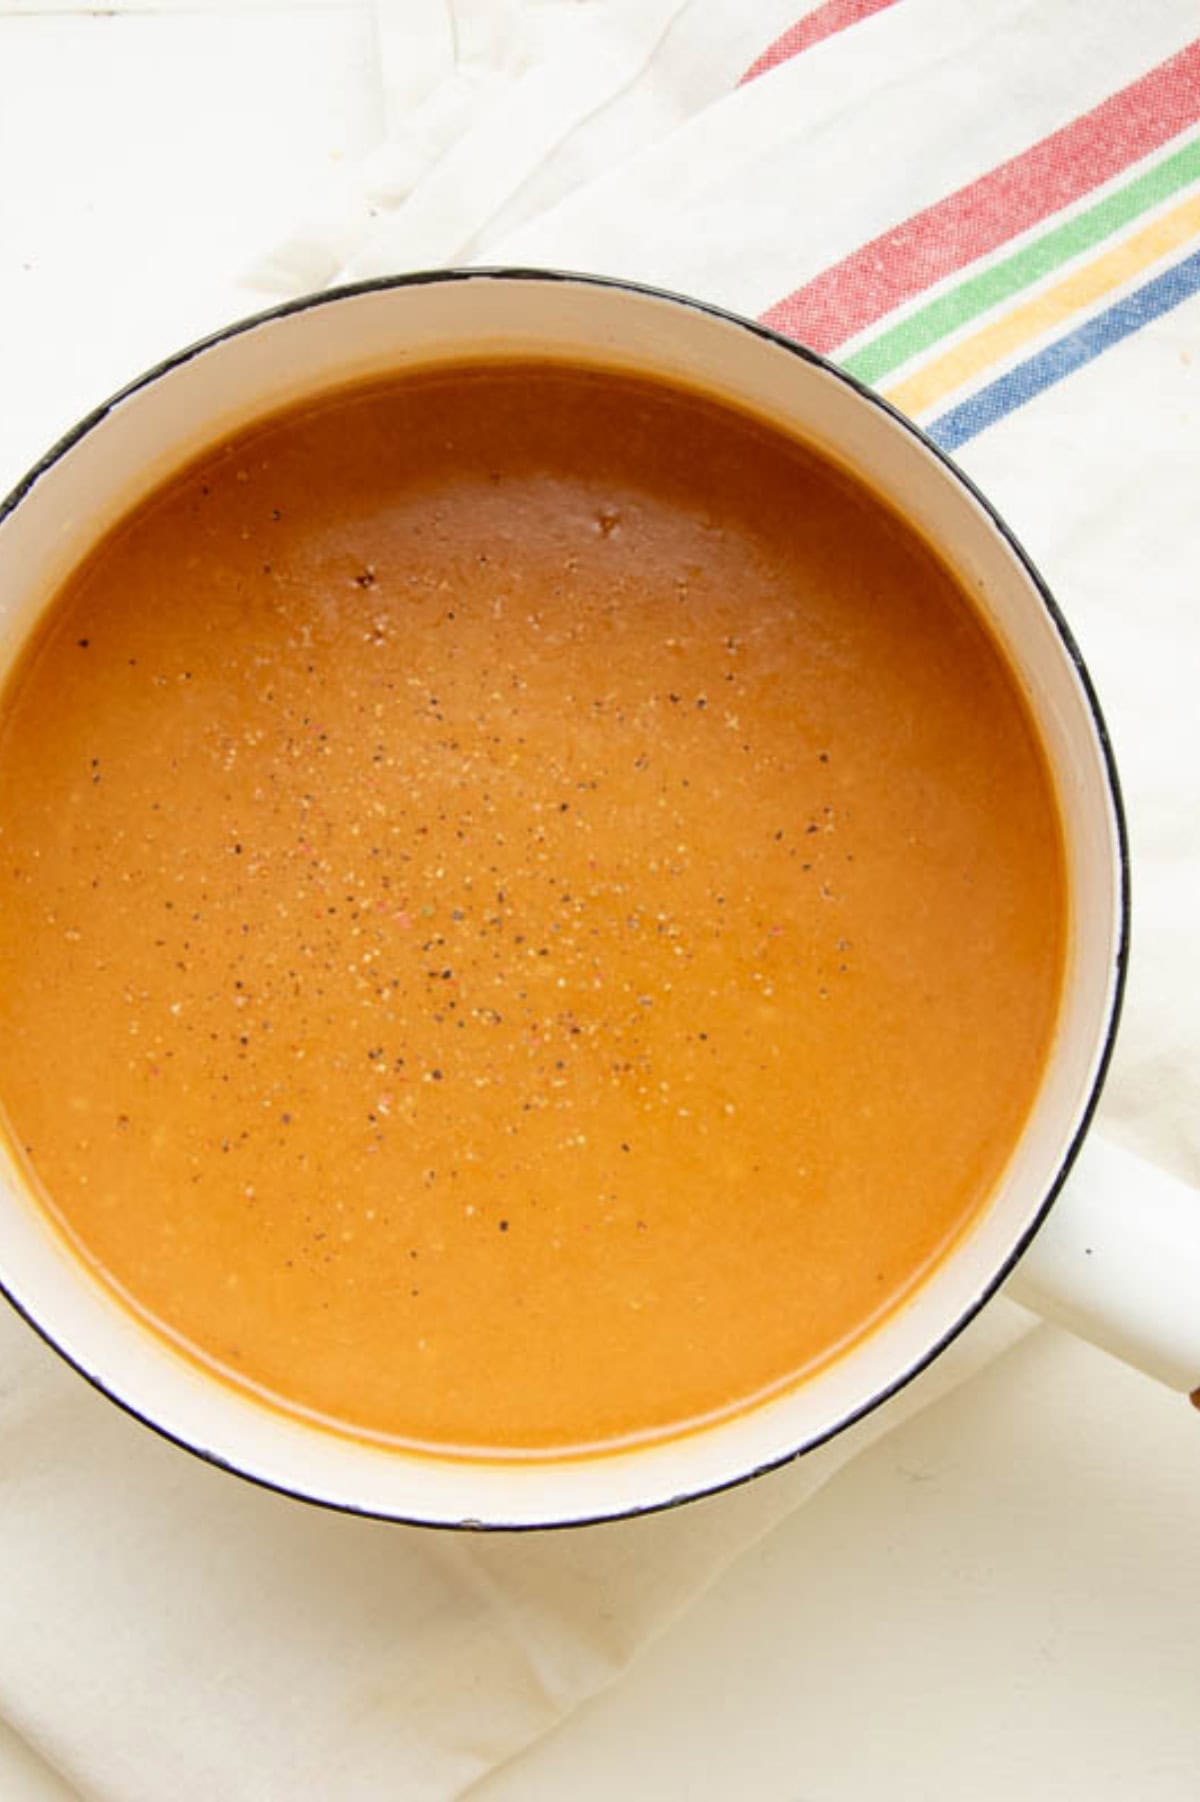
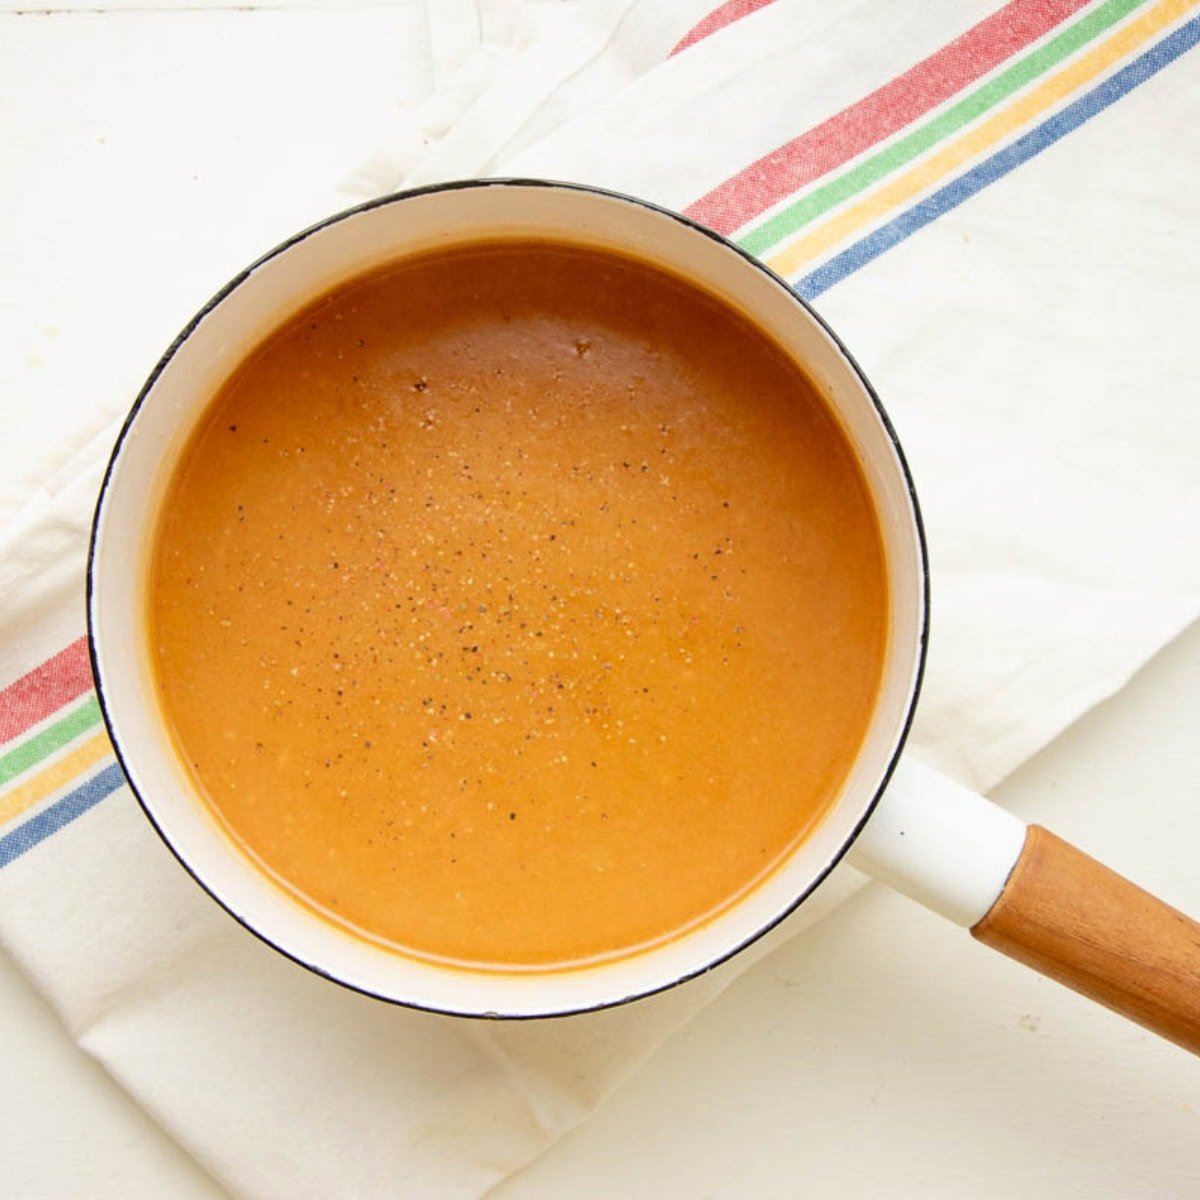
Step 5: Bring the gravy to a simmer and cook. This is how your gravy should look when it is done, thick enough to coat the back of a spoon. Don't go beyond this-remember, gravy thickens as it cools! Remove from the heat and season to taste.
🙋🏻♀️ Homemade Turkey Gravy FAQs
If your gravy is too thin, remember that gravy will thicken slightly as it cools. But if it's still too thin, whisk together one tablespoon of cornstarch or arrowroot powder with ¼ cup chicken broth or water until smooth. Add to the gravy and whisk over medium-low heat until thickened.
The best way to fix lumpy gravy is to prevent it in the first place. Make sure you whisk vigorously when you add the broth to the roux while making the gravy. Still lumpy? Just strain your gravy through a fine mesh sieve and discard the lumps. No one will ever know!
Leftover gravy stashes wonderfully in an airtight container in the refrigerator for up to a week. Gravy also freezes great! Cool completely, then transfer it into freezer-safe food storage containers-we like using half-pint or wide-mouth pint canning jars. Label and freeze. Use within six months.
Want to save this recipe?
👩🏻🍳 My Expert Tips & Tricks
- Get a fat separator: The hardest part of making gravy from scratch (and it isn't hard at all!) is separating the drippings. I highly recommend a fat separator-they'll run you about $20, last for years, and will make your Thanksgiving prep so much easier. But if you don't have a fat separator, no worries. You can still make gravy!
- Not too thick: Gravy will thicken slightly as it cools in the gravy boat or other serving dish, so don't make it too thick right in the saucepan.
- Saved from overwhelm: My Ultimate Thanksgiving Planner can help save your from turkey day overwhelm! This isn't a cookbook-it's your field guide to a stress-free Thanksgiving dinner. I'll show you how to time your cooking so that everything is ready and still warm when it is time to eat and give suggestions on what you can prep ahead. I even provide a food calculator so you know how much to cook, and every recipe you need!

🥧 More Easy Thanksgiving Recipes:


If you tried this homemade turkey gravy or any other recipe on my blog, please leave a 🌟 star rating and let me know how it went in the comments!
📖 Recipe
Turkey Gravy
Ingredients
- 3 cups turkey pan drippings fat and juice
- ¼ cup all-purpose flour (gluten-free all-purpose flour also works)
- Salt and pepper to taste
Instructions
- Pour the turkey pan drippings through a fine sieve or strainer into a fat separator or a large glass measuring cup. Allow the drippings to rest for about 5 minutes or until the fat is separated in an even layer from the broth.
- If using a fat separator, pour out the broth into a separate bowl or glass measuring cup. Measure out ¼ cup of the fat and 2 cups of the broth. Discard any extra. Set both aside.
- If using a glass measuring cup, use a ladle or kitchen spoon to scoop out the fat layer into a separate bowl or glass measuring cup-it doesn't have to be perfect. Measure out ¼ cup of the fat and 2 cups of the broth. Discard any extra. Set both aside.
- In a saucepan over medium heat, add the ¼ cup of fat and ¼ cup flour. Whisk together until it turns into thick lumps. Cook, stirring constantly, for 2-3 minutes, or until the mixture just begins to brown slightly.
- Pour in the 2 cups of broth, whisking constantly as you pour. Whisk vigorously until all lumps disappear. Bring to a simmer and cook until just thickened enough to coat the back of a spoon-about 5 minutes. The gravy will thicken slightly as it cools.
- Remove from heat, taste, and adjust seasoning. Depending on how much salt you use in your turkey roasting recipe, you might not need to add salt.
Notes
- No turkey drippings? No problem. Just use ¼ cup butter in place of the turkey fat and 2 cups of chicken, turkey, or vegetable stock in place of the broth to make a shortcut gravy.
- If you are a little short on the broth after separating the drippings, you can top off to 2 cups with chicken, turkey, or vegetable stock.
- If you are a little short on the fay after separating the drippings, you can top off using melted butter or olive oil.
- Lumps? If you didn't quite get the lumps out after adding your broth, no problem. Just strain your gravy through a fine mesh sieve and discard the lumps. No one will know!
- Too thin? Remember that gravy will thicken slightly as it cools. But if it's still too thin, whisk together 1 tablespoon of cornstarch or arrowroot powder with ¼ cup chicken broth or water until smooth. Add to the gravy and whisk over medium heat until thickened.
- Too thick? Just whisk in a couple of tablespoons of water or chicken broth, and repeat until the gravy is thin enough.
- Not enough flavor? Test for seasoning first by adding more salt or pepper, but if you need more flavor, crumble in half a chicken bouillon cube and whisk until well combined.
Gravy has a bad rep for being finicky, but it's actually super easy to make! And don't worry if it doesn't turn out perfectly—there are ways to fix almost every issue with gravy. This is the perfect easy gravy recipe to make for your holiday table.