
How to Make Hot Sauce (Homemade Hot Sauce Recipe)


This homemade hot sauce recipe is one I make every summer when peppers start piling up in the garden! Over the years, thousands of readers have used it to learn how to make hot sauce at home, either by fermenting the peppers or making the quick cooked version that's ready in about 30 minutes.
🔍 Recipe At-A-Glance: Homemade Hot Sauce
- ⏰ Prep Time: 10 minutes
- 🗓️ Fermentation Time: 5 days (or skip this using my quick cook version)
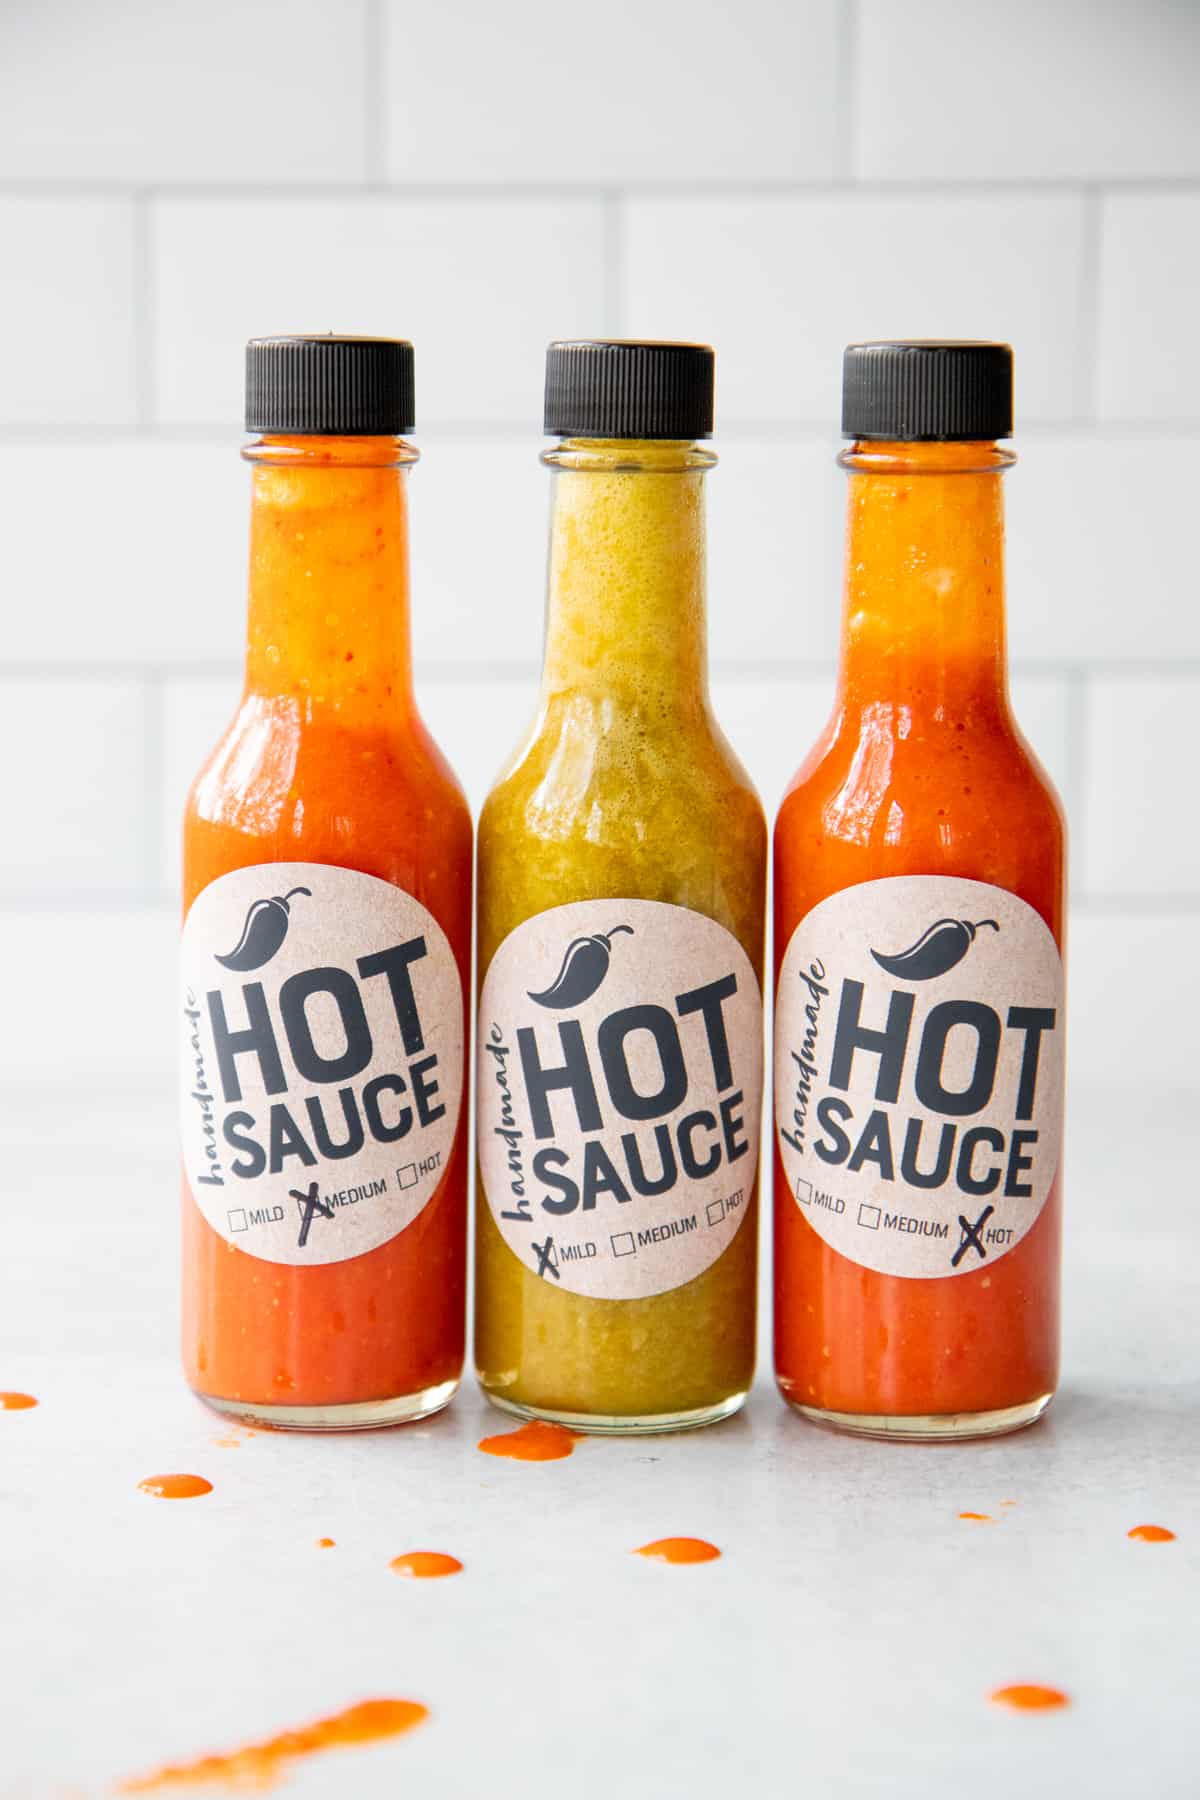
- 🌶️ Flavor Options: Anywhere from mild to super spicy
- 🎁 Good For: Everyday eating, awesome gifts, stocking stuffers, host or hostess gifts, teacher gifts, preserving your harvest, selling at farmer's markets
- 🧡 Difficulty: One of the easier fermentation projects out there, or make it easy-as-can be using the quick-cook option

"This might seem melodramatic, but this recipe kinda changed my life. On a whim I looked online for a hot sauce recipe, and I happened upon this one. I'm so glad I did! I absolutely encourage everyone to try the fermented version."
- JOEL -
Jump To
- 🔍 Recipe At-A-Glance: Homemade Hot Sauce
- 🧡 Why You'll Love This Recipe
- 🌶️ The Ingredients You Need
- 🔥 How to Do Heat Variations
- 🫑 Best Peppers for Homemade Hot Sauce
- 🫙 The Supplies You Need
- 🫶 Before You Start
- 📷 How to Make Hot Sauce (Fermented Version)
- 📷 How to Make Hot Sauce (Quick-Cook Version)
- ❄️ Storage and Preservation Directions
- 🌮 Ways to Use Hot Sauce
- 🙋🏻♀️ Homemade Hot Sauce FAQs
- 👩🏻🍳 My Expert Tips & Tricks
- 🌯 Recipes That Will Go Great with Your Hot Sauce
- 📥 Download the Free Labels
- 📖 Recipe
- 💬 Reviews
🧡 Why You'll Love This Recipe
I make a big old batch of this hot sauce every single summer! I've fine-tuned this recipe and method over almost a decade using my own peppers and farmer's market peppers. My hot sauce is a constant in my house-it comes out almost daily! Here's why you'll love this recipe:
- Shockingly simple: Before I made my own, hot sauce felt like one of those things that was really complicated to make. Plot twist: it's super easy. Anyone can do this.
- Choose your own adventure: I include both a traditional fermented and a quick-cook version of hot sauce, so you can choose your own adventure when it comes to hot sauce creation.
- Infinitely customizable: No matter if you like it super mild or tears-in-your-eyes spicy, you can make your hot sauce your own. My default is a jalapeño/bell pepper/habanero version with apple cider vinegar because it goes with basically everything I eat.
- So useful: Put it on pumpkin enchiladas, my taco chili recipe, or my simple chicken quesadillas recipe. The possibilities are endless!
- A recipe you can trust: Go ahead and read the reviews down below!
🌶️ The Ingredients You Need

- Peppers: Jalapeños, reapers, Thai chilies, habanero, bell, cayenne, ghost peppers, serranos, OH MY. Which peppers you use really depends on your personal heat tolerance and the flavor profile you're looking for.
- Water: I recommend filtered water (especially if you are following our fermentation version) to make sure your flavor is crisp as possible.
- Xanthan gum (optional, but recommended): This emulsifier helps keep your hot sauce from separating. You'll have to give your hot sauce a good shake before using each time if you don't include it.
Make sure to check the recipe card below for the full ingredients list, along with quantities and my expert tips and tricks.
🔥 How to Do Heat Variations
You are in complete control of your hot sauce! So no matter if you like it no-heat or burn-off-your tongue spicy, you are in charge.
I recommend tasting your peppers raw before blending them into your sauce. To test, I cut a pepper open and just lightly touch a cut part with a toothpick and then touch my tongue with the toothpick. You'll know very quickly what you're working with!
The pepper heat level wont change much after cooking or fermenting (although the flavor profile may end up more complex). If a pepper is hot raw, it's going to be hot in your hot sauce.
If you're new to hot sauce, here's my opinion: err on the mild side for your first batch. You can always blend in an extra pepper later, but you can't un-burn your tongue from a too-hot sauce.
From there, you can tweak your ratio until it's to your liking. Some heat-phobic folks use nothing but sweet bell peppers. Some heat lovers using nothing but hot peppers-so it really is up to you to pick your poison here.
In our house, I usually start with about start with a 3:1 ratio of sweet bell peppers to mild hot peppers (like jalapeños), and then toss in 1-2 habaneros when I want heat that shows up but doesn't dominate.
🫑 Best Peppers for Homemade Hot Sauce
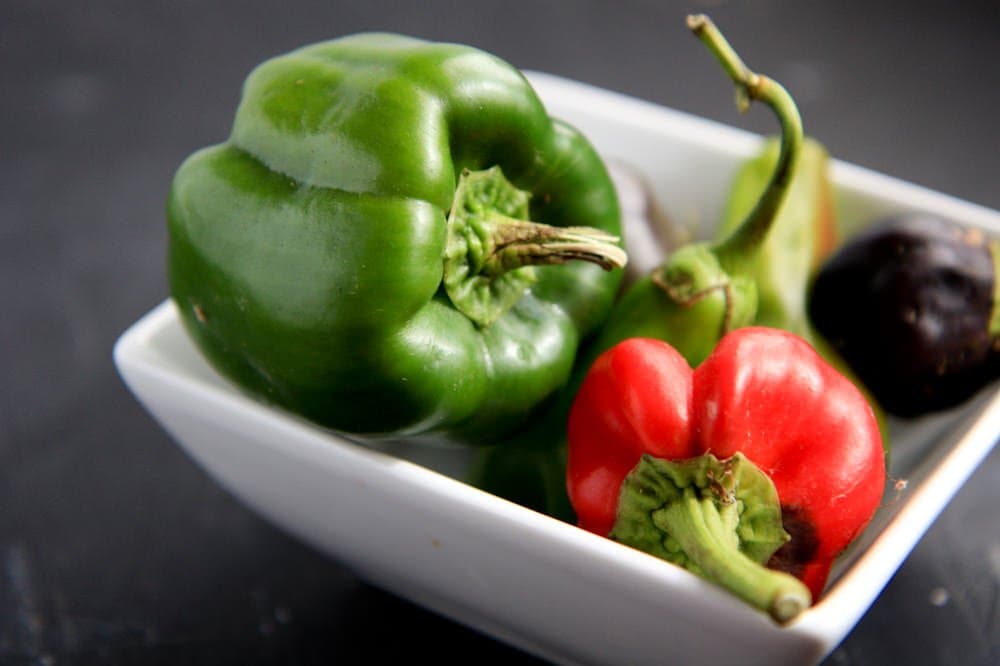
Here are a few peppers that work especially well for homemade hot sauce:
- Jalapeños: Mild to medium heat with a fresh, bright flavor. Great if you want a hot sauce that has some kick but isn't overwhelming. I've found out over the years that jalapeños vary wildly on their heat level based on growing conditions! Some years, one jalapeño is enough to make a scorching hot sauce, and then the next I need 10! This is why I highly, highly recommend tasting your peppers raw first.
- Serranos: Similar flavor to jalapeños but noticeably hotter. A good choice if you want to bump up the heat a bit.
- Cayenne peppers: These are classic hot sauce peppers. They give that familiar bright red color and straightforward spicy heat.
- Habaneros: Very spicy, but also fruity and flavorful. If you want fruity heat, habaneros are the move, but they can be really spicy, so I almost always mellow them with a handful of bells.
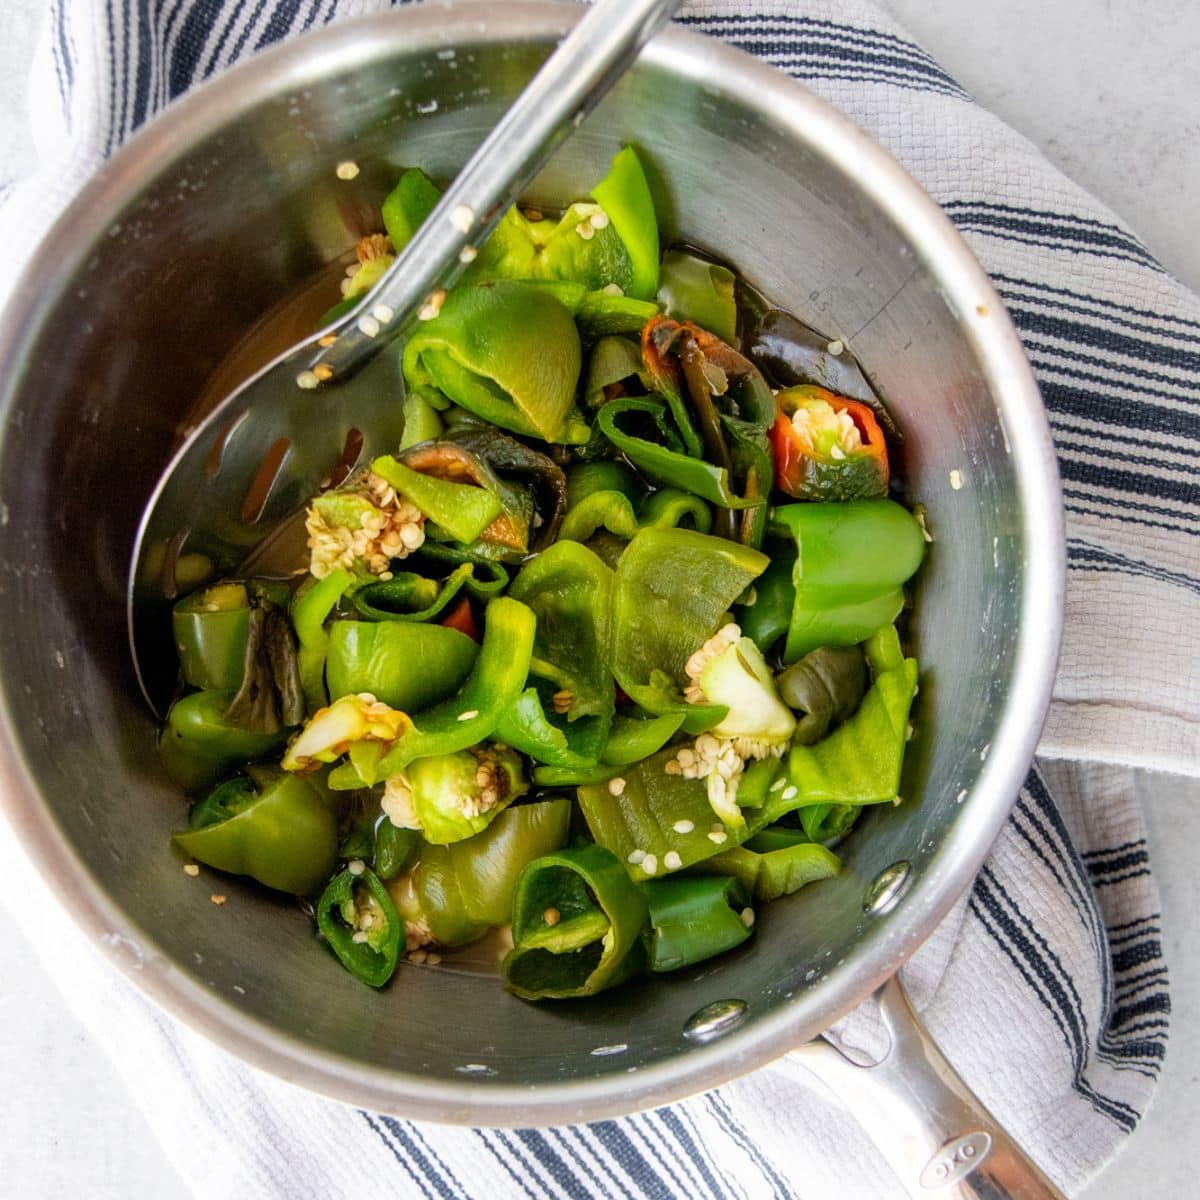
These are just a tiny selection of peppers you can use. Use whatever you find at the store, farmer's market, or in your own garden. This is really a fun recipe to get creative! You can use just one type of pepper or mix several varieties together for a more complex flavor. Here's my rule though if using a mixed bag of peppers: keep your color family consistent so you don't end up with swampy brown sauce. Red peppers with red peppers. Green peppers with green peppers.
🫙 The Supplies You Need
You probably have all the supplies on hand to make this recipe, but if you want a few special items to make the project easier, here's what to grab:
- Fermentation weights and lids: If you want to make the fermented version of this recipe, some fermentation weights and lids make the process much easier.
- Wide mouth canning jars: To go with your fermenting weights and lids.
- Hot sauce bottles: You can put your hot sauce into any sealed container, but these hot sauce bottles are perfect for gifting.
🫶 Before You Start
Imagine you are in my kitchen with me, and I'm teaching you how to make hot sauce. Here is exactly what I'd tell you.
- Fermented is worth it (most of the time): I strongly prefer the fermented version. The flavor gets rounder, more complex, and has less of a sharp vinegar punch. Fermentation is what makes hot sauce taste like hot sauce. I get it though. Time is at a premium for all of us, so if you want something bright and immediate, the quick-cook version is your friend.
- Apple cider vinegar is undefeated: I'm team apple cider vinegar for hot sauce. White vinegar tastes a little one-note to me. I like the fruity flavor ACV adds.
- I don't chase maximum heat: I'm a firm believer hot sauce should taste good first and burn second. I like a sauce that I can put on eggs every morning without regretting my life choices. If you want to make the hottest hot sauce in the land just for funsies, you do you, but I also recommend making some "everyday" milder hot sauces.
- Xanthan gum truther: Xanthan gum isn't required, but I use it because I'm lazy and I don't want to shake the bottle every time I want a few drops. It's worth it. Especially if you are gifting your hot sauce.
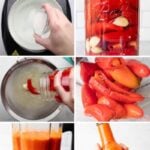
📷 How to Make Hot Sauce (Fermented Version)
If you've ever made homemade sauerkraut, you already know the process we're using to ferment this hot sauce.
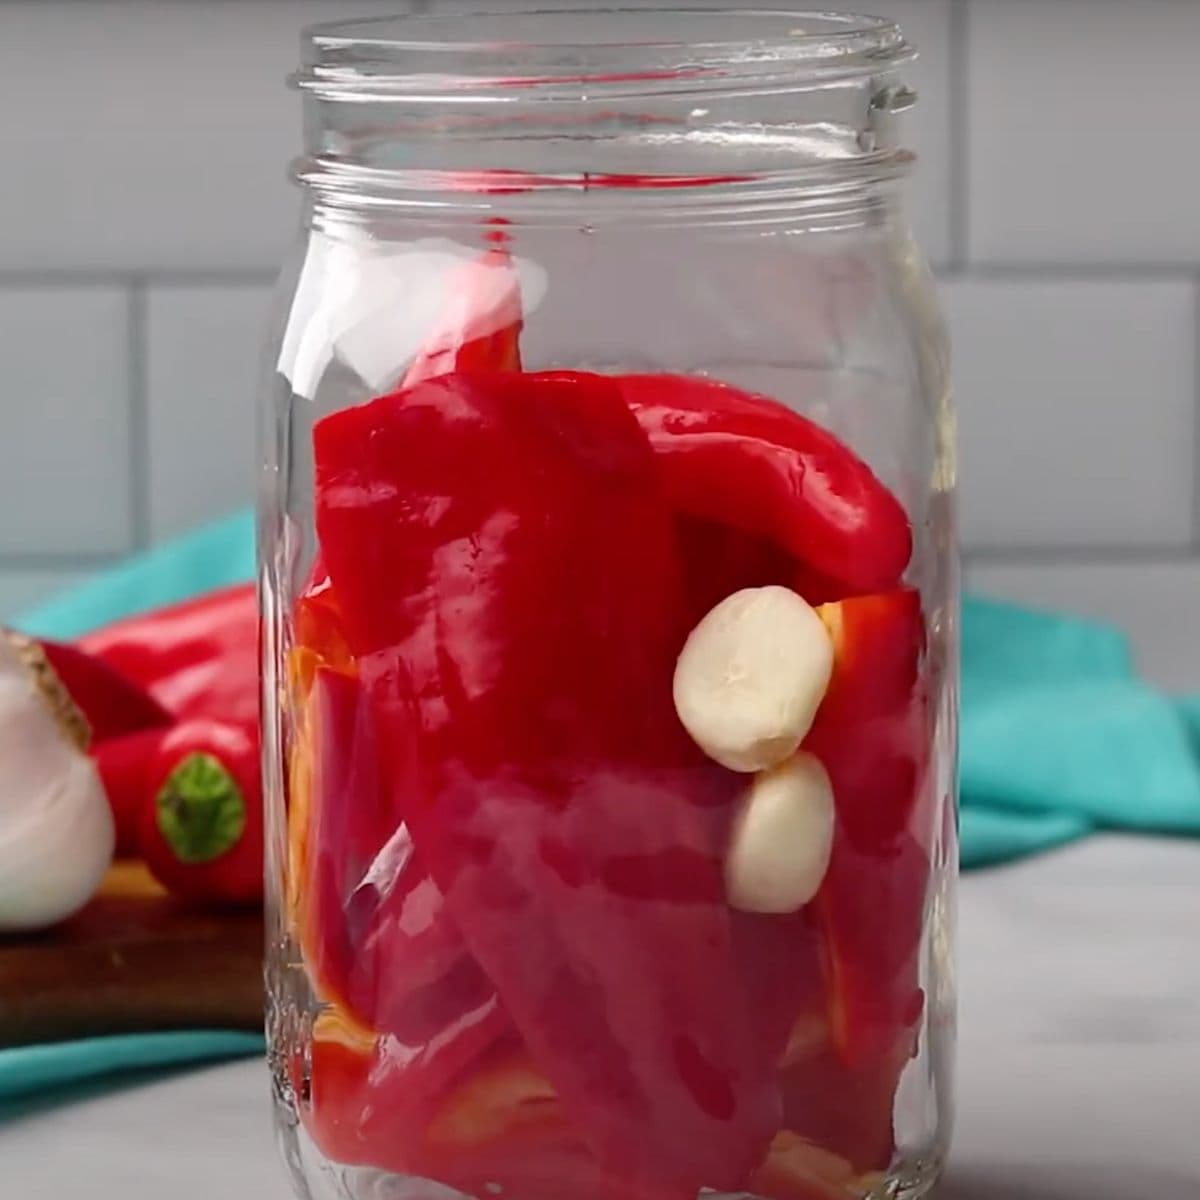
Step 1: Combine peppers and garlic in a wide-mouth canning jar.

Step 2: Make the brine by combining the water and salt in a saucepan and heating until salt is melted. Let cool.
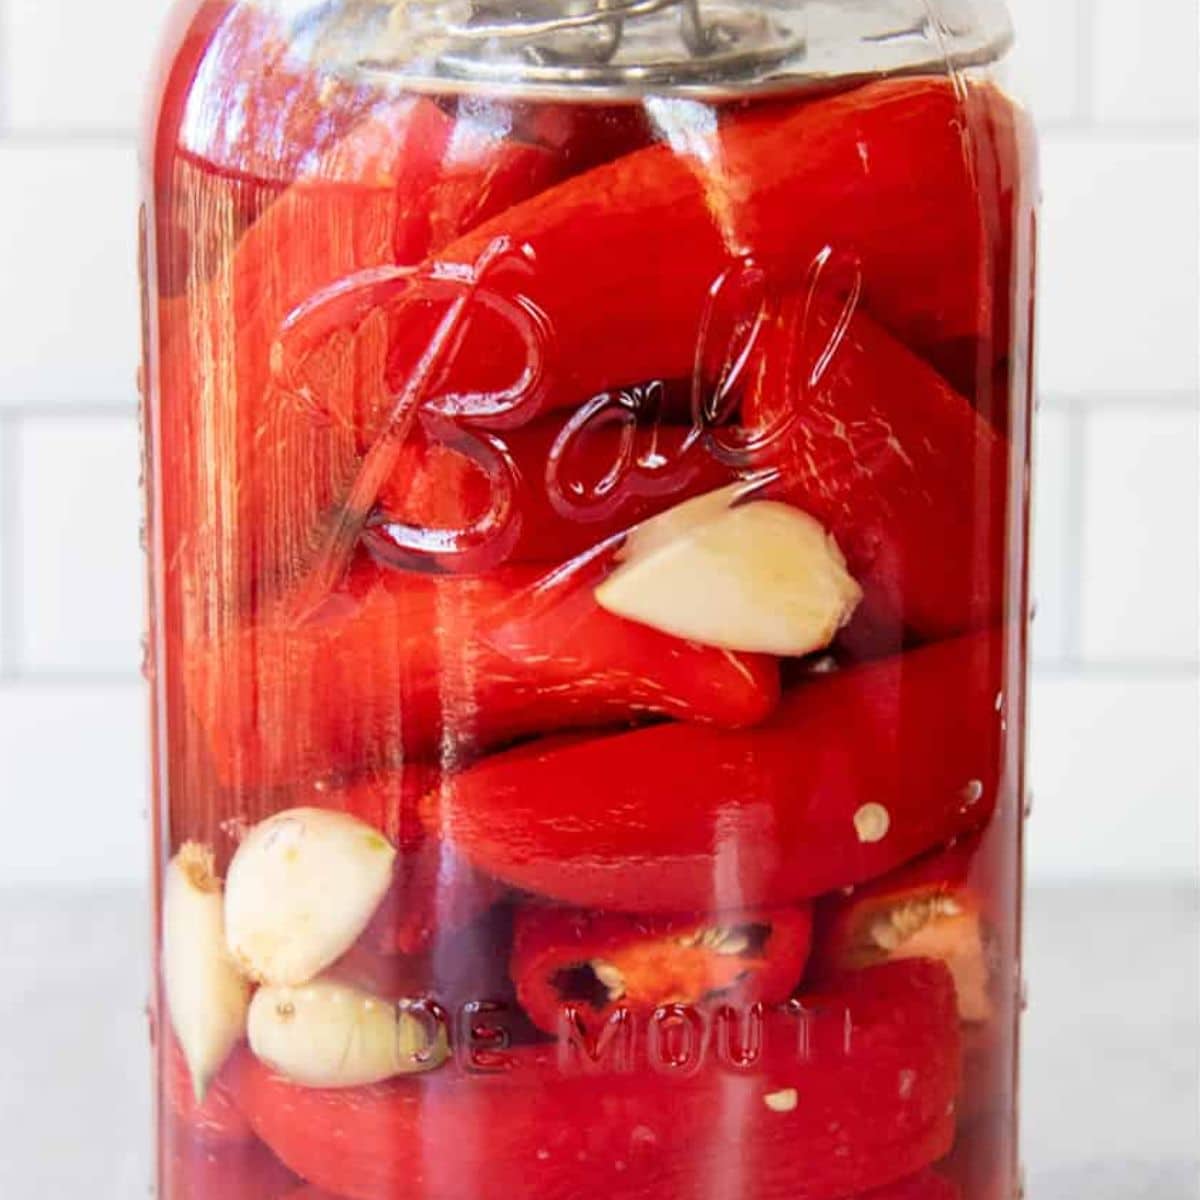
Step 3: Cover the pepper and garlic with the brine, fit with a fermentation weight and lid, and let ferment out of direct sunlight for 5-7 days.
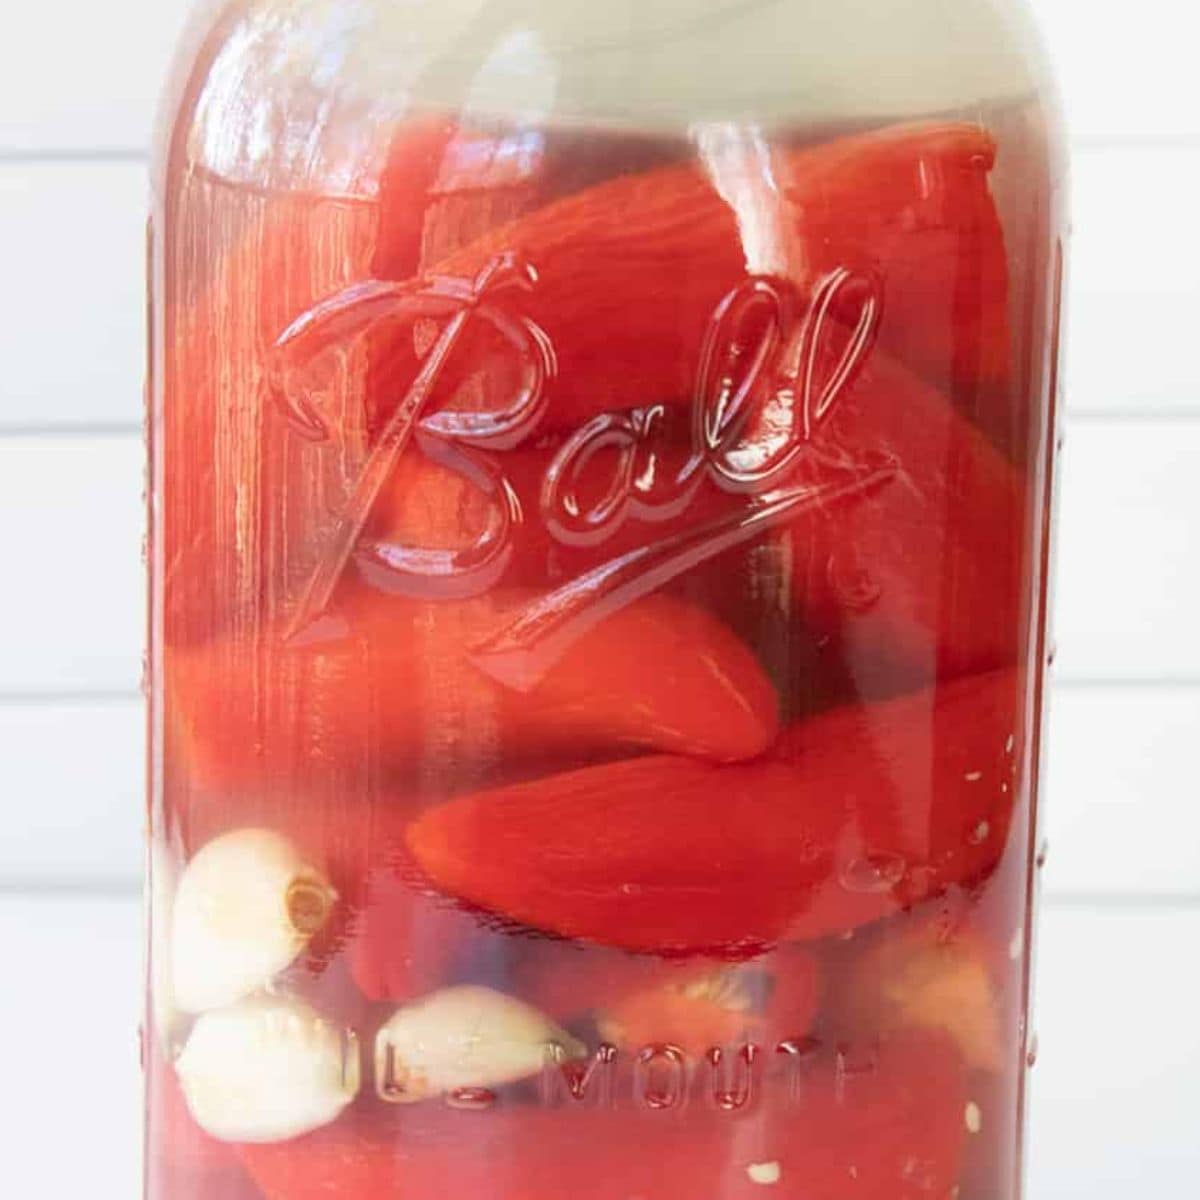
Step 4: The brine will look cloudy when it's ready-this means the fermentation is working!
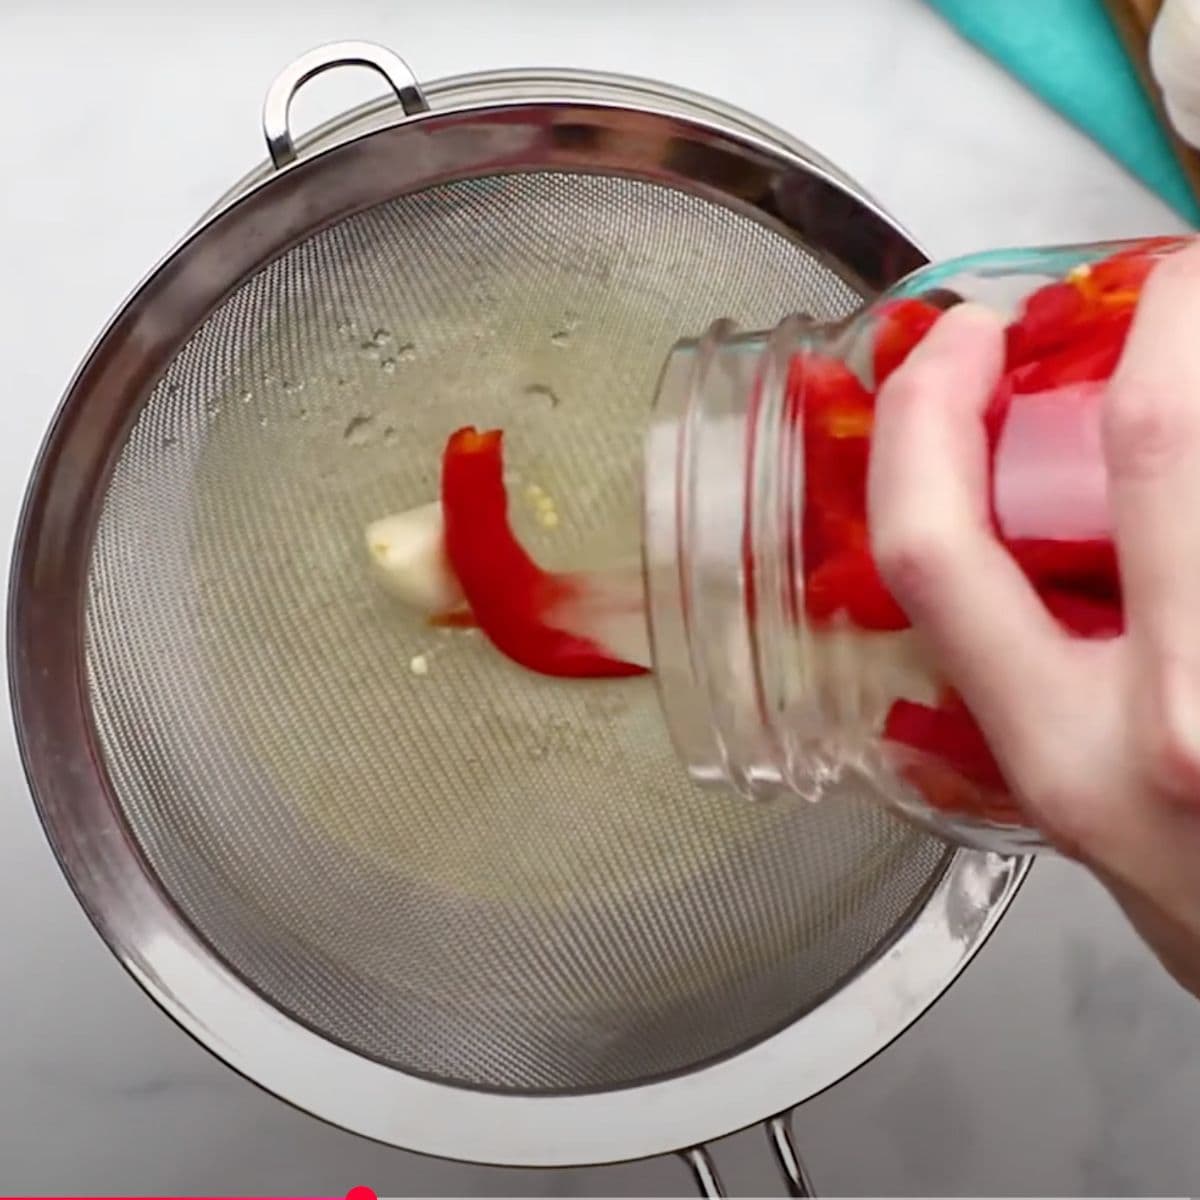
Step 5: Drain the peppers, reserving the brine.
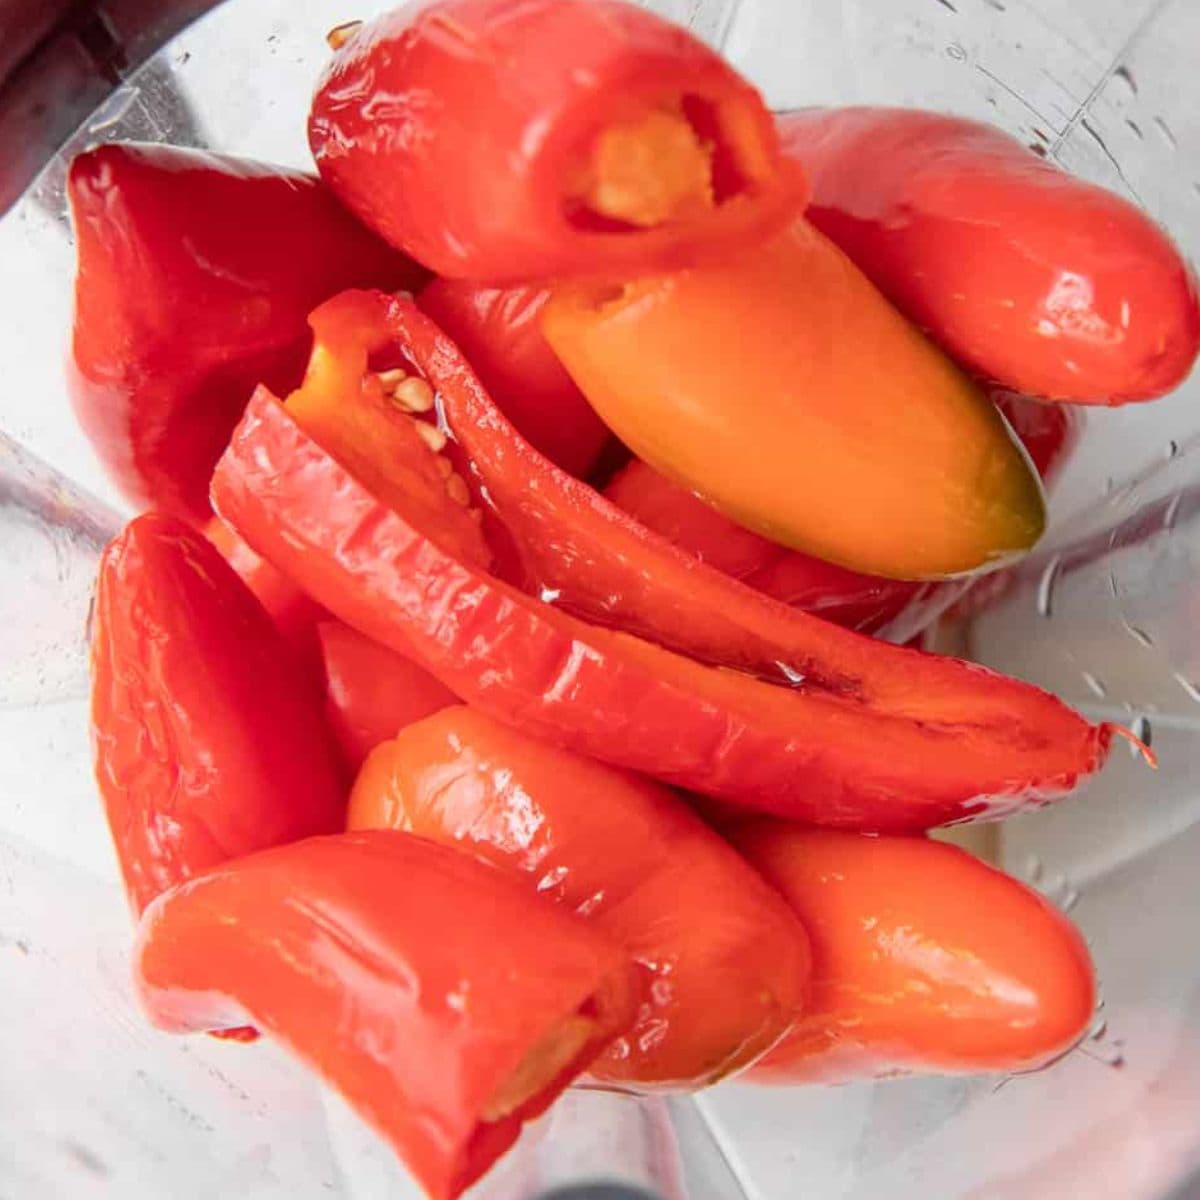
Step 6: Combine the peppers and garlic, vinegar, honey or maple syrup, and 1 cup of brine in a blender.

Step 7: Blend until silky smooth, adding in additional brine to thin out if necessary. If you using the xanthan gum, sprinkle it in while the blender is running and blend for an additional minute.
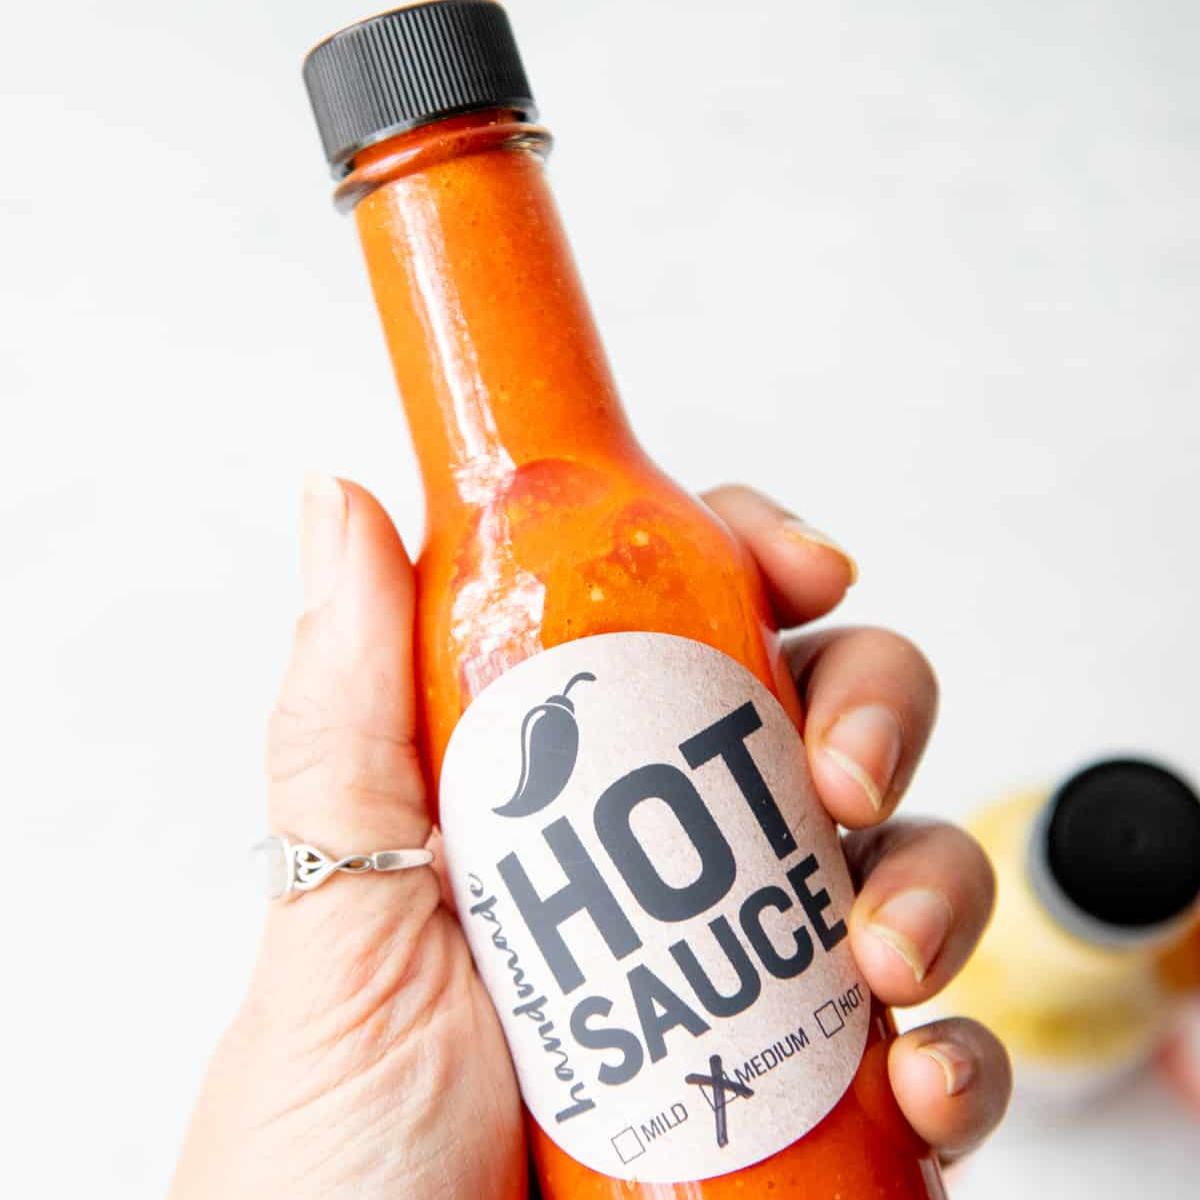
Step 8: Bottle and label!
📷 How to Make Hot Sauce (Quick-Cook Version)
Step 1: Combine the peppers, garlic, water, salt, vinegar, and honey or maple syrup in a medium pan. Bring to a boil and simmer until the peppers and garlic have softened.
Step 2: Pour mixture into a blender and blend until very smooth. While the blender is running, sprinkle in the xanthan gum and blend for an additional minute.
❄️ Storage and Preservation Directions
- Fermented version: thanks to the beneficial bacteria, it will last 3+ months in the fridge easily.
- Quick cook version: lasts in the fridge for 2-3 weeks
- Freezing: Hot sauce freezes great for even longer preservation!
- Canning: If you choose to can hot sauce to extend the shelf life, use a hot sauce recipe that has been tested and proven safe for canning instead of my recipe here.
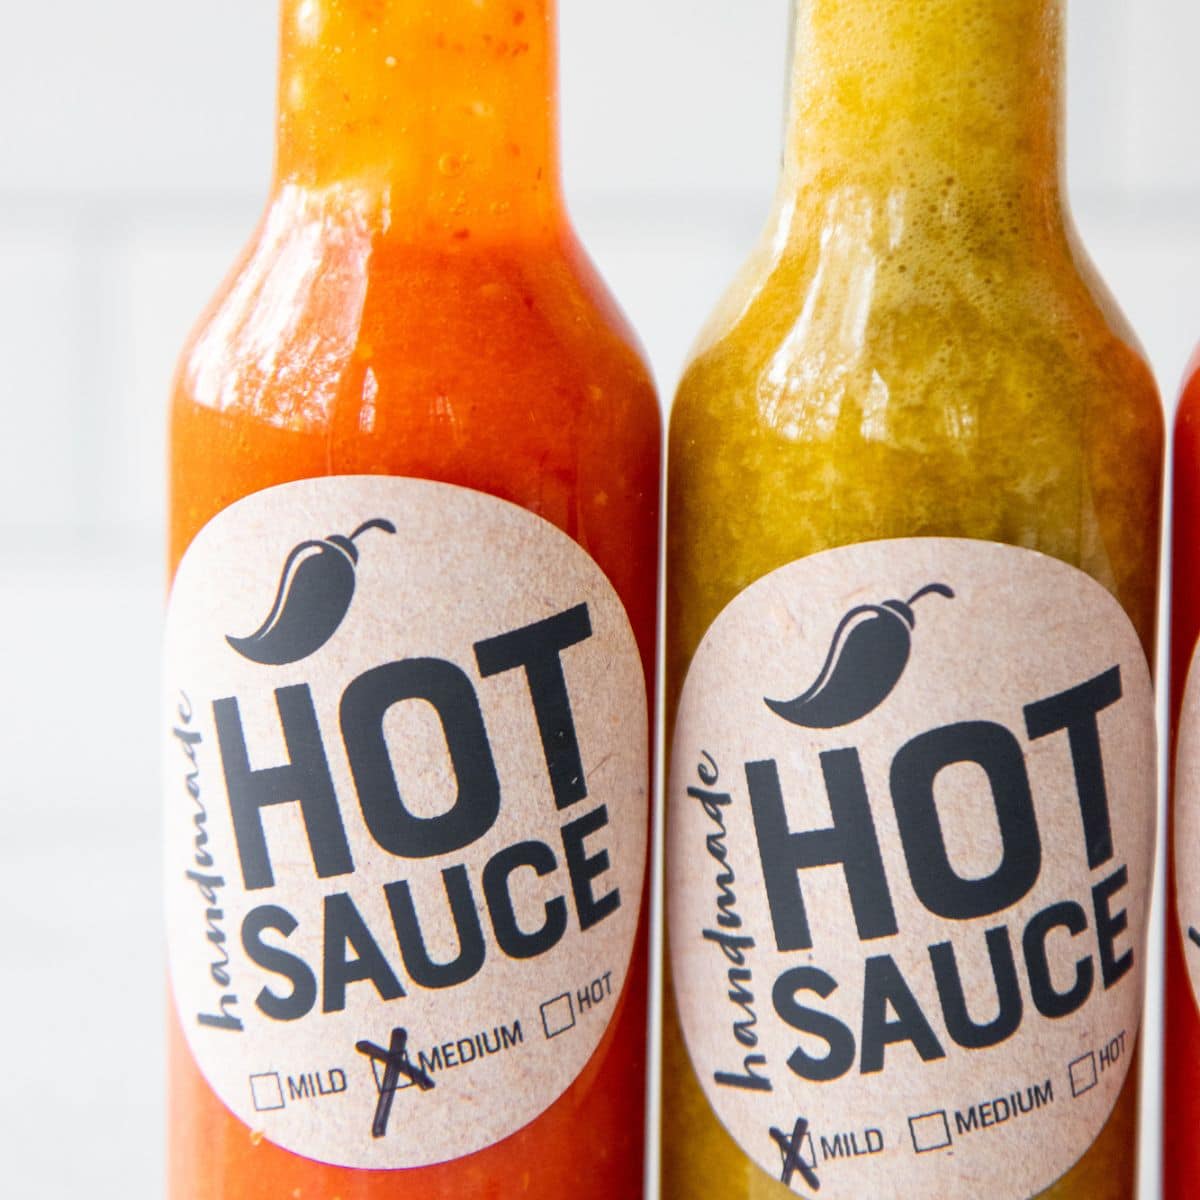
- Labeling: Make sure to label your hot sauce well so you know exactly what it is, what spice level it is, and when it was made. I have free labels you can download by filling out the form below.
🌮 Ways to Use Hot Sauce
Once you start making your own hot sauce, you'll find yourself reaching for it all the time. It's such an easy way to add a little heat and flavor to everyday meals. I have my hot sauce almost every morning on top of scrambled eggs with avocado.
- Drizzled over scrambled eggs or stirred into breakfast egg cups
- Spooned onto a plate of simple chicken quesadillas
- Added to a bowl of taco chili for extra kick
- Poured over a steak fajita bowl
- Mixed into easy slow cooker buffalo chicken dip
- Brushed onto oven baked chicken wings
🙋🏻♀️ Homemade Hot Sauce FAQs
You can use either white distilled vinegar or apple cider vinegar here. I prefer the slight fruity flavor of apple cider!
If you don't want to make fermented hot sauce, you can quick cook the ingredients on the stove and bottle them (and enjoy your sauce the same day).
Thanks to the beneficial bacteria in the fermented version, it will last 3+ months in the fridge easily. The quick-cook version lasts in the fridge for 2-3 weeks.
The best peppers are the ones you have! Any peppers work, but I recommend most people start with a mixture of bell peppers, jalapeños, and a few spicier peppers like habaneros.
Hot sauce may be foamy when you're finished blending. It's normal! If so, let the hot sauce rest for 15-20 minutes, then scrape off any foam before bottling.
👩🏻🍳 My Expert Tips & Tricks
- No brown hot sauce: Mix and match different types of peppers to get the flavors and heat levels you desire, but make sure you stick to the same color family to avoid a yucky brown hot sauce.
- Stay safe: When working with hot peppers, it's important to: wear gloves while handling and cutting, wash hands extremely well after handling, wear goggles, and work in a well-ventilated area
- Label your bottles: Fill out the form in the post to get my free hot sauce labels. These are designed to print on Avery 2 ½" round water-resistant labels.
- The sauce thickens: The hot sauce will thicken quite a bit in the fridge, so keep that in mind as you decide on the consistency while blending. Also: I always start blending with 1 cup of brine, then add in small splashes. It's way easier to thin hot sauce than to thicken it.
- Cloudy brine is good: Cloudy brine is the good sign I look for. Clear doesn't automatically mean failure, but cloudy tells me the party's happening.
- Got foam? Your hot sauce may be foamy when you're finished blending. If so, let the hot sauce rest for 15-20 minutes, then scrape off any foam before bottling.
- No fermentation weights? You'll need to use some sort of weight to keep the peppers submerged under the brine to prevent mold growth. A budget option is to fill a zip-top sandwich bag with water and submerge it in the top of the jar and secure cheesecloth or a thin piece of cotton to the top of the jar with a rubber band.

🌯 Recipes That Will Go Great with Your Hot Sauce


If you tried this Homemade Hot Sauce or any other recipe on my blog, please leave a 🌟 star rating and let me know how it went in the comments!
📥 Download the Free Labels
I've made you some free labels for your hot sauce bottles that you can print off at home. Just fill out the form below to get them delivered right to your inbox.
📖 Recipe
Homemade Hot Sauce Recipe (Fermented or Quick Cook)
Ingredients
- 1 ½ pounds peppers of your choosing a mix of sweet peppers and hot peppers, tops/stems removed, halved
- 6 cloves garlic peeled
- 4 cups filtered water
- 4 teaspoons sea salt
- ⅓ cup apple cider vinegar
- 1 tablespoon honey or maple syrup optional
- ½ teaspoon xanthan gum optional (see notes)
Instructions
For the Fermented Version
- Place the peppers and garlic in a clean wide-mouth quart canning jar. Set aside.
- To make the brine, heat the filtered water and sea salt in a medium saucepan until the salt has dissolved completely. Let cool to room temperature.
- Pour the brine over the peppers and garlic, completely submerging them. If you run out of brine, you can make more by mixing 1 cup of warm filtered water with 1 teaspoon of sea salt.
- Fit the jar with a fermentation lid or cheesecloth secured with a rubber band (see notes on weighing down the peppers if using cheesecloth). Place in a warm, dark spot for 5-7 days, or until the brine looks cloudy and small bubbles begin to appear when you tap the side of the jar. Make sure the peppers stay submerged under the brine during the entire fermentation process to prevent mold-growth.
- When the fermentation time is up, strain the brine, reserving it. Place the fermented peppers and garlic in a blender, and add in 1 cup of the brine, plus the apple cider vinegar, and honey or maple syrup, if using. Blend until completely smooth, adding in additional brine to reach the desired thickness. The hot sauce will thicken in the fridge.
- While the blender is running, sprinkle in the xanthan gum, if using, and blend for an additional minute.
- Transfer to a bottle and store in the fridge for 3-6 months.
For the Quick Cooked Version
- Combine the peppers, garlic, 2 cups of water, 2 teaspoons of sea salt, apple cider vinegar, and honey or maple syrup, if using, in a medium pan over medium-high heat. Bring to a boil, reduce heat, and simmer for 10-15 minutes, or until the peppers and garlic have softened.
- Pour mixture into a blender (making sure to leave the cover vent open, but covered with a kitchen towel) and blend until very smooth.
- While the blender is running, sprinkle in the xanthan gum, if using, and blend for an additional minute.
- Transfer mixture to a squeeze bottle and store in the fridge for 2-3 weeks.
Video

Notes
- If you choose to use cheesecloth during fermentation, you'll need to use some sort of weight to keep the peppers submerged under the brine to prevent mold growth. You can purchase fermentation weights to do this, or fill a zip-top sandwich bag with water and submerge it in the top of the jar.
- In this recipe, xanthan gum works as an emulsifier, stabilizer, and thickener. If you choose not to use it, your hot sauce will separate in the fridge. Just give it a good shake each time you go to use it.
- The hot sauce will thicken considerably in the fridge, so keep that in mind as you decide on the consistency while blending.
- Depending on the power of your blender, your hot sauce may be foamy when you're finished blending. If so, let the hot sauce rest for 15-20 minutes, then scrape off any foam before bottling.
I accidentally forgot to wait for my brine to get to room temperature after boiling it... I waited about 20-30 min after boiling so it wasn’t boiling hot but it was a little bit hot... would you say my batch is ruined? What should I do?
Your batch is not ruined! The main reason for cooling the brine down is so that you don't kill off all of the beneficial bacteria that we're trying to encourage to grow when fermenting. So without knowing exactly how hot your brine was, we would say you have two options: you can always take your batch and process it using the instructions for the quick cook version, or you could ferment it anyway and see how it goes! Make sure your peppers stay submerged under the brine to reduce the chances of mold developing and then keep an eye on it. The brine should get cloudy after 5 to 7 days if all goes well! Good luck!
I just made this fermented version with the last of my green serrano peppers and some jalapenos and 2 habaneros... Even though my husband dumped my brine down the drain thinking it was trash (waaahhhh!!!) it is Delish!! Not too spicy, great consistency (I just made more brine per your instructions for pre-fermentation) and gorgeous green color. I used my Kitchen Aid blender at first, then my Cuisinart immersion blender. I think I'm going to invest in the drool-worthy Vitamix though for the next time I do this as I think in there I wouldn't have to use multiple options. I ordered the bottles and labels suggested in here. This was a great find! Thank you!
Yay! So happy to hear this turned out well for you, Andrea—despite your brine mishap! Hopefully next time you'll have that drool-worthy blender and all of your delicious, probiotic rich brine and you'll love it even more!! Thanks for sharing your feedback with us. We appreciate you taking the time!
I’m fermenting my pepper mix and have the jar filled with brine and a layer of cheesecloth secured to the top. At first all the peppers were submerged, but now there are some peppers poking out of the brine. The jar is totally full to the top lip with liquid. Do I need to worry about that? Will there be a risk of mold if there is peppers breaching the brine?
Yes, mold can develop if any part of the peppers aren't submerged. You can use a plastic bag filled with water as a sort of weight to hold the peppers down.
I misread the recipe and added the vinegar to my brine. Will this hinder the sauce and do I need to still add more vinegar to the blending process? I have a cloudy liquid and it was bubbling. I’m at 7 days today.
Hi, Kris! If the liquid turned cloudy and got bubbly then it fermented! You may not need to add any more vinegar to the blending process. Your best bet will be to blend it, taste it, and see how you feel about it. You might find that it's okay as is, or you might be missing some of the brightness from additional vinegar. It's really going to be up to your personal preference. Let us know how it turns out for you!
I have a ton of peppers ready to be used to make this hot sauce. I am wondering... do you think it would work to freeze the hot sauce in larger batches, and then thaw and bottle for gifts later? If so, would it still last 3-6 months after thawing? Thank you!
I'm not sure! If I had to guess, I'd think it might work, because freezing does tend to be a decent way to preserve probiotic-rich foods, but I honestly couldn't tell you for sure.
Very excited to make this recipe! Before I start, I'm wondering whether the salt you call for in the recipe is a coarse or fine sea salt. I'm noticing a lot of people saying their peppers molded and if they're using a coarse salt instead of a fine salt that might be part of the reason. Thank you!
Fine sea salt is what I always use. 🙂
You need to explain the fermentation process a little better...i just used the cheesecloth method and wasted a whole summers worth of hot peppers grown in the garden due to mold. And no it was not yeast, it was green and fuzzy
I just did the same 🙁
So sorry you lost your peppers!
All of my peppers float in the jar so they won’t stay beneath the brine.. I tried this a week ago with the cheesecloth and it ended up molding.. this time I bought the fermentation lids but since the peppers aren’t staying under the brine, will it mold anyway??
If the peppers aren't under the brine, they will likely mold. Depending on the brand of fermentation lid you have, it may have something you can adjust to push the peppers below the brine and keep them there—I know the Kraut Source ones push it down with a stopper, and the Easy Fermenter ones come with glass weights. We've also added a recommendation for using a baggie filled with water in the cheesecloth method to keep the peppers down.
Another option to specialty weights (expensive) or bags filled with water (don't work) is to use 4 oz mason jars. They are cheap and have other uses besides as weights. They fit inside wide mouth quarts. Just put the peppers in the quart, then the 4 oz jar, the fill with brine. The 4 oz jar will be filled with brine and hold down the peppers.
Hi, David! We've actually had no issues with the bags filled with water not working, but we're glad you found an alternative that works well for you. Thanks for taking the time to come back and share it with us!
How weird is it supposed to smell after fermenting? 😕
It should smell yeasty or vinegary. 🙂
Hi there,
I made this sauce and stored it in my cabinet. When I opened the bottled, the sauce was fizzing out - how do I avoid that?
We recommend storing both versions in the fridge. Your hot sauce kept fermenting while stashed at room temperature—hence the carbonation.
Can you put more than 1 1/2 lbs of peppers in one quart jar,
I’m curious as to why you submerge the peppers in the brine in a clean jar then transfer them to another clean jar. Couldn’t you keep them in the initial jar you pour the brine into?
Rodney, yeah, I had that same question. That's what I've always done when fermenting--just leave them in the same jar, pickles, kimchi, sauerkraut, whatever I've done. It's worked fine!
That was a mistake! Thanks for catching it. 🙂 We've updated the recipe.
I can’t wait to try this. I have fruit in mind but I wanted to know, so I add it after the fermentation process?
You can ferment the fruit with the pepper, if you like!
Are there any alternatives to xantham gum? Cornstarch slur perhaps? I added too much brine and need to thicken it up.
A cornstarch slurry will definitely thicken it, but you'll have to heat it to a simmer to use it, and that will kill all the beneficial bacteria. So it's up to you!
This looks fantastic! I just have a quick question. Does the fermented version need to be refrigerated? I'd like to give this as a gift, but it would be wrapped in a cool place for about a month. Thanks!
The fermented version does still need to be refrigerated! It would likely be okay sitting out for a few days but would need get into the fridge pretty quickly after that. If your hot sauce gifts absolutely need to sit out for a month before gifting, we would recommend looking for a recipe that's been tested and proven safe for water bath canning (not this one!). That's the best way to preserve your hot sauce for longer storage. The only issue you should know about canning is that the high heat from the canning process with kill the beneficial bacteria in your fermented sauce—so no probiotic goodness inside—but it will still be delicious! Hope this helps!
When you say to store in the fridge for 2-3 weeks, does that mean to wait 2 or 3 weeks before eating it or it will go bad in 2 or 3 weeks?
Eat within 2-3 weeks—the quick-cooked version won't last longer than that. 🙂
What about fermentation using only whey as the starter?
This is probably a foolish question, but is it possible to make hot sauce in this manner without the salt (skipping the brine or altering it)? My goal is a no-added salt version. Most of the recipes I've found online are very clearly not going to yield a good-tasting sauce, but your fermentation method is super intriguing (and promising). Unfortunately, I'm doomed to life without salt, so any help is super appreciated.
No, the salt in the brine is what keeps bad bacteria and mold from multiplying during your fermentation. 🙂
I have a thought! Have you ever done a lacto-ferment? We have made some lovely lacto-fermented bell peppers; I firmly believe it would work with chilis as well. Instead of a salt brine, you ferment the veggies in whey. Whey from homemade yoghurt is what we usually use, but you could take some from store bought yoghurt if you don't make your own, simply strain some of the liquid out of a plain yoghurt from the store, making sure it has all the live cultures. DON'T use Greek yoghurt for this. Greek yoghurt is strained longer than standard, as thus has less whey to give up for you.
I was curious what the maple syrup or honey does to the hot sauce? Like what flavor does it add? I don’t really like honey but I find it weird to add syrup, so I was curious what exactly it’s added for?
It helps to add another layer of flavor. It doesn't taste like honey or maple syrup, it just balances the heat a bit. 🙂
Love this! We have tons of peppers and we’d love to make hot sauce as our wedding favors. After bottling do they need to go in the fridge right away? Or would they be ok sitting out for a few days?
They would be fine sitting out for a few days, but I would make sure all your wedding guests know to get them refrigerated as soon as possible. 🙂
Can I add fruit to this recipe? Like what can I do if I want want to make a passion fruit or mango flavored hot sauce? Please let me know! Also, thank you for the recipe. I'm going to get all of my ingredients tomorrow!
Sure can! Experiment away.
I had a hard time fitting all the peppers in one jar, because I weighed them as I sliced them. To make them fit I had to chop them in tiny pieces which makes it hard to keep all submerged. You should clarify that they should be weighed before the stems / tops are removed, as removing the tops makes them weigh a lot less.
Thanks so much for your feedback, Clayton! We're sorry to hear you had trouble with the recipe, but we appreciate you taking the time to tell us about it so that we can look for ways to improve =)
Really informative. Thanks
So bottled water would be fine to use?
Hi, Amanda! Bottled spring water or distilled water would be fine. You just want something that's not chlorinated so it won't interfere with the fermentation.
Thank you so much for this recipe. You give the basic tools needed to make everyday items at home without all the mystery ingredients that store bought sauces have in them. And it's tons of fun to make my own stuff and show it off!! Lol
Does the water need to be filtered? If so, why?
Hi, Jane! We highly recommend using filtered water when fermenting. Municipal water from the tap is typically chlorinated to prohibit bacteria growth. The problem is, that prohibits the growth of the good bacteria we're trying to encourage to grow with our ferment! So using unfiltered water can slow down or prevent the fermentation from happening.
If you don't have a way to filter your water, the easiest thing you can do is leave it out in an open container or pitcher (on the counter or in the fridge) for 12-24 hours before using it. Most of the chlorine will evaporate during that time, making it better for use in fermenting recipes like this one. I hope this helps!
I've attempted the fermented recipe and I'm disappointed to find that on the 6th day there's mold growing around the top of my jar just above the liquid. I don't believe I'll be using this to make hot sauce.
There is a strong possibility that what you are seeing is not mold at all, and is actually a completely safe yeast (called kahm yeast) that tends to bloom during fermentation—it's really easy to get these two mixed up. Here are some photos to help you figure out the difference: https://www.fermentingforfoodies.com/kahm-yeast-mold/
If it is mold, you do want to discard the ferment—some folks scrape it off and keep fermenting, but I've always been on the "better safe than sorry" side of things. But if it's just yeast, you can keep on just fine.
Wish I'd read this before pouring mine into the garbage disposal!
Oh no!
Thanks for sharing this! I'm glad I read this and saw the picture before I discarded my peppers and brine! The picture saved the day!
Hooray! That's so great to hear—thank you!
Tried the fermentation recipe and my brine got moldy on top about 5 days in. Used the same salt/water ratio. Not sure what happened.
Were your vegetables completely submerged in the brine? If not, that can often be the cause of mold issues.
After more consideration I do believe that what I saw was not mold but brightly colored yeast bloom as suggested.
Thanks again!
Update, I skimmed the nasty and completed the recipe as stated with the exception of me boiling brine. The hot sauce is yummy 😋
Thanks for the recipe!
I'm trying to create my own hot sauce, but so far there's no luck in doing that. Luckily you shared the hot sauce recipe, I never knew that emulsifiers should be used during the blending process to keep the hot sauce from sauce from separating. I'll try your suggestion, but in the time, I'd look for the best hot sauce here in Kansas first.