
Homemade Sauerkraut


As a kid, I was certain that I hated sauerkraut-the store-bought jars that my dad broke out to have with his dinner never appealed. But then, I discovered the beauty of homemade sauerkraut. This recipe makes a sauerkraut that is tangy, crunchy, and chock-full of gut-friendly probiotics. I know you'll love it, too!
I've been making this sauerkraut recipe for years now, and I've learned a lot along the way. Now that I have my method fully tested, perfected, and repeated time and again, I'm finally ready to share it. Let me teach you all my best tips and tricks for this easy fermentation project.

What is sauerkraut, anyway?
If you didn't grow up with a kraut-loving dad, you might not realize that sauerkraut is just cabbage mixed with salt and fermented. That's really it! Of course, you can fancy it up however you like (and I provide some suggestions in a bit), but you really only need those two ingredients to make homemade sauerkraut.
What kind of salt should I use to make homemade sauerkraut?
I prefer using sea salt. Either coarse or fine sea salt should do the trick.
Does sauerkraut have vinegar in it?
Traditionally fermented sauerkraut (which is what we're making here) does not include vinegar. However, you can mimic the tangy flavor of fermented sauerkraut by making "quick" pickled cabbage using vinegar, like we do in our Beer-Braised Brats recipe.
Why should I make homemade sauerkraut?
The biggest reason I think you should dive into any kitchen project is that you think it'll be fun! Beyond that, sauerkraut is delicious and incredibly good for you (more on that in a sec). It's also a wonderful way to preserve food! Fermented sauerkraut can easily store for months.
Is fermented sauerkraut good for you?
Yes, my friends! Fermented homemade sauerkraut is packed full of gut-healthy probiotics. Having a healthy gut biome (the name for the population of bacteria and yeast that live in our digestive system) is linked to obvious benefits like better food digestion and and helping you poop regularly, but also may contribute to things you might not think of-like lowered risk of mental health issues and a healthier immune system. Our ancestors didn't take a probiotic pill each day, but they ate a bevy of fermented foods daily, like kefir, yogurt, and sauerkraut!
Is it okay to eat sauerkraut every day?
Absolutely! In fact, some healthcare professionals I've worked with have suggested I eat fermented foods at every single meal!
Is all sauerkraut fermented? Even the store-bought stuff?
Yes, fermentation is what gives sauerkraut its distinct sour, tangy flavor (just like with fermenting yogurt) and a hefty dose of gut-friendly probiotics. HOWEVER (and this is a big caveat!), shelf-stable sauerkraut-often found in either a can or jar at the grocery store-has been heated to high temperatures during the pasteurization and canning process, thereby killing the probiotics. You still get some of the sour, tangy flavor, but the major health benefit is gone. And the process also makes for some seriously limp kraut-another reason I MUCH prefer homemade sauerkraut!
In the past few years, we've seen a resurgence of fermented sauerkraut in stores that is not shelf-stable. They still have all of their probiotics intact, but unfortunately, they are pretty pricey! I've seen it cost as much as $7-$8 a jar! Which is really crazy when you realize you can make that size jar for pennies at home.
Protip: Get those probiotics!
Homemade sauerkraut has way more gut-friendly probiotics than the shelf-stable stuff at the grocery store!

How long does sauerkraut take to ferment?
The amount of time you leave your sauerkraut fermenting is more of a personal preference than a rule set in stone. I recommend starting to taste your sauerkraut at the four-day mark, and then to keep tasting every day until its taste and texture are to your liking. Some people ferment sauerkraut for months-so it's really almost impossible to overdo it! The longer you ferment, the more probiotics you'll get in each bite, and the tangier and softer the sauerkraut will be. I tend to like my sauerkraut right around the 14-day mark-it's nice and tangy, but still crunchy!
Protip: When is sauerkraut ready?
Sauerkraut may be ready as early as 4 days after you start it. But for a tangier taste (and more probiotics!), let it ferment for closer to 2 weeks.
Do you make sauerkraut in a crock? Or in a jar?
Traditionally, sauerkraut was fermented in a large ceramic crock (similar to this one), and you absolutely can do that if you have access to one and want to do sauerkraut on that scale.
I've found that for most smaller families (especially ones who don't grow their own cabbage), a jar or two of kraut at a time is plenty-which is why I much prefer fermenting sauerkraut in a mason jar on my countertop. Small batch fermenting is fun and requires a low investment-if a batch doesn't work out, you didn't just waste five gallons of food! I exclusively use wide-mouth quart mason jars for homemade sauerkraut.
Protip: How much kraut?
A quart mason jar makes the perfect amount of sauerkraut for a small household.
What special tools do you need to make homemade sauerkraut?
Other than a good size jar with a lid, you don't really need any special tools. However, there are two elements to the fermenting process that special tools can help with:
- Keeping the cabbage below the brine. The key to getting a good ferment without any mold is to make sure the cabbage stays below the level of the liquid brine-mold can't grow in the salty, liquid environment. There are specialty sauerkraut weights and fermentation lids that help with this. You can also DIY it for free! Grab some rocks from outside, clean them well, and then seal them in a zip-top baggie. Cut a circle the width of the jar out of one of the outer leaves of the cabbage. Wedge the cabbage circle into the jar on top of the cabbage under the brine, and then place the bag full of rocks on top to hold it down.
- Allowing carbon dioxide to release from the ferment. As the bacteria multiply, the sauerkraut will release carbon dioxide. This gas needs to escape somewhere or eventually, your jar of sauerkraut will turn into a bomb of sauerkraut. You can avoid exploding kraut with a regular jar just by "burping" it (opening the jar to let some of the gas out) every day or so. There are also special fermentation lids that also have airlocks that do the burping for you.
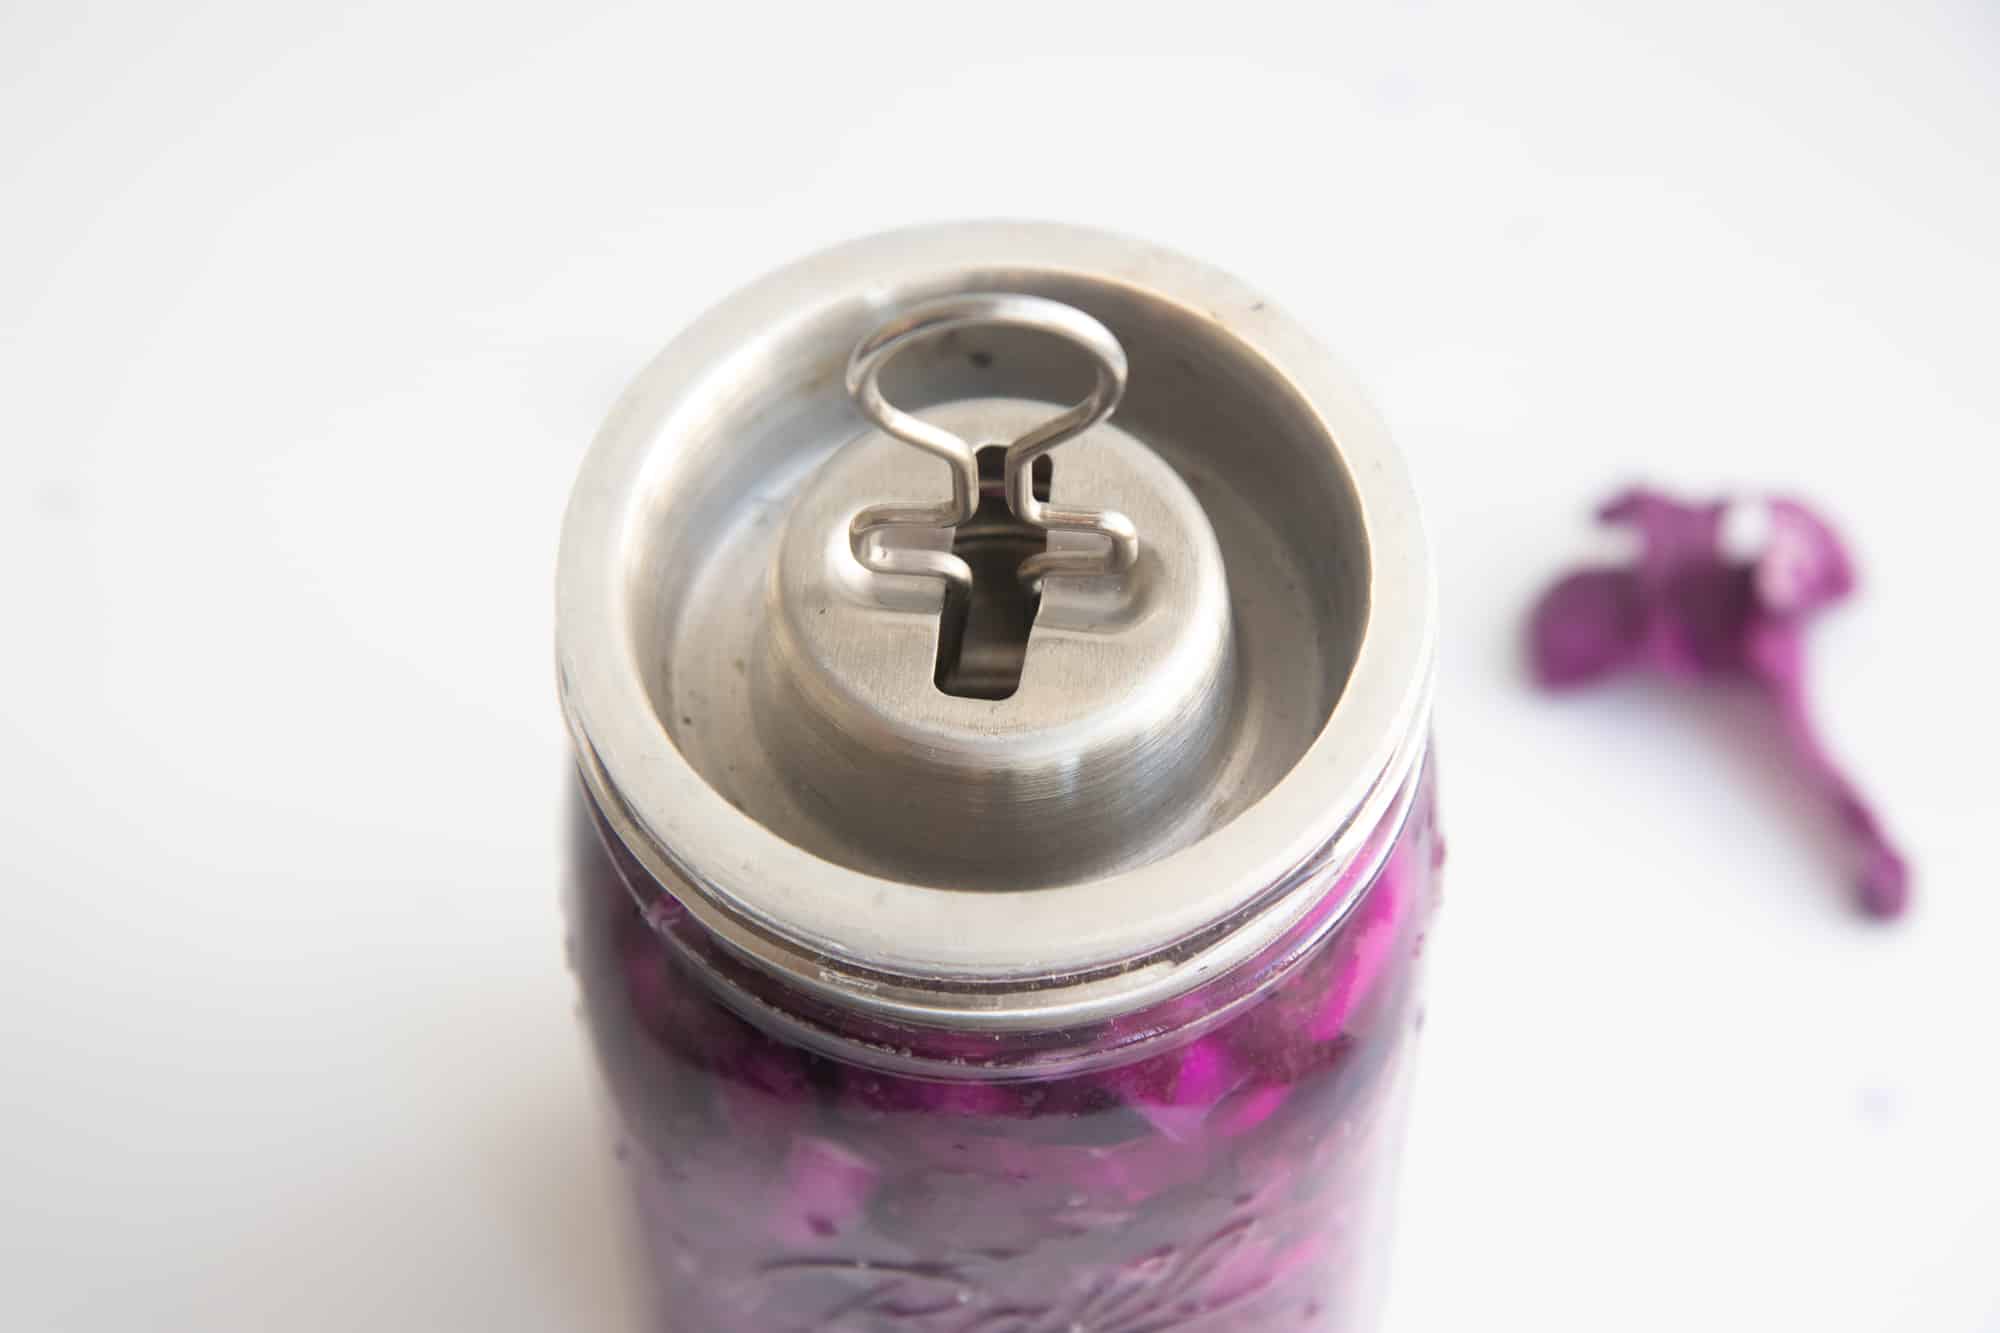
Overall, you don't need any special equipment, but if you think you'll be fermenting and making sauerkraut regularly, your process will be a lot simpler if you do invest in fermentation lids. I personally use two different fermentation lids:
- These all stainless steel lids from Kraut Source. I like that they solve both issues-they keep the cabbage below the brine and have an airlock. I've had them for years and am very happy with them!
- I also have an Easy Fermenter set, which truly lives up to its name! It's incredibly easy to use. I find myself reaching for them quite often.
Is this recipe okay for canning?
This recipe has not been tested for canning, so please don't try it! Instead, we recommend you check out this sauerkraut recipe from the National Center for Home Food Preservation. And remember, you won't get nearly as many probiotics in canned sauerkraut.
How to Make Sauerkraut:
You'll be shocked at how easy the process is. I promise you can do this! Here is a step-by-step tutorial showing you how to make sauerkraut:
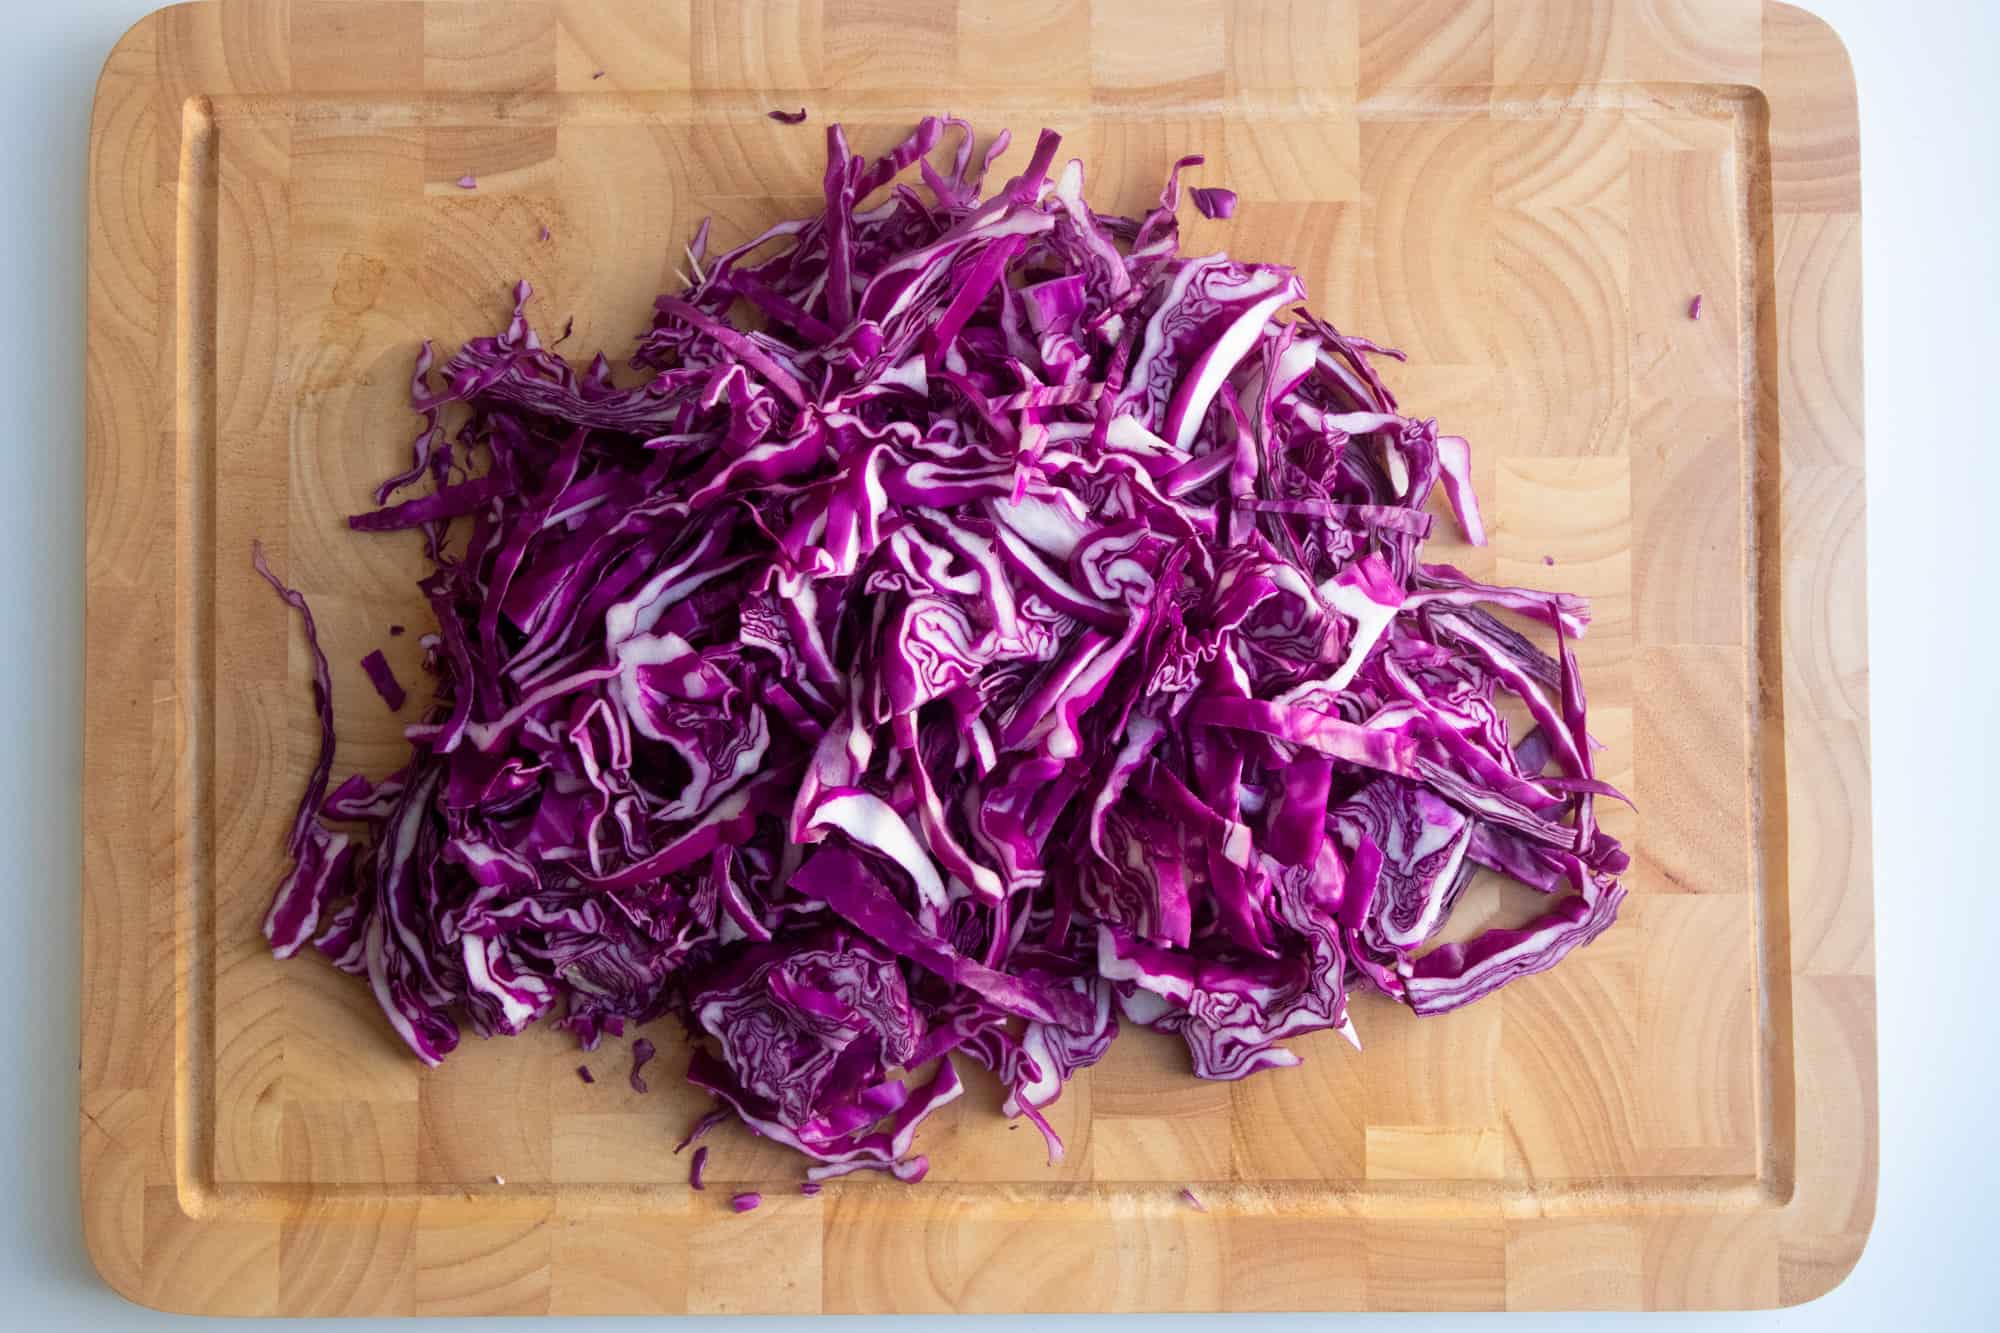
Step 1: Shred or Thinly Slice Your Cabbage
You can do this with a sharp knife, a mandolin slicer, or the shredding blade of your food processor. In general, the thinner the cabbage is shredded, the easier it is to pack it into the jar and get a good ferment going. I do tend to enjoy the texture of slightly thicker cabbage though-it's a personal preference thing!
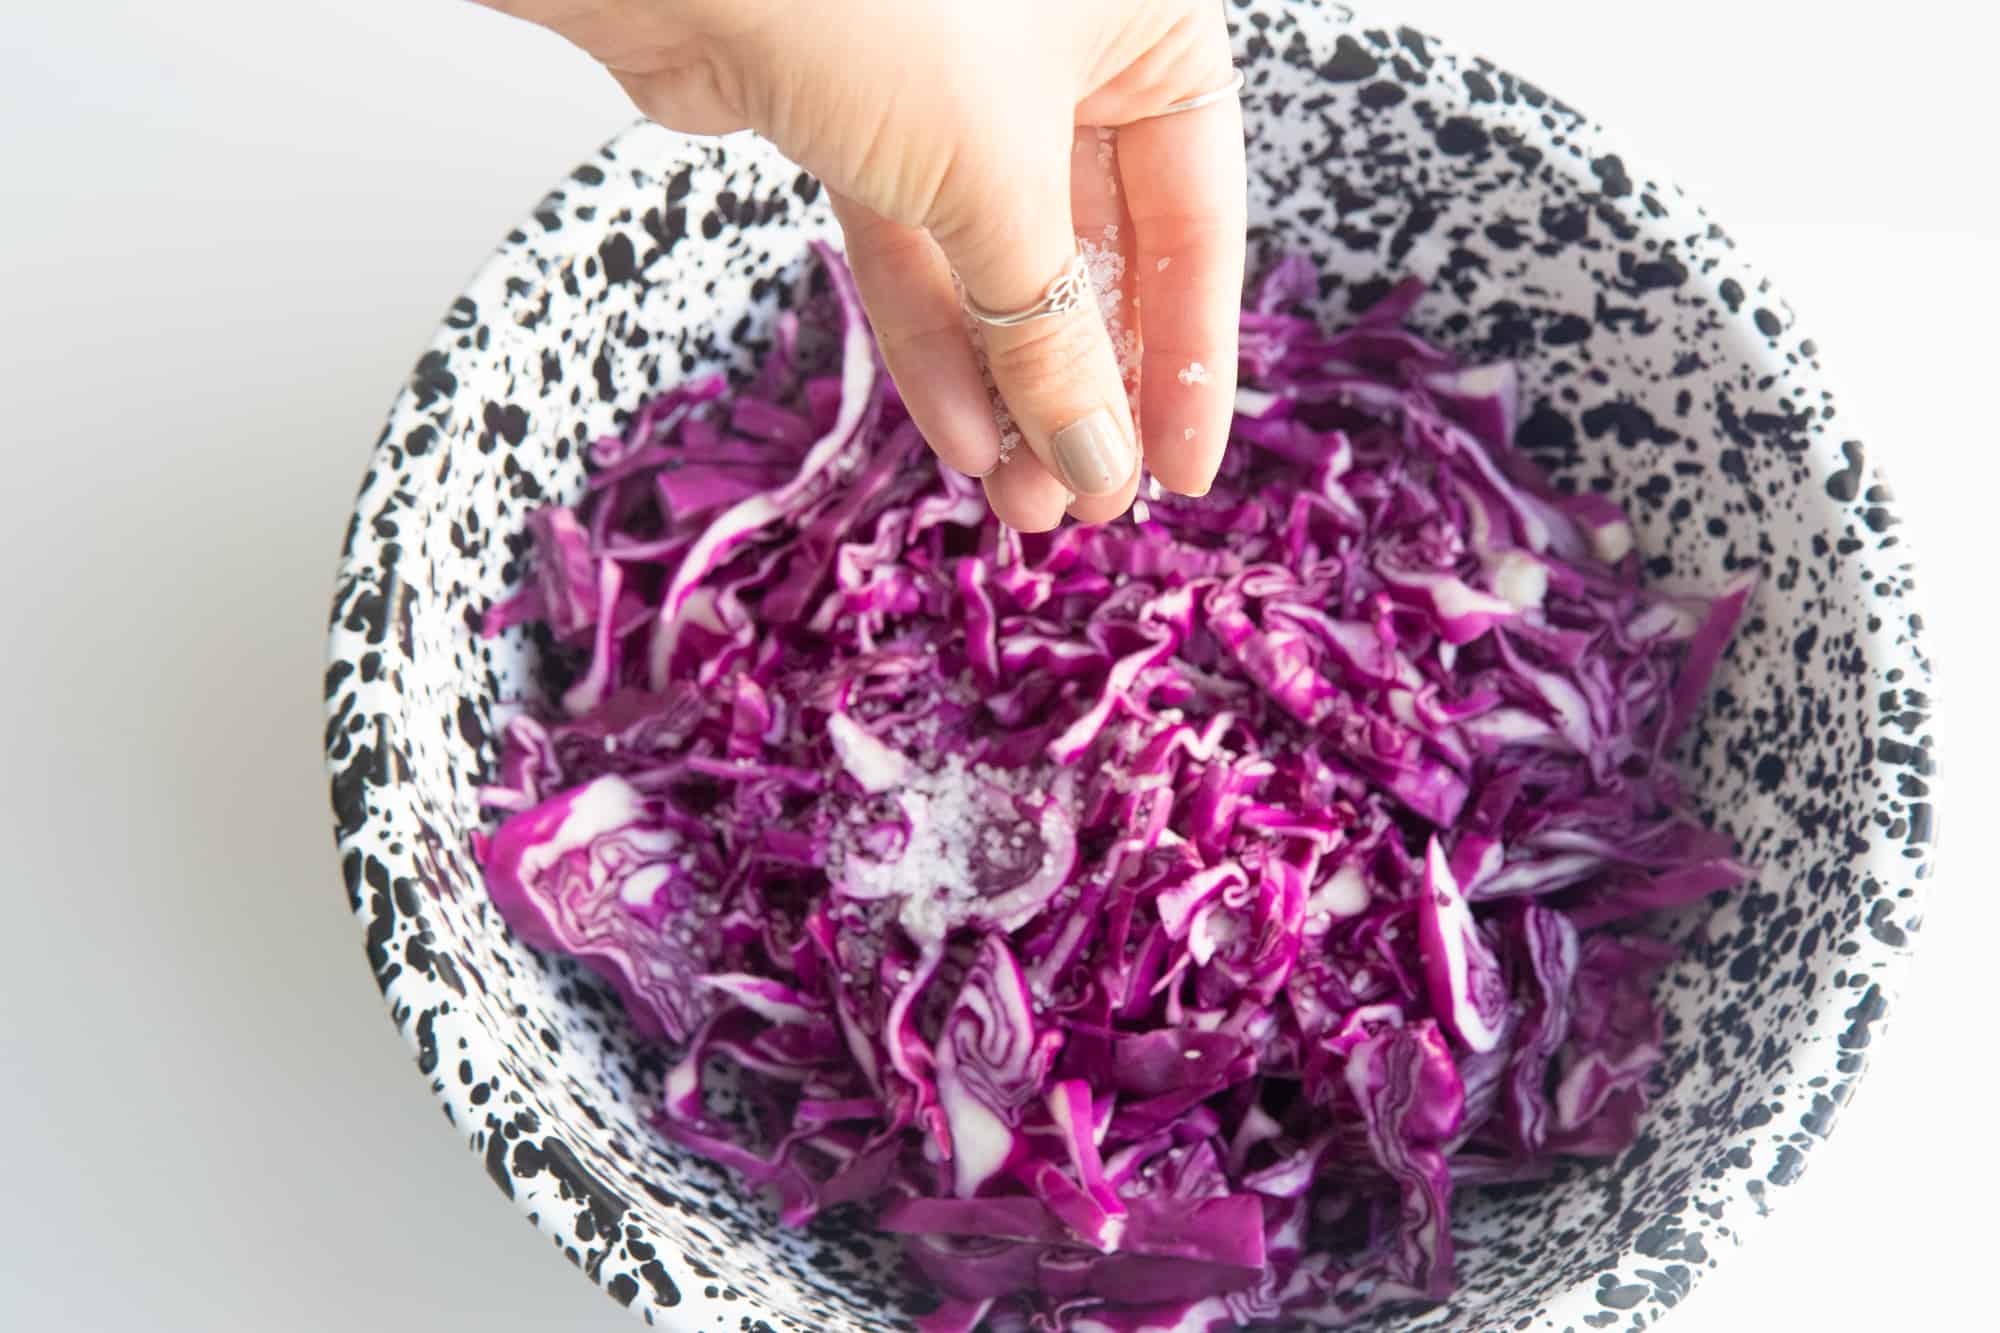
Step 2: Mix the cabbage with salt.
Adding enough salt to the cabbage is what creates an environment where the sauerkraut can ferment without nastiness growing. The best way to figure out how much salt to add is by weight. Add the cabbage to a large bowl, and then add 1 tablespoon of salt for every 1 ¾ pounds of cabbage (or other vegetables, if you want to do a mix in your sauerkraut). I prefer to use sea salt.
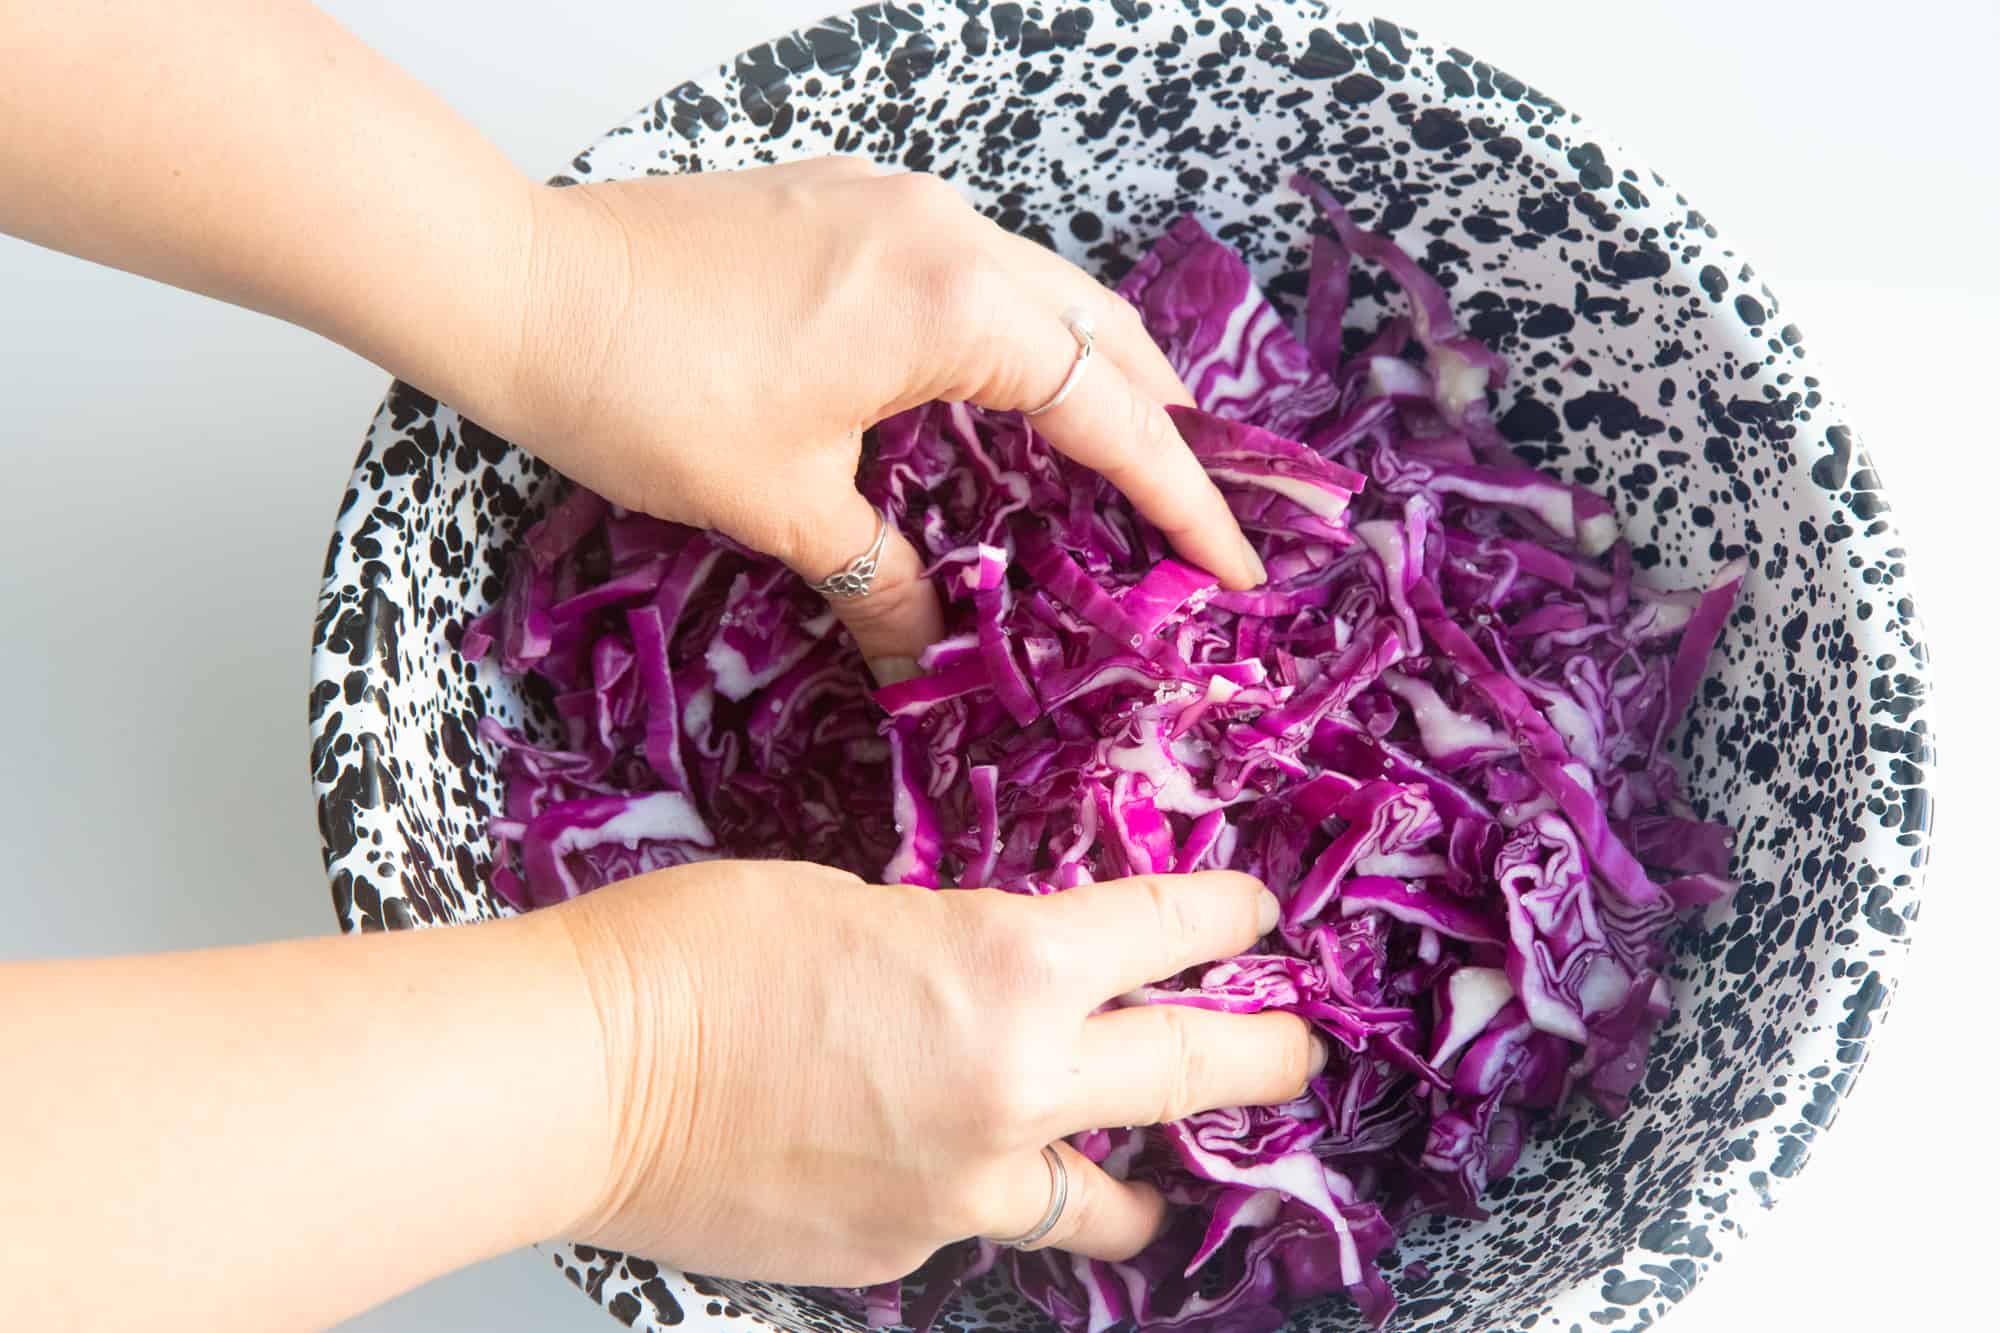
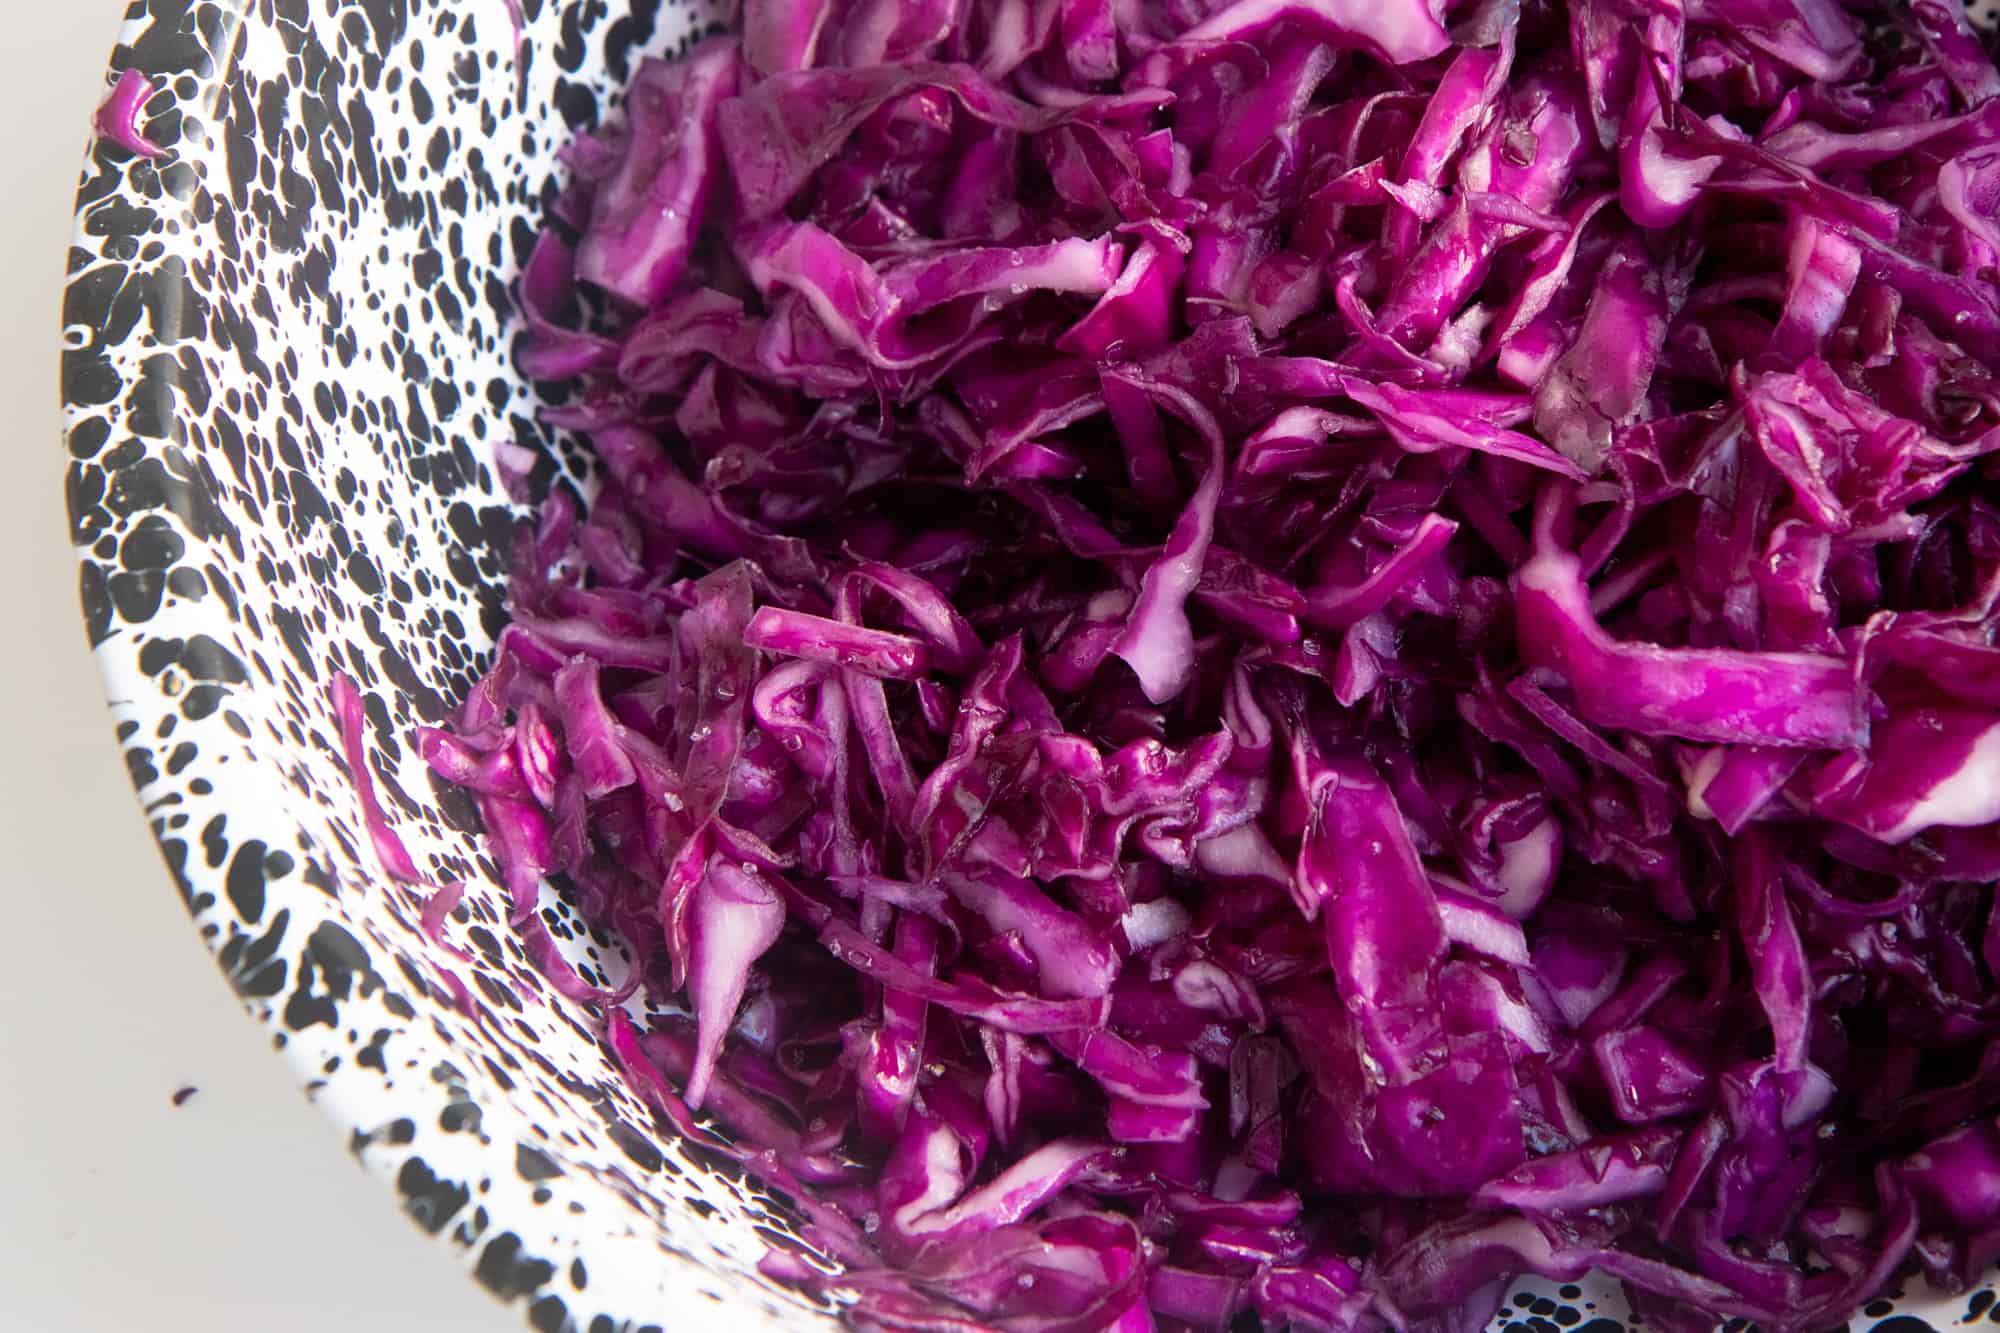
Step 3: Massage the cabbage.
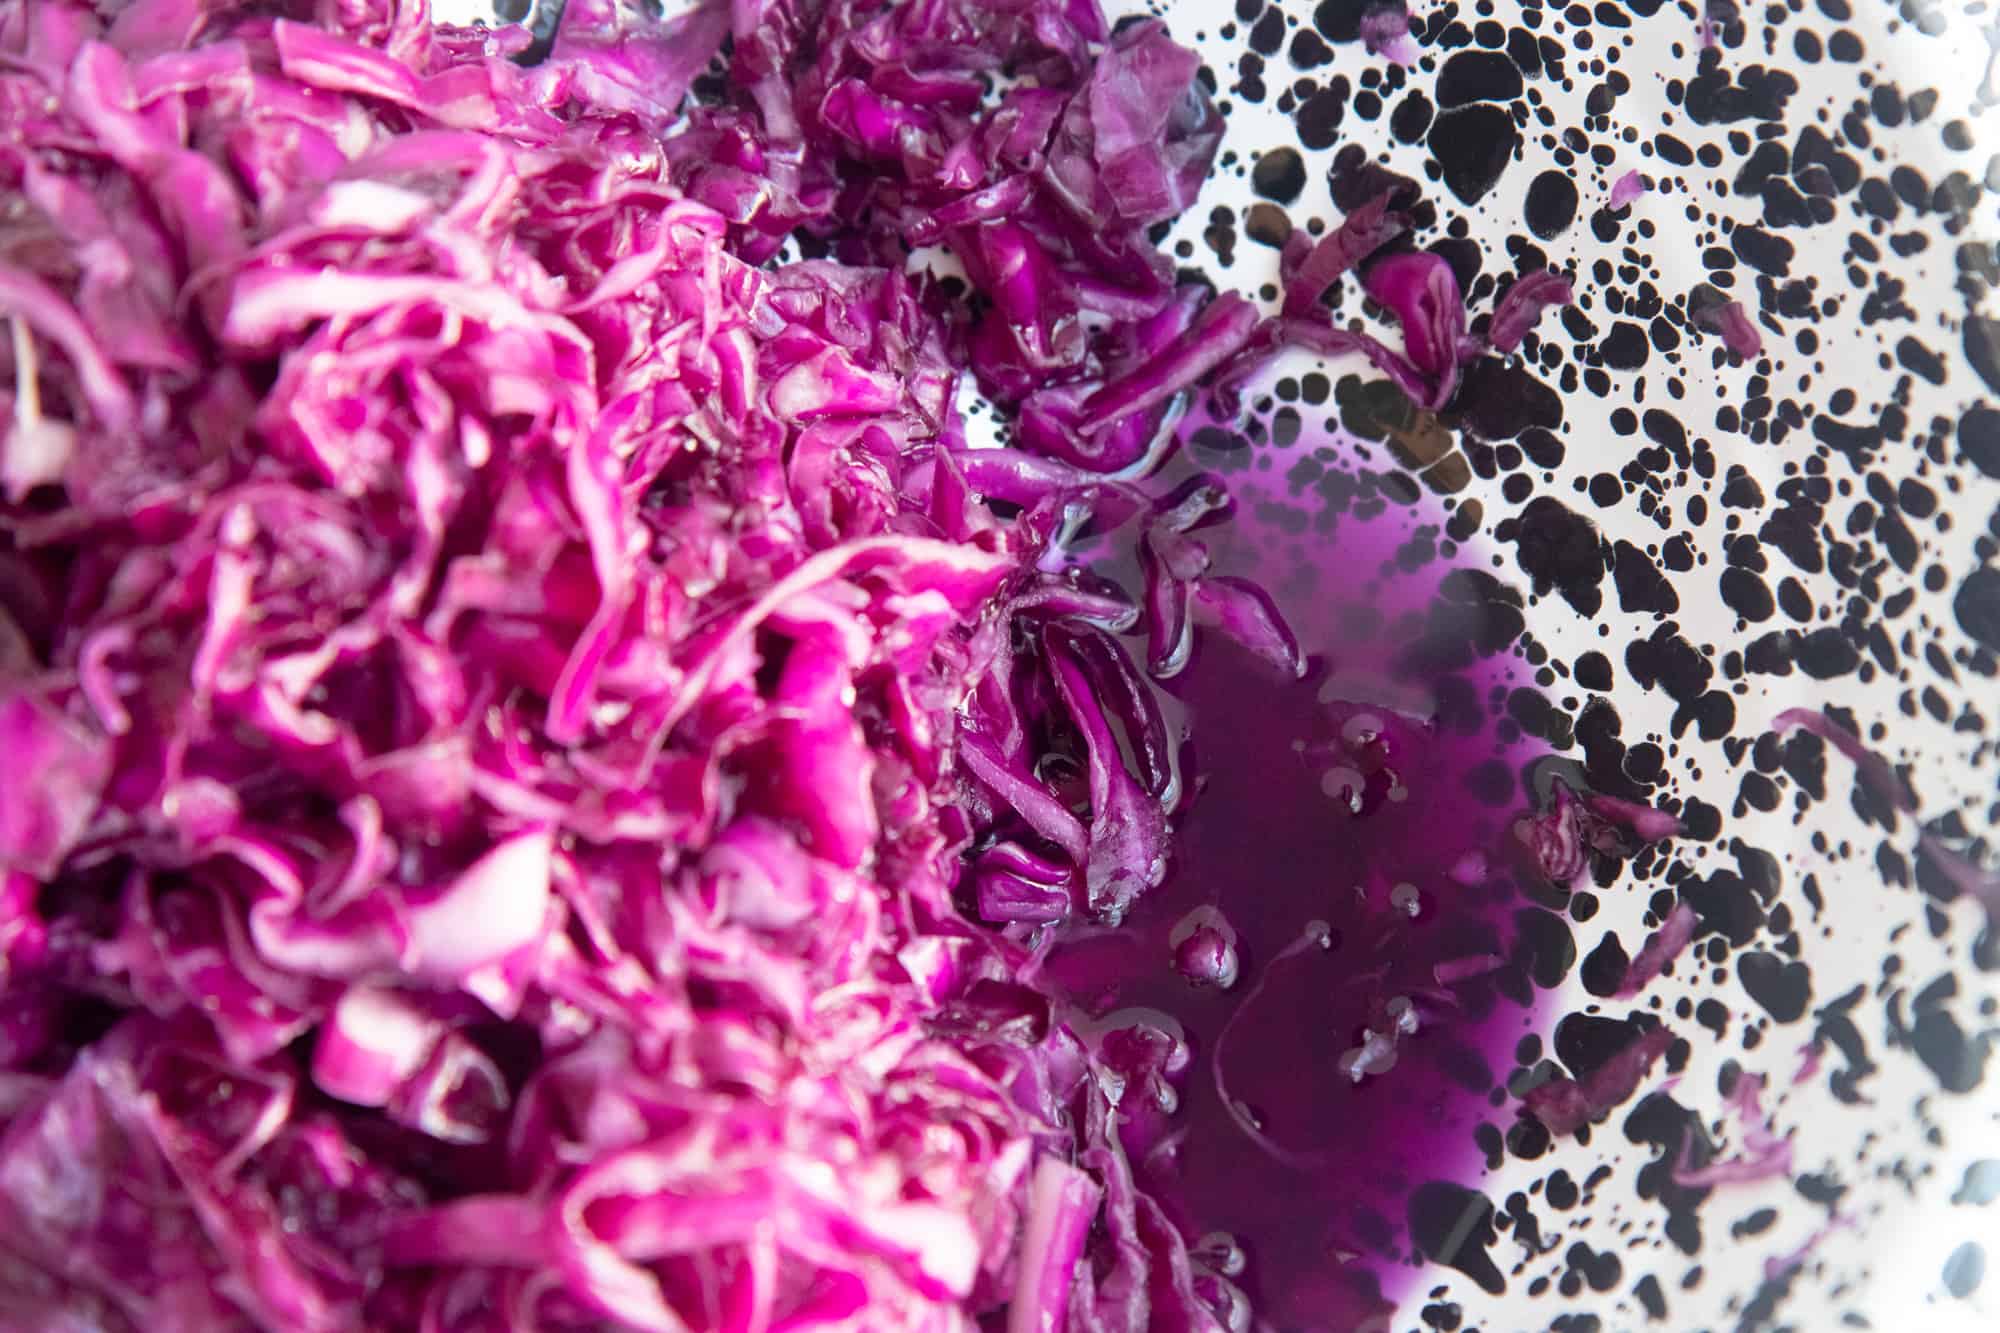
Using cleaner-than-clean hands, massage the cabbage and salt together so the cabbage starts to wilt and create a lot of juice-this liquid is called the brine. How long this takes will depend a lot on the cabbage; some have more water, some have less. The cabbage should be somewhat limp and shiny, and there should be a good puddle of brine. When you grab a fistful of the cabbage, the brine should run out of your hand in a stream. This can take anywhere from just a couple of minutes to up to 15 minutes.
Step 4: Let the cabbage rest (optional).
If you're struggling to get a good brine going, it might help to let the cabbage rest for 20-30 minutes to bring out even more of the juices.
Step 5: Pack the cabbage into a clean jar.
Grab a handful of cabbage and pack it tightly into the bottom of a wide-mouth pint mason jar. I have a specialty sauerkraut tamper that I love and use, but you can easily just use your fist or the end of a thick-handled wooden spoon.
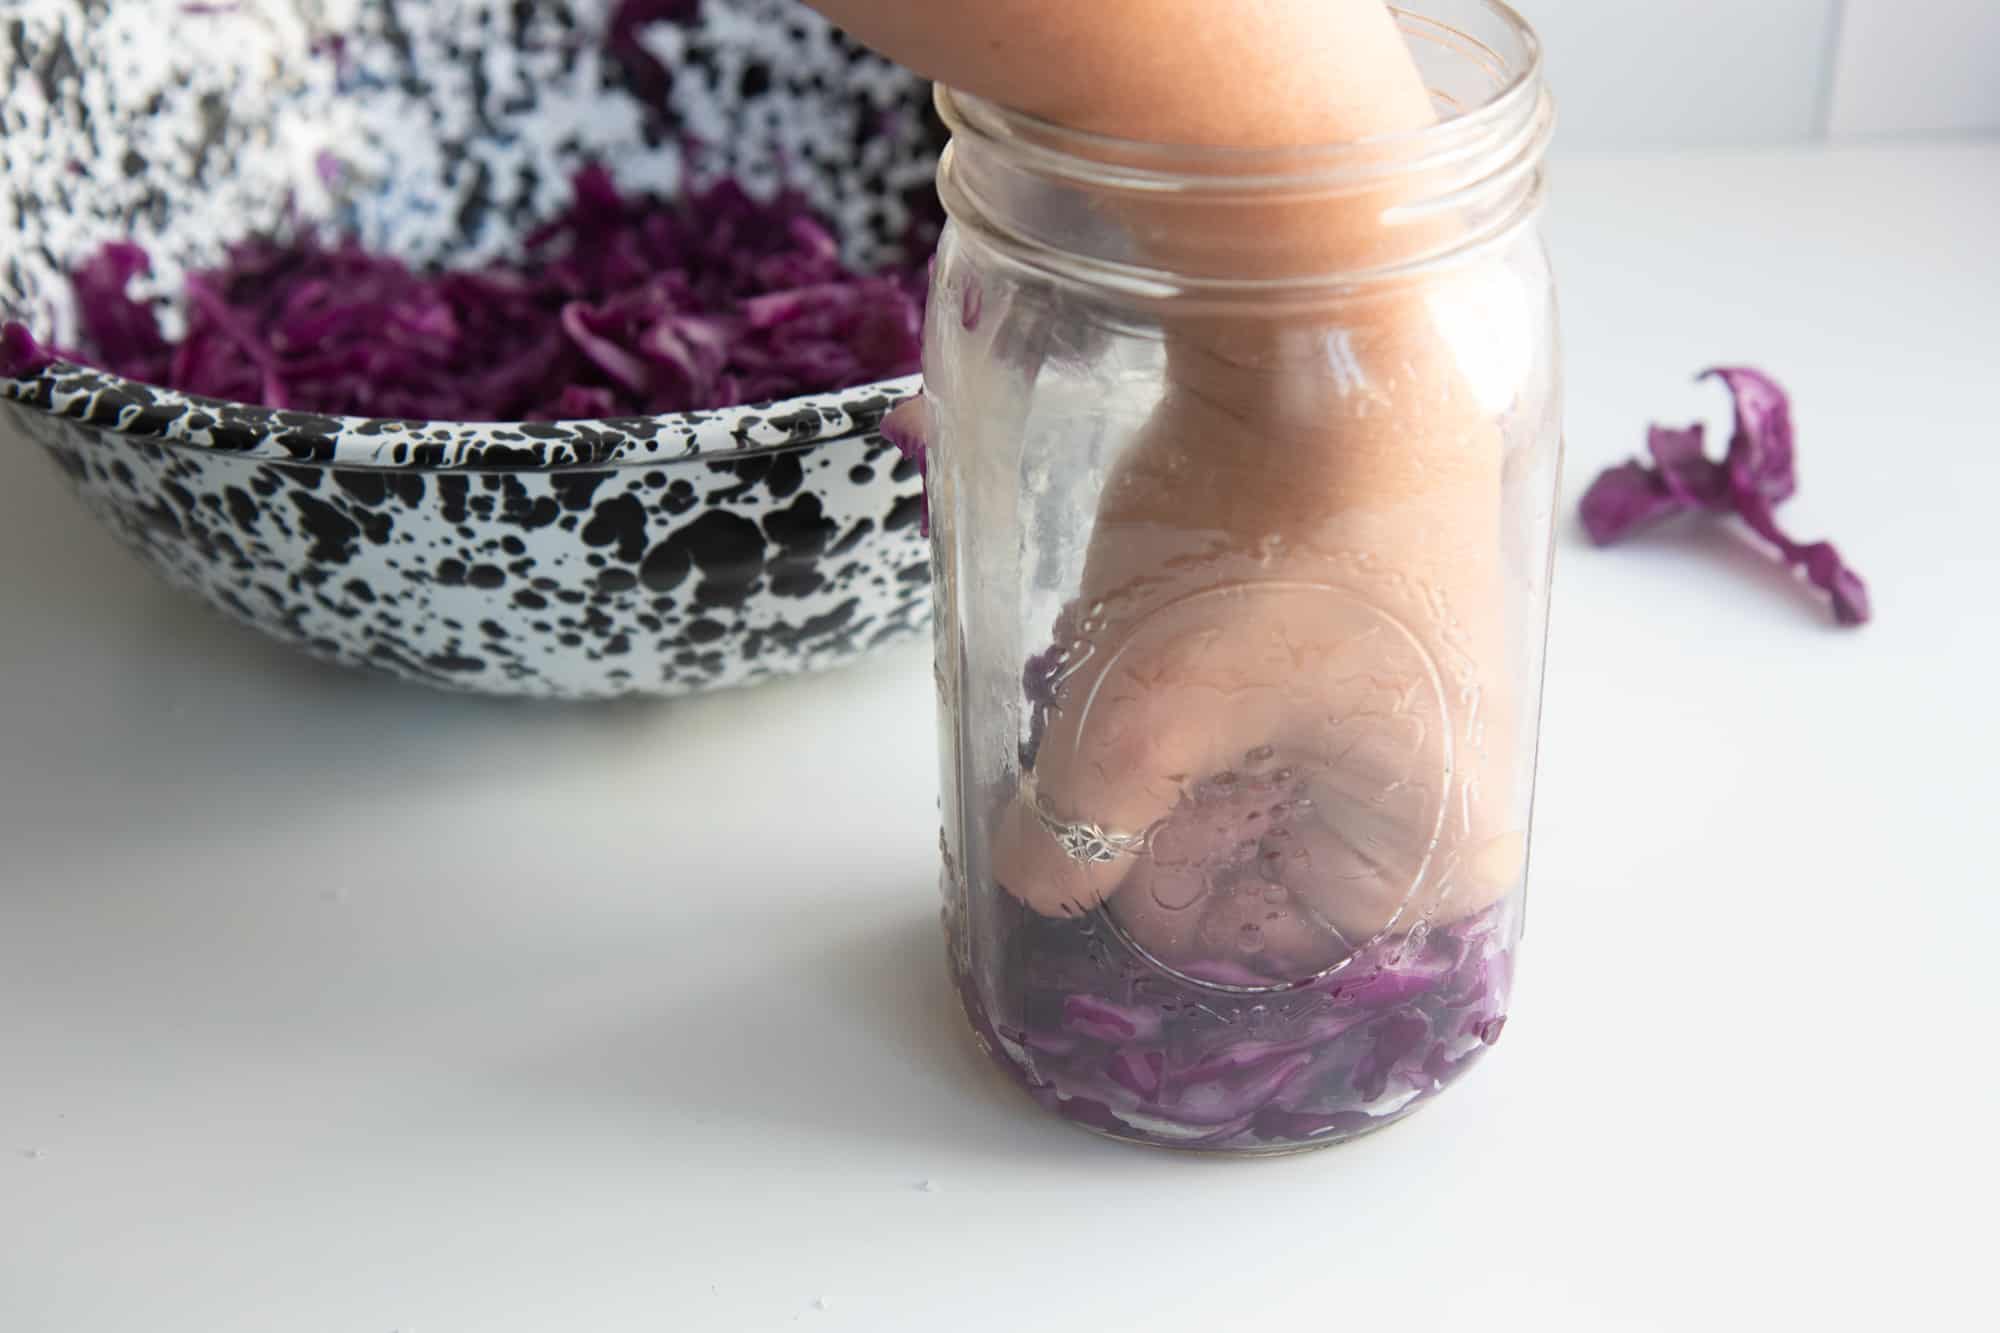
Make sure that every time you add more cabbage to the jar, you're tamping it down well. You want to remove air pockets, as well as create more brine. As you pack more in, the liquid level should naturally rise up to cover the cabbage. Fill the jar to where the cabbage itself fills the jar about 75-85% full.
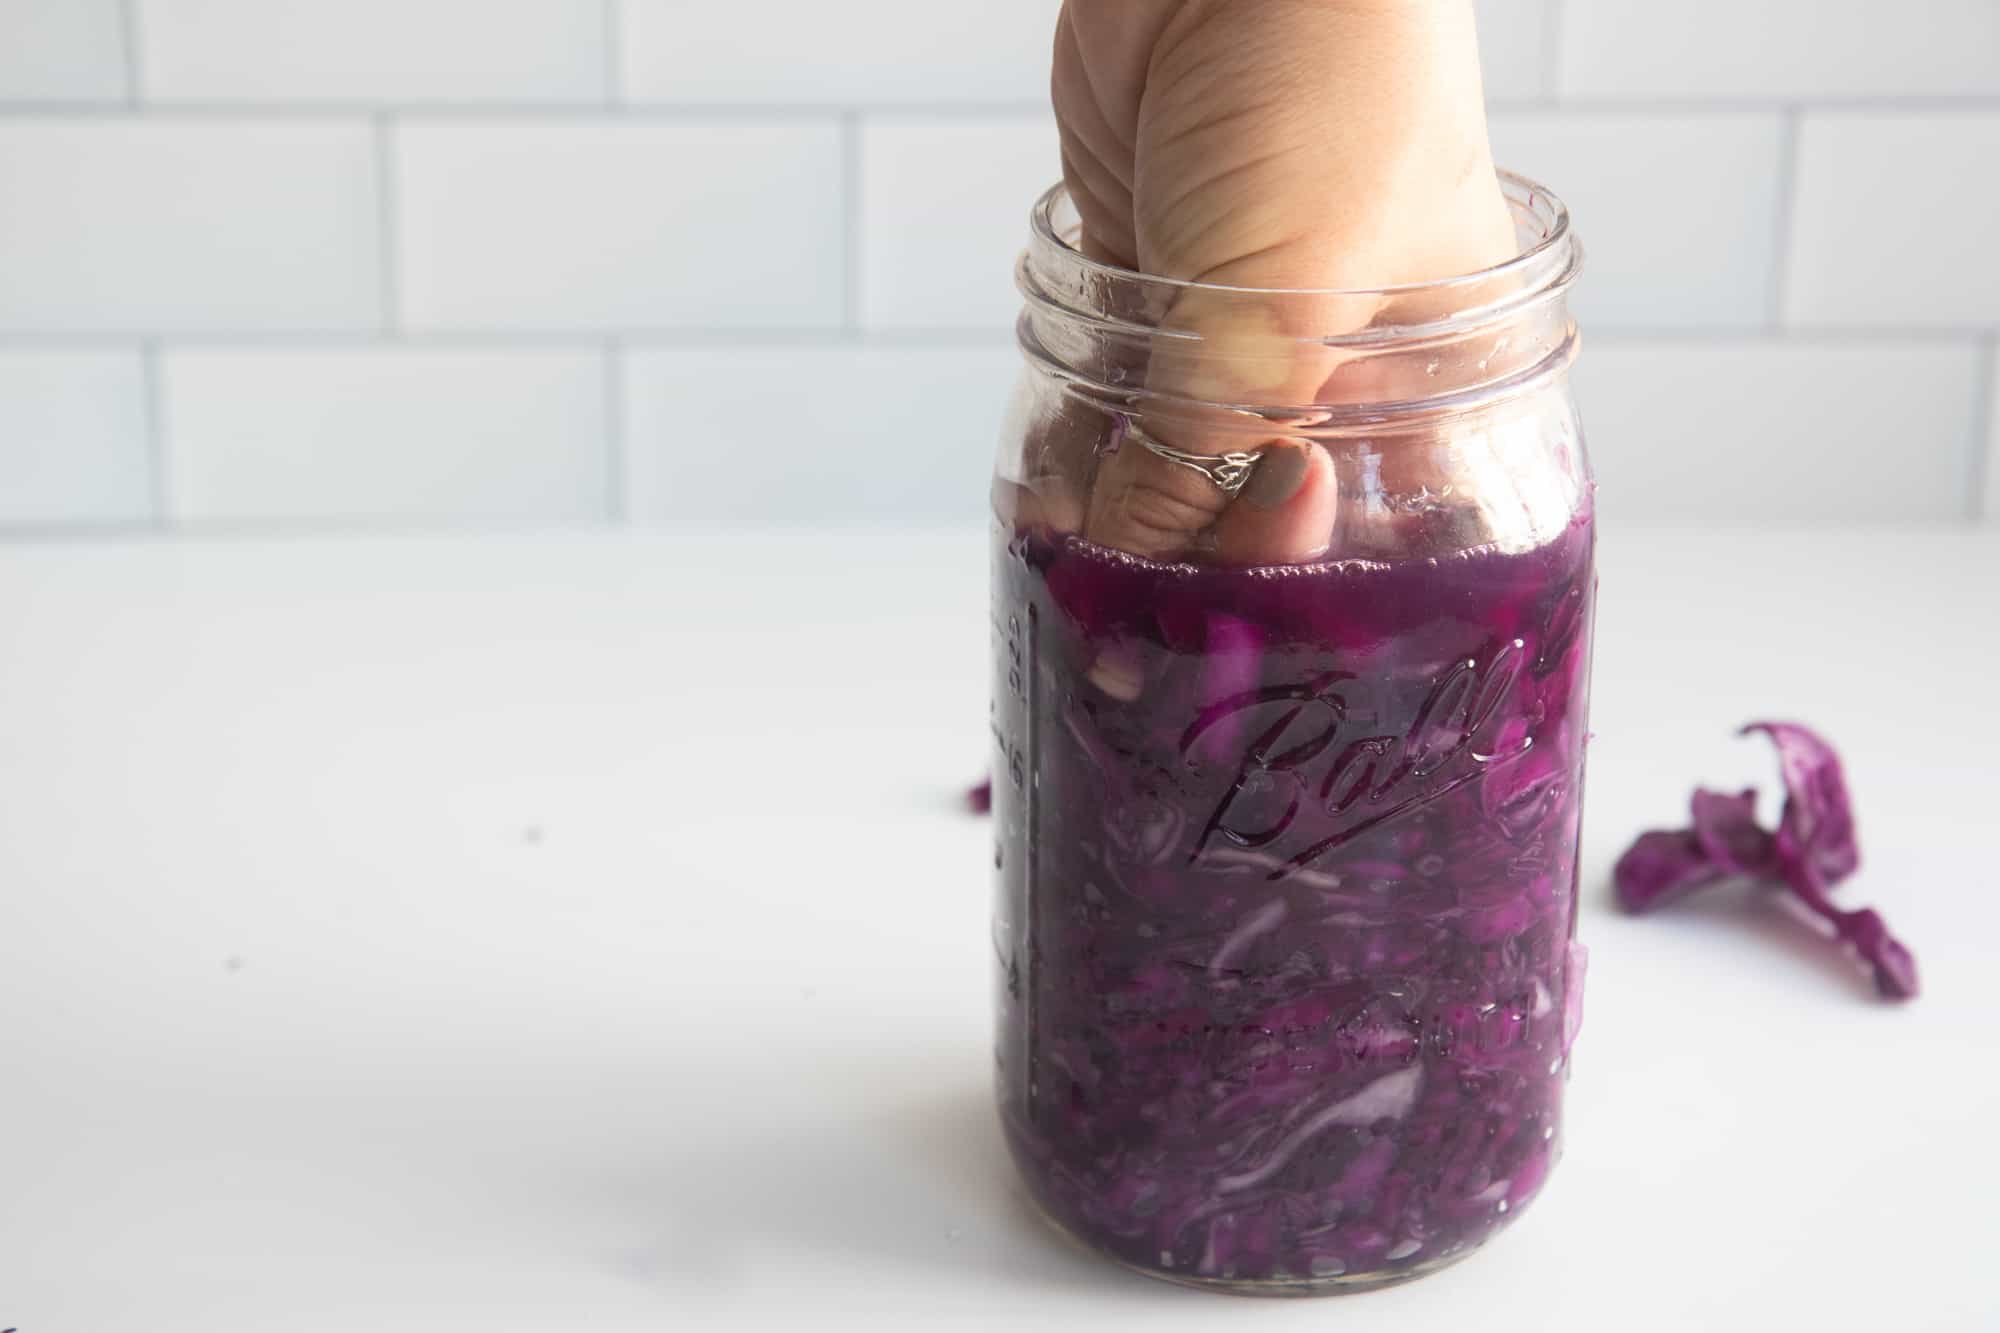
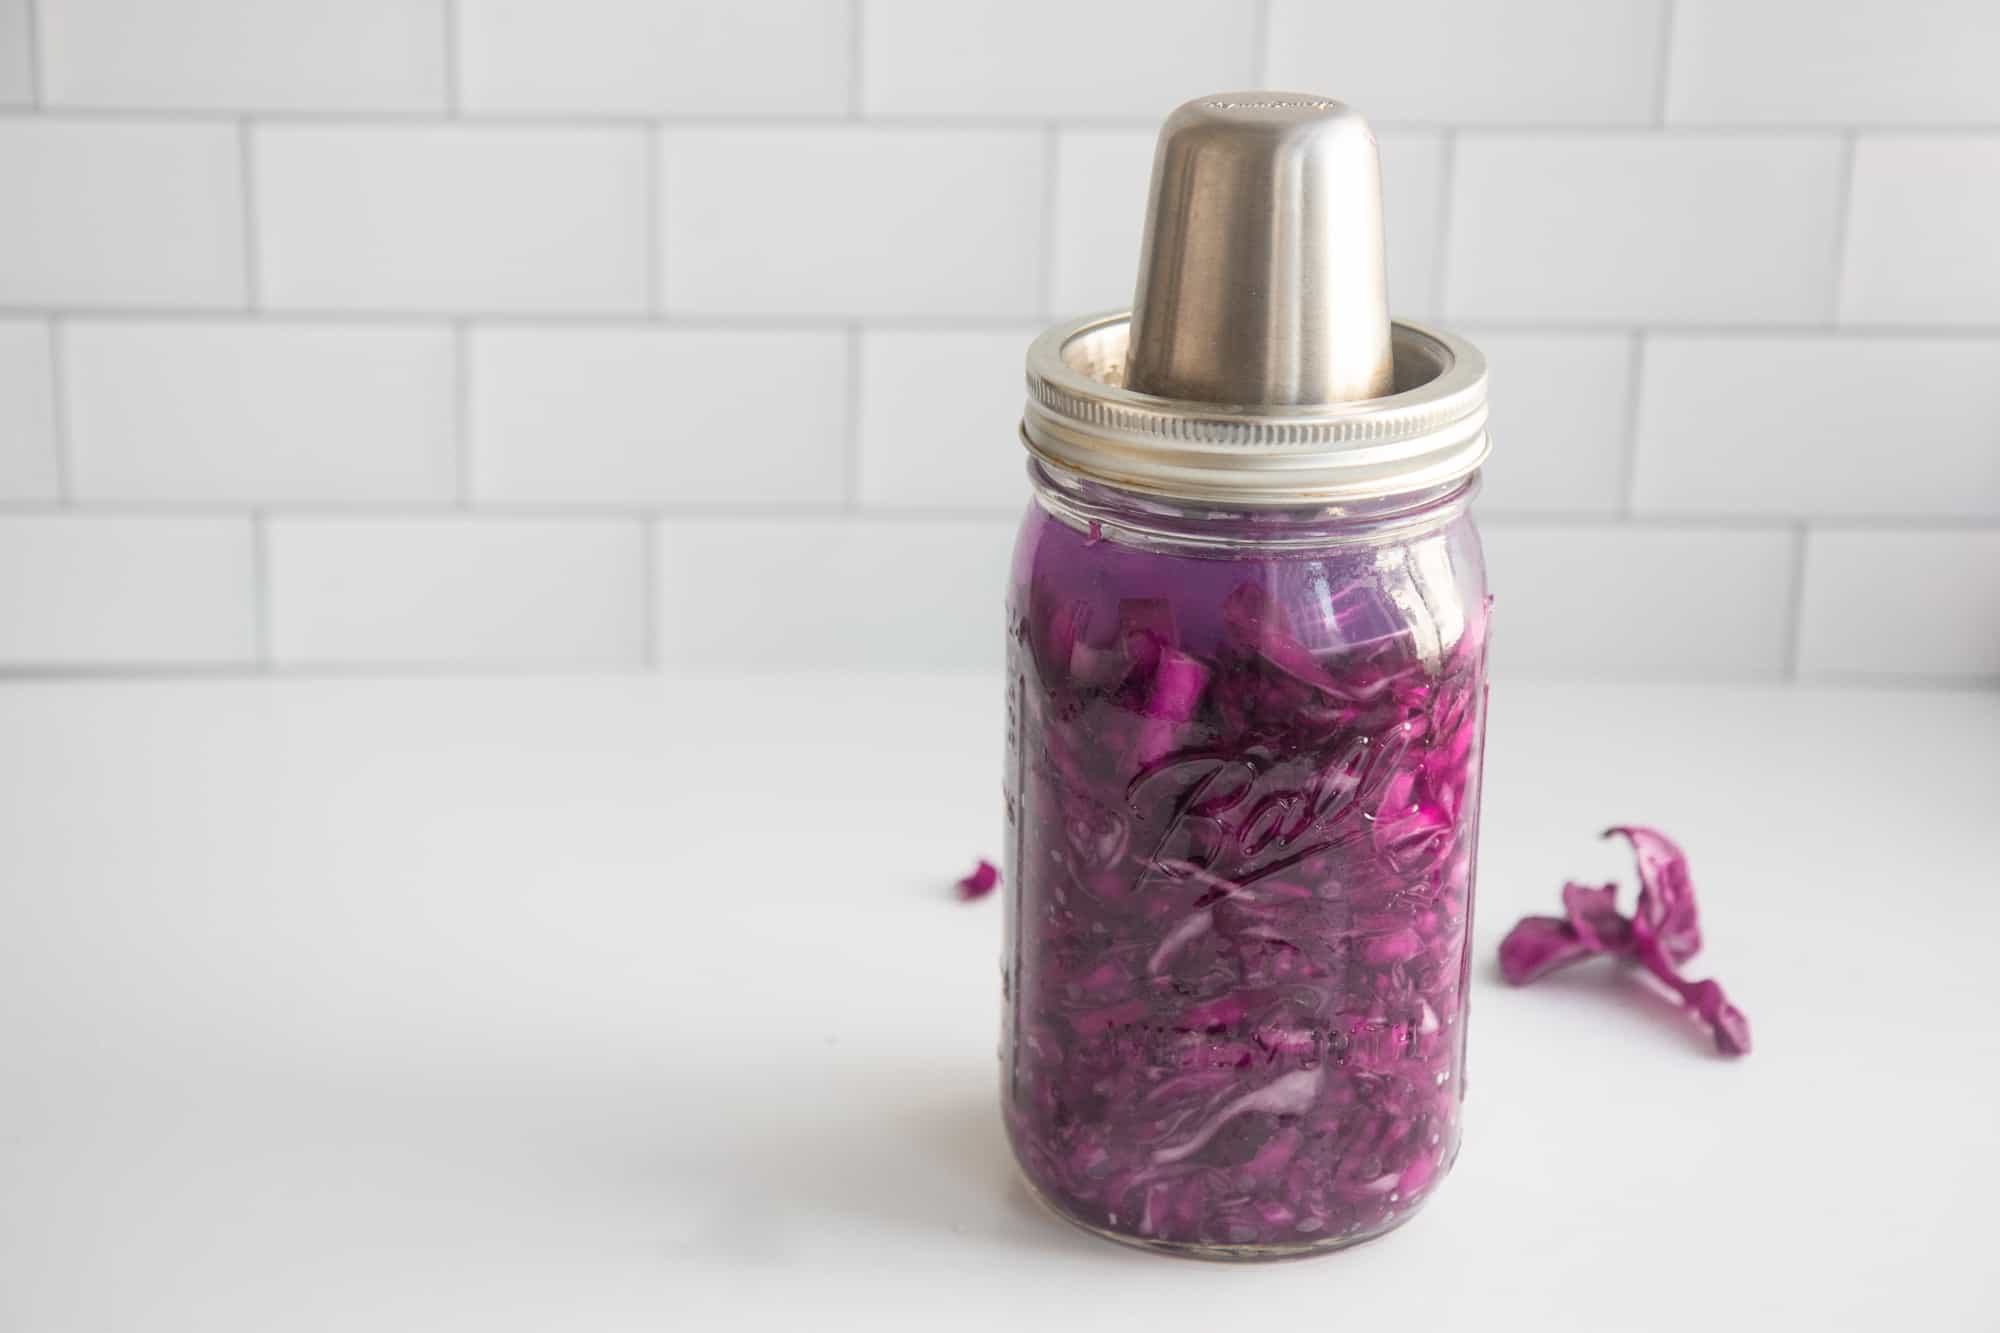
Step 6: Top off the jar with additional brine and weigh down the cabbage under the brine.
The cornerstone rule to sauerkraut making (or any fermentation)-under the brine, everything is fine!-so your #1 goal here is to get all the cabbage under brine. If you need to add some more brine from the bowl to top off your jar, do it now. Then, weigh the cabbage down under the brine. You can do this as I do here with a special fermentation lid (mine has a plate that pushed the cabbage below the brine), sauerkraut weights, or by using a DIY solution like we talked about above.
Protip: On avoiding mold.
Make sure that every last bit of cabbage is submerged in the brine to make sure you are fermenting sauerkraut, not growing mold.
Step 7: Close the jar.
If you're using an airlock, now is the time to use it. These are the standard sauerkraut airlocks, but my fermentation lids have a stainless steel airlock that I really like. If you are using a regular jar lid, close the lid just fingertip tight.
Step 8: Ferment away!
Place the jar in a room temperature spot (65-70°F) out of direct sunlight to ferment. If using an airlock system, there's no need to burp the jar, but if you're just using a regular lid, make sure to slightly open the jar lid to release some of the carbon dioxide at least daily.
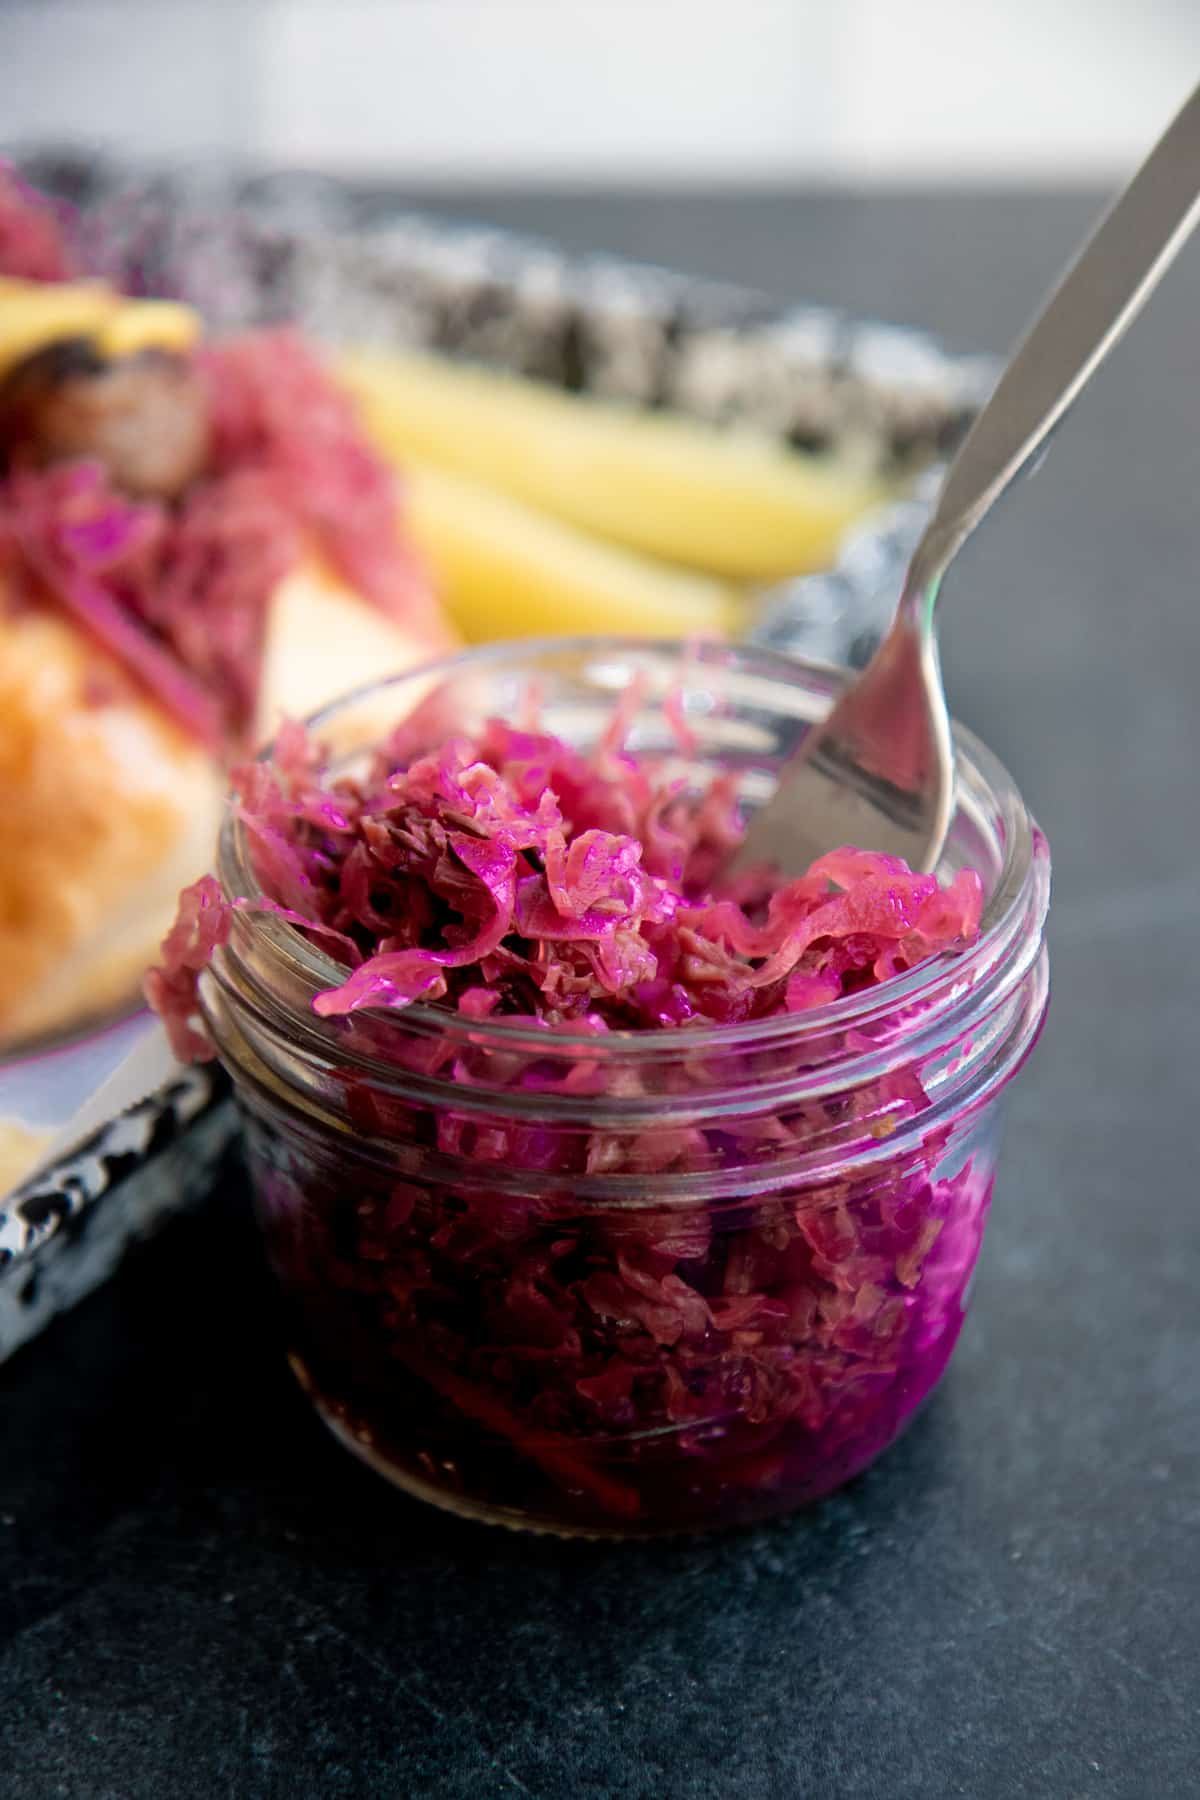
Your sauerkraut is ready when the brine is cloudy, the cabbage has softened, and the kraut tastes sufficiently tangy! This length of time depends on a lot of factors, so I recommend opening the jar to check flavor starting at day four, and tasting every day or two until it's the perfect tang and texture for you. Store sauerkraut in the jar you made it in (with a storage lid) in the fridge for up to six months.
Protip: Let it ferment!
Your sauerkraut should be ready in 4-14 days (though you can leave it longer than that if you really want to!). Just keep tasting it until it is at the tanginess level you like!
What are some flavors you can add to homemade sauerkraut?
Part of the fun of fermentation is sticking things in the jar to see what works and what doesn't! I highly encourage some creative experimentation with homemade sauerkraut. Here are a few jumping-off ideas:
- Spicy garlic sauerkraut: Add in a couple of whole cloves of garlic plus a sliced cayenne pepper.
- Caraway sauerkraut: A classic! Add in a teaspoon of caraway seeds and a teaspoon of whole mustard seeds.
- Garden bounty sauerkraut: Mix the cabbage with shredded carrots, peppers, onions-whatever is coming off in the garden!
What do you eat homemade sauerkraut with?
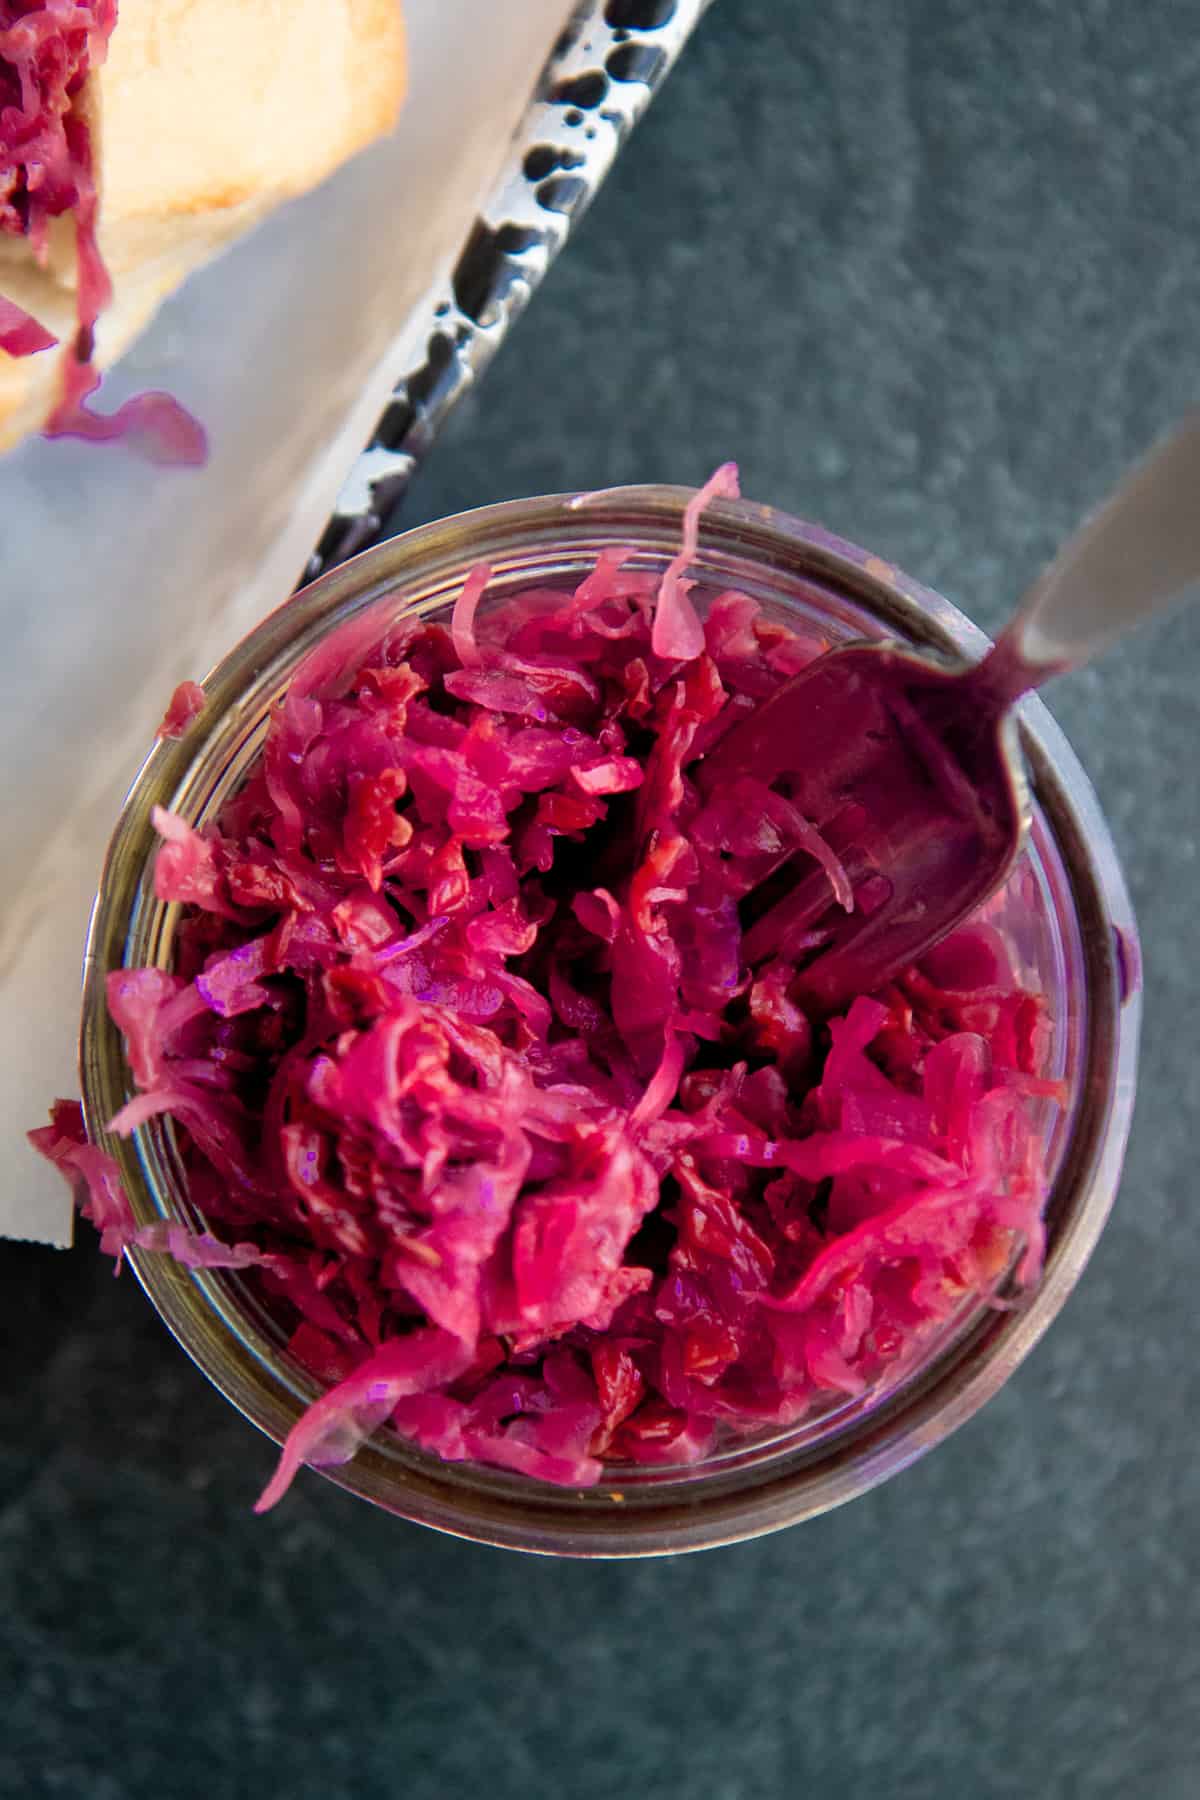
Uh, everything! But sauerkraut is truly at home combined with some rich, fatty meat. Try these:
- Put it on a brat.
- Serve it next to pork chops.
- Layer it into a Reuben.
- Add it to a salad.
- Put it in a dumpling.
- Mix it into my crockpot mashed potatoes recipe.
Trust me, once you start making sauerkraut at home, you'll find lots of ways to use it up!

Homemade Sauerkraut Troubleshooting
Working on some homemade sauerkraut and now you see something funky? Don't worry, 90% of the time, your sauerkraut is just fine. In fact, now is a good time to drop this oft-repeated (well, in fermentation circles) quote from a USDA microbiologist:
"As far as I know, there has never been a documented case of food-borne illness from fermented vegetables. Risky is not a word I would use to describe vegetable fermentation. It is one of the oldest and safest technologies we have." - Fred Breidt, microbiologist, US Department of Agriculture
Feel better? Okay, good. Now let's tackle some of the common sauerkraut fermenting issues:
Help! There is mold in my sauerkraut.
Take a breath and look closely. First up, is it mold or is harmless Kahm yeast? A lot of newbie fermenters confuse Kahm yeast for mold and toss out their precious sauerkraut! How to tell the difference between Kahm yeast and mold: Kahm yeast is a thin coating that is white to off-white in color and has a stringy texture. Mold is raised and very fuzzy. Kahm usually isn't. Even so, white mold (which is what you'd be most likely to confuse with Kahm yeast) is usually considered safe if you remove it. With both Kahm yeast and white mold, most fermenters just scrape them off and enjoy their sauerkraut.
If you really do think it is mold, where is it located? Is there mold in your sauerkraut or is there mold on some small pieces of cabbage that are floating on the top of the brine or are stuck to the top of the jar? In most cases, you can just remove the mold and the sauerkraut is fine.
If there is mold growing on the top of your brine, you can use a spoon to skim it off. But if the sauerkraut smells off or the mold growth is overwhelming, throw it in the compost (after all, that's one of the benefits of doing small batches of sauerkraut in jars-you aren't losing much).
If you do spy mold and decide to remove it and keep fermenting, it's best to shorten your fermentation time-mold spores will quickly turn veggies to mush.
In the end, the decision to eat or not to eat sauerkraut that had mold or Kahm yeast is entirely personal. I can't tell you what you feel comfortable with. Here is a great, informative, exhaustive article on mold growth in fermentations, which might help you make your decision.
How to prevent mold the next time: Both mold growth and Kahm yeast growth are almost entirely avoided by using an airlock fermentation lid. If that's not possible, make sure your equipment is very clean, ferment at a lower temperature (between 60-70°F), and make sure you're using the right amount of salt.
There aren't any bubbles! Aren't there supposed to be bubbles?!
You might have heard that you know your sauerkraut is fermenting when you see bubbles escaping up to the surface of your jar. This is true-if you have a keen eye and the time to babysit your jar, you will probably see champagne-like bubbles during the first few days of fermentation. But just because you haven't seen bubbles, doesn't mean it isn't fermenting. The bubbles can be very small, very sporadic, and very hard to see!
Other ways to know your sauerkraut fermentation is active: See if the color of the cabbage is changing (bright green to dull yellow or bright purple to pink), check if the brine is turning cloudy, and taste it for tanginess!
Wholefully Protip
You'll know your cabbage is turning into sauerkraut when you see the color changing, the brine getting cloudy, or bubbles rising to the surface.
Whoa! My brine is overflowing my jar/my airlock.
Yup, that cabbage sure can release some juice! This isn't actually an issue, it's a good thing! This tends to be more of an inconvenient mess instead of an actual problem. The amount of brine created by the cabbage can vary between batches of sauerkraut, so you might have this happen one time and not the next. My recommendation is to place your jar in a bowl to catch the briny mess and ferment as usual. You may even eventually need to add the brine back to the jar to help keep the cabbage under cover.
How to prevent brine overflow next time: Don't overpack your jars, and let your cabbage rest after massaging to release a lot of the liquid.
My brine is cloudy, is that right?
Yup, sure is! Cloudy brine is a great sign that your sauerkraut fermentation is rocking and rolling. Proceed!

Are you excited to go make your first batch of sauerkraut? One word of warning: once you catch the fermentation bug, it's hard to stop. It's a super fun (and healthy) culinary hobby that I'm sure you're gonna love. Happy fermenting!
Want more fermenting and preserving recipes like this one?
- Homemade Kefir. My favorite thing about kefir, other than the loads of probiotics it contains, is how easy it is to make!
- Canning 101. In this in-depth post, we cover every question you may have about water bath canning (what you would use for most pickles and jams).
- Coconut Yogurt. This Instant Pot yogurt is a great probiotic option for anyone who needs to eat dairy-free.
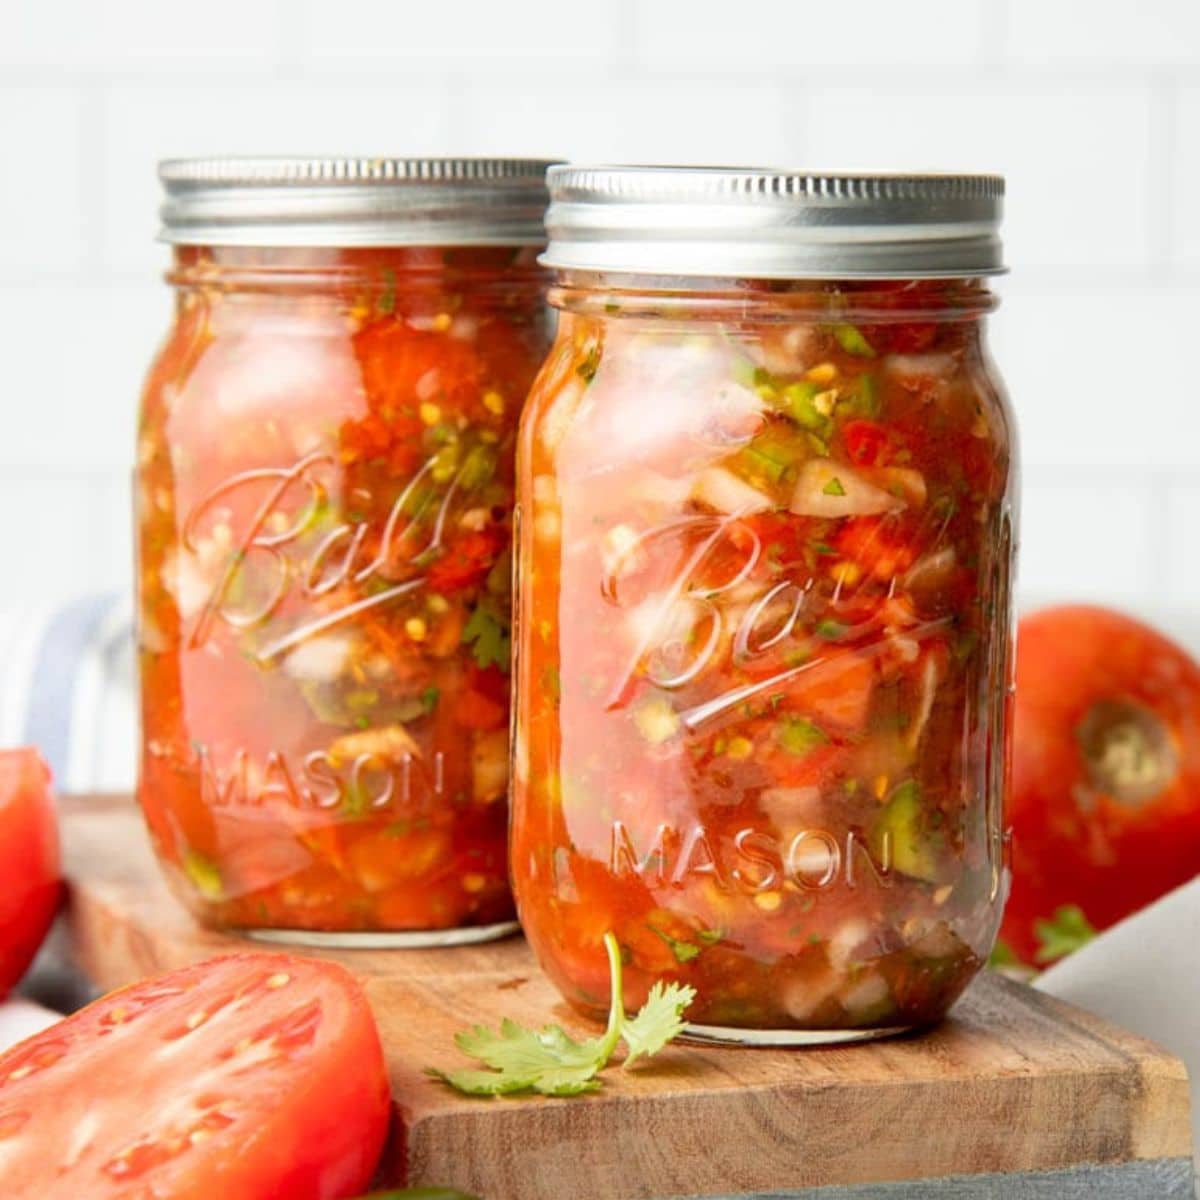
- Canning Diced Tomatoes. This is the one canning project I never skip. Diced tomatoes are just such a versatile ingredient to keep on hand year round!
📖 Recipe
Homemade Sauerkraut Recipe
Ingredients
- 1 ¾ pound shredded red or green cabbage about 1 small head worth
- 2 medium carrots peeled and shredded (optional)
- 1 clove garlic finely minced (optional)
- 1 tablespoon sea salt heaping if using the carrots and garlic
- 1 teaspoon caraway seeds optional
- Wide mouth quart mason jar
- Fermenting lid for wide mouth jar optional
Instructions
- In a large bowl, combine the cabbage, carrots, and garlic (if using). Sprinkle on the sea salt.
- Using clean hands, massage the vegetables for 2-15 minutes, or until the vegetables are shiny and soft, and there is a decent amount of liquid in the bottom of the bowl. When you pick up a handful of the mixture, liquid should stream out. Alternatively, massage the salt with the vegetables for two minutes, then let the mixture rest for 20-30 minutes, then come back to massage for an additional minute or two.
- Working one handful at a time, pack the sauerkraut into the mason jar, using your fist to tamp the cabbage in tightly. Continue to do this until the jar is 75-85% full. There should be quite a bit of liquid by the time the jar is filled.
- Top off the jar with additional brine from the massaging bowl. Then submerge the cabbage in the brine by following one of the methods listed in the post.
- Close the jar, either with an airlock lid or a regular lid, and set in a room temperature (65-70°F) spot out of direct sunlight to ferment. If using a regular jar, "burp" the jar each day by just sightly unscrewing the lid.
- Check the sauerkraut for flavor starting on day four and taste every day or two until it achieves the texture and tang you prefer-anywhere from 4-30 days.
- Store the sauerkraut in a jar in the fridge for up to six months.
Video

Very helpful website. Thank you!
I’m using a canning jar that is loosely screwed on to allow gas to escape. At what point do I tighten it down to get it to secure?
Is it important for the lid button to be depressed at LL?
You shouldn't tighten the lid until you are finished with fermentation, and you are storing the kraut in the fridge.
I’ve got comfortable with the canning part due to your resources and guidance, and now we try fermenting some of the beautiful cabbage my mother has grown to make my 2 year old’s favorite food - sauerkraut! Can’t wait to try it!
Happy fermenting!