
How to Make Reusable Snack Bags (Tutorial)
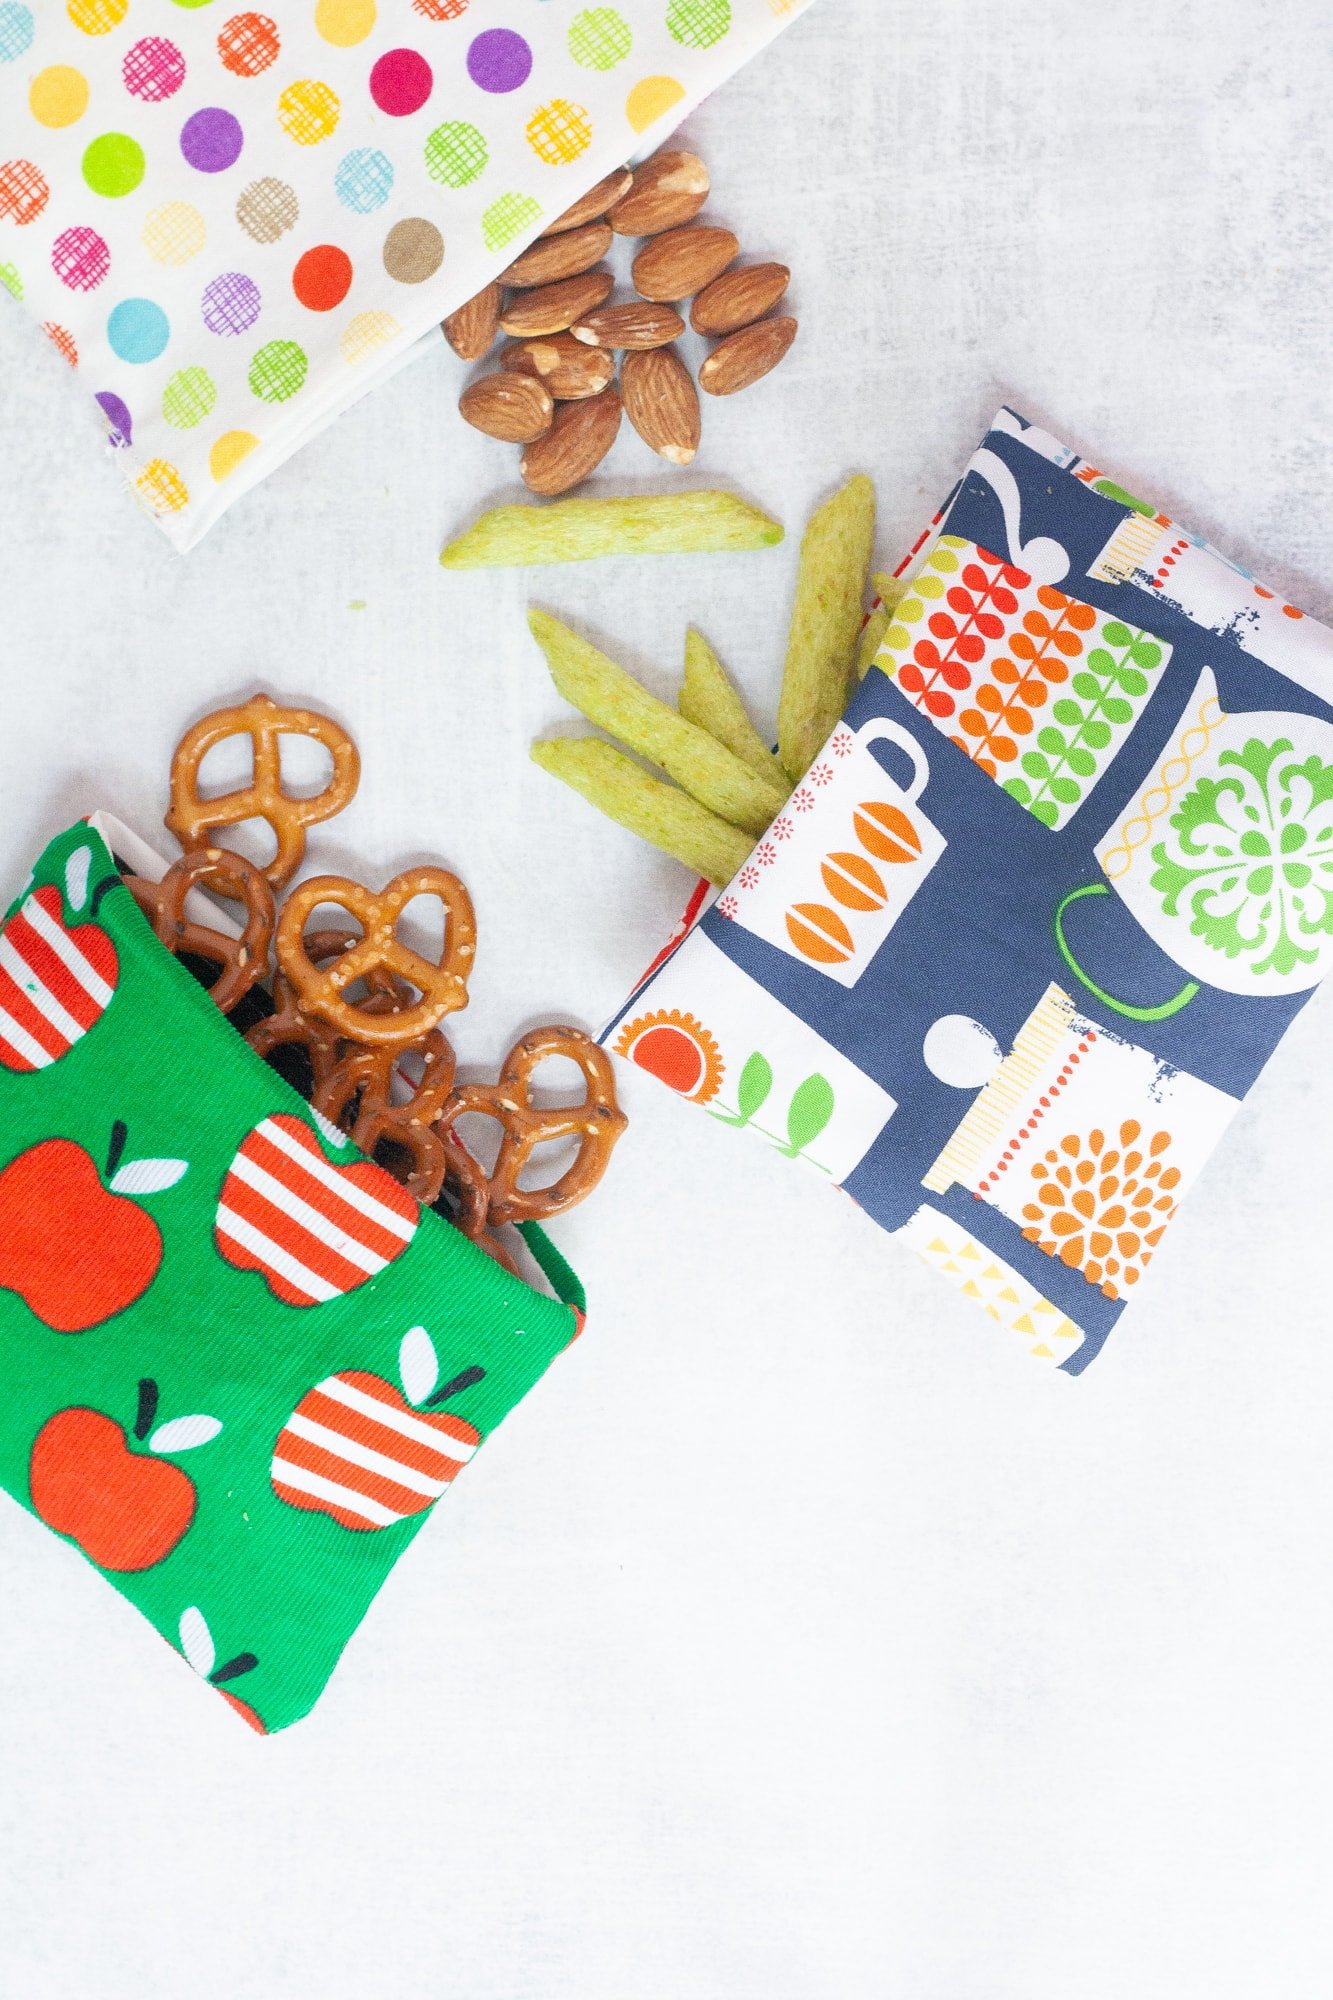
Snacks are a big deal in our house. With two little kids, any time an adventure or errand keeps us out of the house for more than 90 minutes or so, I need to pack a snack. Containers can be too bulky, and I hate the waste that comes from single-serve packets or using plastic bags. Reusable snack bags are the answer!

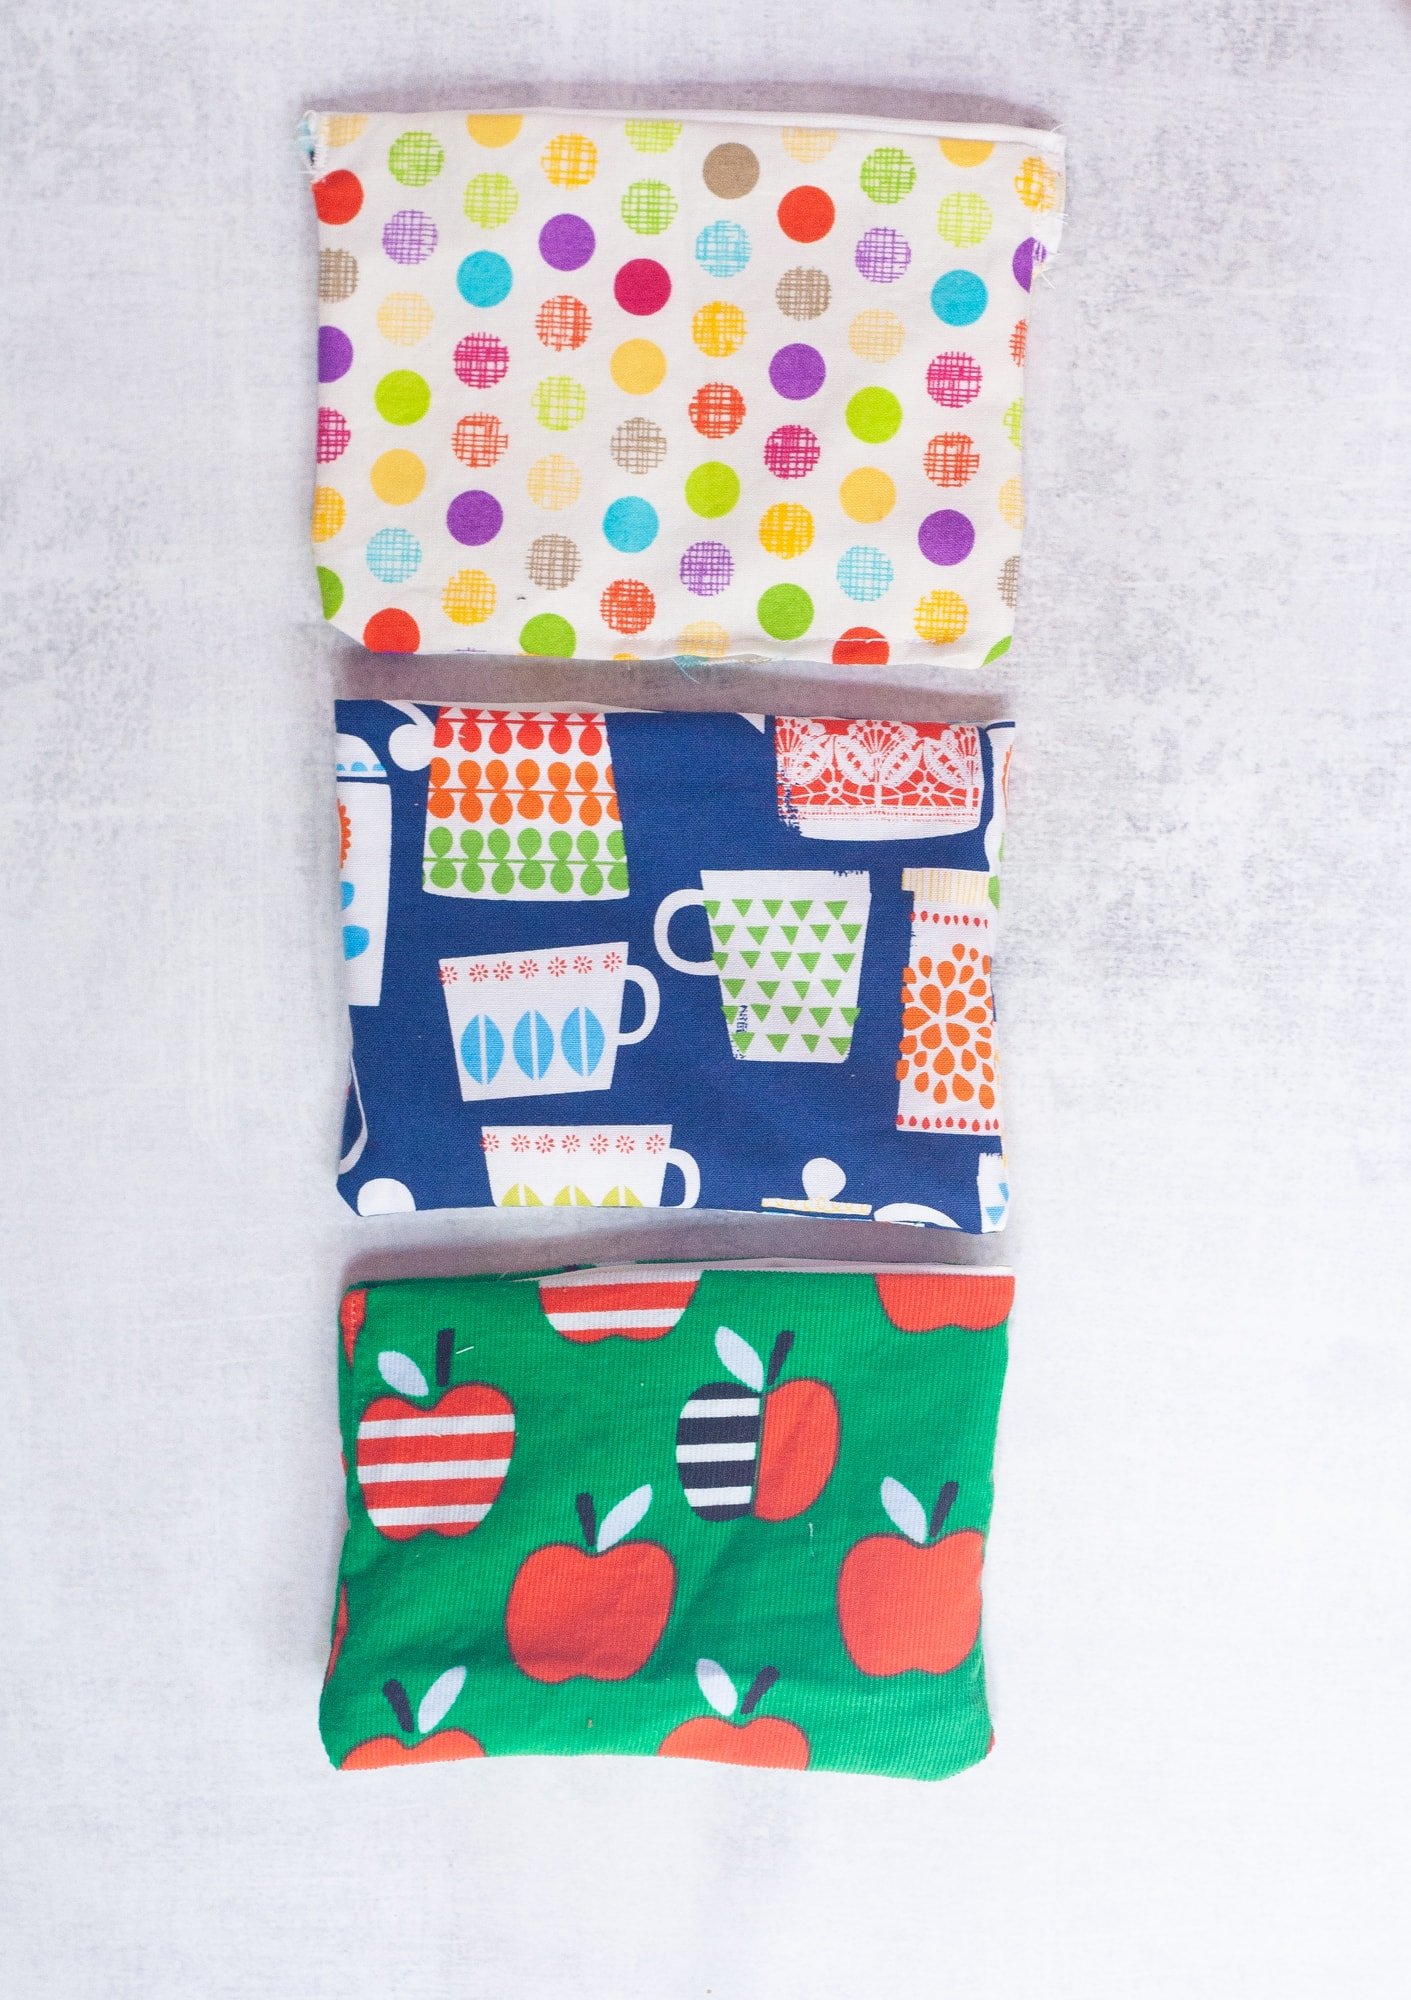
They are a breeze to make! These go very, very quickly if you assembly line them. I made these three in about 30 minutes.
You may remember that we've talked about reusable snack bags on Wholefully before. In that version, we ironed a piece of vinyl to a cotton liner. But in the eight years since that tutorial was posted, we realized that there might be some food safety concerns with the vinyl coming into contact with food. So we're updating it today with food-safe fabric-which also conveniently cuts out a few steps from the tutorial. And as a bonus, this liner is waterproof, which means you can even use these to pack snacks like fruits and vegetables. I just used mine the other day for bell pepper slices!
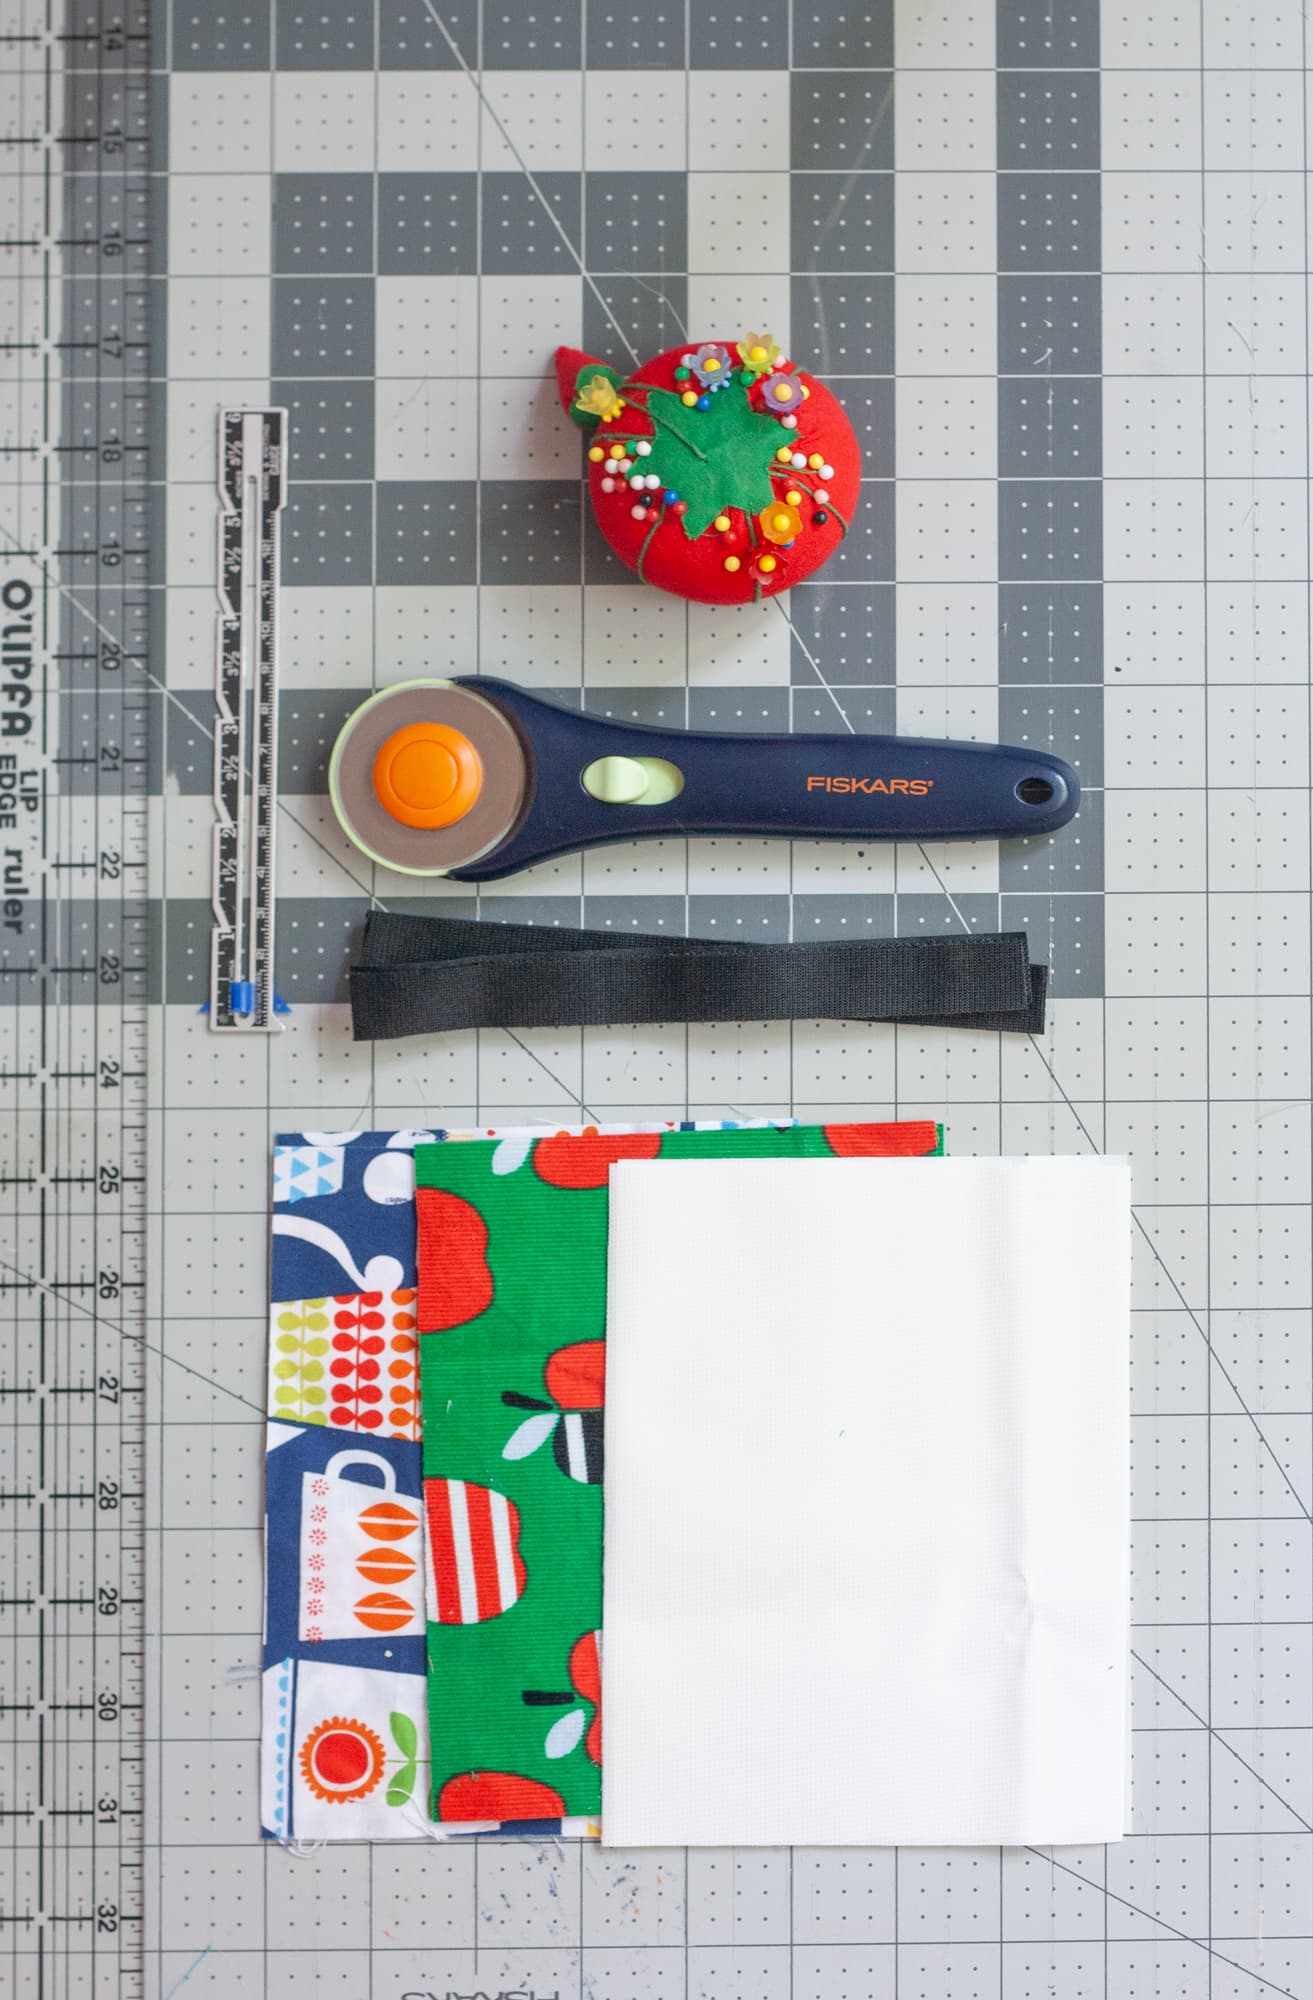
Materials for Making Reusable Snack Bags:
- Outside cotton fabric-dig through your fabric stash! You just need enough to make two 6 ½"x5" rectangles
- Waterproof food-safe fabric
- Velcro
- Coordinating thread
- Scissors
- Ruler
- Seam gauge
- Rotary cutter and mat (optional, but makes this project even quicker!)
How to Make Reusable Snack Bags:
Cut your fabric. Cut two pieces each of the outer fabric and the liner-I used 6 ½" x 5" and thought that was a good snack size. But any size will work! Cut a strip of the Velcro/hook and loop fastener to 6 ½" (or whatever width your bag will be).
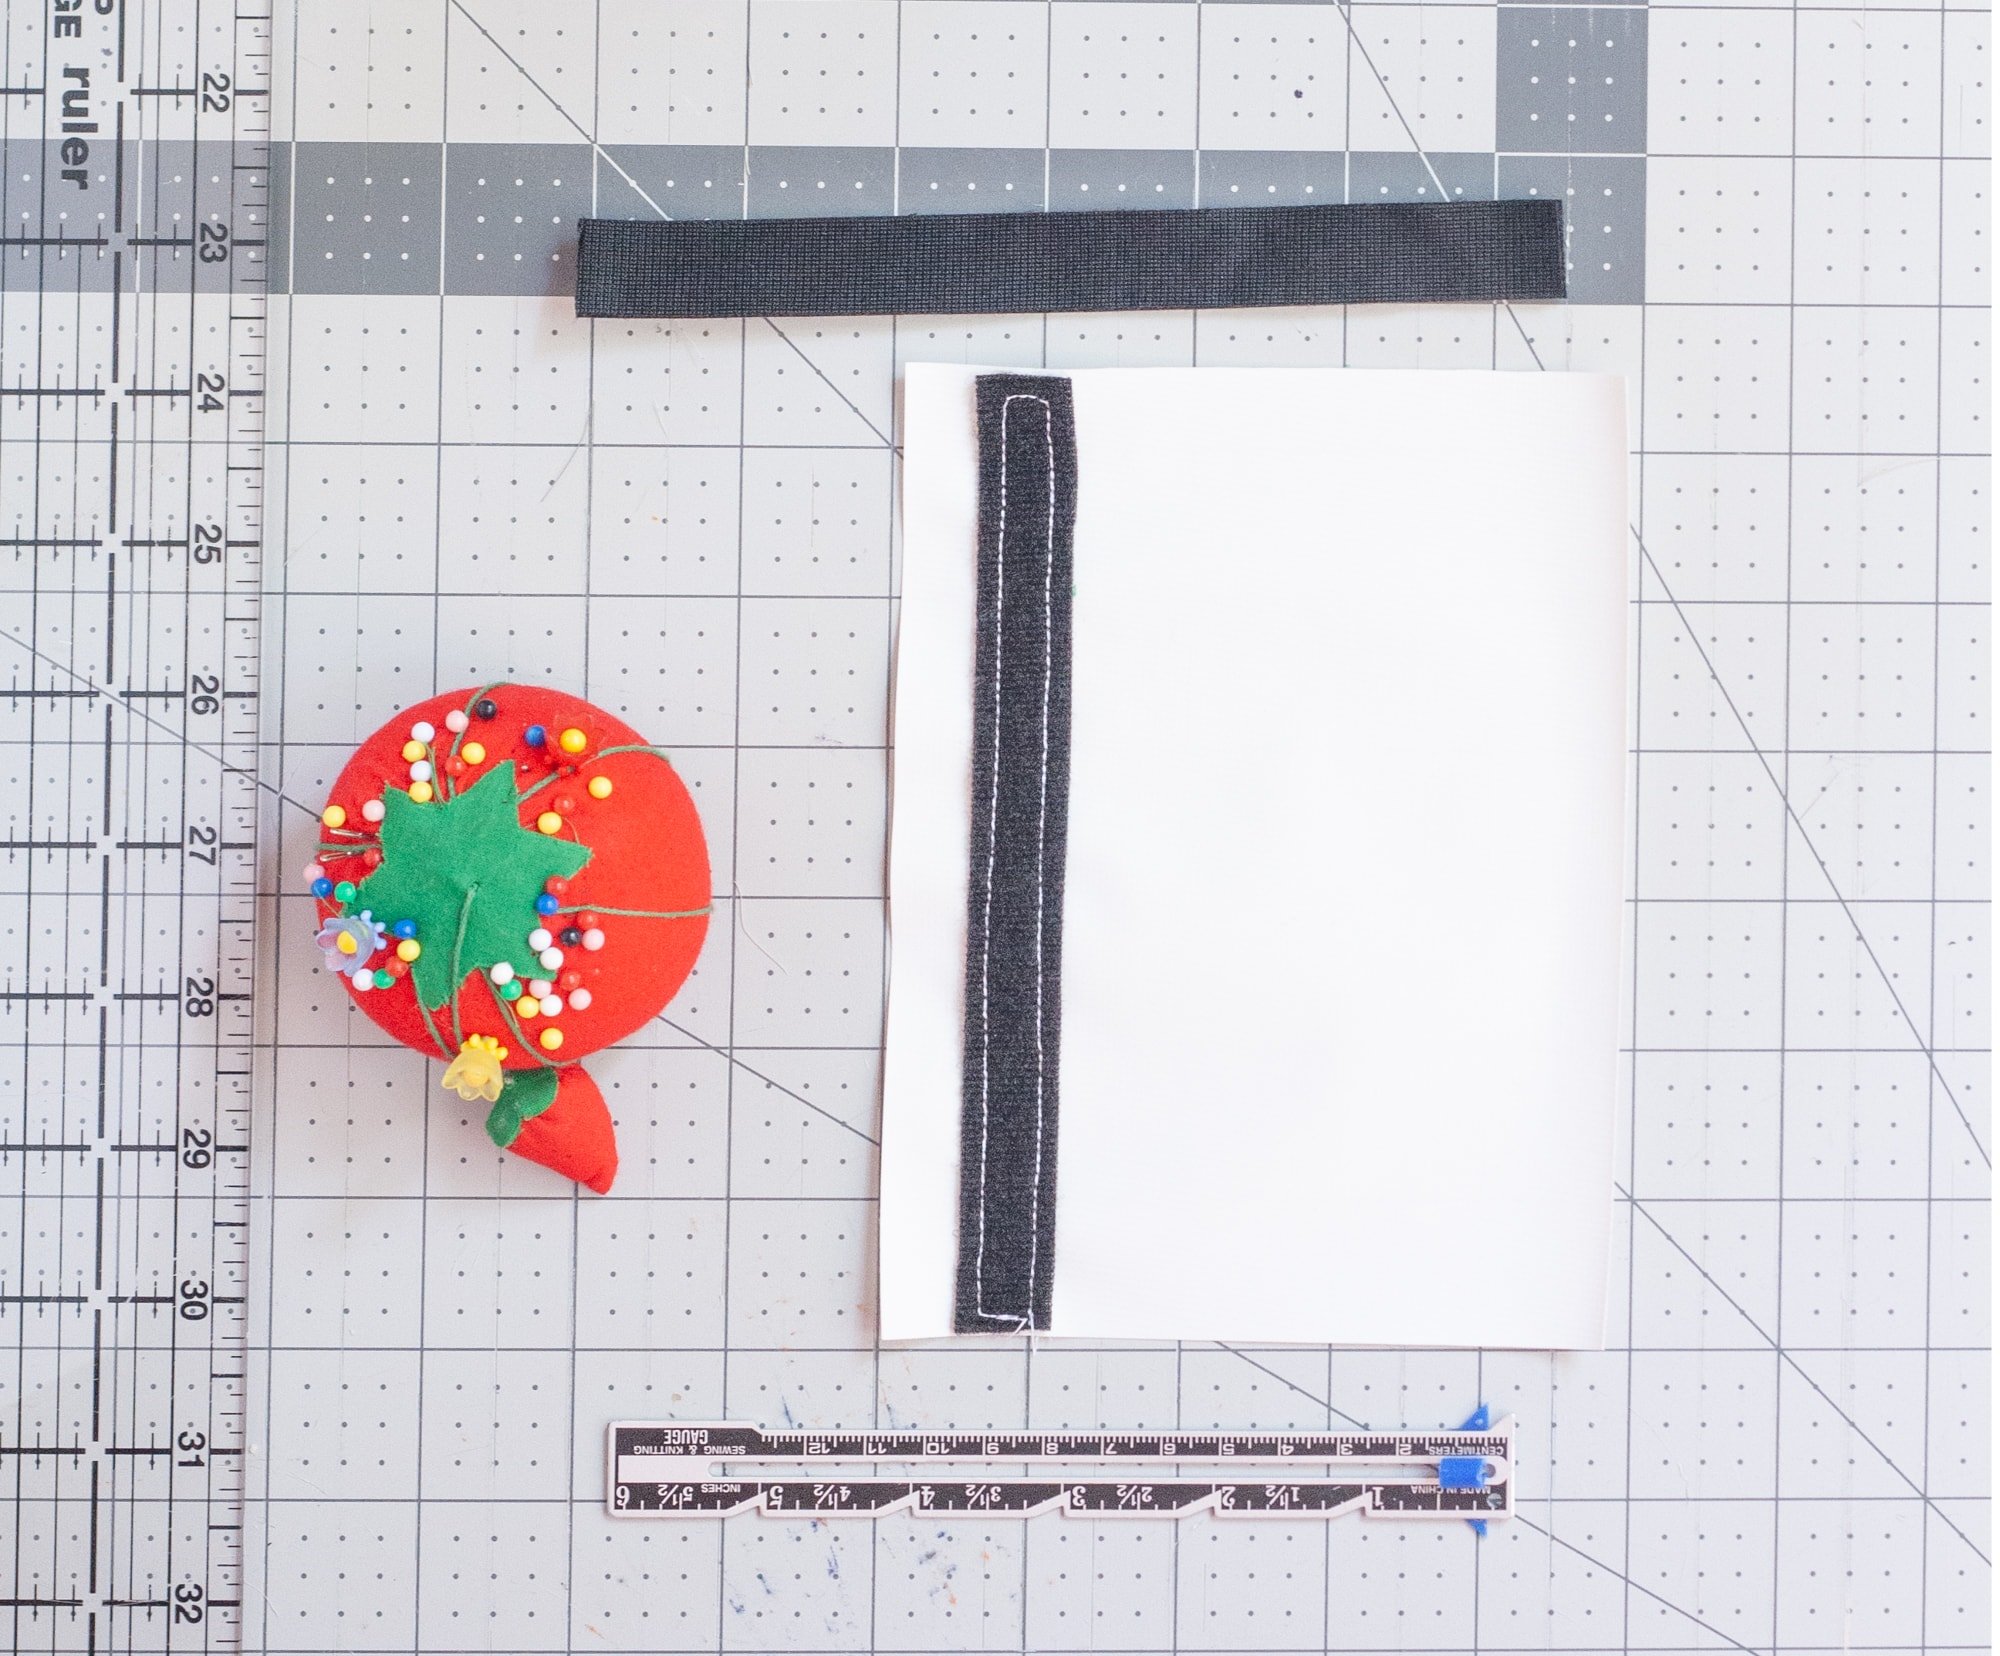
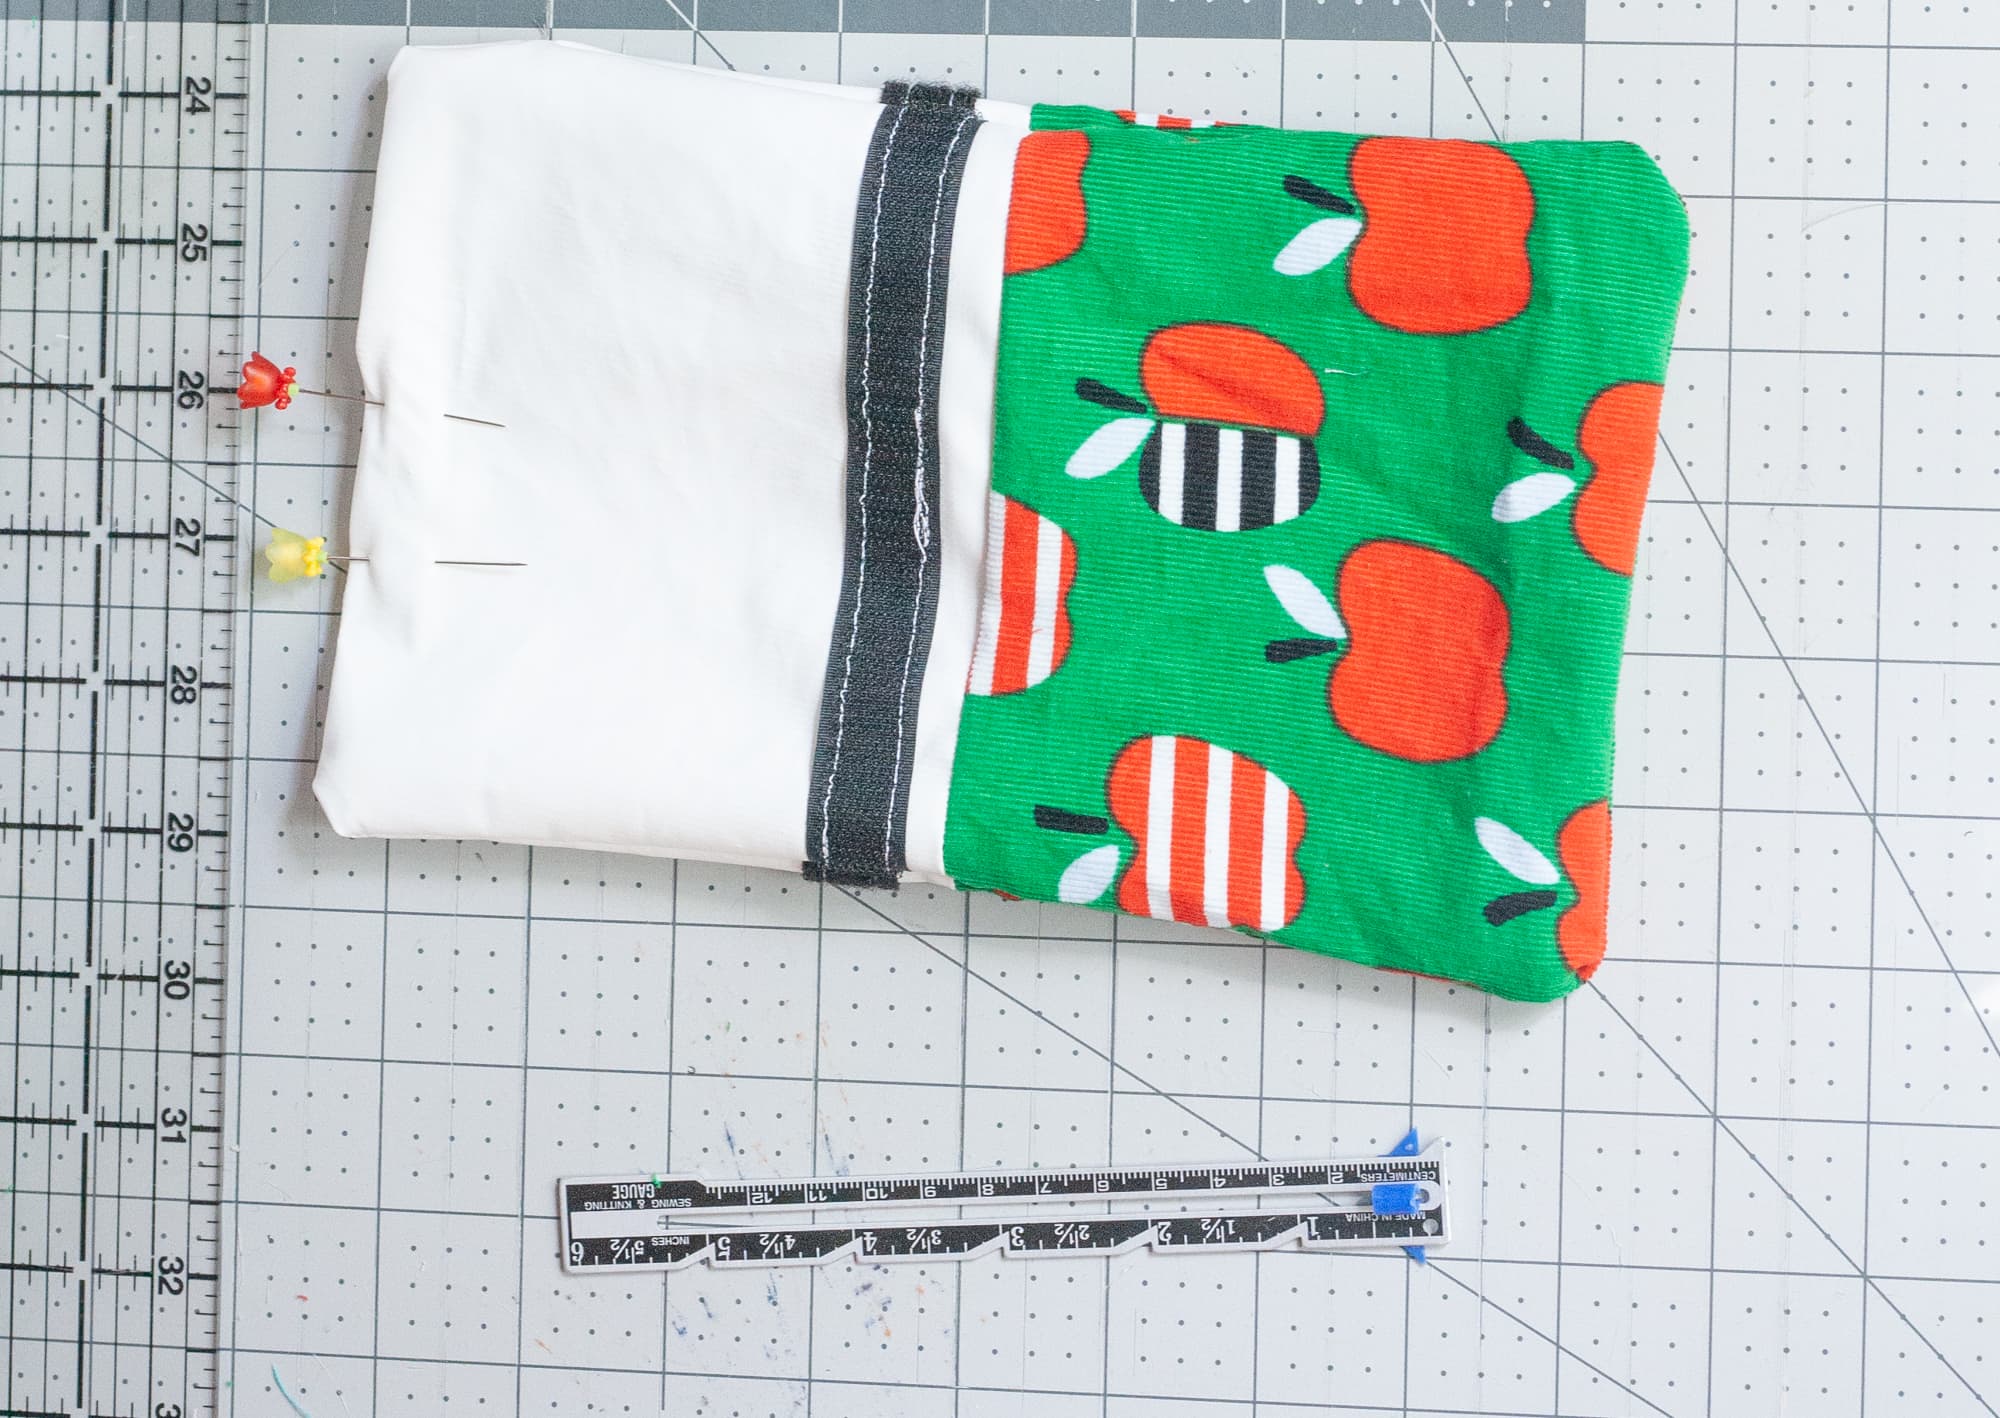
2. Pin one half of the velcro strip ¾" from the top of one liner piece, and sew all around the edges of the fastener. You may be tempted to not pin, but that vinyl gets slippery. Trust me, even if you tend to freehand your sewing, you want to pin in this case.
Repeat with the other piece of lining fabric and the other half of the hook-and-loop fastener.
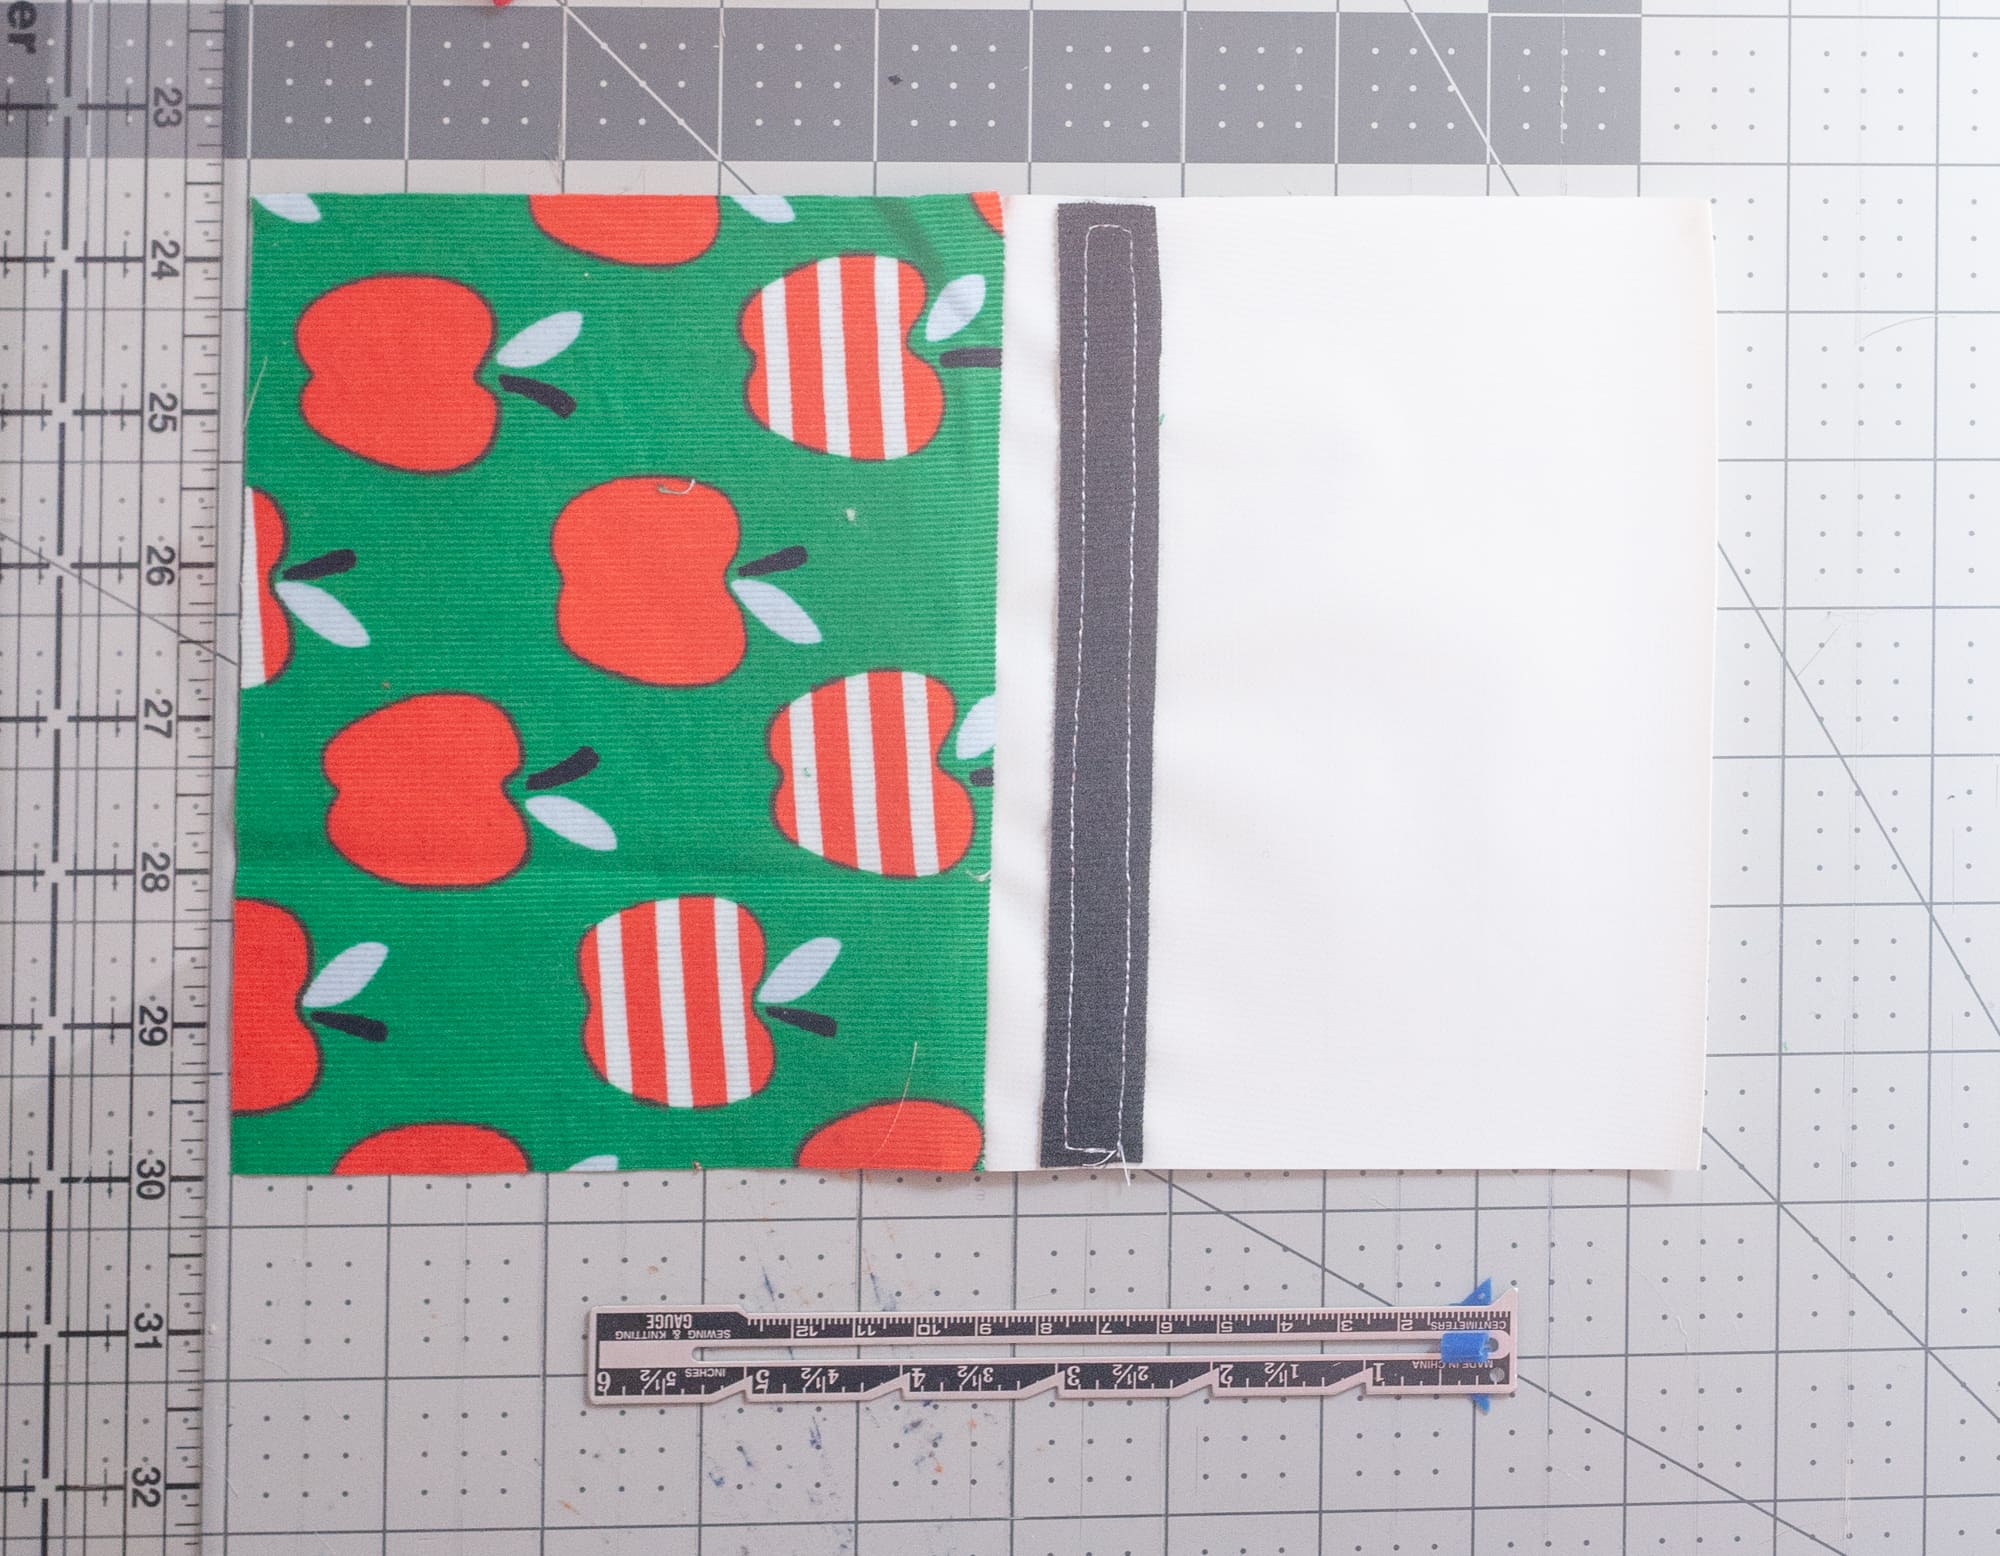
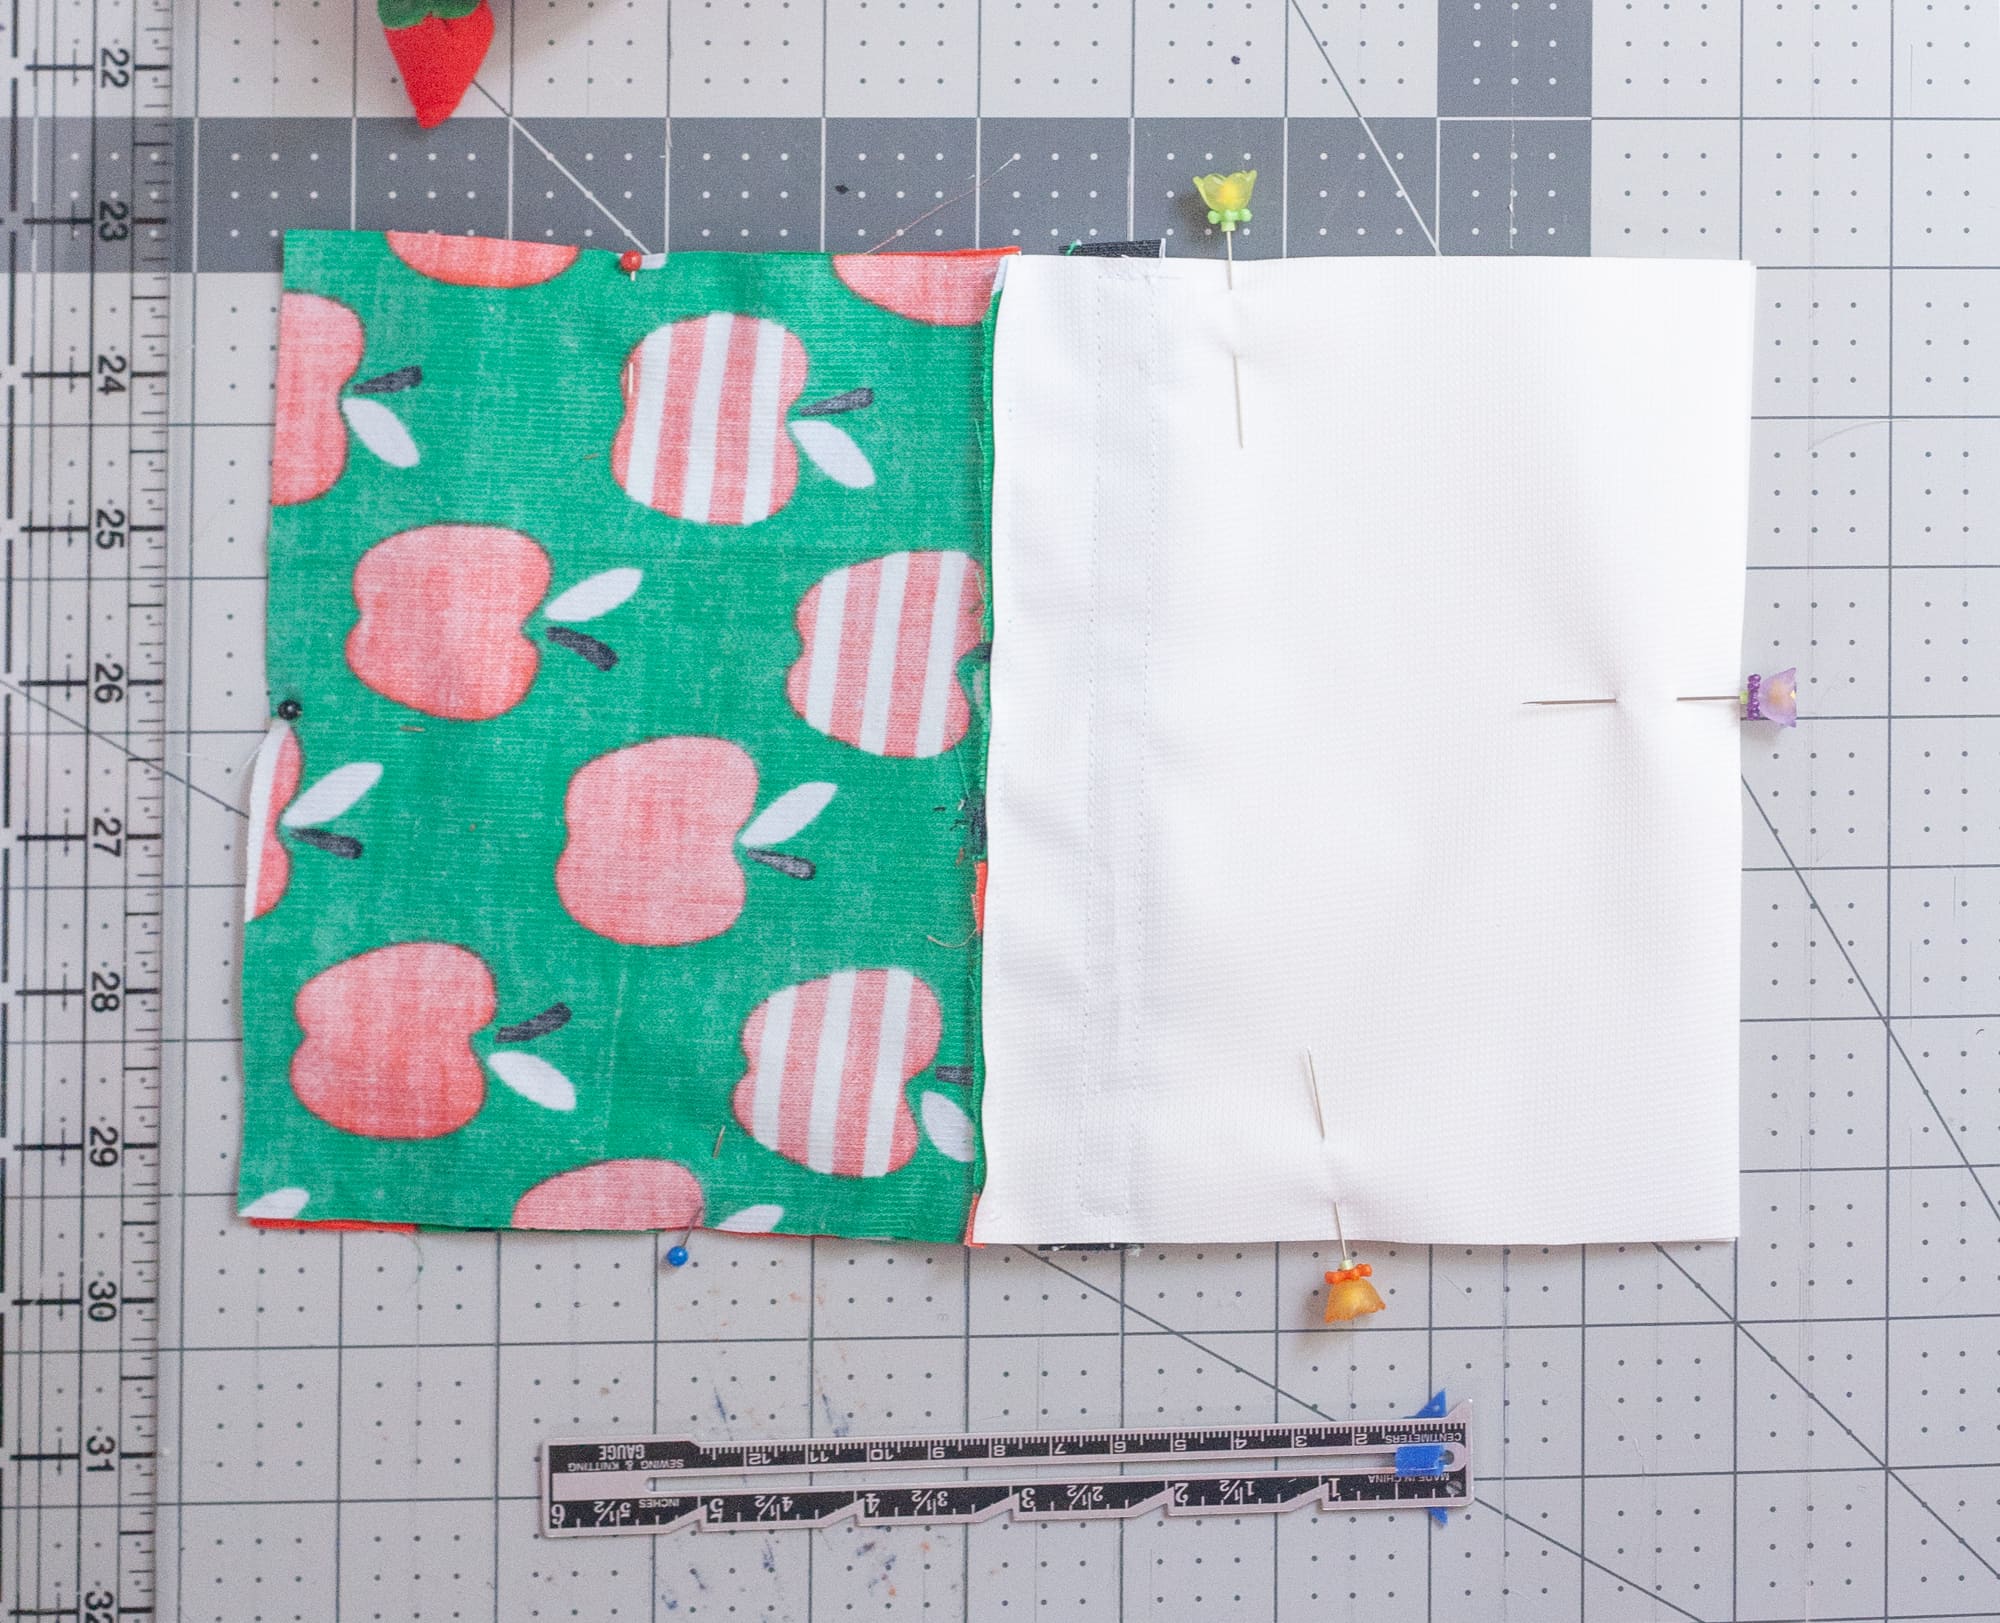
3. Pin one piece of the lining fabric to one piece of the outer fabric, right sides together (for the lining, the "right side" is the one with the fastener on it). Sew along the top, ¼" from the edge.
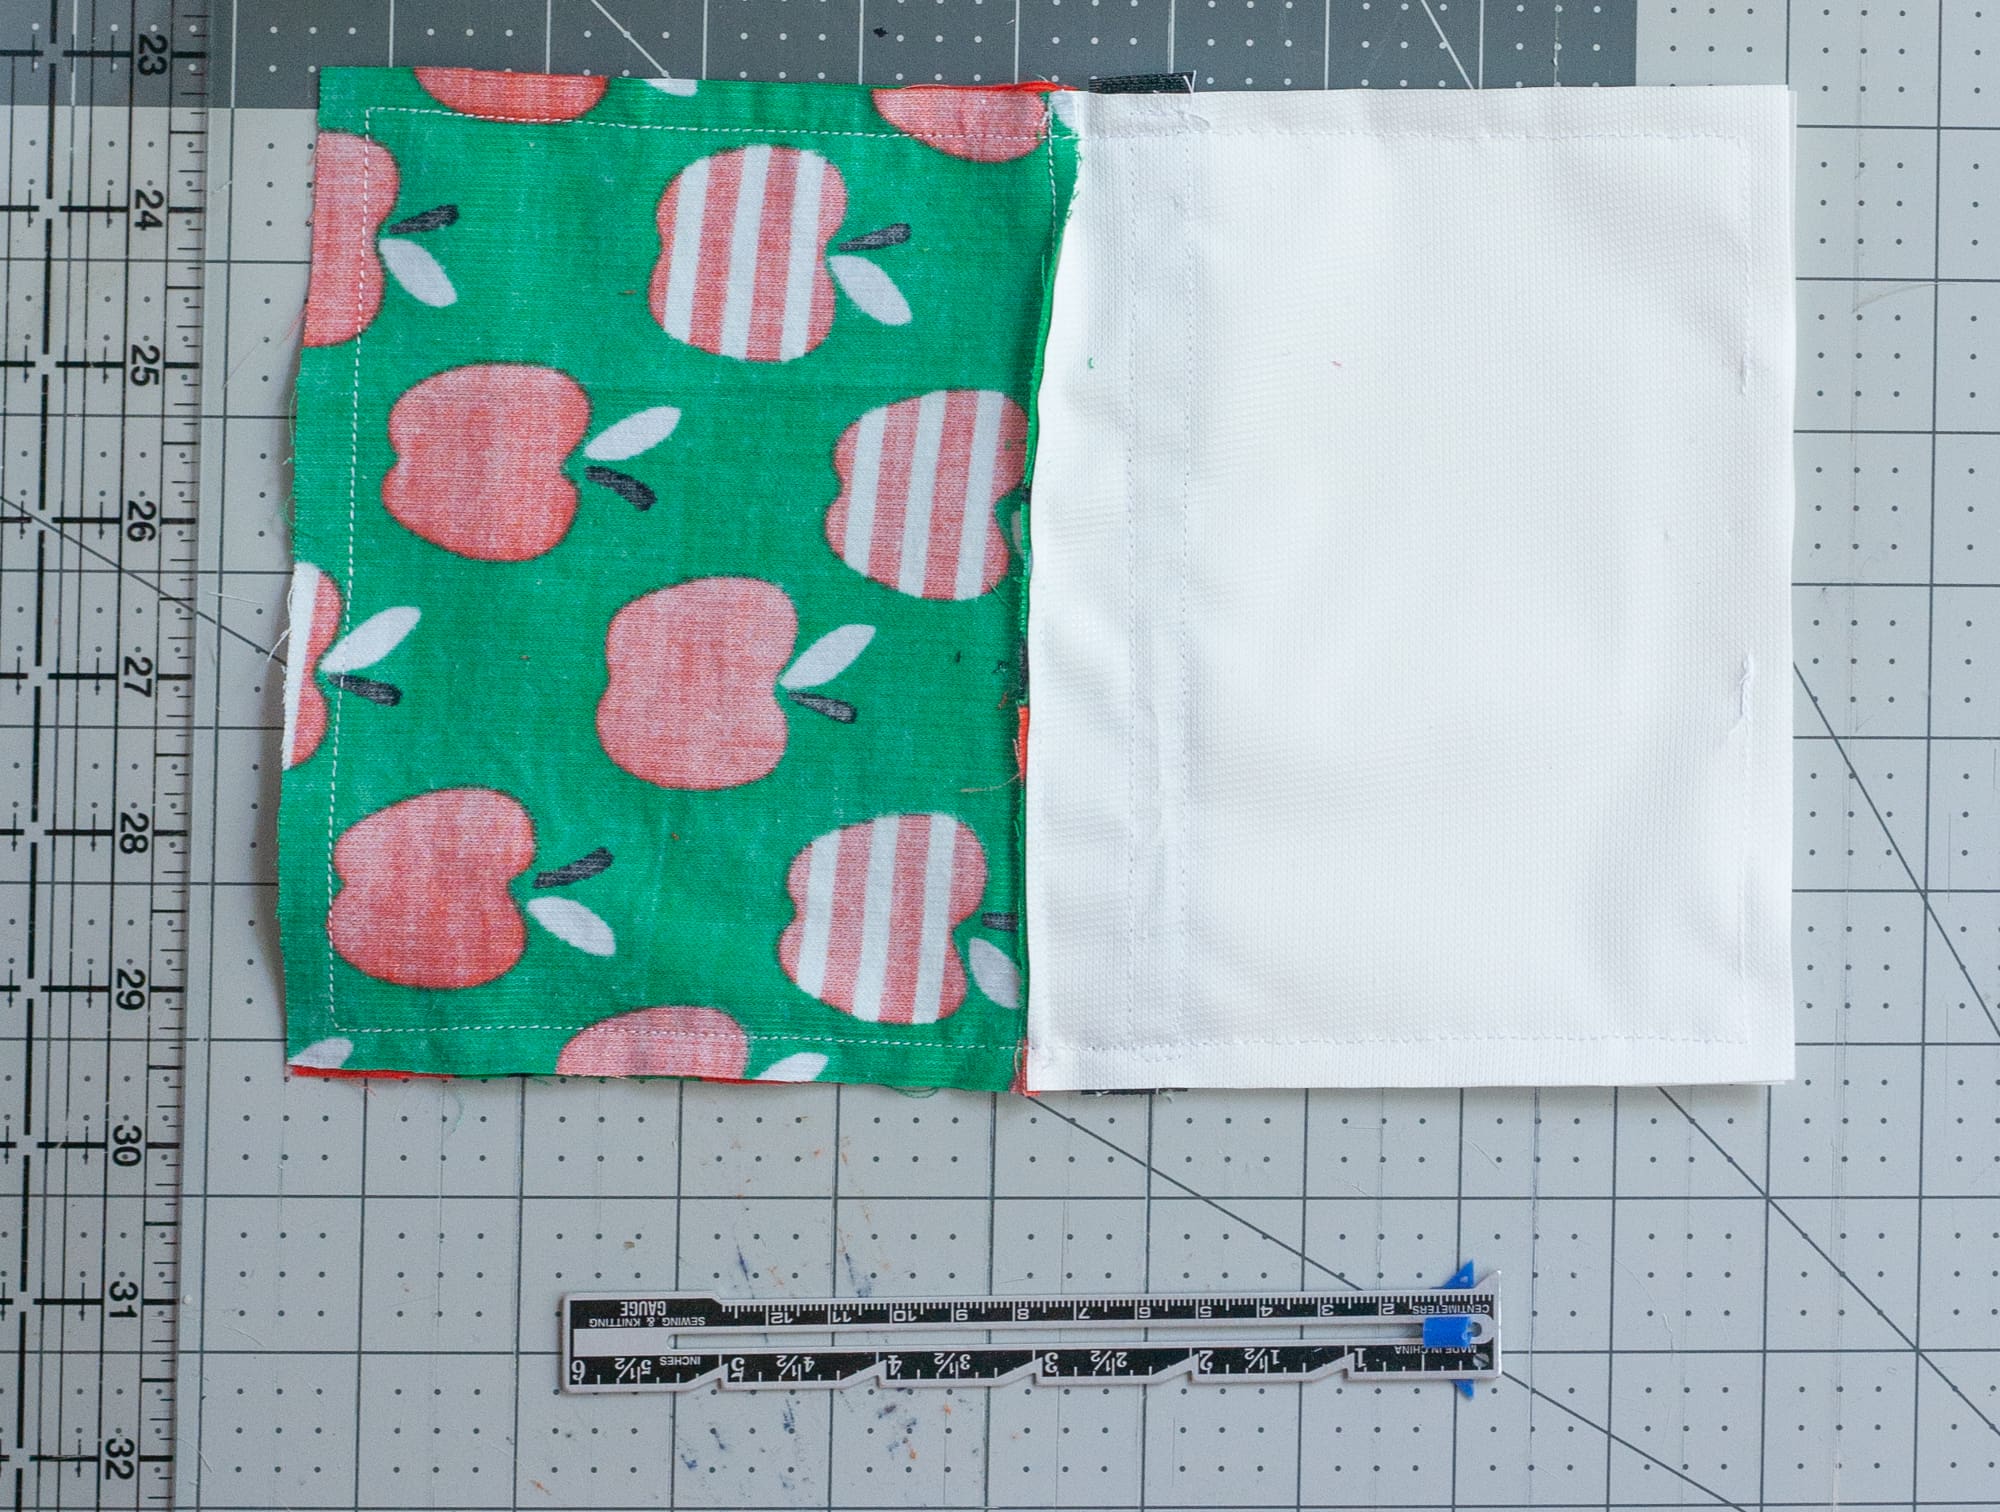
Repeat with the other lining and outside fabric piece. Open up both pieces and run your finger along the seams to press them open. You'd usually want to iron here, but the liner won't hold up high heat, and I didn't want to risk it. So finger pressing it was!
4. Put together both pieces, right sides together, matching up the seams and the Velcro. Starting at the bottom of the lining fabric, sew around the perimeter of the piece, leaving a 2" space open at the bottom of the liner to turn the bag. Backstitch at each end of your sewing.
5. Turn the bag right-side-out through the opening in the bottom of the liner.
6. Close the opening at the bottom of the liner by folding in the edges to create a seam. You can either topstitch over this, or slipstitch it. Since nobody is going to be looking that closely at the inside of these bags (and if they are, they are probably just looking for more snacks!), I went ahead and topstitched these.
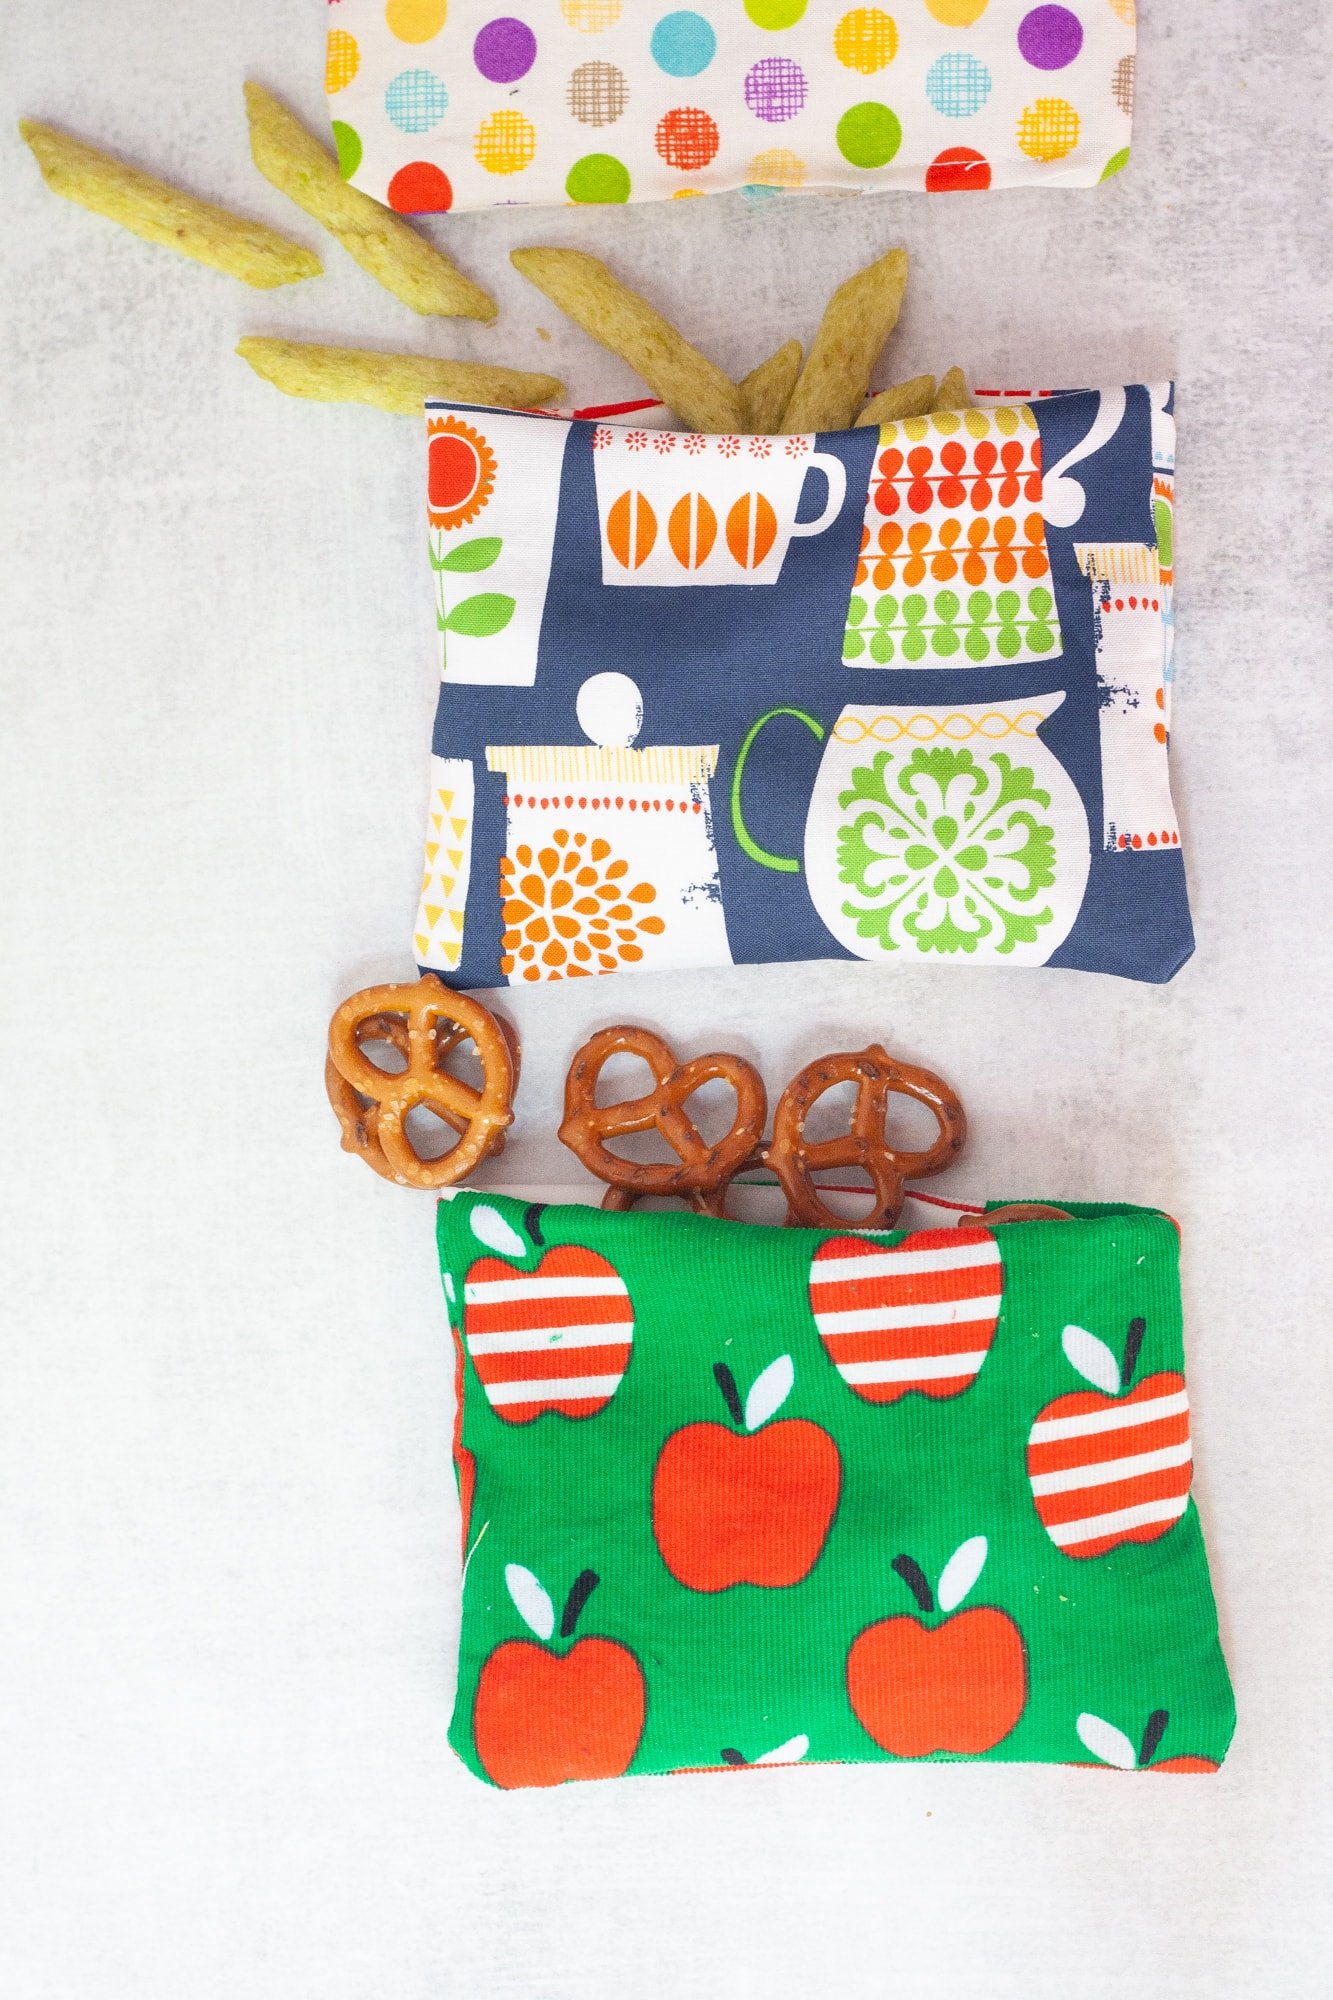
7. Push the liner inside the bag, and you're done! To make the bags lay flat, you may want to either finger press the top seams or briefly run over the bags with a very low iron. Like I said, heat isn't great for the liner fabric, but I figured using a low iron on the outside of the bags for just a few seconds wouldn't heat the liner up much, if at all.
Cleaning Your Snack Bags
Most of the time, you can just turn the bags inside out and wipe off any crumbs or juice. But if it gets really dirty, wash in cold water and hang up to dry. If you put these through the washer, I recommend putting them in a mesh laundry bag first, just so the Velcro doesn't snag on the rest of your laundry.
Using Your Extra Liner Fabric
The smallest amount of the ProCare Waterproof Food Safe fabric you can get online is ½ yard, which will make you about a dozen snack bags at this size. If you don't need a giant stash of reusable snack bags, a set of these would make a great gift or stocking stuffer!
Hi. These snack bags you make are GENIUS! Question: do you know that the vinyl application is food safe? Thanks!
Not actually sure. But I’d think that for dry things (like crackers or pretzels), you could just do a fabric liner instead.
Got to make some of these to stop using plastic bag s fabulous tutorial thanks
Hi I made 6 this w/e. They are so cute. I used PUL for the liner. The first one sewed up beautifully but with each successive one I found my machine shortened the stitches and the tension seemed a bit tighter. I haven`t worked with PUL before. Is there a trick I should know?
Thanks.
Joy
Hmmm, I never had this issue. I wonder if maybe your needle just got dull? PUL can sometimes dull a need in a flash.
Fiid safe liner?
Yep, you can find more about food safe fabric here:
http://www.sewcando.com/2013/07/ultimate-reusable-snack-sack-tutorial.html
https://craftingagreenworld.com/2013/12/04/food-safe-fabric-sandwich-bags-follow/
http://www.wazoodle.com/fabrics/food-safe-fabrics.html
You give the absolute BEST tutorials. Thank You for that. You don't know how much its appreciated.
Love this! Quick question...rather than making a liner, can I just iron the vinyl onto the wrong side of the outside fabric and not have a separate liner?
Every vinyl lining I can find says not to use with food. Any thoughts??
Doesn't stitching thru the two layers of velcro make the edges not lie flat?
Nope, it always works for me. But I guess if you had very thick velcro, it might cause issues.
Thank you for the tutorial this is very helpful
Where could I find iron on vinyl online? My local Joanns doesn't have any.
These are really, really cute and so great to have instead of using plastic bags everyday. For those of us less crafty, there are food safe drawstring bags you can purchase in bulk online. Check us out at state line bag co.
I wonder... is there any reason we couldn't use the empty food bags from items we've already purchased and eaten - ie cookie bags, nuts, etc. They could go on the inside...
Not sure how long they would last, but might be worth a try...
Here's an example -
http://sewlicioushomedecor.com/recycled-food-safe-oreo-cookie-bag-zipper-bag/
I have a plastic / vinyl (I'm not sure what it is) table cloth that's slightly fuzzy (so it won't slide) tablecloth that I'm thinking about cutting up to use. It can be washed in the washing machine. Any suggestions?
Vinyl inside or outside?
It's rather ugly (plain tan). How might I make it more attractive?
Thank you for such great instructions. Just made my first one and showed it to my daughter-in-law. She loves it too. Got 10grand children and one more on the way so I guess I better get cutting and sewing!
I just made two of these and I'm in love LOVE LOOOOVE with your pattern. you made it so easy to follow! Thank you a million times thank you. I searched all over to find something to help drop out of ziploc world now that my son is starting school.
Thanks for this great tutorial. I just found it via Pintarest. I will make some reusable bags for my kids. They are learning about recycling so it is perfect.
Thanks so much for this I found your blog via the carry on bag on pinterest! this is so smart I need to do these as well just for everyday travels with the hubby. He is always wanting to know what snacks I have! Would be great for pet snacks too instead of zip lock bags that they chew through! Thanks again!
what is PUL? I bet oil cloth would work for these.
PUL is polyurethane laminate fabric - used for diaper covers. http://www.diapersewingsupplies.com/pul-fabric/
I've never used it but it looks perfect for these.
I will make it this weekend (:
Thanks.
Thank you for posting the pattern! I've made 2 already using the PUL as a lining and I love them! I can't wait to get some more finished!
What is PUL?