Italian Pinwheels with Cream Cheese Spread


These Italian pinwheels are an absolute family favorite recipe! Packed with flavorful meats and cheese, these pinwheels work just as well as a prep-ahead school lunch as they do as a dish to bring to a potluck-everyone loves pinwheels! Bursting with flavor, these savory bites are beloved by kids and grown-ups alike. Let's get rolling!
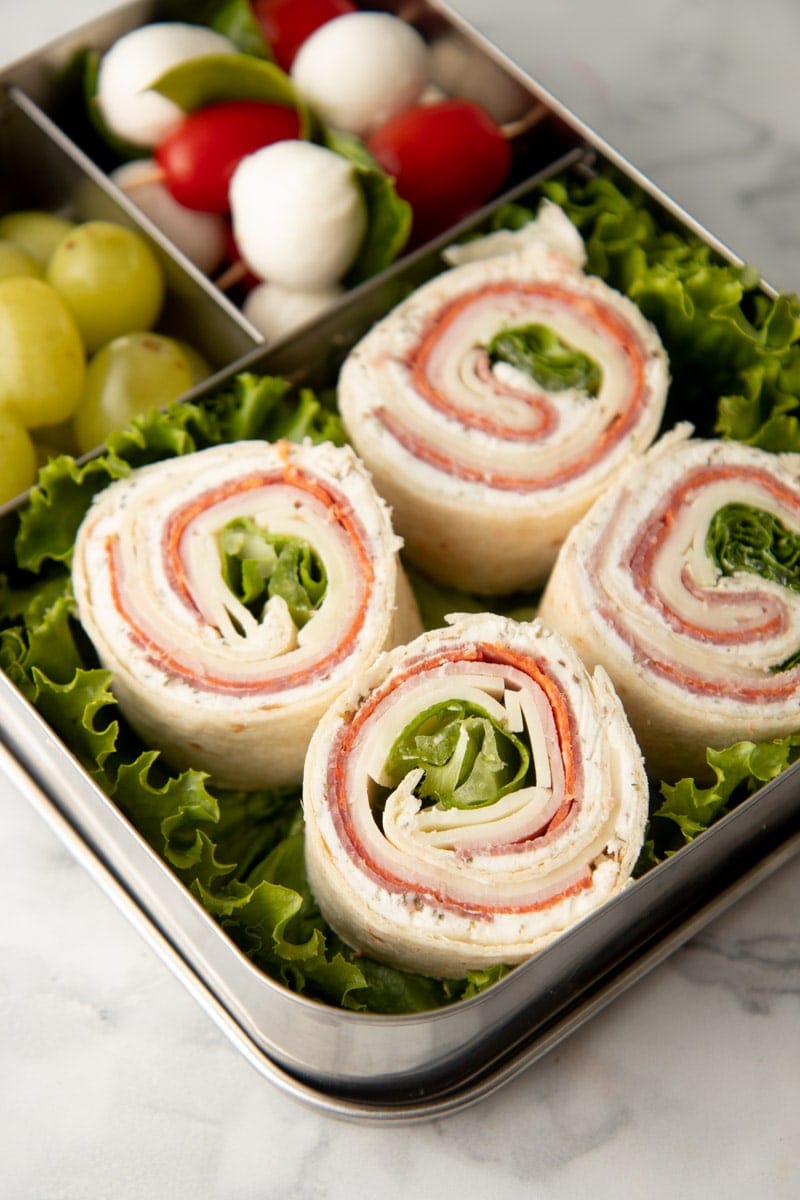
What are Italian pinwheels made of?
These pinwheels have all the flavors you love in an Italian sub sandwich but in a cute, portable form. Plus, they are easy-peasy-that's what makes them a great party appetizer OR quick lunch! To make these cream cheese roll-ups, you'll need:
- Flour tortillas. Large tortillas are best-you may see them labeled as "burrito sized."
- Deli meats: Salami (we recommend hard salami or Genoa salami), pepperoni, ham.
- Slices of provolone cheese.
- Green leaf lettuce.
For the cream cheese spread that helps hold the Italian pinwheels all together, you'll need:
- Softened cream cheese.
- Italian seasoning.
- Garlic salt. If you don't have garlic salt, mix 3 parts salt to 1 part garlic powder to make your own.
- Grated Parmesan cheese.
- Pepperoncini peppers. Banana peppers will work as well, and are a little milder.
- Roasted red peppers.
Protip: Make it mild.
If you are making these pinwheels for school lunch boxes and your kids are picky, the peperoncini and roasted red bell peppers are optional!

How do you make Italian pinwheel sandwiches?
- Make the cream cheese spread by combining the ingredients in a mixing bowl until blended.
- Lay out one tortilla and spread ⅓ of the cream cheese over the entire surface.
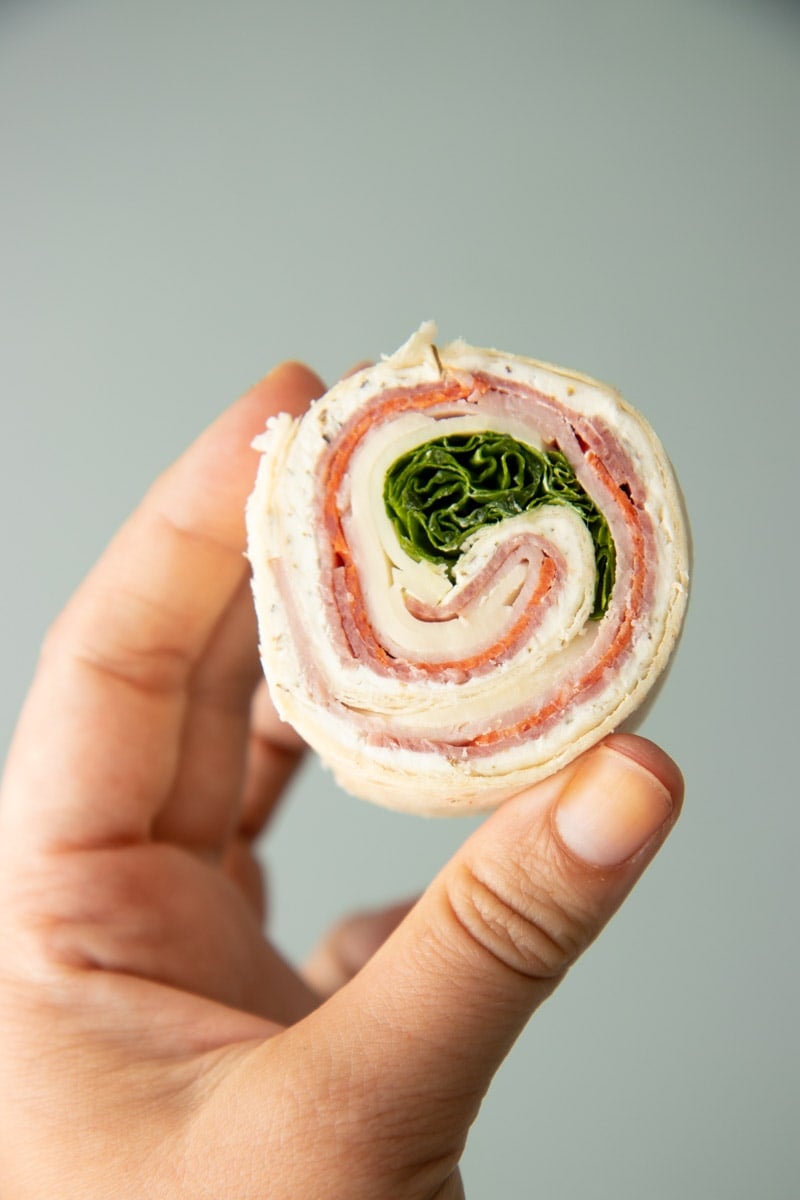
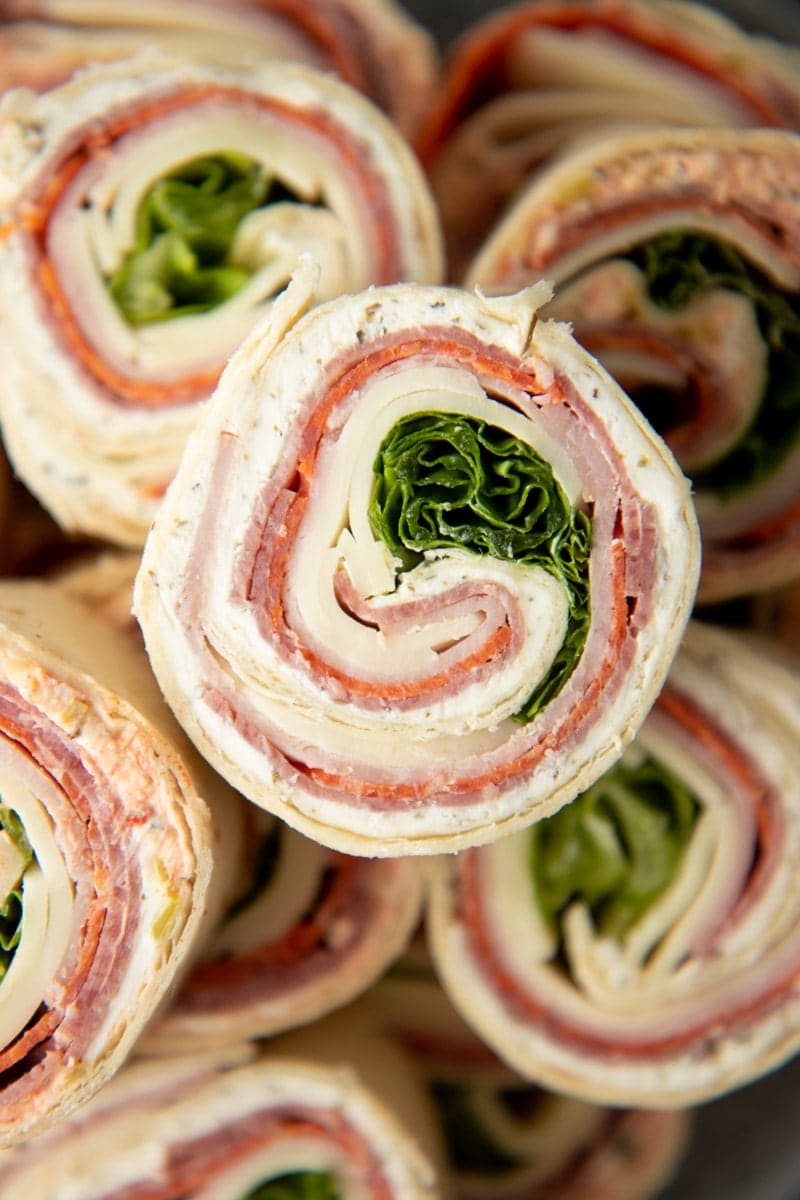
- Leaving a 2" gap on one side of the tortilla, layer ⅓ of each filling in this order: salami, pepperoni, ham, and provolone. Lay a few pieces of lettuce in the middle of the tortilla.
- Tightly roll up the tortilla, gently squeezing to help everything stick together.
- Repeat three times with the rest of the ingredients.
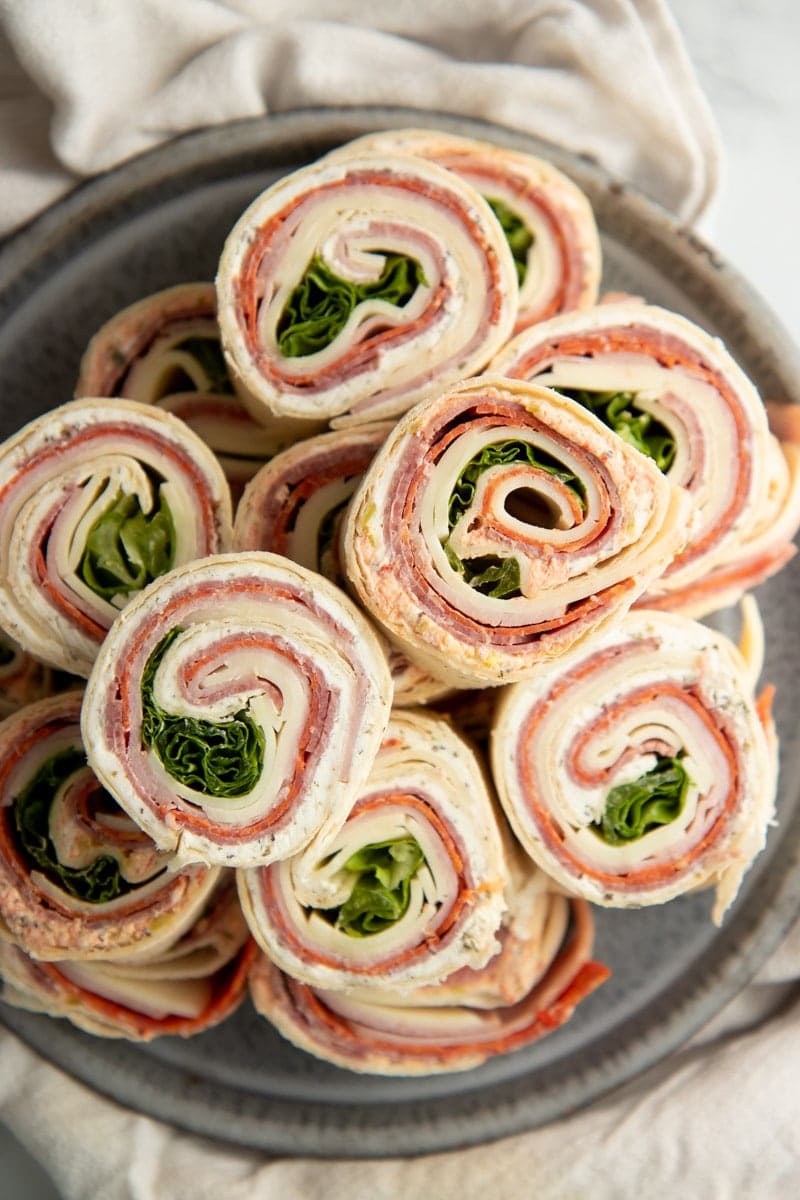
- Place all the roll-ups on a sheet pan and chill for an hour before slicing.
How do you make pinwheels that don't fall apart?
The cream cheese spread acts as the "glue" for these pinwheels, helping the whole thing stick together.
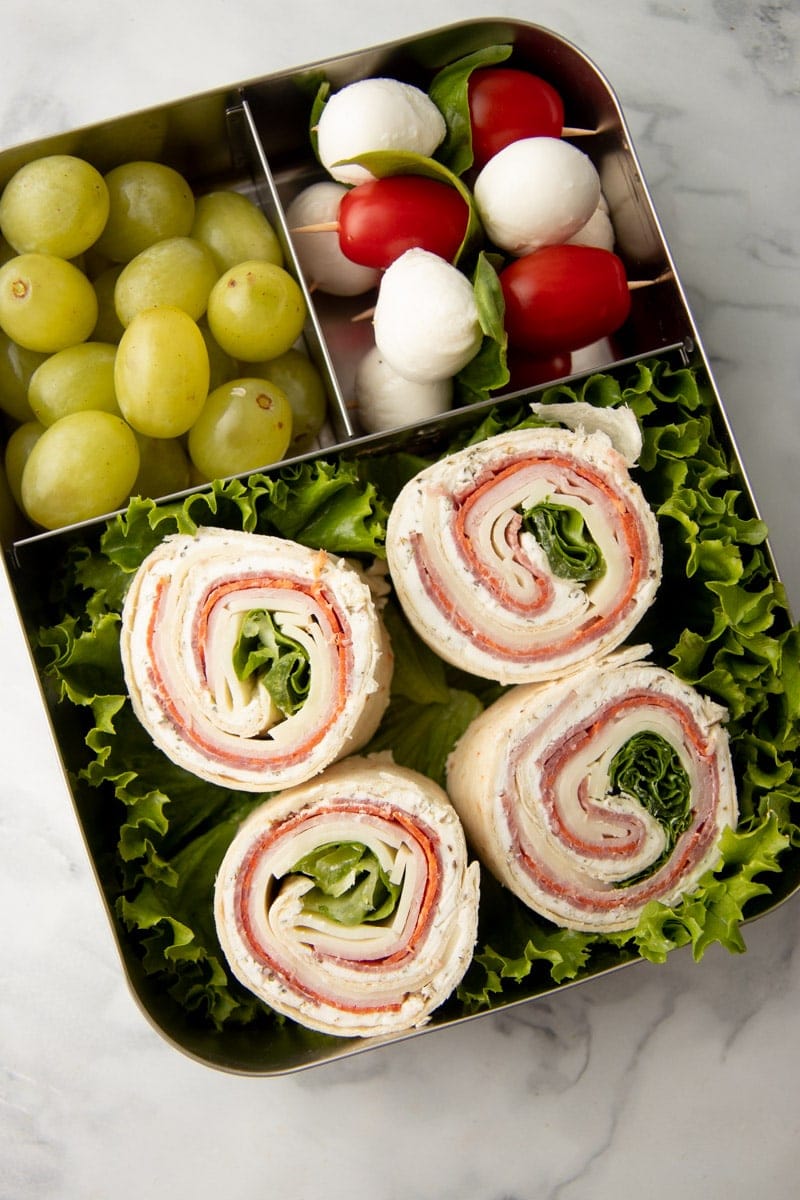
Protip: Pinwheels everywhere!
We love the versatility of these Italian pinwheels. They are just as at home in a lunch box as they are at a bridal shower, brunch, or picnic!
Want to save this recipe?
Do you refrigerate pinwheels before cutting?
Yes-a little bit of time in the fridge gives the cream cheese time to firm back up a bit. This helps the pinwheels stay together when you slice them!
How long do you chill pinwheels before cutting?
The tortilla roll-up should be refrigerated for at least an hour before you slice it into pinwheels. Then use a serrated knife to remove the end of the roll-up (this piece doesn't look great or hold together as well, but it is a tasty snack while you are doing your prep!). Cut the rest of the roll into 1" wide pieces-you'll get about six pinwheels out of a typical large tortilla.
How do you make pinwheels not soggy?
The layering order is key! Wet ingredients or thin condiment sauces can make the tortilla soggy, so you want to put a buffer between any wet ingredients and the tortilla.
The ham is the most likely culprit in these easy Italian pinwheels, so we keep it as the middle layer. If you follow the order in the recipe, the hard salami, provolone cheese, and lettuce will be the ingredients most likely to come into contact with the tortilla, and they shouldn't make it soggy at all (assuming you dry your lettuce!).
How far in advance can I make Italian pinwheels?
Pinwheels can be refrigerated in an airtight container for two to three days. We doubt you'll have any trouble eating them up by then!
Can Italian pinwheels be frozen?
Most of the ingredients will be fine in the freezer, with one exception: the lettuce. If you'd like to freeze these Italian pinwheels, skip the green leaf lettuce in the middle of the roll.
Want more easy pinwheels like these?
📖 Recipe
Italian Pinwheels with Cream Cheese Spread
Ingredients
For the Cream Cheese Spread:
- 8 ounces cream cheese softened
- 1 tablespoon Italian seasoning
- 1 teaspoon garlic salt
- ¼ cup grated Parmesan cheese
- ½ cup finely chopped pepperoncini optional
- ½ cup finely chopped roasted red peppers optional
For the Pinwheels:
- 3 large burrito-sized flour tortillas
- 24 thin slices salami about 2" in diameter
- 18 thin slices pepperoni about 3" in diameter
- 9 thin slices deli ham
- 12 thin slices provolone cheese
- 1 head of green leaf lettuce
Instructions
- Combine the cream cheese, Italian seasoning, garlic salt, Parmesan cheese, pepperoncini (if using), and roasted red peppers (if using) in a medium-sized mixing bowl until well-blended and smooth.
- Spread ⅓ of the cream cheese mixture onto one tortilla, making sure to spread the cream cheese all the way to the edges-this is the "glue" of the pinwheel.
- Leaving about 2" uncovered on the left side of the tortilla, layer ⅓ of the salami (8 slices) on the remaining part of the tortilla. Top with ⅓ of the pepperoni (6 slices), ⅓ of the ham (3 slices), and ⅓ of the provolone cheese (4 slices).
- In the middle of the tortilla, place a few leaves of green lettuce vertically.
- Starting from the side opposite from the empty area you left, roll tightly, stopping regularly to gently squeeze the rollup to adhere everything together. When you get to the end, give everything a good gentle squeeze to make sure it sticks together.
- Place the rollup on a small baking sheet, and repeat with the remaining ingredients to make a total of three rollups.
- Place the baking sheet in the fridge, and chill the rolls (uncut) for at least an hour.
- When chilling time is up, remove a roll from the baking sheet and place on a cutting board. Using a serrated knife, cut off the first inch of the roll (this scrap part doesn't look pretty, but it sure does taste good!). Then cut 1-inch slices down the roll. You should get about six full slices per roll. Serve immediately, or refrigerate and enjoy within 2-3 days.
Notes
- For picky eaters, feel free to leave out the pepperoncini and roasted red peppers from the cream cheese spread-they add a nice kick to the pinwheels, but they are perfectly flavorful and delicious without them.


Many links on this site are affiliate links. As an Amazon Associate, we earn from your qualifying purchases at no extra cost to you.
Comments
No Comments