There are as many different methods and setups for seed-starting as there are gardeners! It can be as simple (read: affordable) or as complex (read: $$$$) as you want it to be. Because this is a guide for beginning gardeners, we’re going to give you some easy and affordable first-timer options.
These might not be the absolute best options out there (in my opinion, that would be soil blocks in a solar greenhouse), but the methods suggested below do balance effectiveness with cost. Once you’ve really gotten into gardening, you can then start to investigate more advanced methods of seed starting. Alright, let’s dive in!
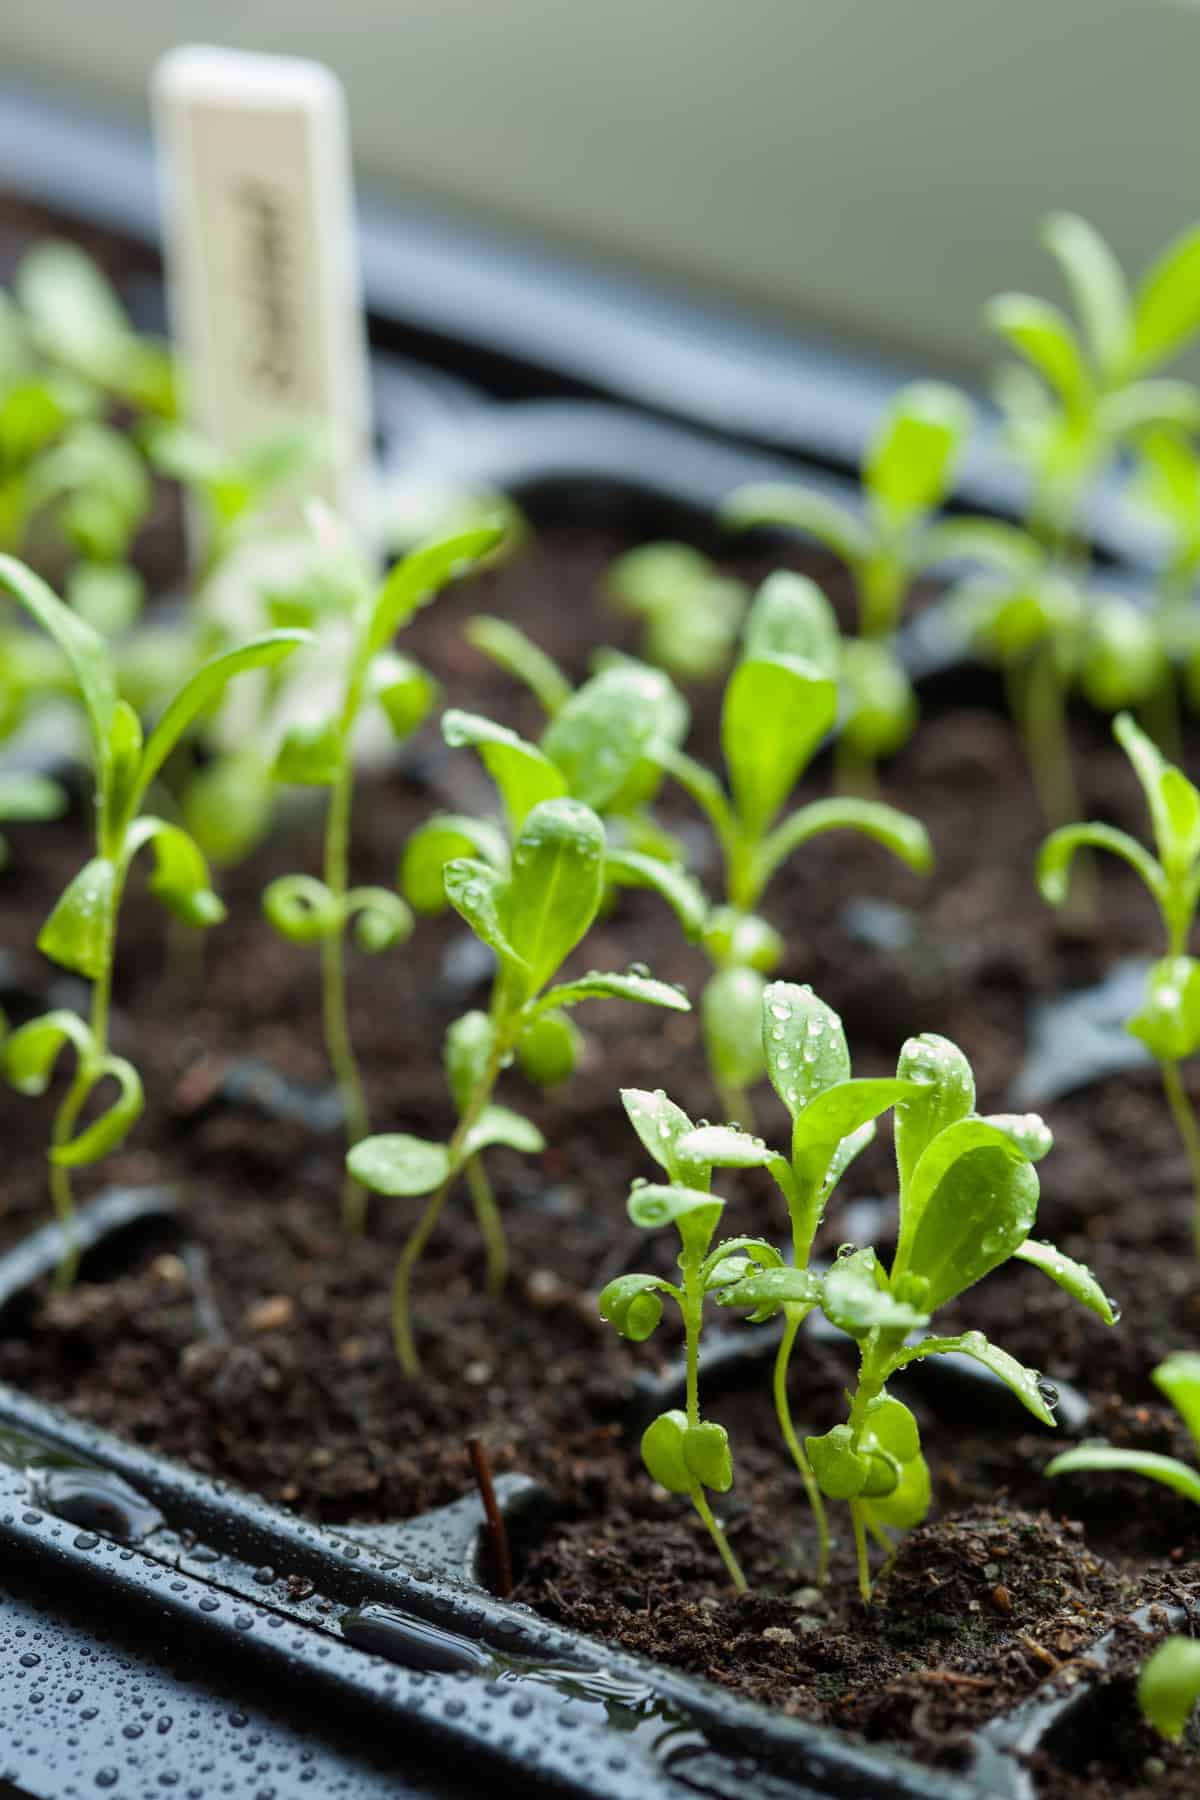
Table of Contents
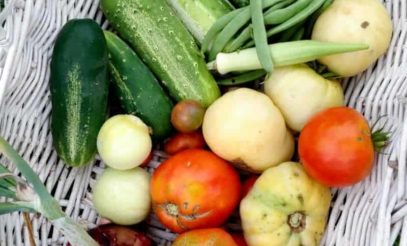
Why start from seeds?
There are lots of reasons we prefer to start seeds ourselves rather than buying seedlings from the nursery:
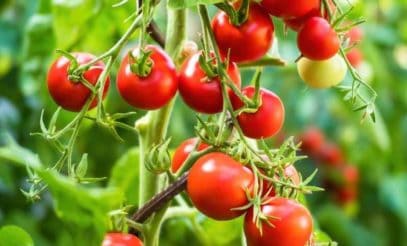
- Longer growing season. Many gardeners don’t have enough warm days to grow heat-loving crops like tomatoes outdoors from seeds. Starting seeds indoors gives your plants a head start!
- Lower cost. It is much cheaper to buy a packet of seeds than individual seedlings.
- More variety. With purchased seedlings, you’re stuck growing whatever select varieties they decided to sell this year. You have literally hundreds or even thousands more options when you start from seed.
- More control. Plants you have babied and cared for since they were seeds are usually healthier or more robust. You can’t tell if a plant has been overwatered or dealt with pest issues at the garden center.
We still plant a few seedlings every year, but for the most part, we are team “start from seed” over here!
Which seeds should you start indoors?
It might seem like a good idea to get a head start on all your plants, but not every plant should be started indoors. In general you want to avoid starting plants indoors that don’t like to be transplanted (if you are an expert gardener, you can work around this for some varieites by using methods that reduce root disturbance) or plants that grow so quickly it isn’t necessary to take up the space on your seed starting shelf.
Seeds that are great candidates to start indoors are plants that require a long growing season—especially if you live in an area with shorter growing seasons. Starting indoors can give you more warmth in late winter and early spring to start summer crops, and it can also give you cooler conditions in the heat of the summer to start cool-weather crops for fall.
| Start Indoors | Typically Direct Sow Only | Can Go Either Way |
|---|---|---|
| Tomatoes | Peas | Spinach |
| Peppers | Root Veggies (carrots, beets, parsnips, radishes, etc.) | Lettuce |
| Eggplants | Potatoes | Zucchini and Summer Squash |
| Brassicas (cauliflower, broccoli, Brussels sprouts, etc.) | Garlic | Melons |
| Perennial Flowers | Annual Flowers | Cucumbers |
| Perennial Herbs | Beans | Annual Herbs |
| Celery | Corn | Onions and Leeks |
| Okra | Sweet Potatoes | Hearty Greens (chard, collards, kale, etc.) |
When to start seeds indoors
Before we dig into the how, we have to make sure you’ve got the when right. You want to time your seed starting so your plants are big and strong enough to make it through the shock of transplanting into the garden well, but not so big that they become root-bound (meaning the plant is too small for the pot) or outgrow your seed starting space. To figure this out, it requires a calendar and some planning ahead.

The first step is to figure out what gardening zone you live in and when your last frost date is—that is the date where it is “safe” to plant fragile crops (like tomatoes, cucumbers, peppers—they hate cold!) outside in the garden. Then, using that date, you can calculate the right planting time for the most common crops using this easy printable.
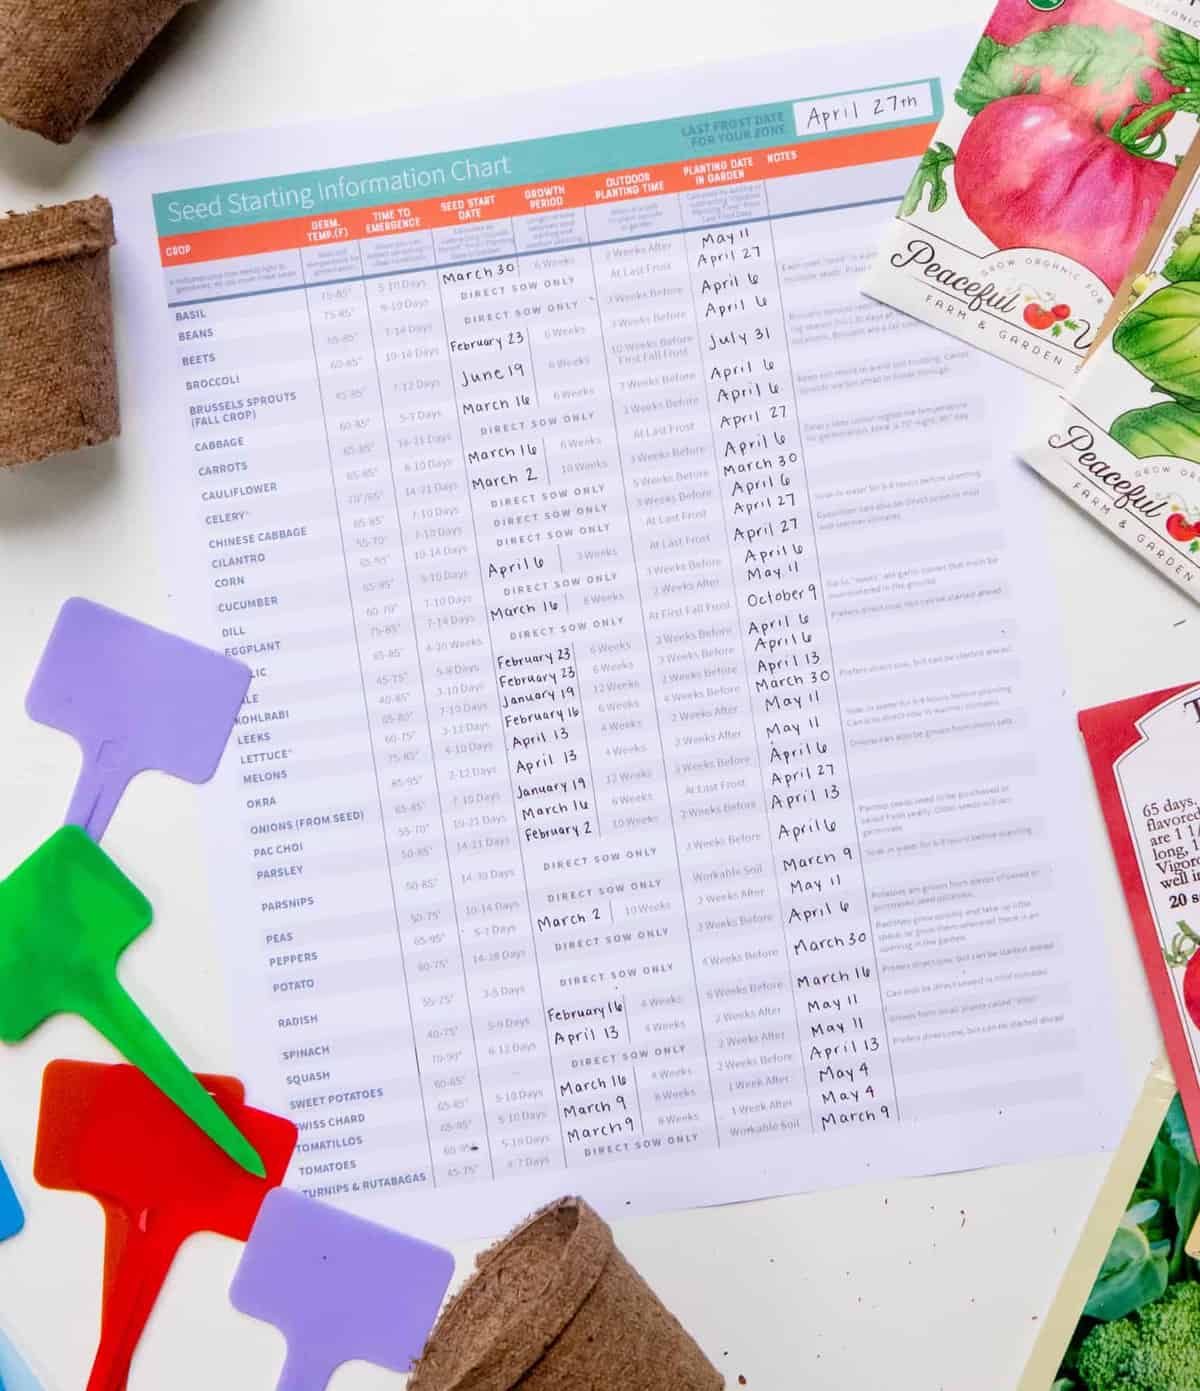
Once you’ve filled this out, I highly recommend laminating it (trust me!) and saving it with your garden seeds for future reference. Download it here.
Chances are, you’ll start to notice a pattern in the seed starting dates—they start to group together. In our area, we usually do two batches of seed starting: one for cole crops (crops that like cooler weather) and a second batch a few weeks later for warm weather crops.
Don’t worry about being spot-on with the exact date here—if you need to shift your sowing or planting dates a couple of days (or even a week) one way or the other, you’ll be fine!
Now that you know when to start seeds indoors, let’s actually do some seed starting!
Types of seed-starting containers
These are the pots for your seedlings. There are lots of options:
- Seed starting tray sets that make it easy, but cost money
- Recycled containers are budget-and-planet friendly. Cleaned-out yogurt cups, clamshell containers, egg cartons, and even plastic party cups all work great as seed starting containers. Just make sure to poke holes in the bottom of any recycled container for drainage!
- Peat pots are pots made from peat moss that you plant directly in the ground. They are nice because they don’t disturb the plant, but they can be pricey if you need to start a lot of plants.
- Newspaper pots are another budget-friendly option that is also sustainable.
There are a ton of other more “advanced” options but the containers above are all good starting points.
Seed-starting medium
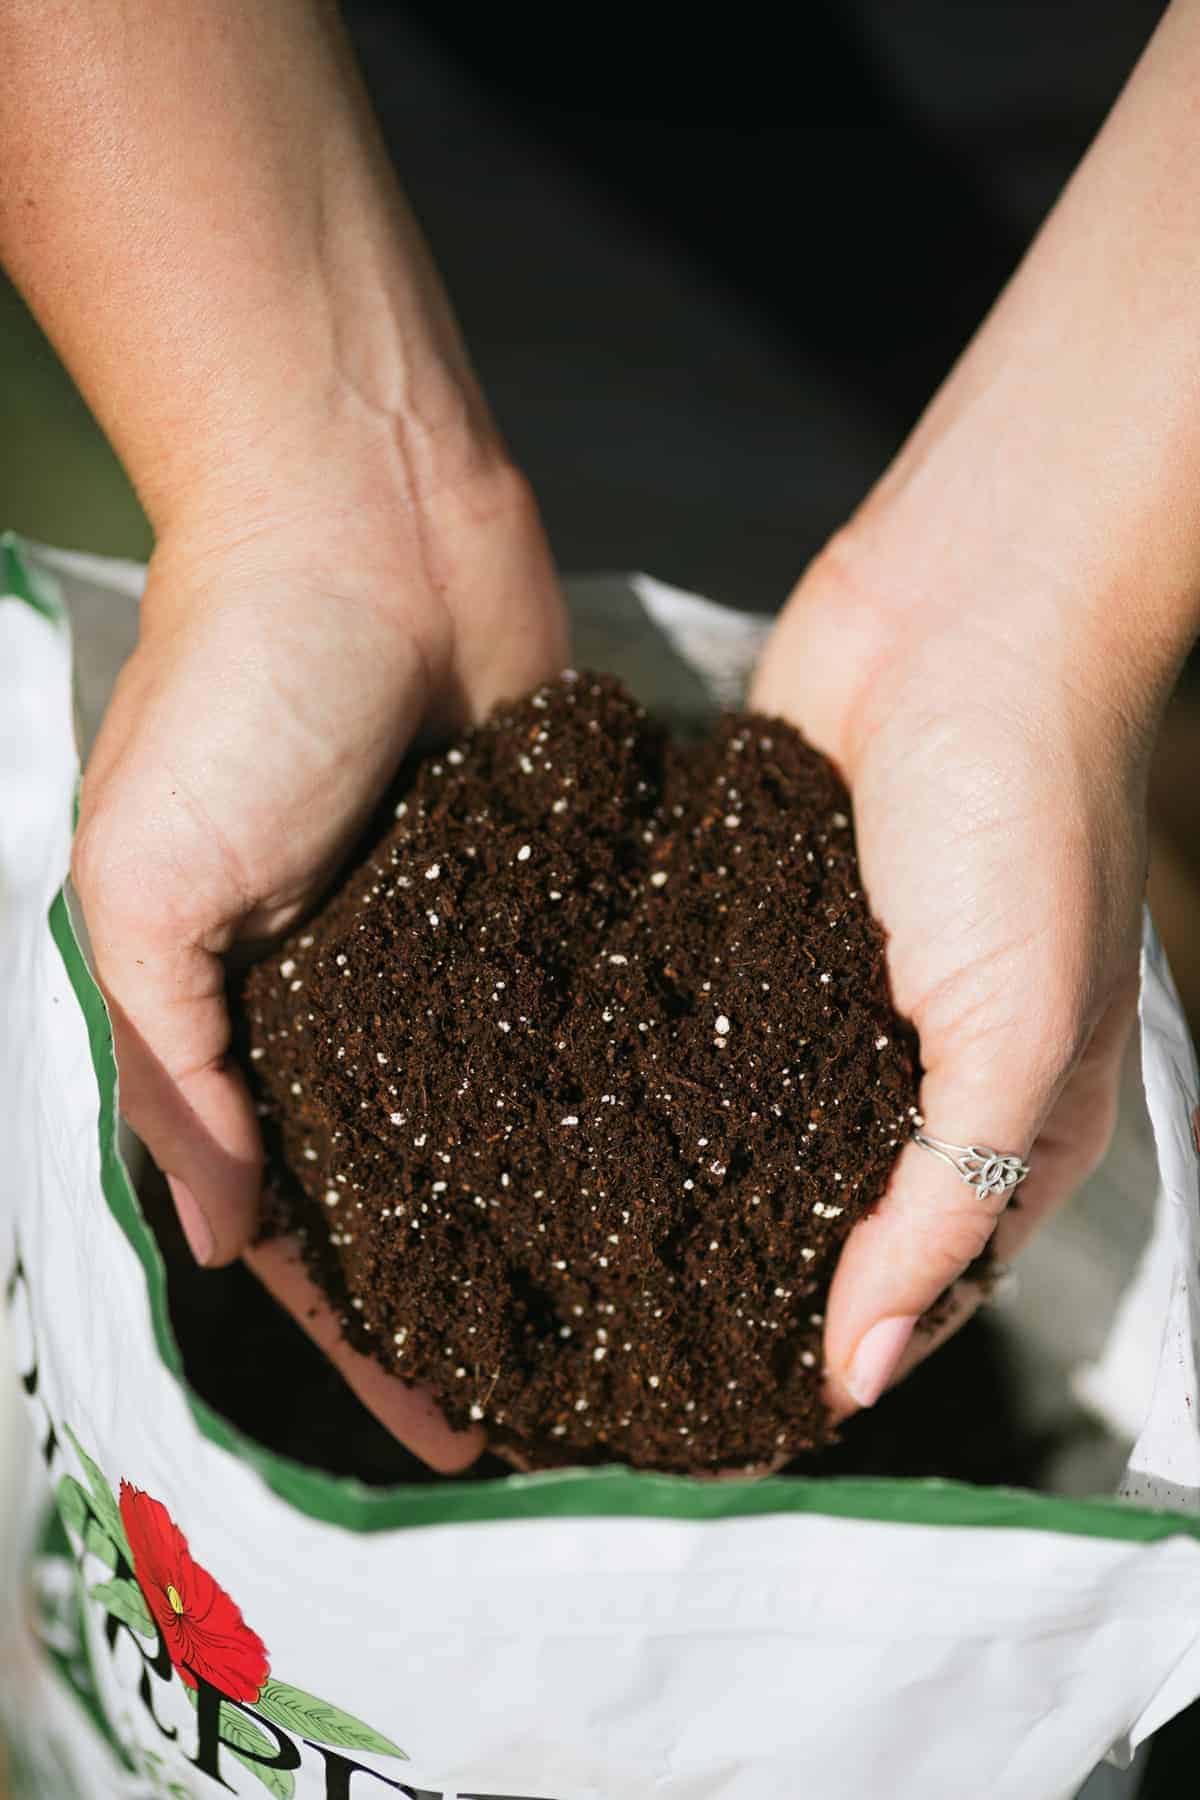
You might think dirt is dirt, but plants need different kinds of soil at different stages in their growth. During seed starting, you want to go for something called Seed Starting Medium.
It also might be labeled as “Seed Starting Soil” or just “Seed Starter.” Once you are an advanced gardener, you can come up with your own growing medium for seed starting (we do!). But for now, a bag of organic Seed-Starting Mix from your local garden center or big box store will do just fine.
Sometimes this also comes in pellet form (often called “Jiffy discs”), which are just little discs that you water and POOF, they expand to be soil ready for your seeds. It’s magic and fun! My kid loves the Jiffy pellets.
Do you need a grow light to start seeds indoors?
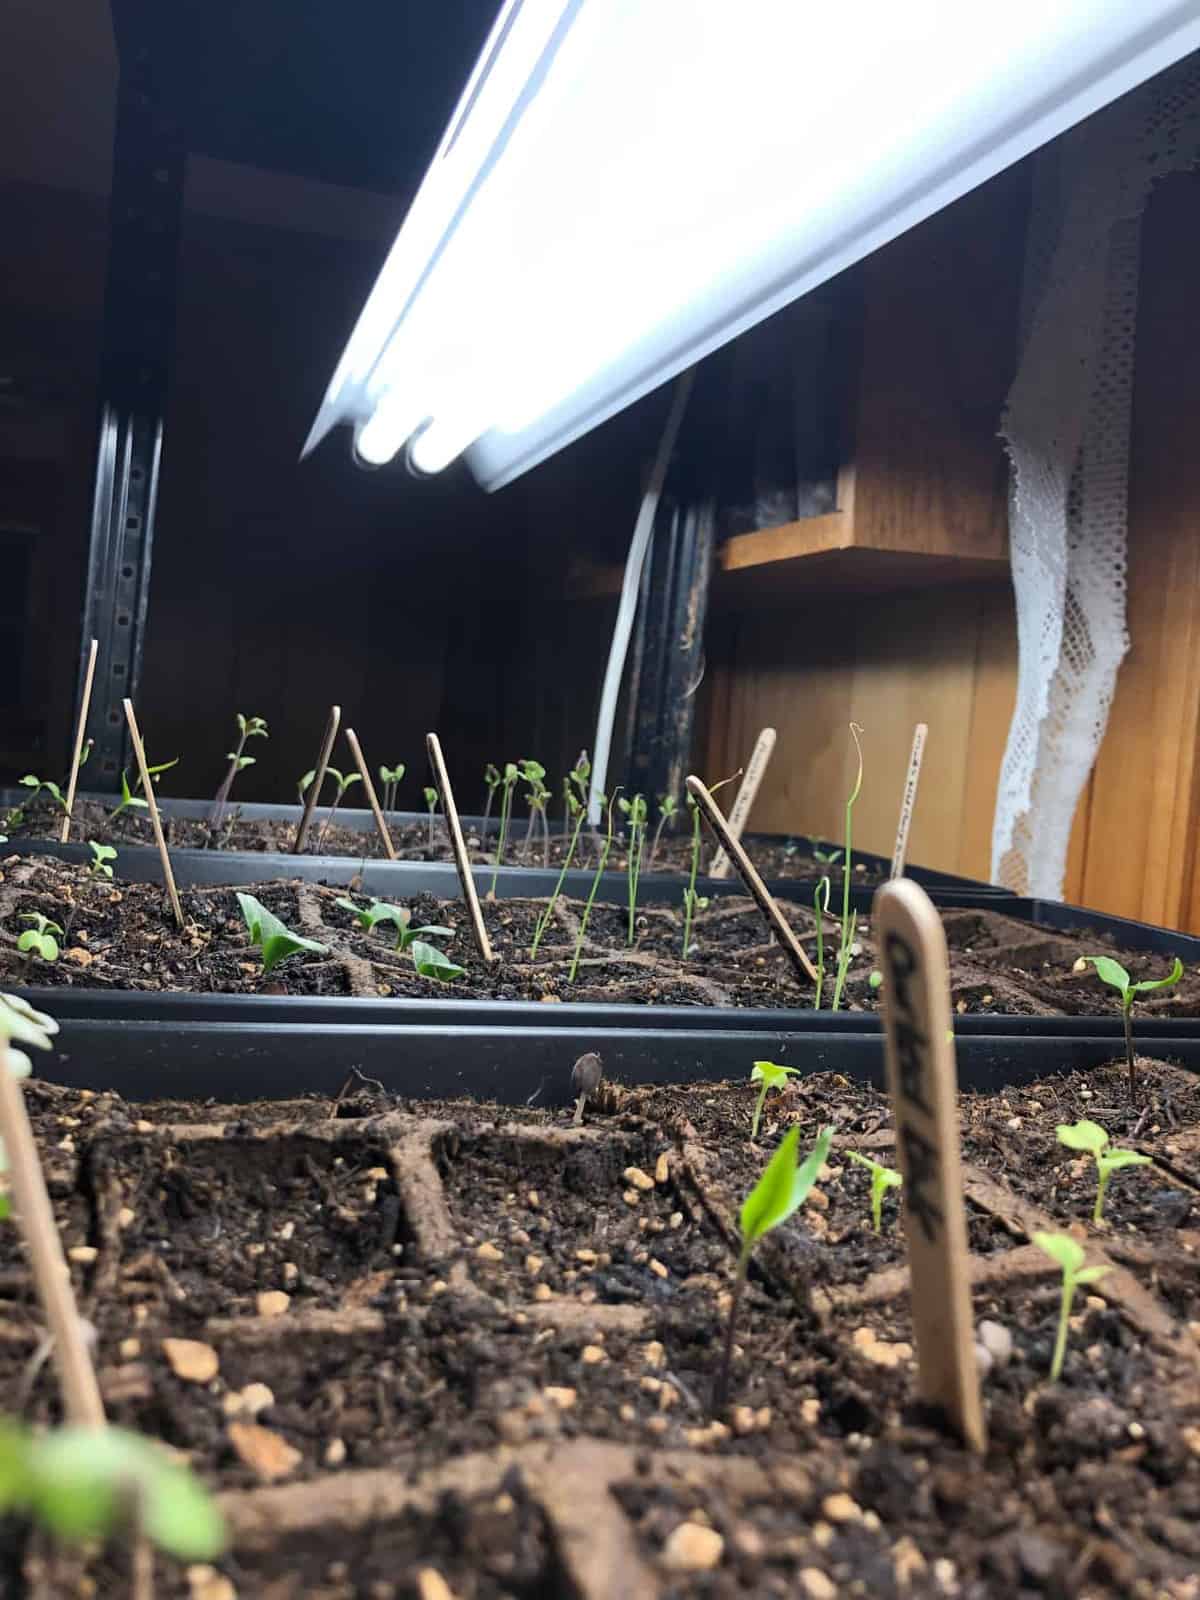
When plants don’t get enough sunshine, they reach their beautiful little leaves for all the sun they can find, and this turns their stems thin and flimsy—this is called being “leggy.” With a few exceptions, once a plant goes leggy, it’s really hard to recover. Which is why you want to provide enough sunshine from the get-go.
If you are lucky enough to have a sunny window, heated sunroom, or greenhouse, this is going to be easy for you. Just as long as your plants are getting 6-8 hours of good quality light a day, they’re going to be pretty happy.
For those of us without those things, it gets a little trickier. There is basically only one path you can go then: using grow lights.
Which grow lights to use
Determining which grow light you’ll use depends on what your current lighting situation is.
If you are looking to just supplement light—say you have a window that only gets 4 hours of sunlight—then you’re in luck, because you can just head to your local big box store, pick up a few cheap-o fluorescent tube lights and some chain and call it a day. Yes, the same lights that hang in everyone’s garage and basement are the same ones that can help grow your plants.
If you need to completely or mostly replace sunlight with grow lights, I recommend getting more specialized lights just for seed starting. There are numerous LED panels, High-Intensity Discharge (HID) lights, and High-Intensity Fluorescent lights to choose from.
In general: it’s important to remember that it’s almost impossible to over-light plants. You are trying to replicate the sun—trust me, no matter how many grow lights you have, you aren’t going to be able to do that! So always err on the side of more light than less. Also, because of this, it’s important to keep all grow lights within 1-2” of the top of your plants—yup, that close! As the plants grow, you can raise the lights higher to accommodate them.
How warm do seeds need to be to grow?
Since you’ll be starting your seedlings before it’s truly warm outside, you’ll need a way to keep your seedlings warm. It is important to remember that different plants like different temperatures—for example, kale would be happy at 60°F all day long, whereas peppers won’t even germinate at that temperature. Make sure to read your seed packets to find out the ideal temperature your plants want. We also included that information on the Seed Starting Information Chart Printable.
If you are start seeds indoors, chances are, you’ll be doing it in a spot that is warm enough to happily grow many cool weather crops—kale, cabbage, broccoli, etc.—without any added warmth. However, for hot weather crops—tomatoes, peppers, melons—you are going to need to raise the heat.

A nice sunny window may be warm enough. You can also add a greenhouse cover or even a clear plastic tote over your seed tray to help increase the heat (and boost the humidity).
My favorite way to add heat is through a heat mat. We have one specifically designed for seed starting, but I’m going to let you in on a little secret—a run-of-the-mill heating pad or even an electric blanket will do the same thing. Just make sure to cover them well with plastic and remove the seedlings to water them—heating pads and electric blankets are not waterproof like seed-starting mats.
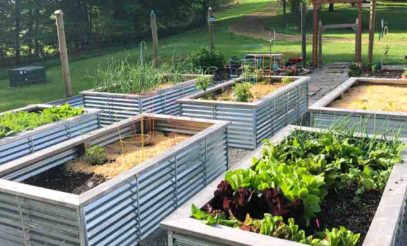
If you are starting your seeds outdoors, depending on your location, an unheated greenhouse or cold frame (basically, a small greenhouse) might do the trick. However, I will warn you that even in our mild Zone 6A climate, we can only start seeds outdoors if we add additional heat through our seed starting mats (which are weatherproof) or in our insulated greenhouse.
You’ve probably seen these affordable plastic greenhouses at your local garden center. I can tell you from experience, they are good for adding a few extra degrees of protection, but they will not work solely on their own outdoors for seed starting purposes—especially when trying to grow warm-weather plants. We do still use these plastic greenhouses, but only for when we get to the hardening off stage of our plants (more on that in a minute), and only when we know the weather isn’t going to be too cold.
How to start seeds indoors
Seed Starting Step 1: Fill Your Trays or Containers with Seed Starting Medium
Fill your trays or containers with your seed starting medium. Depending on the type of seed starting medium, you might want to wet the soil before it goes in or after—just follow the instructions on the packaging.

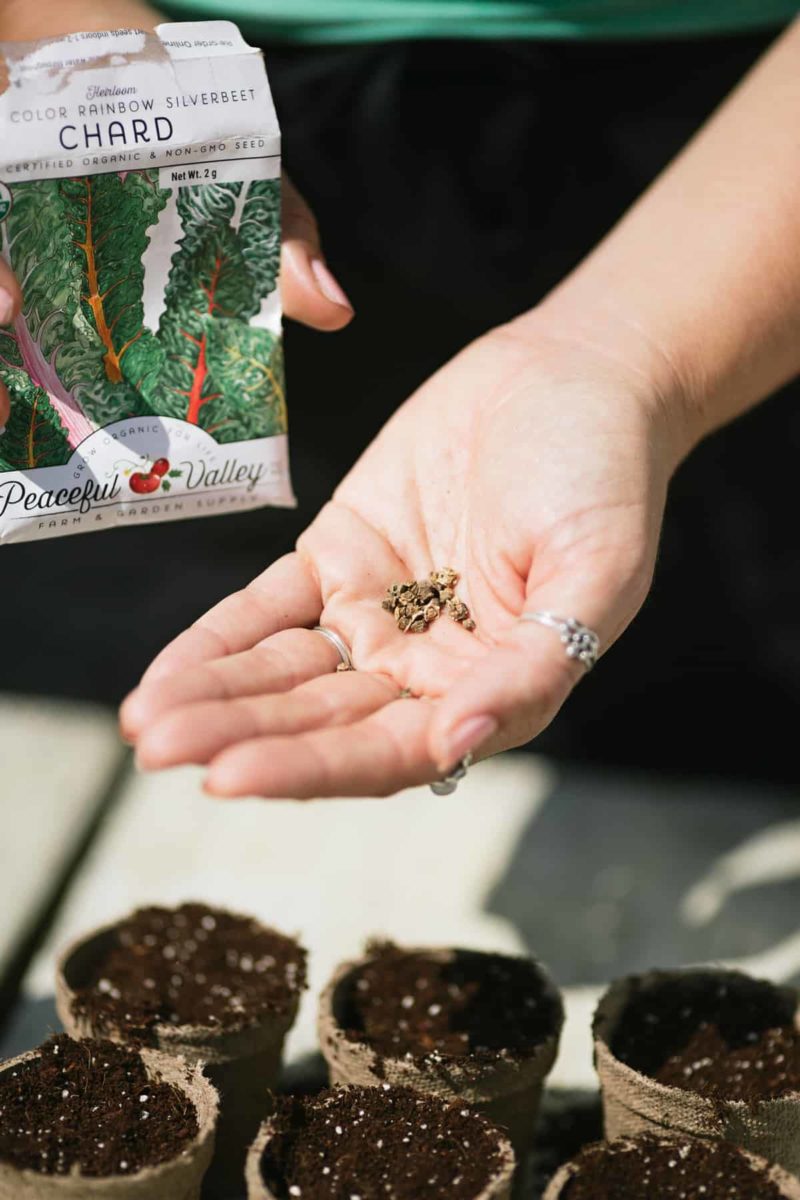
Seed Starting Step 2: Sow Seeds
Different seeds need to be planted at different depths—a good rule of thumb is that you plant a seed to a depth that is two times the width of the seed. So if a seed is 1/4” wide, you need to plant it 1/2” into the soil. Some seeds (like lettuce) also require light to germinate, so you barely even “plant” them at all, instead opting to press them into the top of the soil lightly. All this information should be listed on the seed packet, but we’ve also provided some tips in our Seed Starting Dates and Information Chart printable.
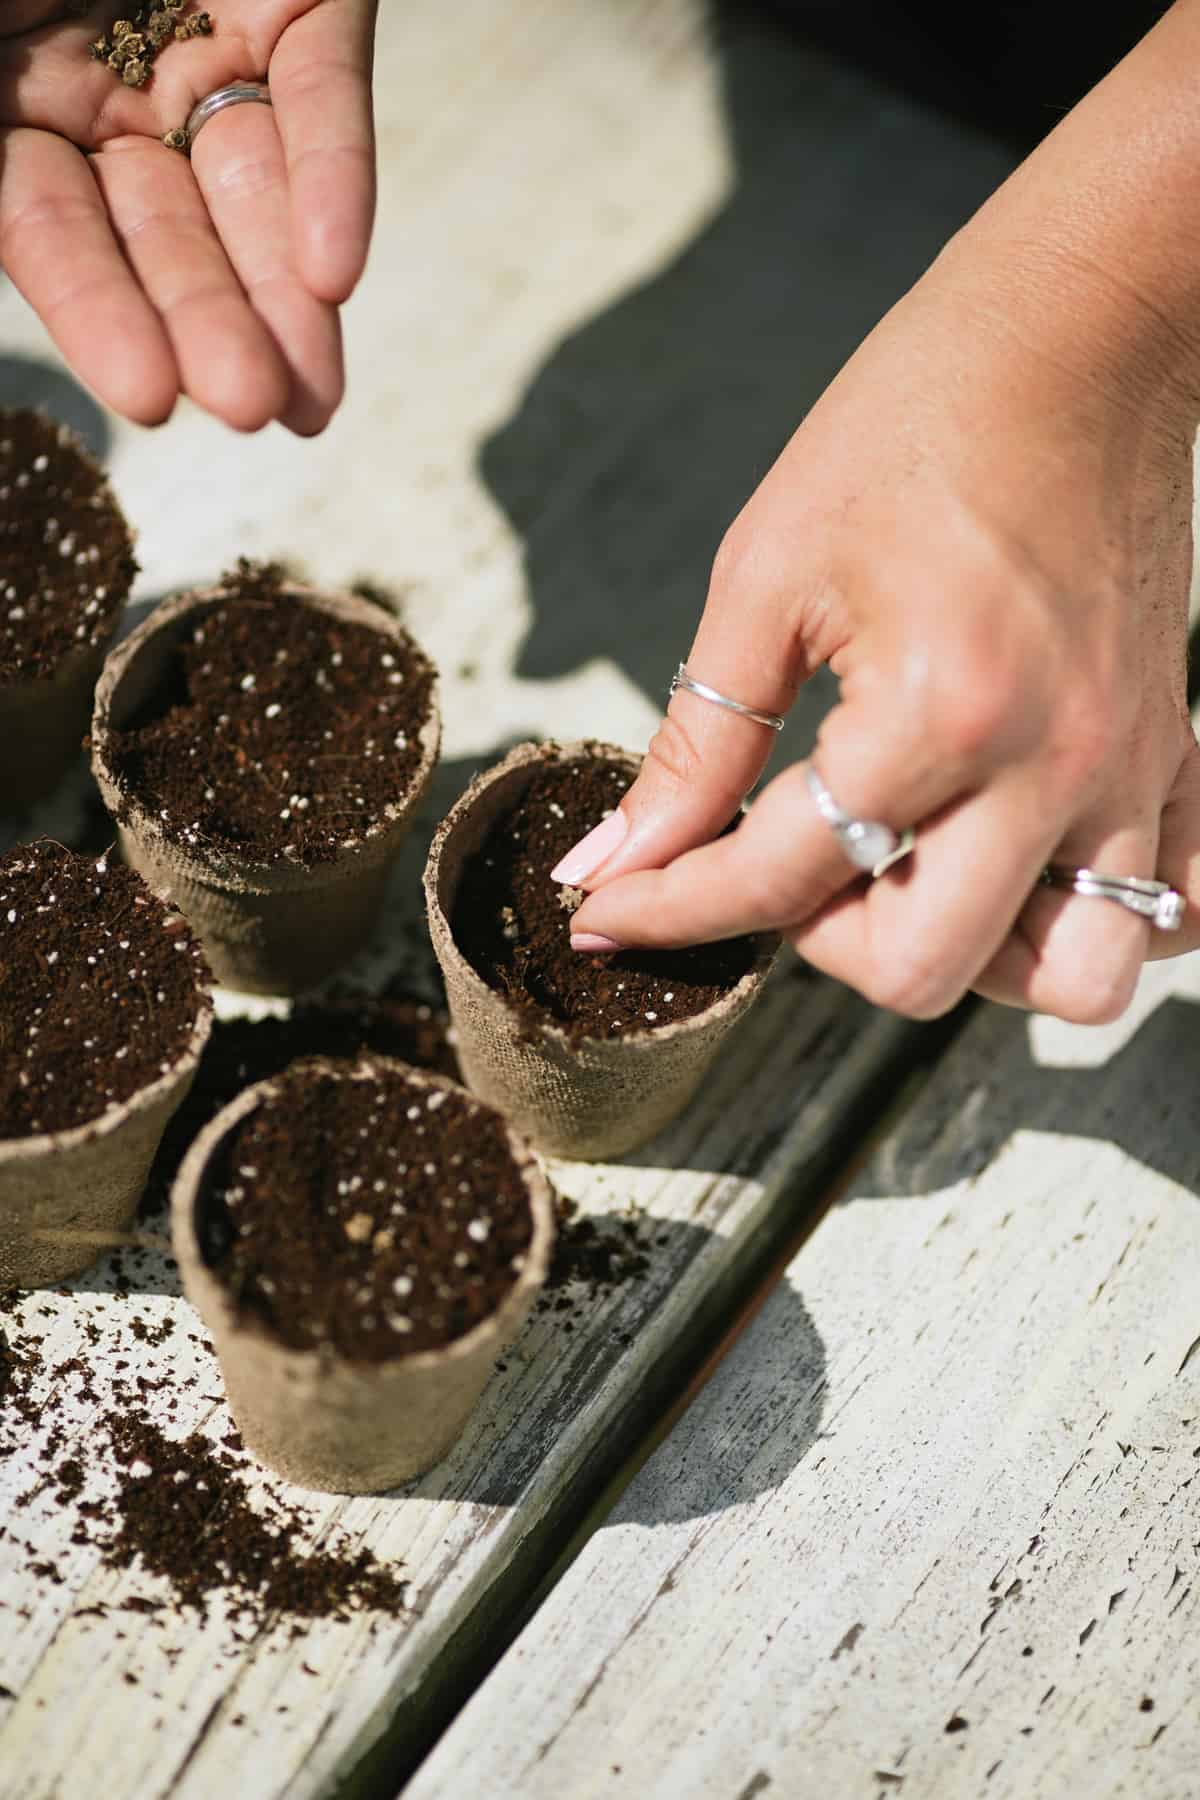
When you plant seeds, I recommend planting 2-3 seeds of each variety into each spot. It’s a fact of nature that some seeds will be duds, so planting extras gives you back-ups in case you come across one that won’t germinate. Yes, this also means that sometimes you’ll have 2-3 plants come up in one spot, but we’ll thin those out later.
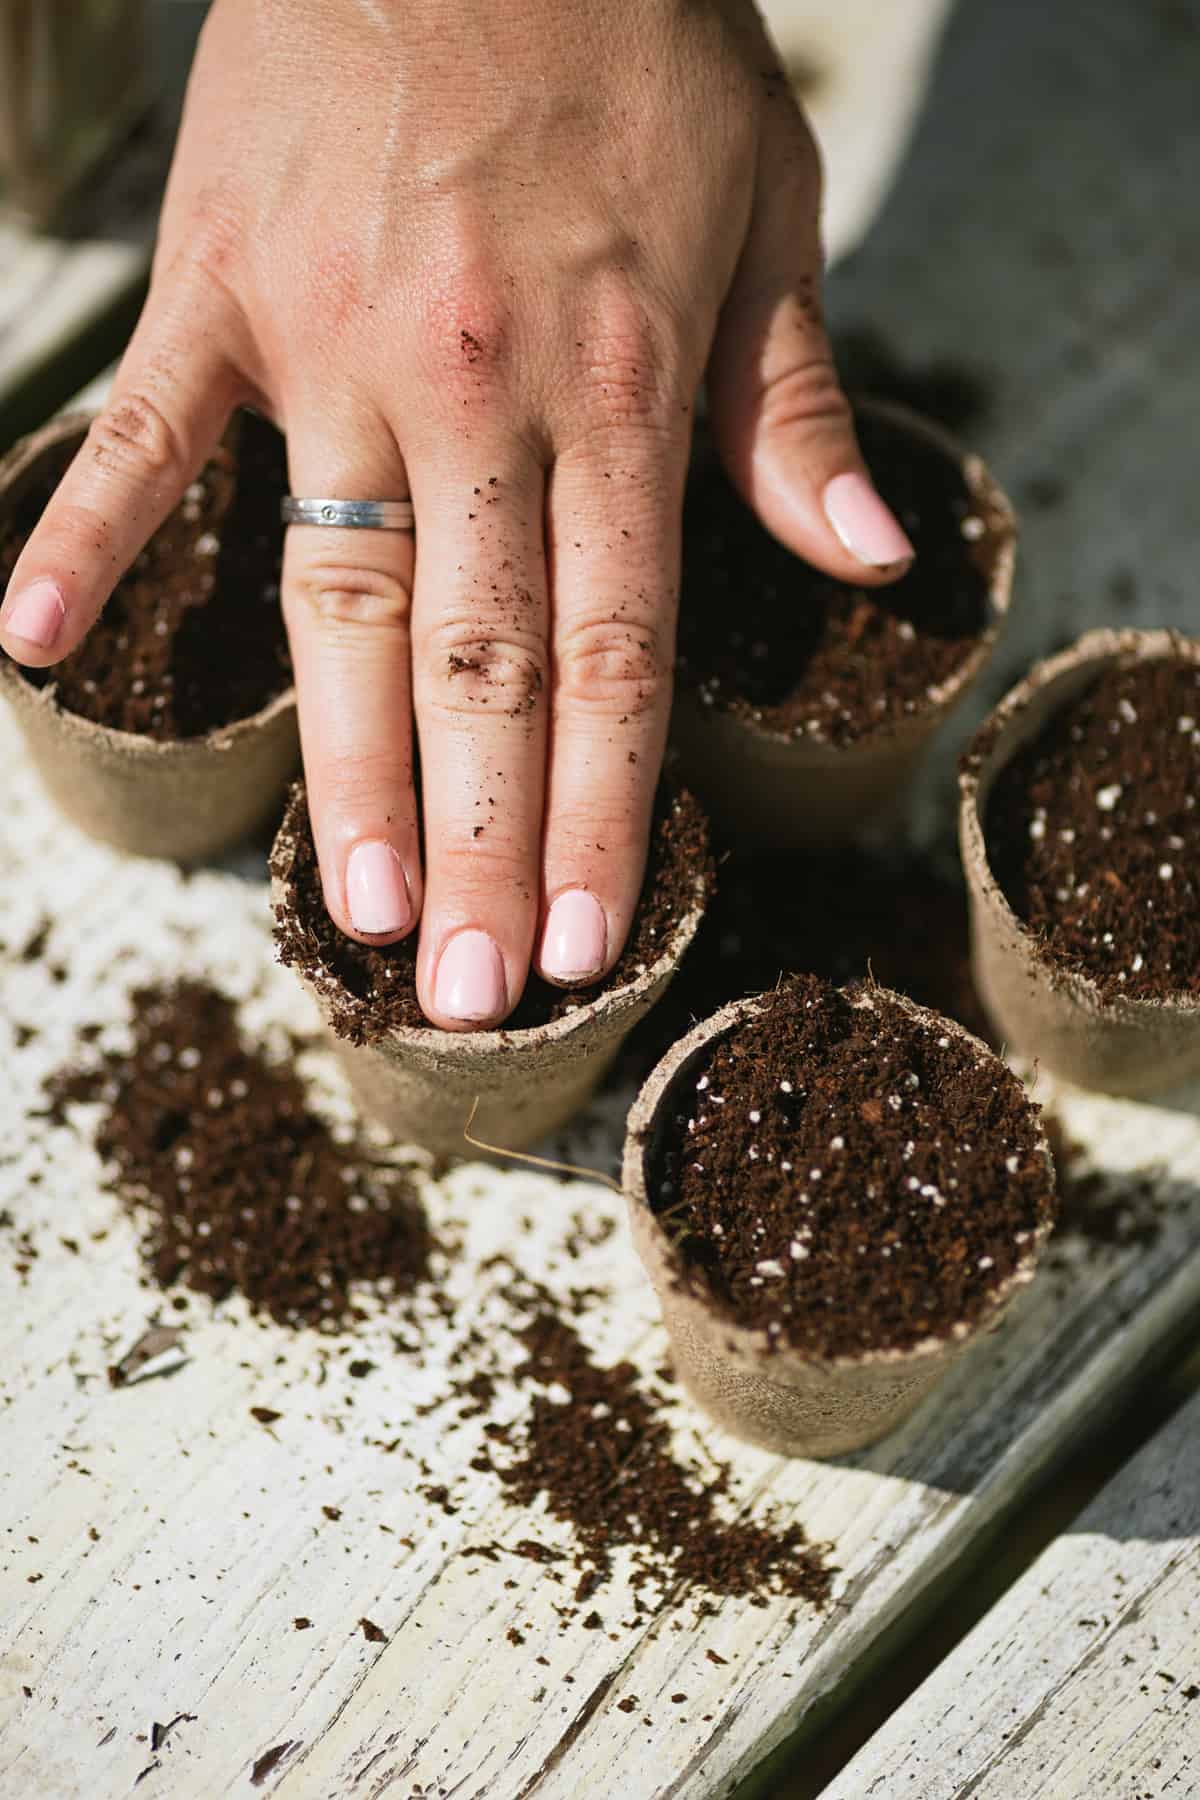
Seed Starting Step 3: Pat Down Your Seeds
Go ahead and give your seeds a good “pat” to get them seeded well (punny!) into the soil. Not only does this help keep the seed nice and secure in its spot in the soil, but it also helps the seed “realize” that everything it needs to germinate is right there ready for it.
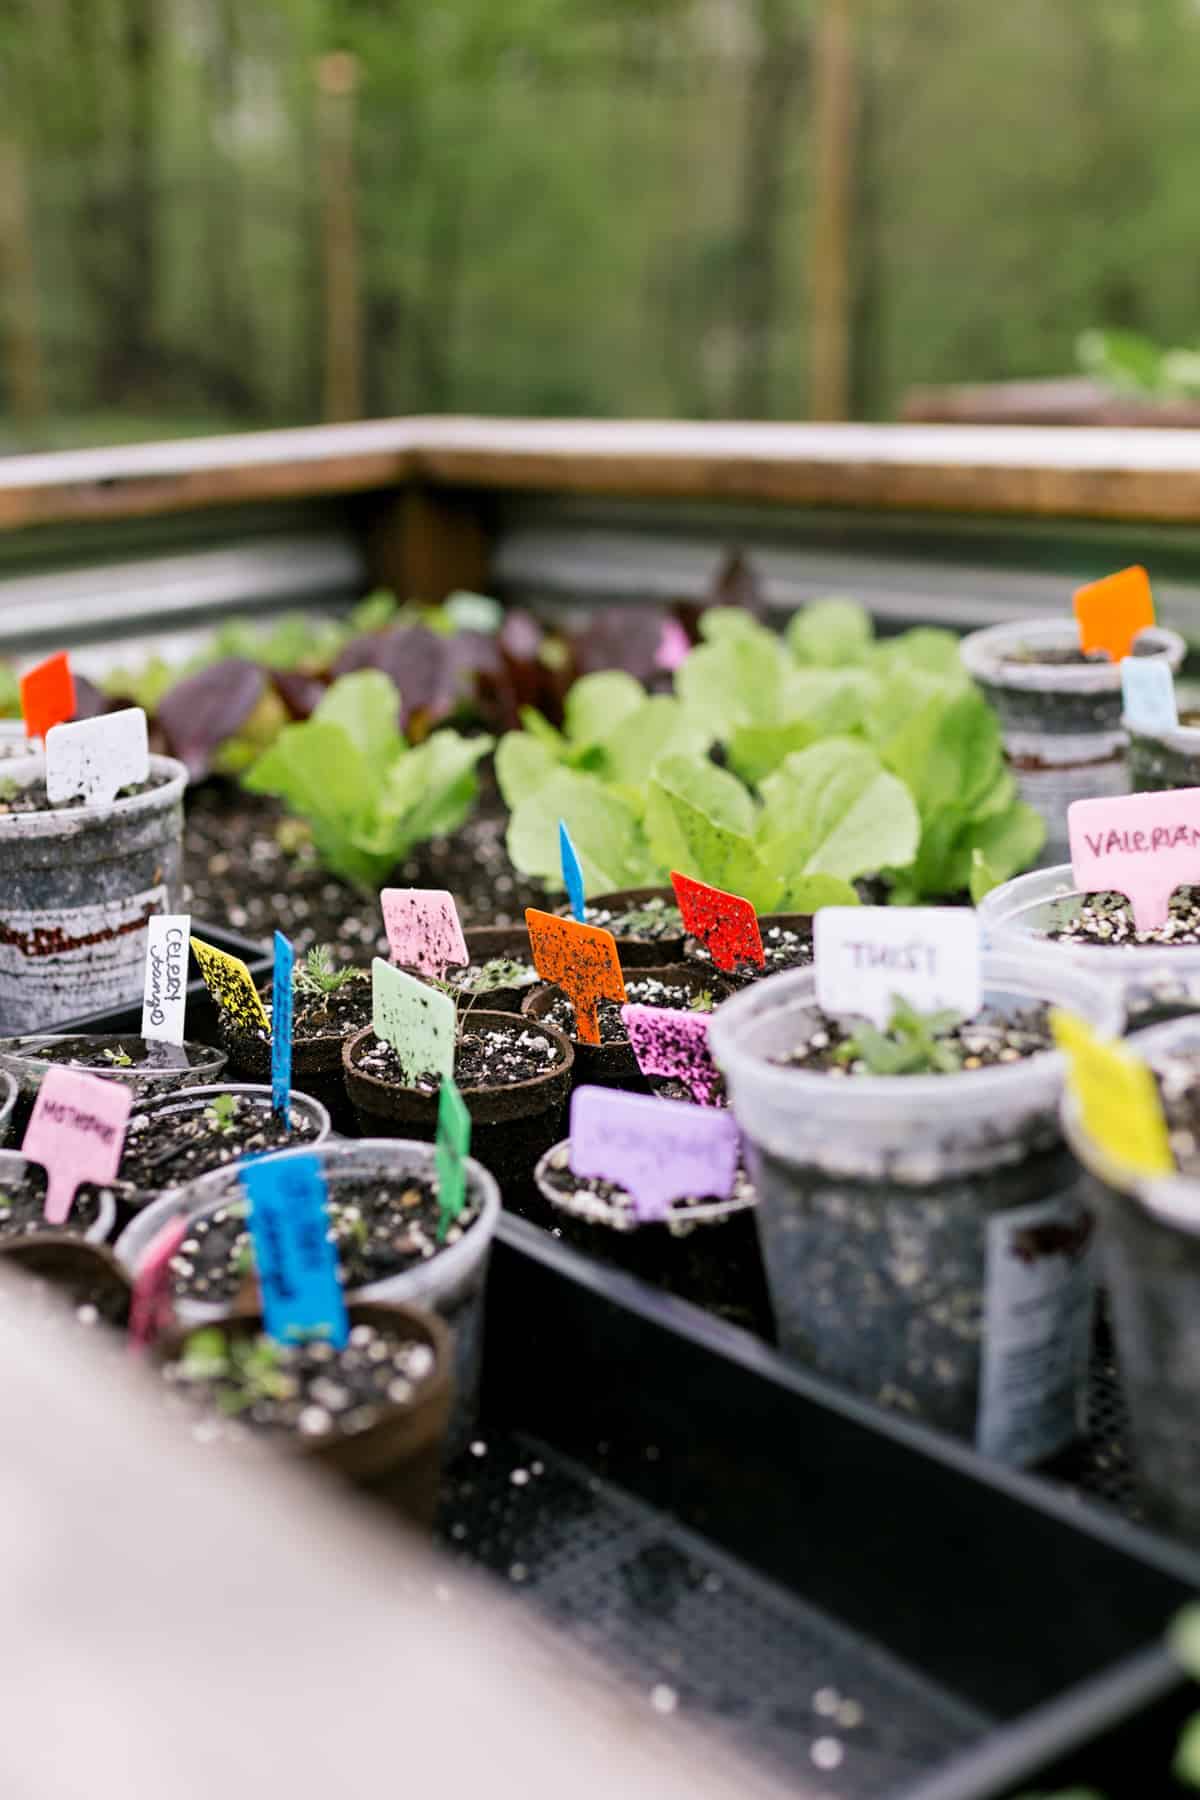
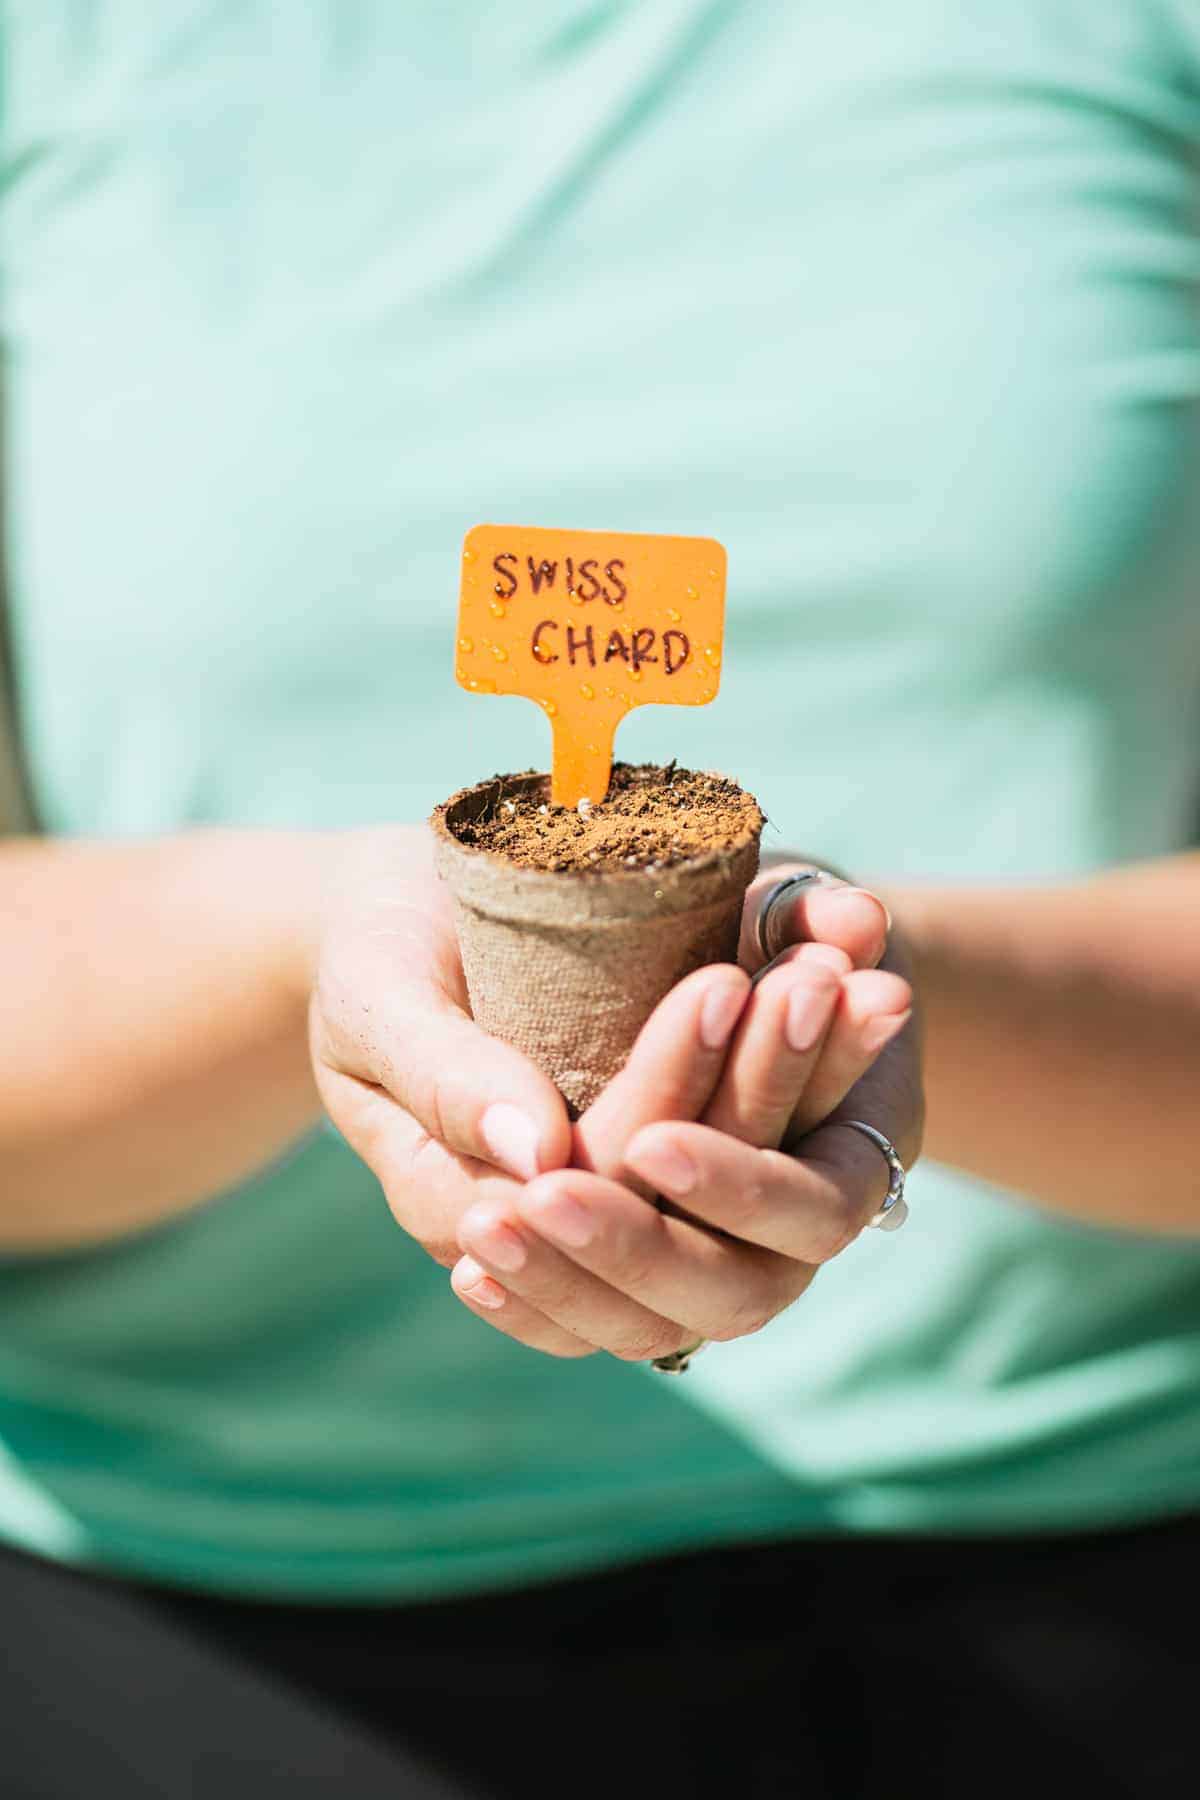
Seed Starting Step 4: Label Your Seedlings
Yes, do it. I promise you won’t remember what is what come six weeks from now. Just grab that marker and write on either the container or plant markers (I like the T-type tags, because they are big enough to be later transferred into the garden and seen easily) what type of plant it is, and the variety.

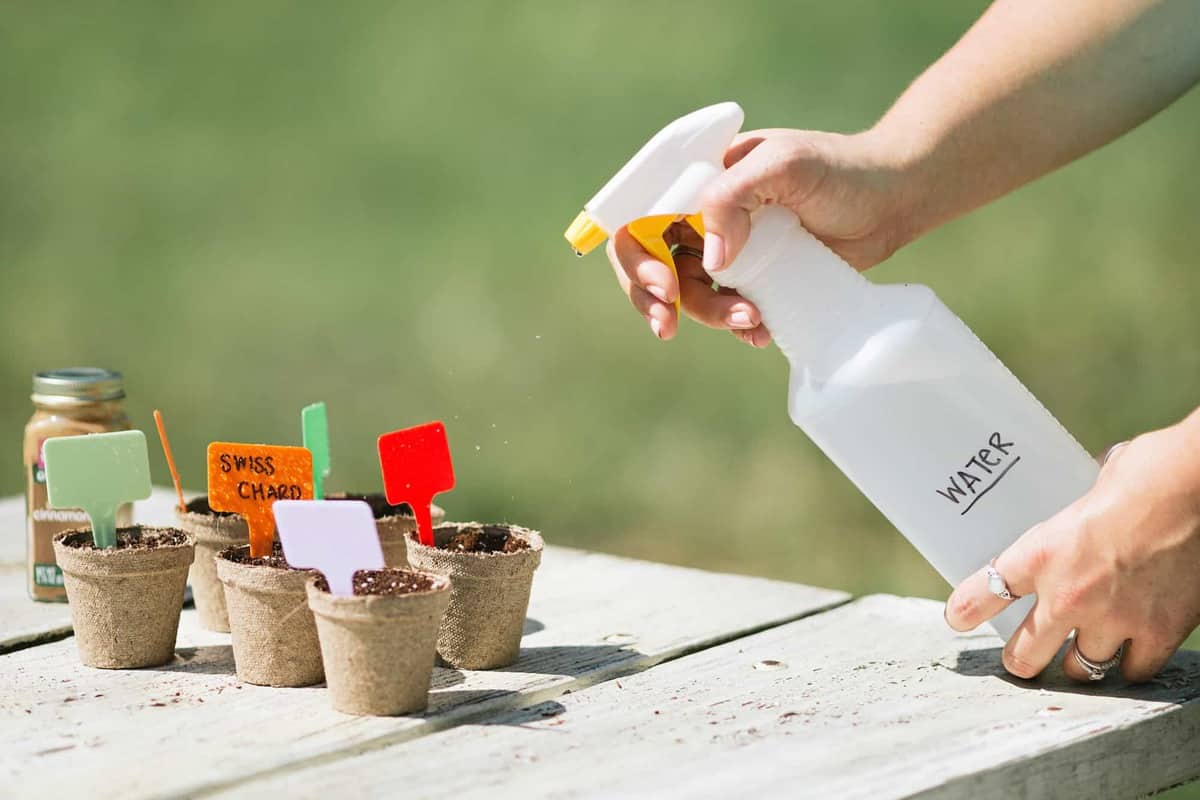
Seed Starting Step 5: Gently Water (Maybe!)
If you mixed your seed starting medium with water before planting, you might not need to water. But if the soil feels dry, go ahead and very gently water your newly-planted seedlings. Seeds are very easy to dislodge at this stage, so I recommend using the mist setting on a hose (from a distance!) or even a gentle spray bottle instead of a watering can at this point. You can bring the watering can in once the seedlings are nice and established.
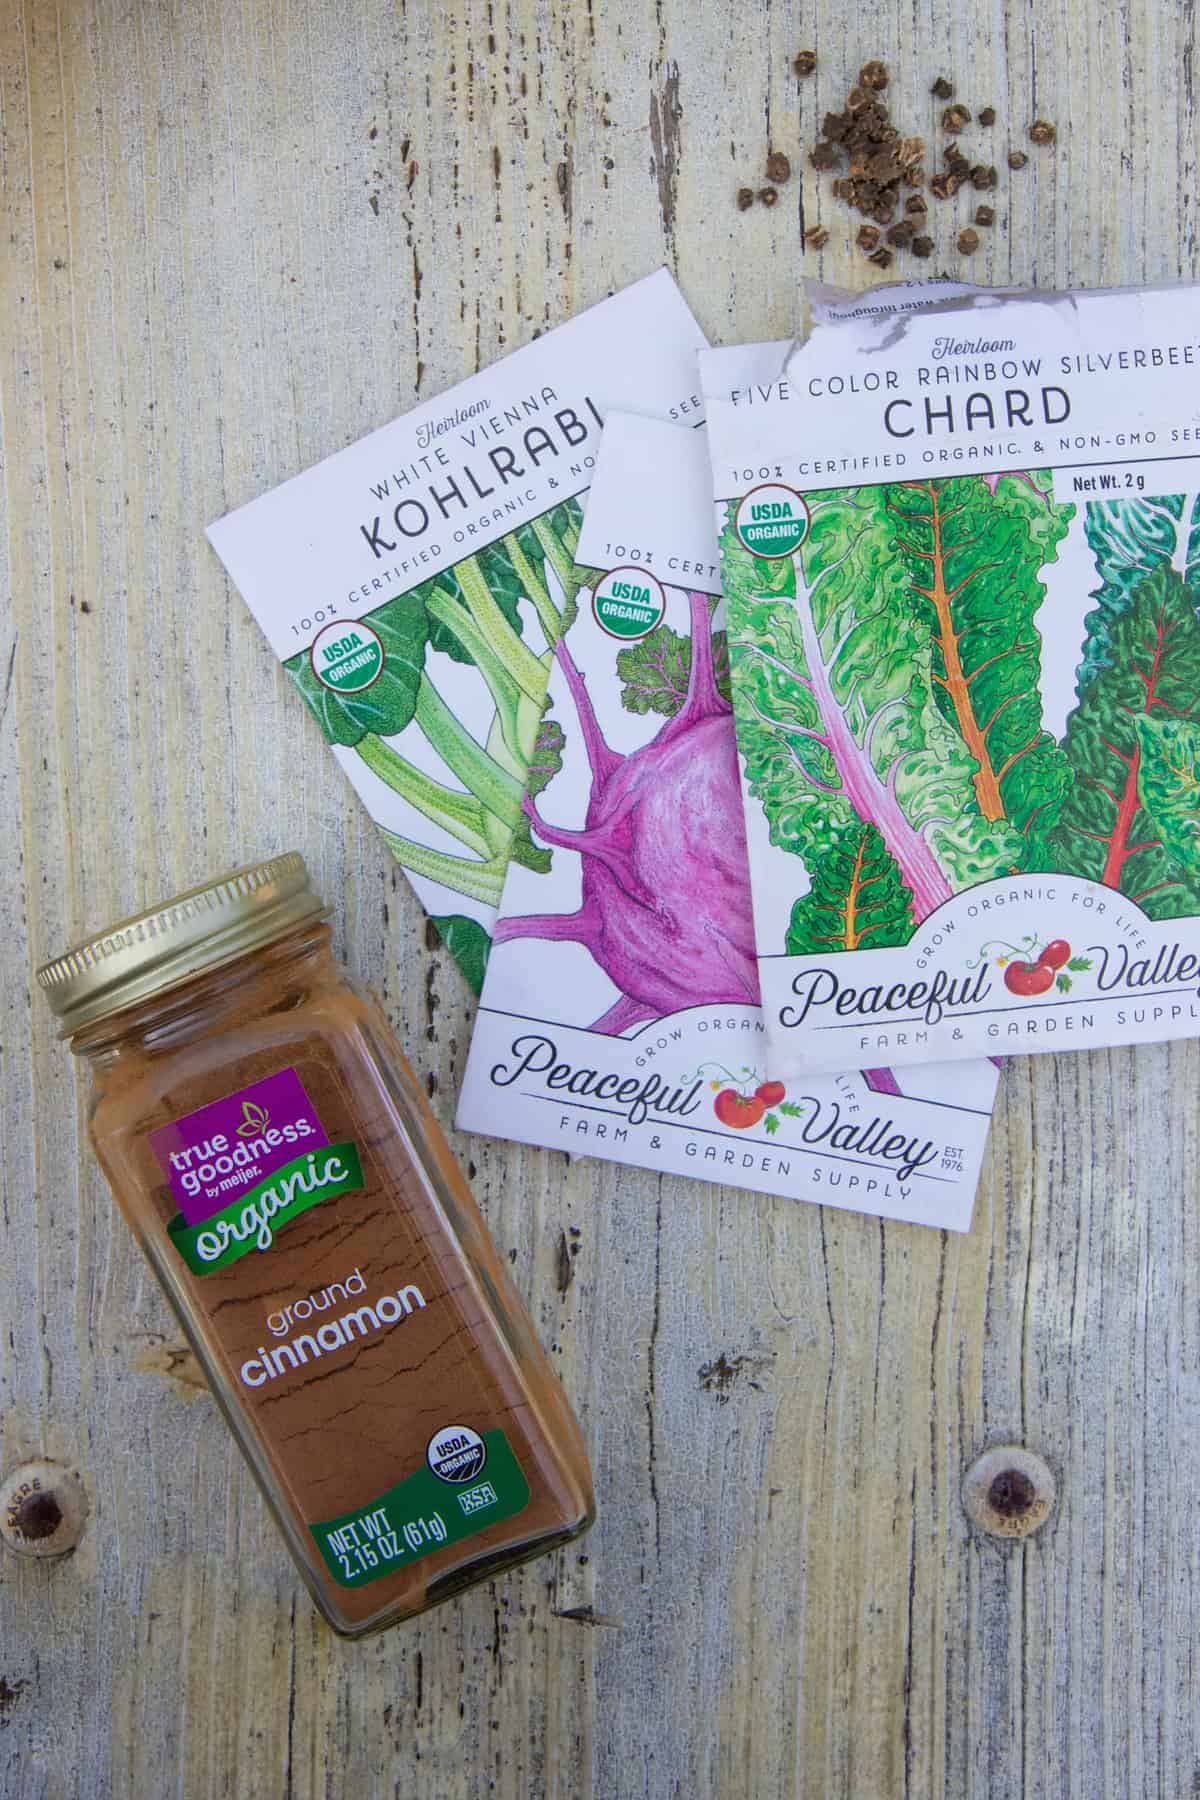
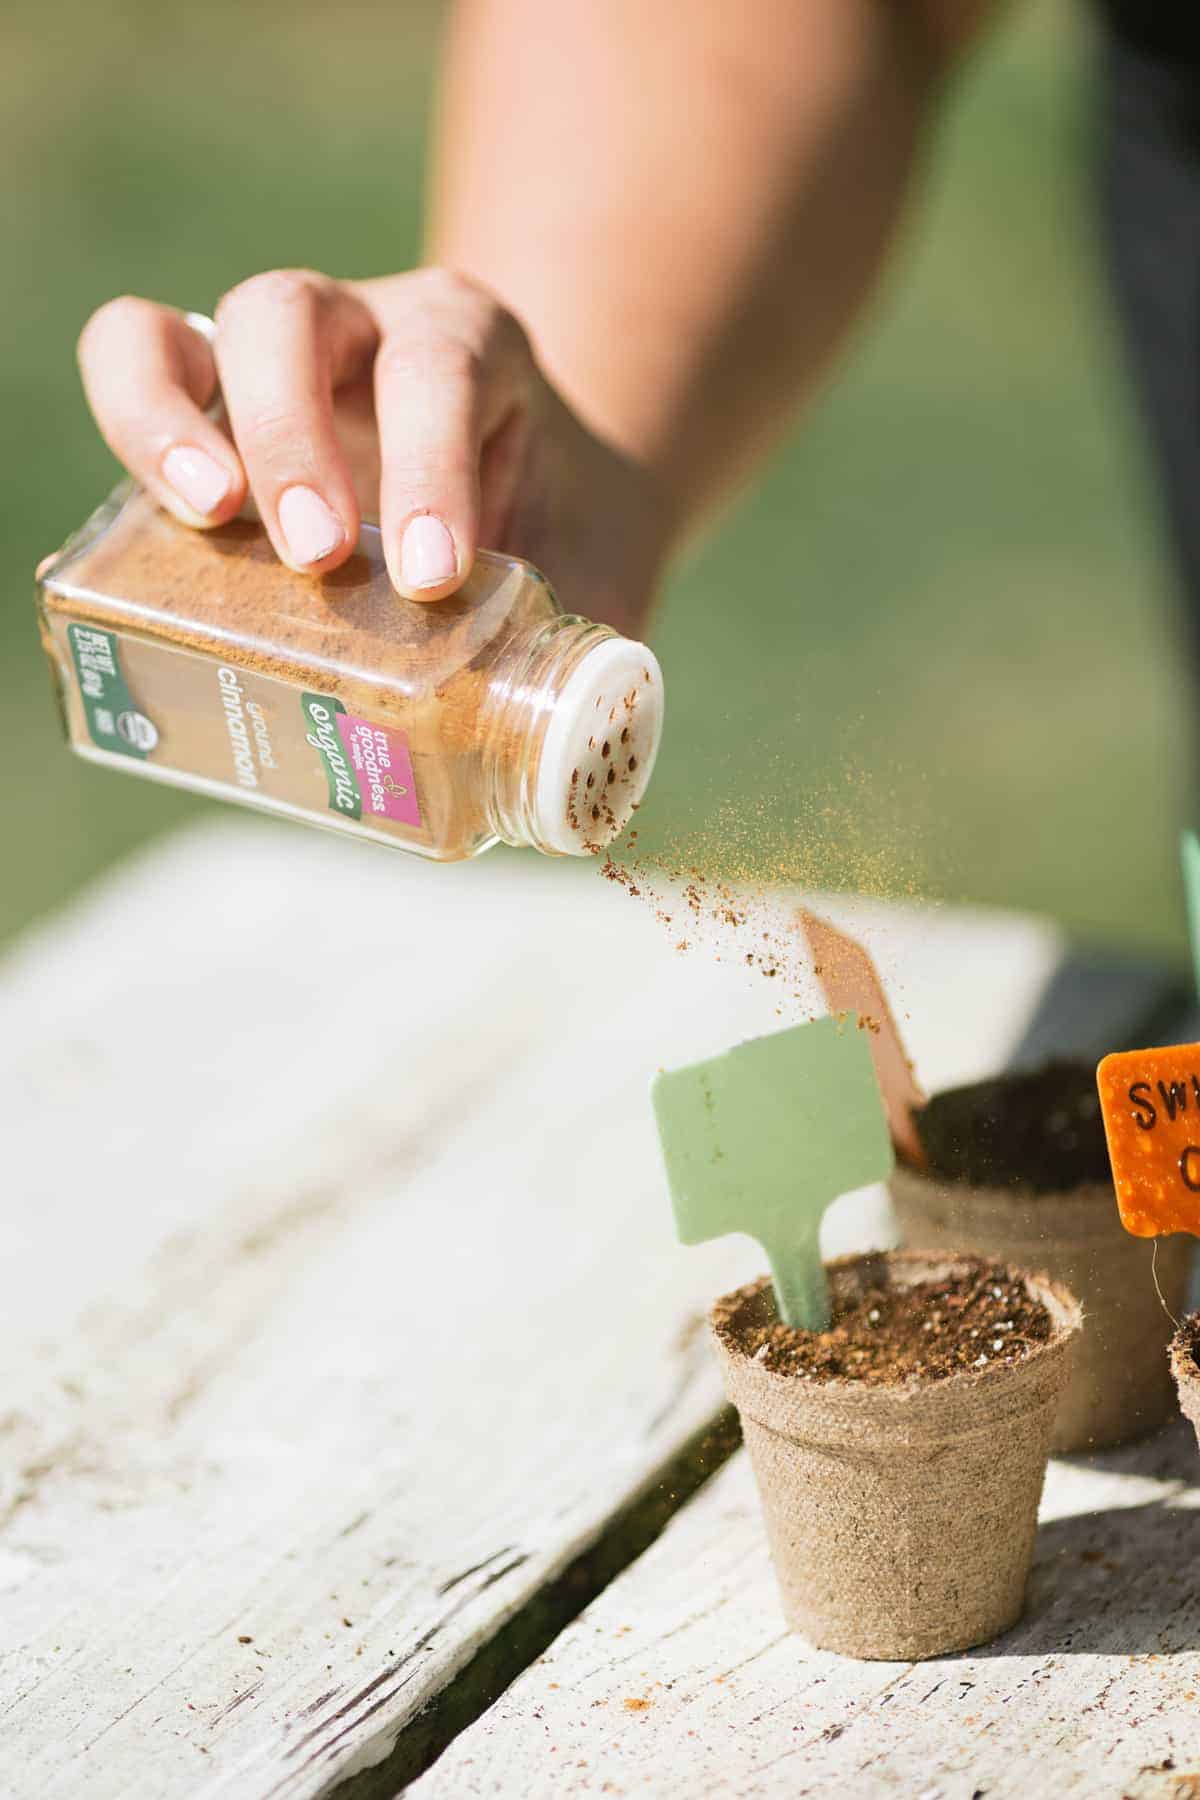
Seed Starting Step 6: Sprinkle on Some Cinnamon
Yes, I know it’s weird. But I promise you, you’ll want to do this. After watering, gently sprinkle some ground cinnamon on the soil of each seedling.
Why cinnamon? Cinnamon is a natural antifungal and antibacterial, and we to use it to help keep our seedlings happy and healthy. Many seedlings can die from “damping off,” which is basically any kind of fungal or bacterial infection that weakens the stem and kills a young plant. This happens most often in cool and wet conditions—which is pretty normal in my part of the world in the spring. Cinnamon helps prevent damping off!
Seed Starting Step 7: Move The Seedlings to Their Home
Go ahead and move your newly-planted seedlings to their new warm and bright home, and then that’s it! Now comes the hardest part: you wait. Some plants will germinate and start to sprout in as soon as 3-4 days, but others may take two weeks or more. Check on your plants every day and be patient!
Growfully Protip
Another environmental choice you’ll need to make is where you actually keep your plants—and how to keep them safe from family pets and curious kiddos. Trust me, cats love nothing more than a tray of warm soil to bury into to take a nap (or use as a litter box), so you’re going to want to have your seedlings behind closed doors if you have family pets.
Caring for your Newly-Planted Seedlings
You’ll want to check in on your seedlings every day to see if they need any water and to make sure they are still warm enough, bright enough, and cat-free enough.
Water wisely
First-time gardeners tend to over-water their plants out of fear of drying them out—but over-watering is just as bad as under-watering. Water your seedlings when the top of the soil starts to look dry, and only water until water starts running out of the bottom of trays or containers.
For those first few days, I like to keep up with the mist/spray bottle a few times a day, because if you do let the soil dry out completely, it can crust over, which can be difficult for some more fragile seedlings to “bust” through. After the seeds have germinated, you can move to more robust watering once per day.
Watch for germination
At first, you’ll start to see the sprout come above the surface, and then the next thing you’ll see are what are called cotyledons—AKA: seed leaves. These aren’t actually leaves of the plant, and are just the first set of leaves put out by the seed to gather nutrients. A few days later, you’ll see a second set of leaves, which are what are called “true leaves.” These are actual leaves of your young vegetable plant—and you can tell the difference because these ones actually just look like mini versions of the big plant! Once you have true leaves, you know your plant is off to a great start.

Do You Need to Fertilize Seedlings?
You might be wondering if you need to give your seedlings any food at this point—and the answer is not really. The seed starting medium you used has all the nutrients your little seedlings need for now. We’ll revisit fertilizing later when we pot-up plants (more on this in a bit).
Thinning Seedlings
Because you planted extra seeds, you might have some areas where you have two or more plants popping up in the same spot. This is totally fine, but now that your plants have true leaves, it’s time to thin them out to only one plant per spot. You don’t want to wait too long, because having so many plants grow in one spot can stunt the growth of all of them—now is the time.

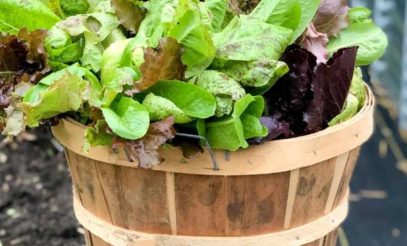
But WAIT, before you go and try to pick or pull out those seedlings, let me tell you that is not the way to go about it. Because those seedlings are so tightly packed, the roots are also intertwined, so when you pick one, you’re going to pick all of them. The hands-down best way to do this is to instead cut the extra seedlings with a small pair of herb scissors. These are my favorite garden scissors, and they work beautifully for thinning seedlings. Just choose the seedling that is the strongest looking of the bunch, and clip the others at the soil surface with your scissors. That’s it. If it’s a plant that is an edible green—kale, chard, lettuce, spinach—you can add those microgreens to your lunch salad!
You’ll be amazed at how much more quickly the remaining plant grows now that you’ve taken out the competition.
Give Them Air Circulation
For the healthiest, hardiest seedlings, you want to replicate the outdoor elements while the plants are still growing indoors. That way, there will be less of a shock when you transfer your seedlings outdoors. We start to do this with a small fan pointed at our seedlings shortly after germination.
What Happens Next with Seedlings
Now that you’ve thinned out your seedlings, your job is mostly just to sit back and watch your little plants do their thing! There are a couple things to keep in mind:
- Keep your seedlings well watered. As they get bigger, their roots will take up more of the soil in their pot, and they will dry out faster. You might need to move to more frequent watering.
- If you’re using grow lights, you’ll need to adjust the height of the lights to be 1-2” above the top of the plants.
- If you’re growing your seedlings in a sunny window, it’s a good idea to rotate your plants every day or so in order for them to get even light on all sides. Even the sunniest of windows can cause plants to “reach” toward the sun without frequent rotation.
Other than that, just sit back and watch your little plant babies grow!
Potting Up Your Plants
When your plant gets too big for its current container and you move it to a bigger one, it’s called “potting up.” Most of the seedlings you start will not need to be potted up—unless you just have one heck of an awesome growing situation where everything grows super quickly!
How to Decide What Plants Need to be Potted Up
Plants need to be potted up when the soil and size of the pot they have is no longer enough for the size of the plant. How do you tell this? Well, there are a few signs:
- The plants seem to dry out super fast. If you feel like you’re watering all the time and the soil isn’t retaining any moisture, it might be time to move to a larger pot.
- Leaves on your plants are showing signs of discoloration. When a plant has used up all the nutrients in your seed starting medium, it can start to show signs of nutrient deficiency through yellow, purple, mottled, or spotted leaves. It’s time to move to a larger pot.
- The plant seems root-bound. A plant being “root-bound” means that its roots are overwhelming the container it’s growing in. While it’s normal to see some roots coming out the bottom of a growing container, if you see lots of roots coming out in all different directions, it’s time to move to a larger pot.
- A growing plateau. If it’s been a week or more and your plant just doesn’t seem to be getting any bigger or stronger, potting up could help.
In general, it will never hurt to pot up a plant—it’s just a matter of if it’s worth your time to do it or not. Plants will always be happier with more space, more soil, and more nutrients.
There are a few plants that you should pot-up to get the strongest, healthiest plants. I always pot-up nightshades like peppers, tomatoes, and eggplants because you can create stronger, healthier plants by burying the stem. Unlike most veggies, these plants will actually send out more roots from the stem when buried. I’ve been known to pot-up my tomato plants 2-3 times before they actually end up in the garden.
How to Pot Up Plants
Potting up plants is as simple as getting a growing container that is bigger (I recommend at least double the size of the original pot) and repotting the plant into that container. I like using large yogurt tubs (the quart size) for this. We also have a lot of the quart size deli containers that we get our dog food in that I clean and use for this as well. Again, just make sure to poke drainage holes in the bottom of any recycled containers for drainage.
At this point, for the soil, you can use organic potting soil or compost to pot up the plants. I would recommend staying away from using garden soil—it just tends to not drain quite as well and can cause some watering issues in small pots like this. Fill the bigger container about halfway with the soil, then gently remove the plant from the original container and place it in the new one. Fill around it with soil.
For plants other than nightshades, plant the plant so the new soil level is equal with the old one—don’t bury the stem. For nightshades like peppers, tomatoes, and eggplants, bury the stem all the way up to the bottom leaves. Just make sure the leaves aren’t sitting on the soil—give them a little breathing room. Pat down the soil and then water well. Place it back in your growing spot, and voila, you have potted up!
Moving Plants Outside
When you get close to the “safe set out” date, it’s time to get seedlings ready to move outside. They can experience shock if you take them straight from their warm, cozy home to a windy garden bed. To avoid this, you’ll need to harden off the plants by gradually putting them outside for a little longer each day. We talk more about hardening off plants and planting them outside here.


Great idea regarding the cinnamon, I use cinnamon a lot for cooking and to save money I buy the cinnamon sticks from the local Amish store which is cheaper and grind my own.
I am a new seed gardener. I am confused about the use of heat mats. I bought a bunch and have been using them, but don’t know when I should turn them off. My seedlings are in an unheated basement that hold a temp of around 60 degrees.
I appreciate any help
They should come with a temperature controller that you can set to the preferred temperature for your soil. Then place the probe in the soil, and they will automatically shut off when the soil reaches that temp.