
I once heard that when an emergency happens, it’s not what you have that’s most important, it’s what you know. I’m not sure I really grasped how true that was until we landed ourselves in a global crisis.
While some people have gotten comfort from stockpiling toilet paper, throughout this, I’ve found great comfort in my gardening, preserving, herbalism, and general homesteading knowledge. Even the most robust stockpile runs out, but my ability to grow my own food and medicine never will.
This article is designed to teach even the newest of gardening newbies how to plant an emergency vegetable garden (AKA: a survival garden) in even the smallest of spots. Below you’ll find the quick and dirty basics for getting a garden set up on the cheap, what plants I would put in my survival garden, and how to maximize space for food production.
A word of warning: this isn’t going to be an Instagram-worthy #plantlady garden. This also isn’t going to feed your entire family or give you the prettiest heirloom tomatoes. But what an emergency vegetable garden can do is give you some supplementation to a diet heavy on pantry staples, plus give you a much-needed physical and mental outlet for anxiety. It also helps you reclaim just a little bit of control in this uncontrollable situation, and that’s a win.
Table of Contents
Where do I even start with gardening?
We’re going to just cover the extreme basics of gardening here to get you started with an emergency vegetable garden, but we highly recommend consuming more gardening information to maximize your growing potential. Here are some resources:
- Our How to Start a Garden page
- Vegetable Gardener’s Container Bible by Edward C. Smith
- Guide to Vegetable Container Gardening by Farmer’s Almanac

How do I build emergency vegetable garden beds?
If you have some sort of outdoor space that is exposed to the sun for at least 4-6 hours per day, you can grow your own food.
If you have a balcony available: Collect as many large containers as you can find. These don’t have to be traditional pots—whiskey barrels, five gallon buckets, and even small trash cans work. Just make sure you poke or drill holes in the bottom of repurposed containers for drainage. If you are buying new, I really like the fabric smart pots that are out now. They are affordable, easy to grow in, and you can get them in a variety of sizes. Also, don’t forget that you can grow in hanging baskets!
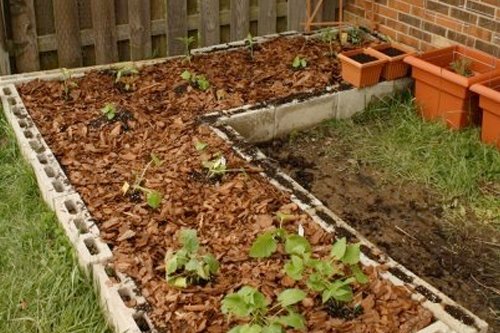
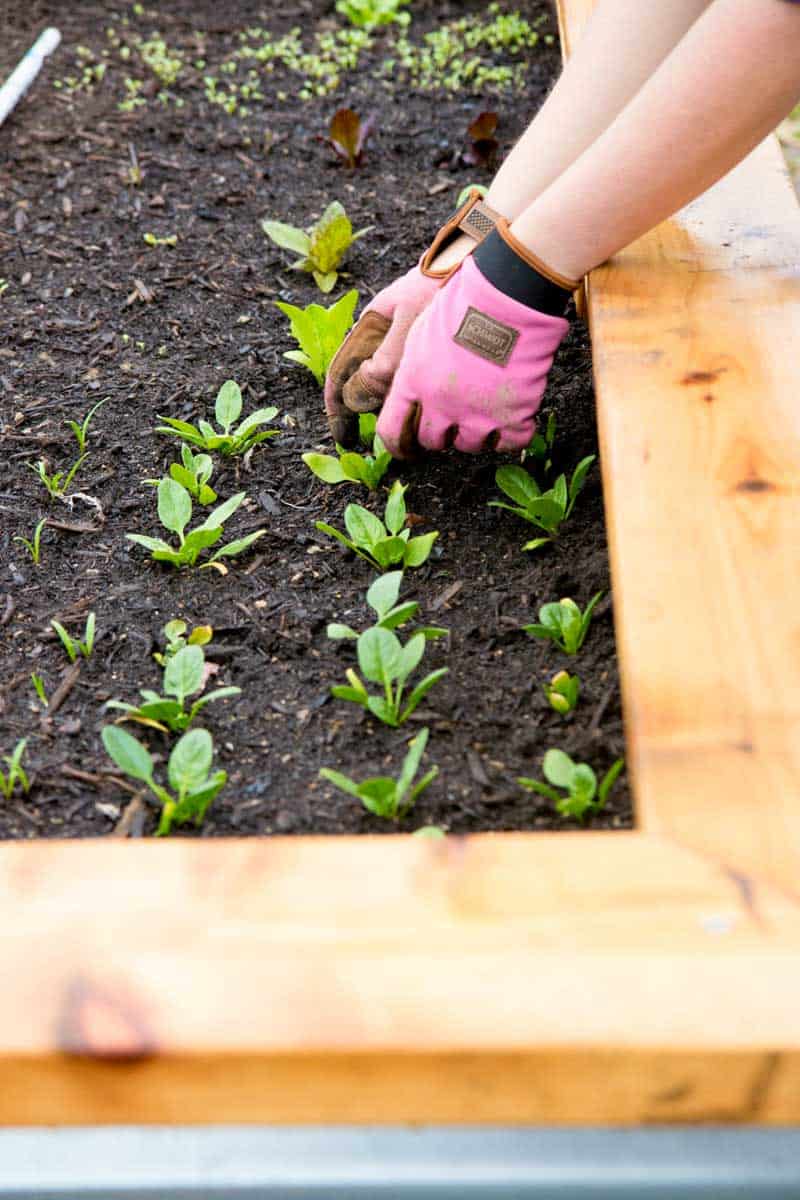
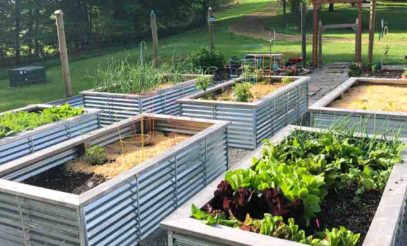
If you have a small amount of greenspace available: A single 8’x4′ raised bed or even a square 4’x4′ bed can produce an absolute TON of food. If you have a patio or a small yard, a raised bed is the way to go. These are the plans we used for our lifetime raised beds, but they are pricey to build and probably not the right option if you are building a survival garden. If you want to do it affordably and quickly, I highly recommend using half cinder blocks to form the outside of your bed. Half cinder blocks (AKA: 4″ cinder blocks) run around $1.50 each, and you can build a very sturdy 8’x4′ bed with them for less than $30. It takes less than 20 minutes to form the bed, and you can also grow herbs and flowers in the holes of the cinder block—utilize every space you have! We used this method in our apartment garden in the city (off the side of our patio), and it worked well for us for years.
Of course, you can also repurpose other materials if you have them available. Bricks, wood, and tires can all be used to create garden beds. Anything that can hold soil in will do the trick—again, it might not be Instagram worthy, but it’ll grow.
How do I prep the site before I put the beds down?
First, you’ll need to remove any sod (grass) that’s below where your raised bed will be. If you have time on your side, you can use a tarp or black plastic and stake it down at the bed site—leave it for a few weeks to cook in the hot sun, and the grass will die. Time not on your side? Use a spade or shovel to cut out the sod. Then place the bed right on top. The more you kill the grass underneath, the less you’ll have to worry about weeds poking through your garden.
If you’d like, you can also put landscape fabric down to protect from more weeds popping up, although that’s definitely not a necessity.
What do I fill the containers and beds with?
My favorite mixture for filling containers and raised beds is one part compost; one post vermiculite, perlite, or sand; and one part garden soil. All of those things are available at your local garden store. If you’re working with smaller beds and containers, you can also just purchase organic potting soil and put that straight in. In a pinch, if you can’t get your hands on anything else, topsoil/garden soil and compost will be what you need to track down.
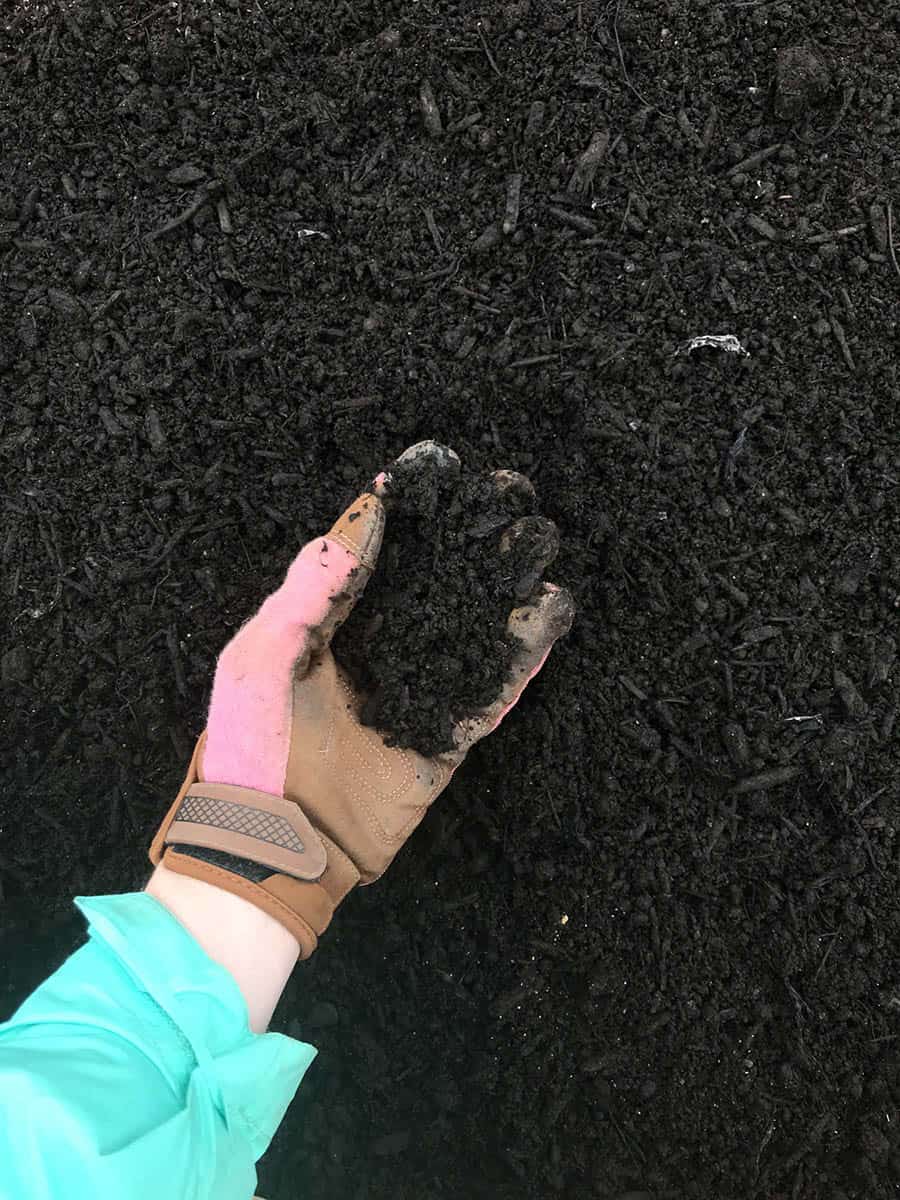
Soil is a very unique thing and will be different for everyone. We have an in-depth post about how to figure out how to amend your soil for best results—but in an emergency situation, you can never go wrong with adding more compost to topsoil to help with nutrient-density and soil texture.
What are the best plants for an emergency vegetable garden?
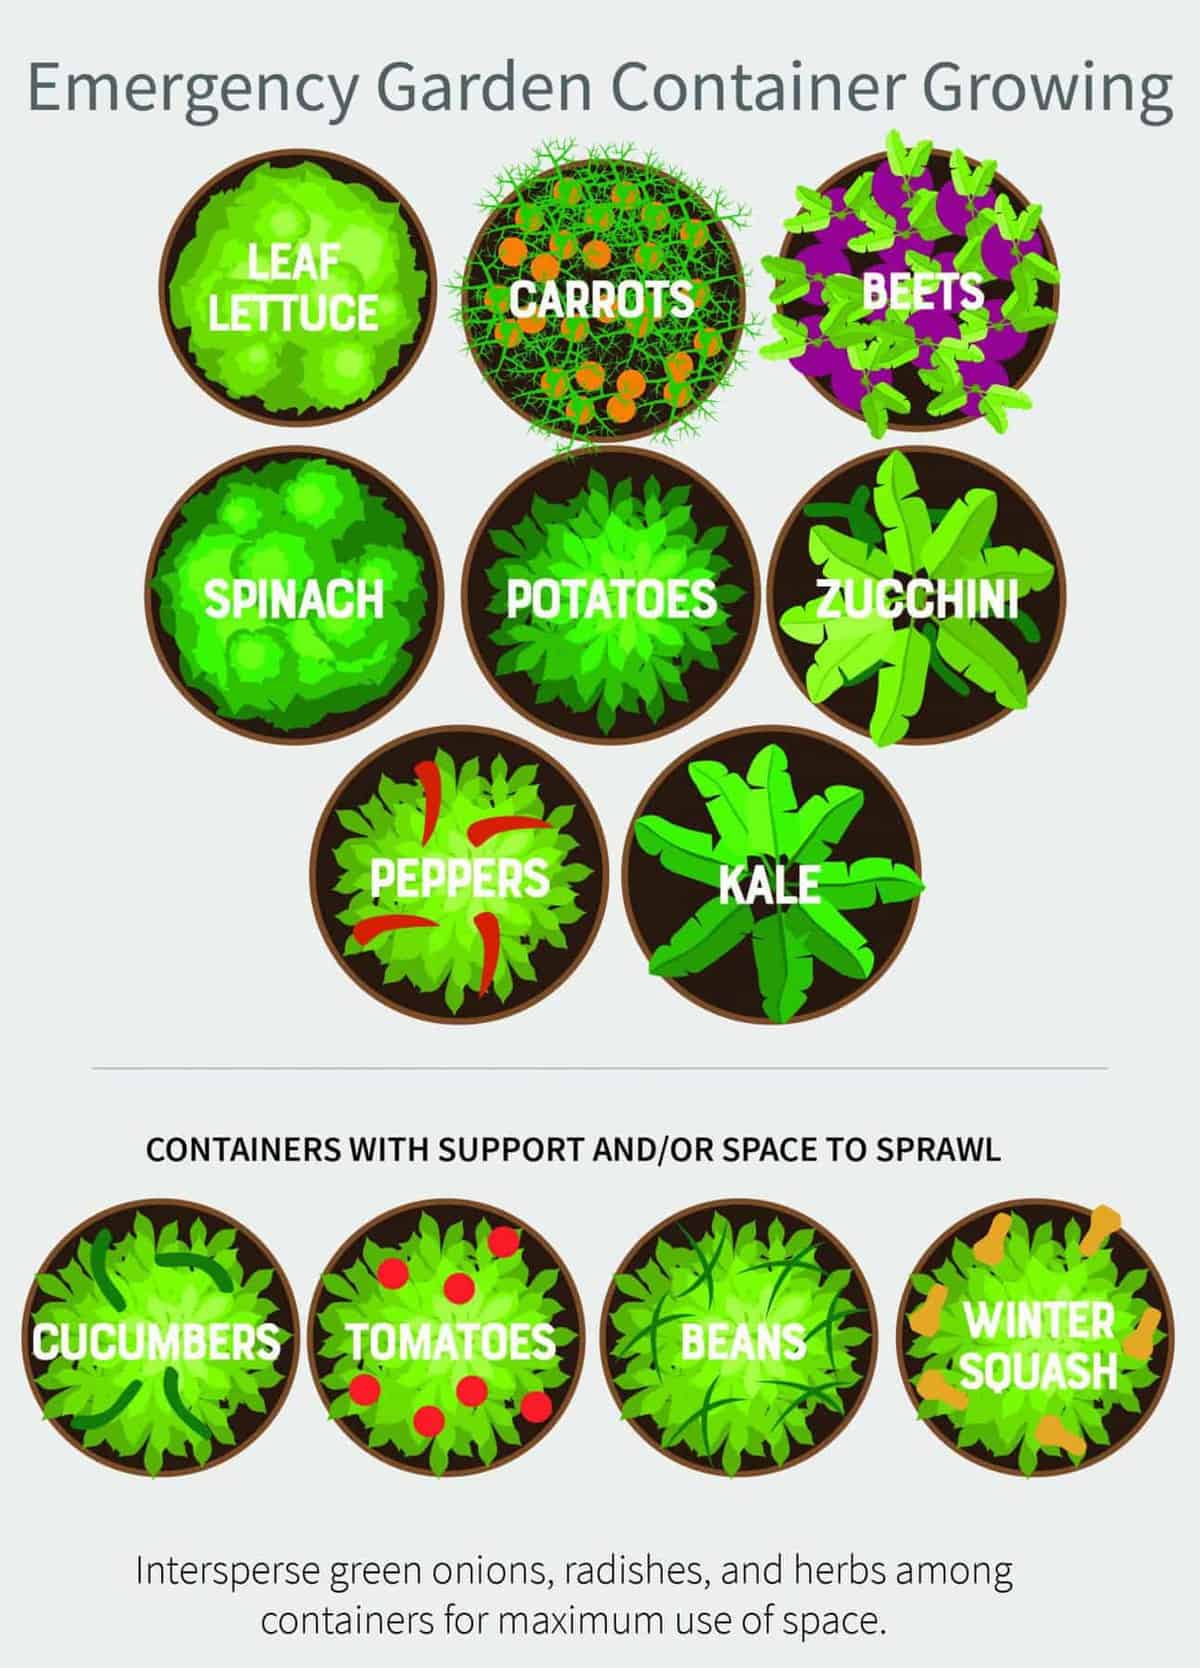
The answer to this question varies widely based on what your family likes to eat, what your climate is, and how much space plants take up. That being said, I’ve considered a lot of factors (flexibility of preservation, flexibility of use, speed of growth, ability to replenish, ease of growth, etc.) to make a list of the veggies and herbs that I would make sure were in my emergency garden. These are listed in order, starting with what I’d consider most important. For example, if I only had one small pot on a balcony, I’d fill it with item #1. Your list might vary.
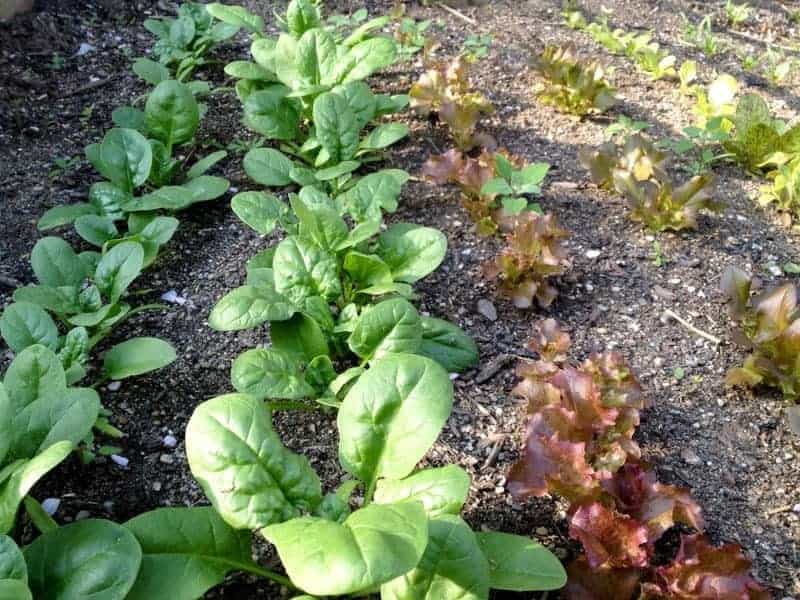
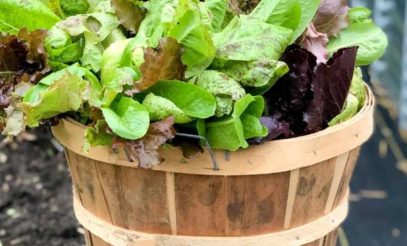
- Leaf lettuces—Leaf lettuces grow extremely quickly (~40 days) and can be picked as needed. Plus, if you cut them off 1/2-1” above the soil surface, they will continue to regrow. Lettuces will also tolerate some shade—especially in warm climates. They can grow in even the smallest of containers, and they are very easy to grow.
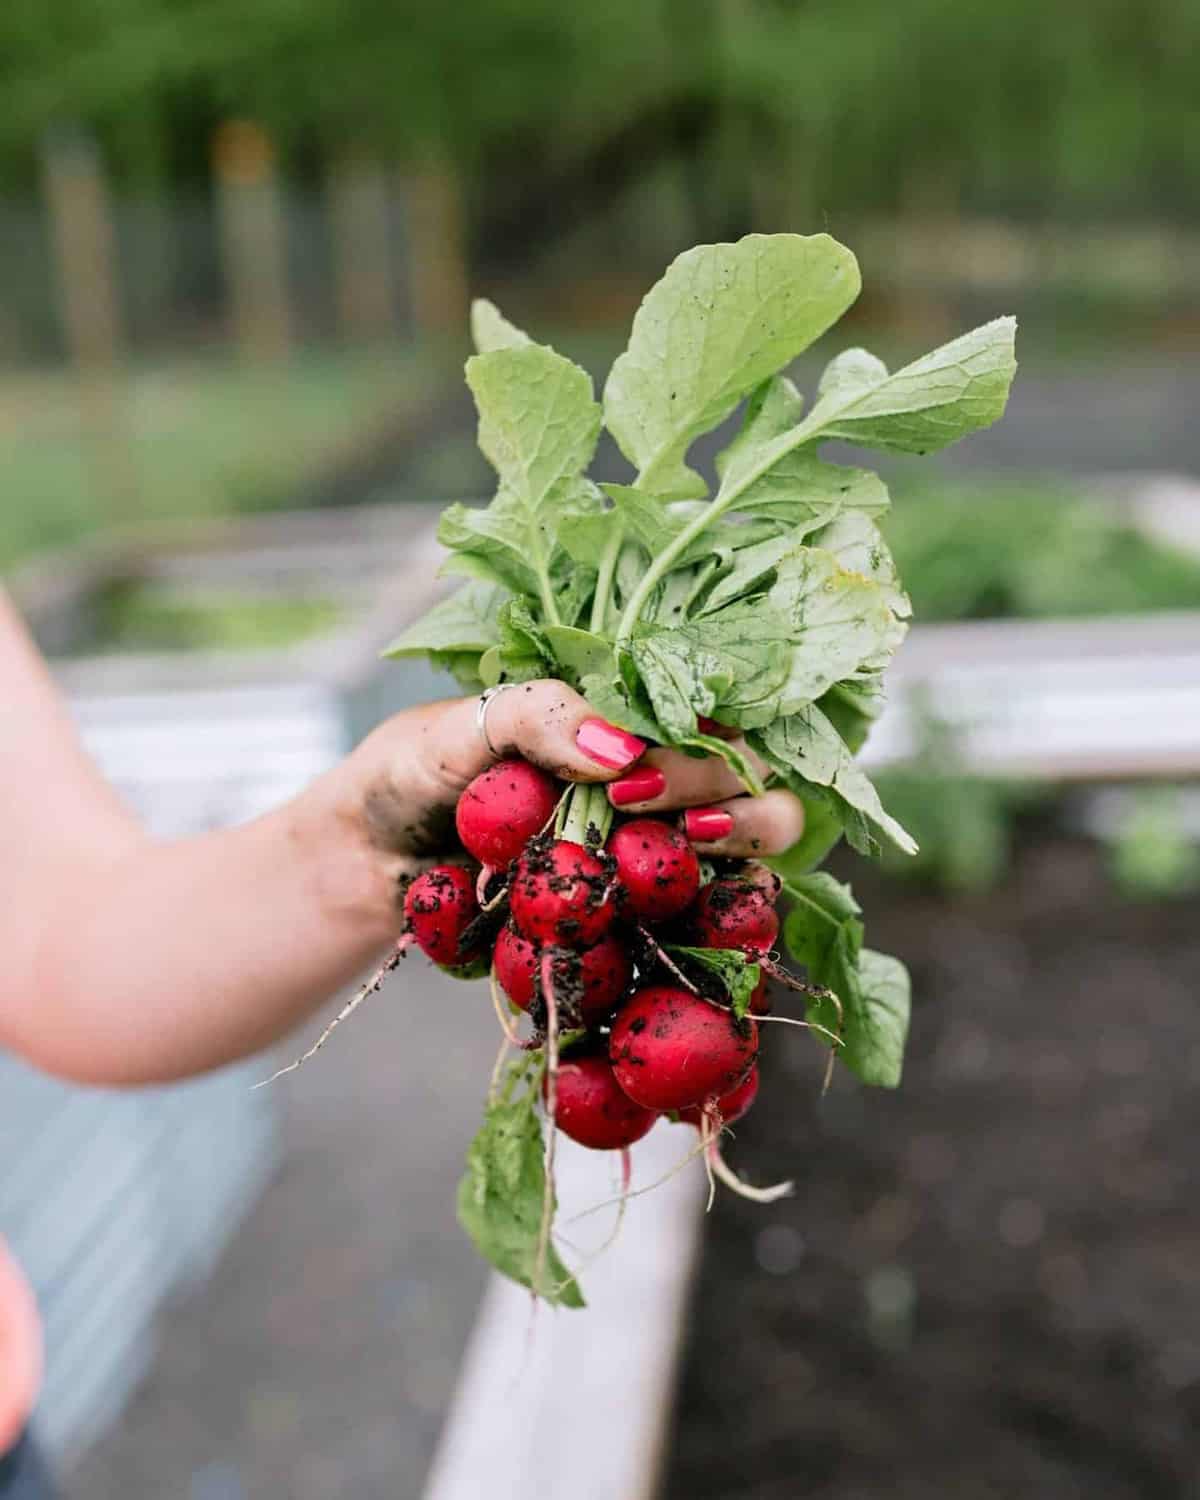
- Radishes—Radishes are incredibly easy to grow, very quick to produce (~25 days), and can be interspersed with other plants because they take up very little space and popup very quickly. You can also easily replant radishes as you pull for a constant supply.
- Spinach (or other greens, like kale and Swiss chard)—If you are in a cooler climate, spinach is a big winner because it thrives in cooler weather, it’s packed full of nutrients, and it doesn’t take up much space. You can also harvest by picking individual leaves, allowing it to keep producing for months. In warmer climates, spinach tolerates (and even enjoys) some shade. Kale is incredibly winter hardy and will last through most snows and freezing temperatures without protection.
- Carrots—While carrots might take a while to produce (~60 days), they will hold in the garden, in the fridge, or in a root cellar for months, making them a great option for survival food. They also take up a very small amount of space—you can easily fit 16 carrots per square foot.
- Beets—These nutritional powerhouses hold well in the garden, fridge, and root cellar just like carrots, and they can add some much needed color to meals dependent mostly on pantry-staples.
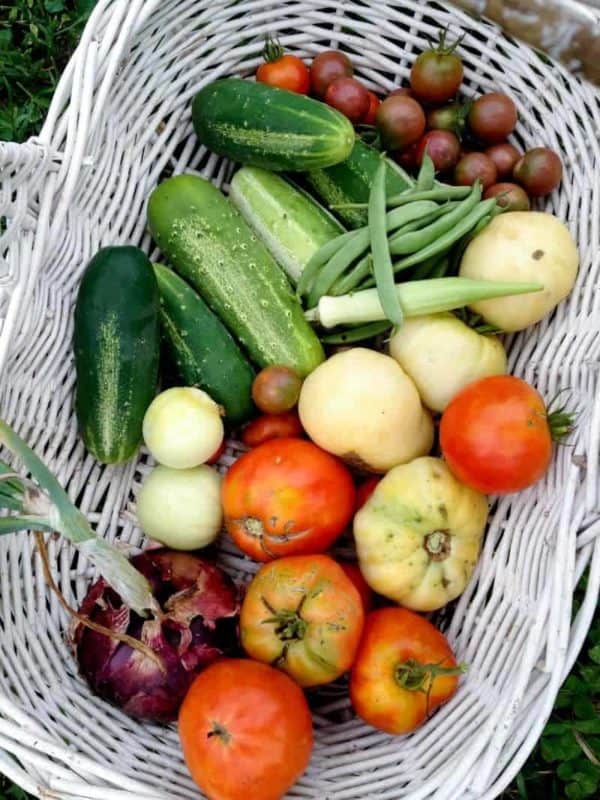
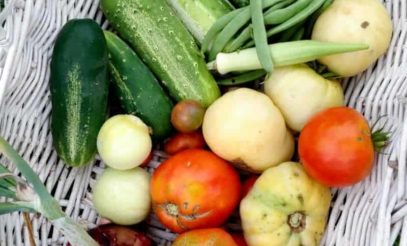
- Cucumbers—Growing cucumbers in a small space? It’s possible! You can use a tomato cage, piece of fence, or poles to train your cucumber plant upward. A single cucumber plant can produce 5-10 pounds of cucumbers in a season. Cucumbers can be eaten fresh, pickled, or dried.
- Bush or Pole Beans—Just like with cucumbers, you can grow pole beans vertically, or you could plant bush beans, which are shorter plants. This is another high production veggie—expect at least a pound of beans per plant. Beans are easy to preserve by freezing, canning, or drying.
- Zucchini—While zucchini is best eaten fresh, it made this list because it is a super producer. You can expect 7-10 pounds of zucchini per plant. Zucchini and other squash do require two plants for pollination purposes.
- Tomatoes—One tomato plant can produce a ton (12 pounds of tomatoes), and if you pick a paste tomato variety, you can easily use it for fresh eating, canning, freezing, and drying.
- Green onions—Onions in general are a very slow growing plant, but that can be used to your advantage, because they can hold in the garden for weeks or even months at a time. They can add a ton of fresh flavor to all kinds of foods, plus they take up very little space. If you can find onion starts (plants or bulbs), that’s wonderful, but seeds will do the trick, too. They will take awhile to be baby onions, but you can harvest the tops at any time to add flavor to foods.
- Common Herbs (basil, cilantro, dill, parsley)—Herbs are easy to squeeze into open spots, they help veggies grow better by protecting them from insects and enhancing flavor, and they add flavor and nutrition to a bland diet. They are also easy to freeze or dry to preserve, and most herbs can be harvested from all season long—in fact, herbs prefer to be clipped frequently.
- Peppers—Peppers are relatively compact plants and can produce quite a few peppers per plant. Hot peppers will produce more than sweet, but both will work. In cooler climates, peppers might be difficult to get to produce reliably without a greenhouse or cold frame.
- Winter squash (butternut, acorn, etc.)—These plants take up quite a bit of space, but each plant can produce 6-8 squash, and the squash can store in your home for up to a year when cured properly. Winter squash grow really well in wide, deep containers like half whiskey barrels.
- Potatoes—Potatoes are toward the bottom of this list because while they are a great storage crop that can add much needed heft to meals, they do take up a lot of space.
- Garlic—Garlic takes a long time to grow, but once you have it, it stores for almost an entire season in the right conditions, adds tons of flavor to dishes, and is an important medicinal herb. It’s also a breeze to grow!
Like I said, this isn’t a comprehensive list, but if I was starting from scratch today in our current crisis, these are the plants that I would plant.
Should I start seeds or buy plants for my emergency vegetable garden?
This is a topic we cover in depth in our choosing between seedlings and seeds post, but I will mention here that through the lens of a crisis—I highly recommend purchasing and using open-pollinated seeds in an emergency. What are open-pollinated seeds? There is a lot to tell you about them, but the most important thing to consider here is that using open-pollinated seeds allows you to save the seeds from your plants to use in future gardens—which is not the case for many of the bedding plants you’ll find at a big box store. In an emergency situation, being able to grow food year after year is comforting. Don’t be intimidated by starting seeds. We have an in-depth photo tutorial that’ll walk you through it.

You can find open pollinated seeds through many online seed retailers. My favorites are Territorial Seed Company, High Mowing Seeds, Peaceful Valley Farm Supply, Seed Savers Exchange, and Baker Creek. Alternatively, you can find open pollinated bedding plants on Etsy if you don’t want to start from seed and don’t want to/can’t buy plants from a big box store.
How should I plan my survival garden?
First of all, with any small garden, I recommend utilizing the Square Foot Gardening method—which is basically just a method of planning your garden space by dividing it into square feet, and then planting certain numbers of crops in each square. Using this method of planning allows you to get the highest production per inch in your small garden. There is a ton of information about this method online.
Using this method, we’ve organized this section based on how much space you have available—everything from growing on a sunny balcony to putting in raised beds in your backyard. What you can and should grow will depend highly on your available space.

Also, keep in mind that these plants are just what I personally would grow if I was starting an emergency vegetable garden from scratch here in Zone 6. These plants are a mix of cool weather and warm weather crops, so depending on your climate, you might be able to elongate your harvest by staggering plants, or you might need to shorten it. You wouldn’t necessarily plant all of this out at the same times depending on where you live. Use these plans as a jumping off point, and make sure to check our larger How to Start A Garden page for detailed ideas for how to plan a garden in your area.

If you have a balcony/patio to grow on for your emergency vegetable garden
First of all, you need to make sure your balcony/patio gets at least 4-6 hours of sunlight. In the northern hemisphere, a south-facing balcony is going to be your best bet, but east- and west- facing patios can also do the trick, just as long as they get the required amount of sunlight (our garden in our apartment in the city was west-facing).
If you are growing in containers, I recommend visiting the list of plants above. Start at the top and work your way down until your balcony is full, or you run out of containers. A few speciality notes for balcony/patio growers:
- Going vertical is going to add a ton of growing space! Use trellises, poles, and fence panels to keep plants upright.
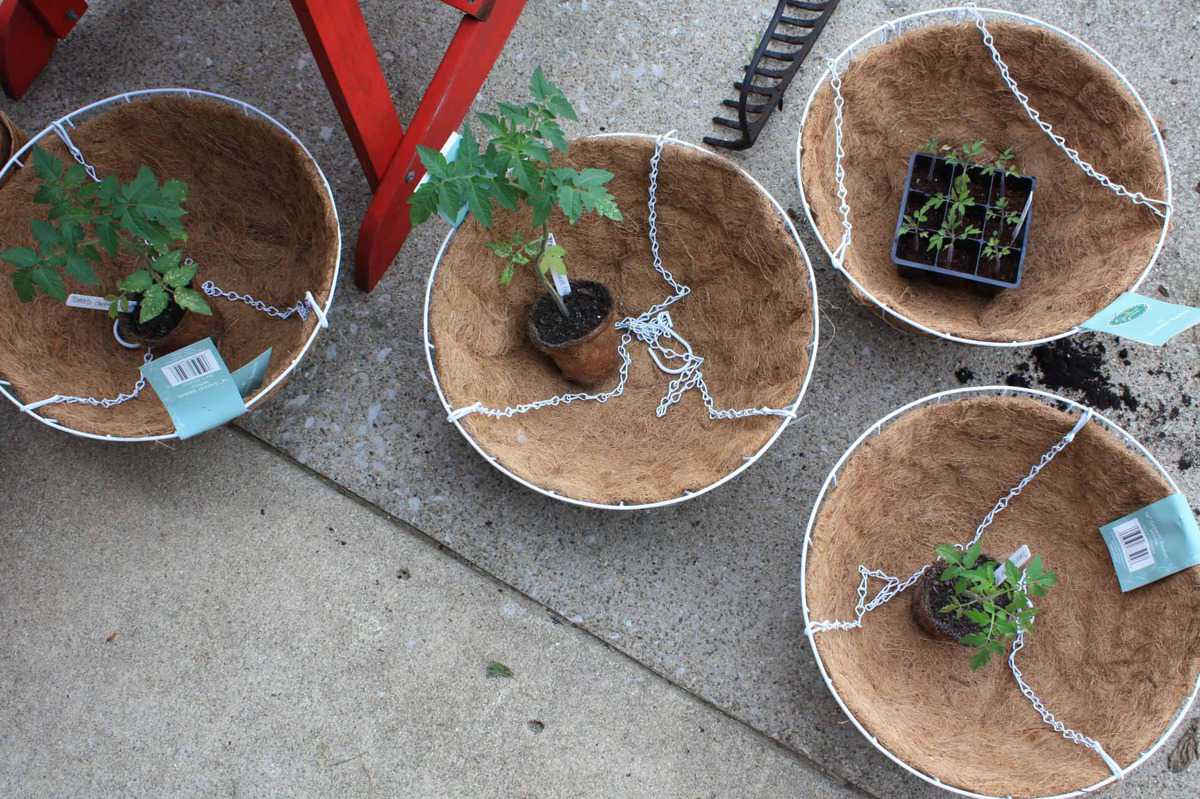
- Don’t forget overhead space. If you live in a multi-story building, you might have a balcony above you. Hanging baskets can grow lettuce, greens, radishes—we’ve even done cherry tomatoes in them before! Just remember that hanging baskets (and really, all containers) dry out pretty quickly, so you’ll need to stay on top of watering.
- If you have railing, make sure to use that space too—there are plenty of railing containers and window boxes that will make use of that otherwise wasted space.
If you can fit a single 4’x4′ raised bed for your emergency vegetable garden
This is a tiny raised bed that can fit on even a postage stamp-sized yard—but it could potentially produce as much as 45 pounds (OR MORE!) of food over the course of a season.
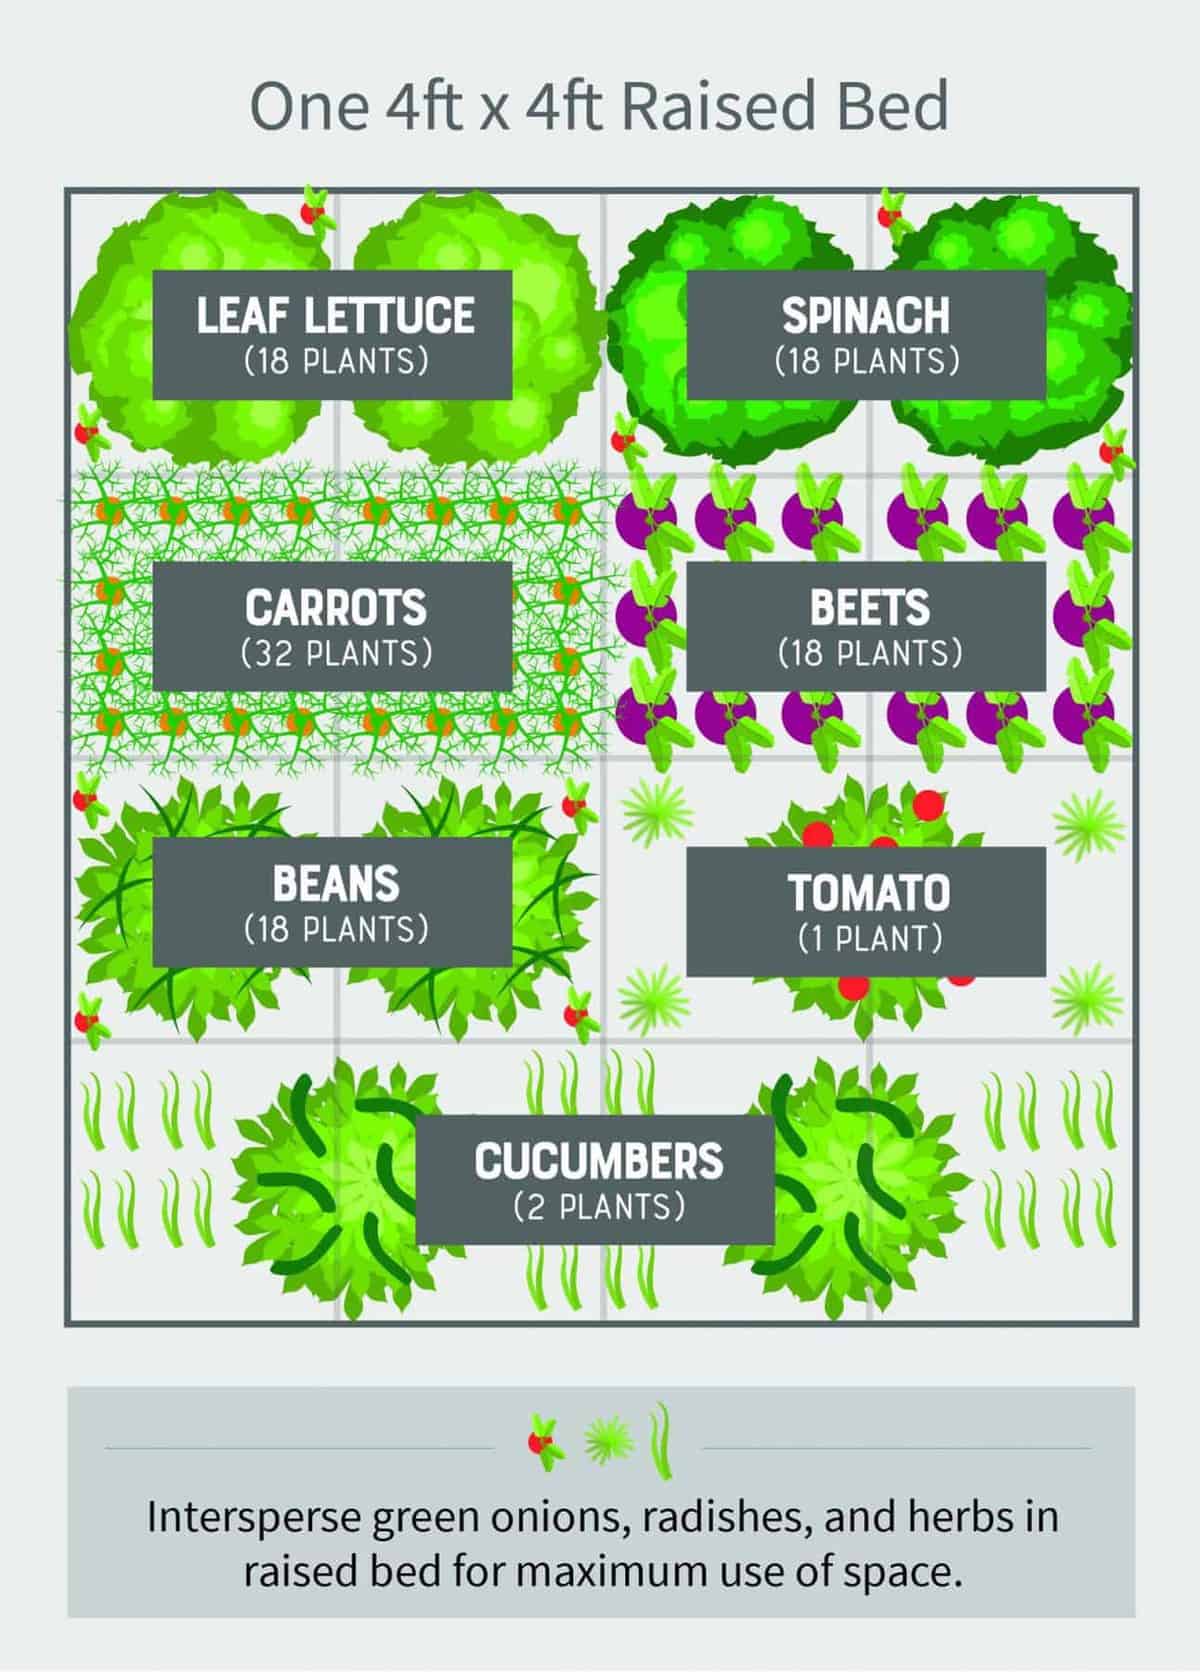
Here’s what’s in the plan:
- 18 Leaf Lettuce Plants
- 18 Spinach Plants
- 18 Beets
- 32 Carrots
- 18 Bean Plants
- 2 Cucumber Plants (trailing up trellis or off side of bed)
- 1 Tomato Plant
- Green onions, radishes, and herbs interspersed throughout
If you can fit a single 4’x8′ raised bed for your emergency vegetable garden
A 4’x8′ raised bed is going to give you a lot more space to grow larger crops and really extend your yield—we’re talking as much as 120 pounds of food in a growing season.
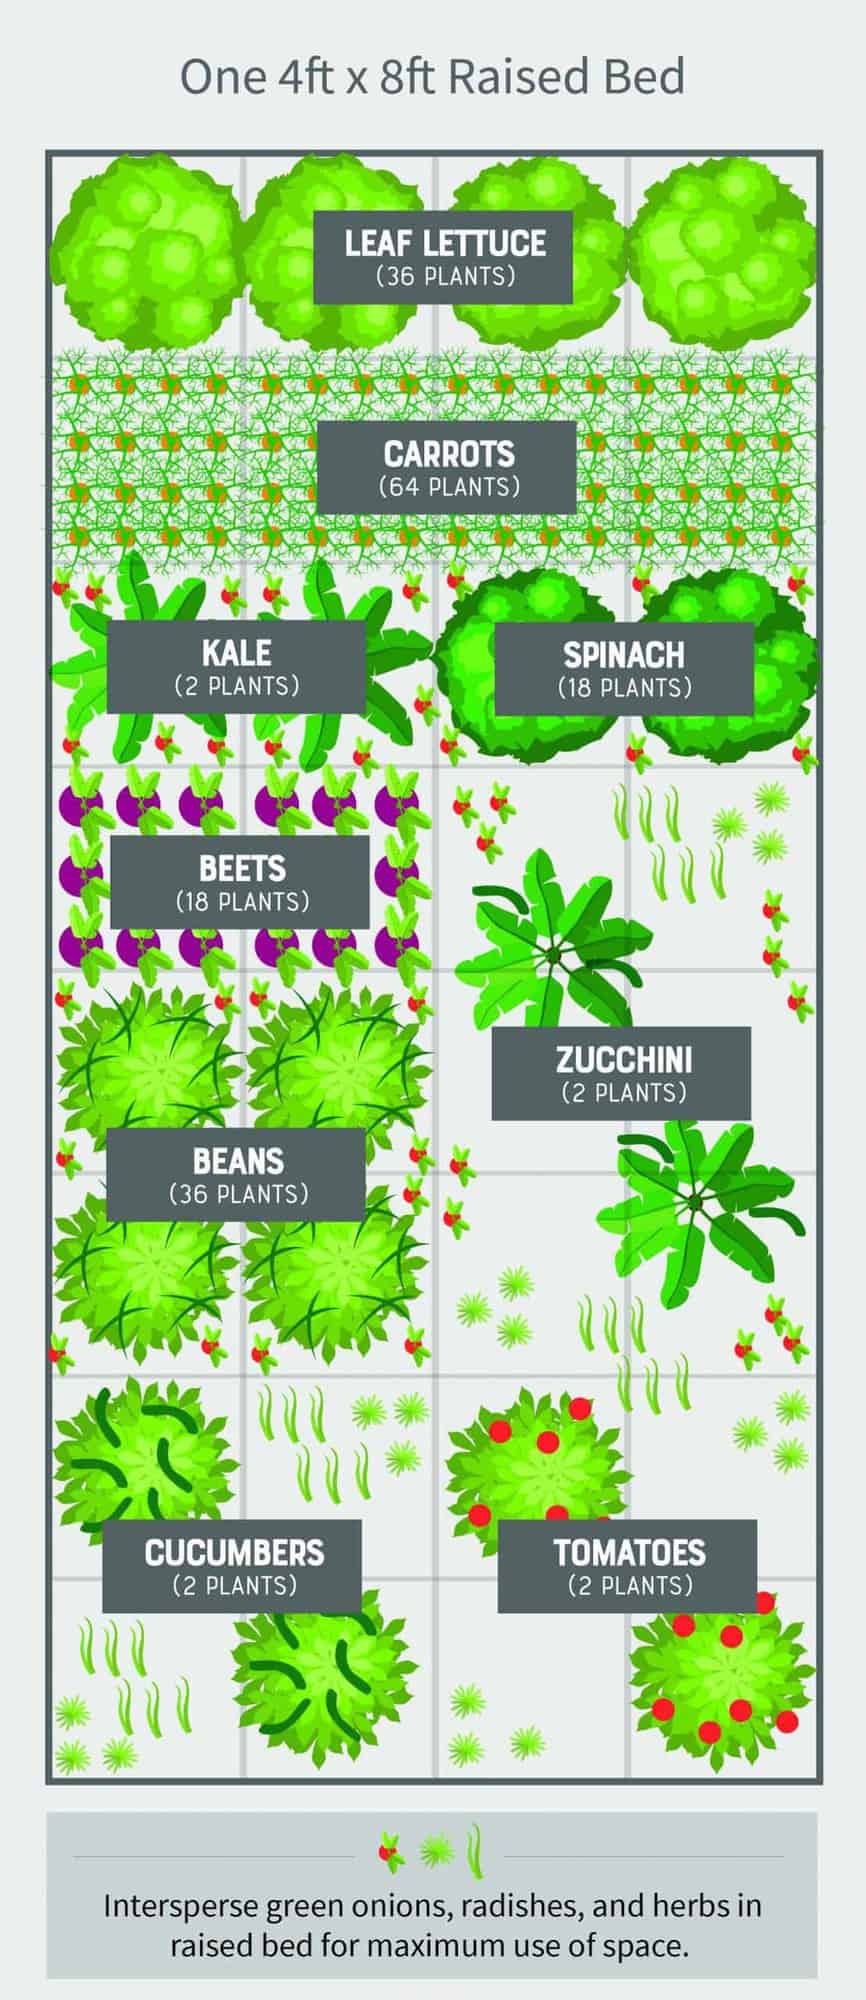
Here’s what in the plan:
- 36 Leaf Lettuce Plants
- 64 Carrots
- 18 Spinach Plants
- 2 Kale Plants
- 18 Beets
- 2 Cucumber Plants (trailing up trellis or off side of bed)
- 36 Bean Plants
- 2 Zucchini Plants
- 2 Tomato Plants
- Green onions, radishes, and herbs interspersed throughout
If you can fit two 4’x8′ raised beds for your emergency vegetable garden
Production really ramps up when you have two raised beds—which still only takes up a space smaller than an average-sized bedroom. You can get upwards of 190 pounds of food out of two beds over a season.

Here’s what’s in this plan:
- 36 Lettuce Plants
- 18 Spinach Plants
- 2 Kale Plants
- 64 Carrots
- 36 Beets
- 36 Bean Plants
- 4 Pepper Plants
- 2 Zucchini Plants
- 36 Garlic Plants
- 12 Potato Plants
- 4 Cucumber Plants (trailing up trellis or off side of bed)
- 2 Tomato Plants
- 2 Winter Squash Plants (trailing up trellis or off side of bed)
- Green onions, radishes, and herbs interspersed throughout
If you can mix and match
If you have some flexibility and can mix and match (say using one raised bed, plus whiskey barrels or pots), you have the potential to grow a ton more. One of my favorite apartment gardens we did was a small raised bed, whiskey barrels, and hanging baskets. We produced a ton of food that year!
Are these emergency vegetable garden plans optimized for companion planting?
Because we’re working on an emergency garden, we’re putting aside some common gardening planning rules to maximize growing space and food production. This means these plants are not necessarily optimized for companion planting or for crop rotation for future seasons.
What are the basics to keeping a garden happy once it’s planted?
I’m going to try to boil down 30+ years of gardening experience into a few easy bullet points, so bear with me! These will not be comprehensive, but they will get you on the way to having a happy emergency vegetable garden:
- Vegetable gardens need an inch of water per week, with container gardens needing slightly more. If the soil feels dry, your garden needs water. It’s better to water a little bit every day as opposed to watering once per week—especially if it’s hot out.
- Mulch is your friend. Once your plants are established, put a thick layer of mulch around each plant to keep weeds down and keep moisture in. Mulch options: straw, pine shavings, wood chips, seedless grass clippings, newspaper.
- Weeds are your foe. Weeds compete with your garden plants for nutrients and water—so keep your beds weed-free. This should be relatively easy since we’re talking about small beds here. Weeding by hand is a good exercise in mindfulness!
- Most plants WANT to be picked. Clipping herbs, harvesting beans, picking cucumbers—it signals to the plant to produce more fruit. Leaving ripe vegetables on the vine signals to the plant that the season is over and the plant goes dormant, starts to seed, or just dies.
- Visit your garden every single day. Not only is it a good opportunity to check in and check soil moisture, pick goodies, and weed, but it also is good for your mental health.
- Compost is the only fertilizer you really need in an emergency. If you have a good compost handy, you can use it to top dress (sprinkle around the base of the plant) if a plant is looking a little sick.
I hope this has empowered you! You can grow your own food at home, and there has never been a better time to start than now. Happy growing!


Hi Cassie, firstly I would like to thankyou for sharing all these good tips etc with us but I noticed you plant your beans next to your garlic, I have always been told never to plant them next to each other . Now I’m confused 😕
Thank you for sharing so much good information. My daughter and I grew a few things last year — we got started late with boxes that straddled the deck rail, a tiny 2X4′ raised bed and a few big pots. We had great success with green beans, spinach and lettuce. Not so much with everything else. We are trying again this summer and I’m determined to figure out a way to get at least one larger raised bed that is high enough so I can comfortably weed and care for it. (A back injury doesn’t jive well with bending over or even kneeling.) I recently read about doing compost with food scraps, etc. But I haven’t quite figured out how to “compost” the stuff we put in or how to use it in the garden. I’m going to sign up to get your free gardening guide but wonder if you could suggest an article that would explain the composting process. I have a large cat litter bucket that we could manage to roll around to mix the compost and I know it has to sit in the sun to do the magic. Any direction would be appreciated.
We have a Composting 101 piece planned for this spring/summer, so hopefully that will be able to help. Happy growing!
Love this article even more than the last 🙂
Great tips all around. We are just harvesting the last of our squash here for the season, and can’t wait to start gardening again next year.
Nice
Something you may want to add- if you live in a upper part of a high-rise apartment; avoid fruiting plants that require pollinators, such as tomatoes, beans, squash, peppers and melons. Stick with plants that your eat the other parts such as onion, garlic, carrots, potatoes, lettuce and spinach.
Great tip!
Like your highly informative postings
Thanks for the tip to find a garden center where you can buy compost, sand, and garden soil. I didn’t realize that you can’t just plop vegetables directly into the soil. Maybe that’s why I haven’t had luck yet? I’ll look for a garden center where I can get advice and anything else I might need.
Make sure you are checking plant compatibility… for example tomatoes and peppers (sweet, bell or hot) should not be planted next to each other, nor should potatoes and garlic. There are a lot of common garden vegetables that can help or harm other garden plants. Some plants vigorously compete for nutrients, while others are actually noxious to specific competing plants… while others add nutrients for the other plant or repel common pest insects.
As we said in the post, these plans were designed as a way to get quick food in limited space—they are not optimized for plant rotation or companion planting.
Cassy, this was a wonderful article!! Thank you so much for taking the time to write it. Because of the pandemic more and more people are growing their own food, which is fantastic. Thank you for sharing your knowledge and giving us all power to start to grow our own fresh food. Stay safe. Happy gardening
Pauline