
I am very fortunate to be in a family of incredible cooks. Like, not to toot our own horns or anything, but we’re bordering on gourmet at times (and then at other times, we make chili dogs, but whatev). I can’t think of a single adult in my family who isn’t supremely good in the kitchen (or on the grill or the smoker). It is a wonderful gift to get to enjoy so many delicious meals prepared by the people that I love the most.
So keep this in mind when I tell you this little tidbit—we almost always eat frozen dinner rolls with our holiday dinners. You know the little balls of dough that come 4,000 to a bag in the freezer section? You plop them into a baking dish and let them rise while you cook dinner, and then you bake them, and everyone oooohhs-and-aaaahhhs over your perfectly fluffy and buttery dinner rolls while you try to hide the bag in the trash so no one knows you’re actually afraid of baking with yeast. Yeah, those. Those little balls of dough have been a part of my life for as long as I can remember.
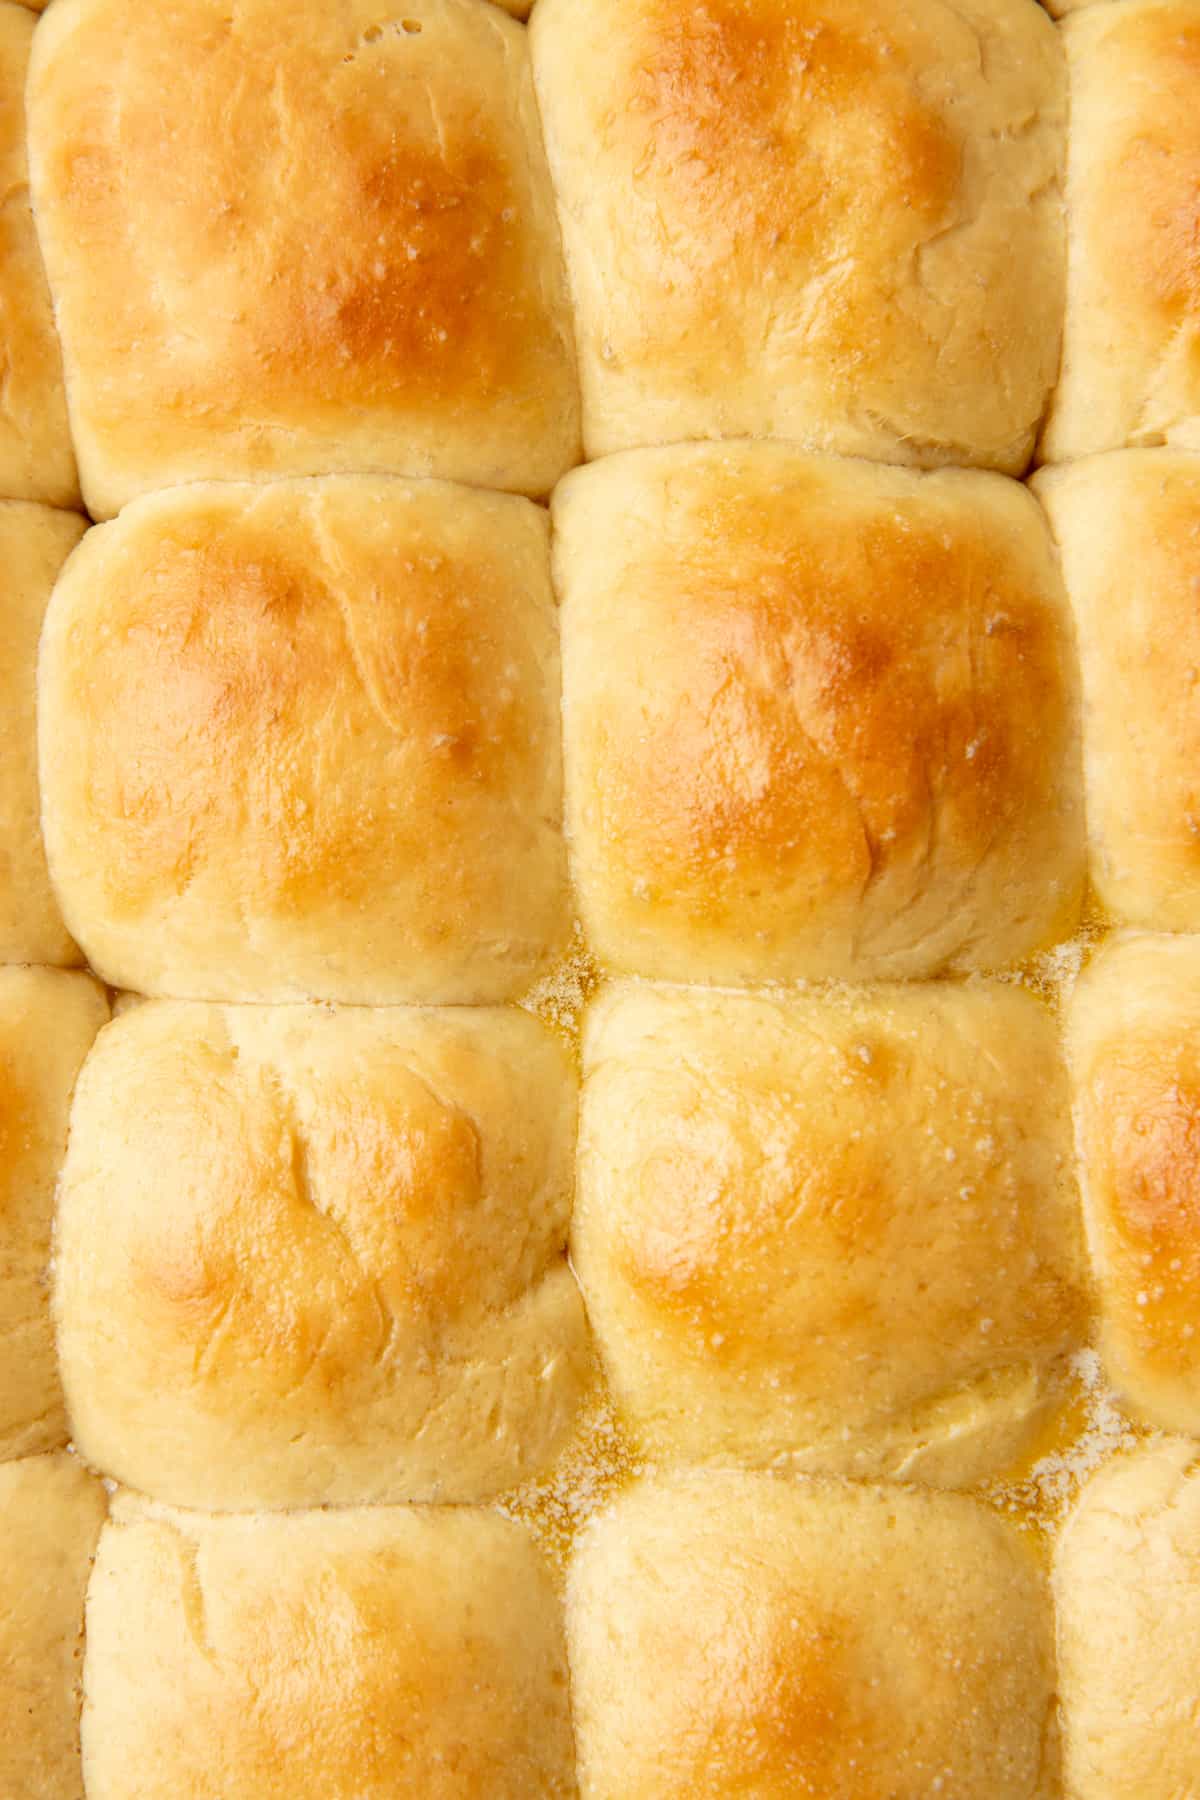
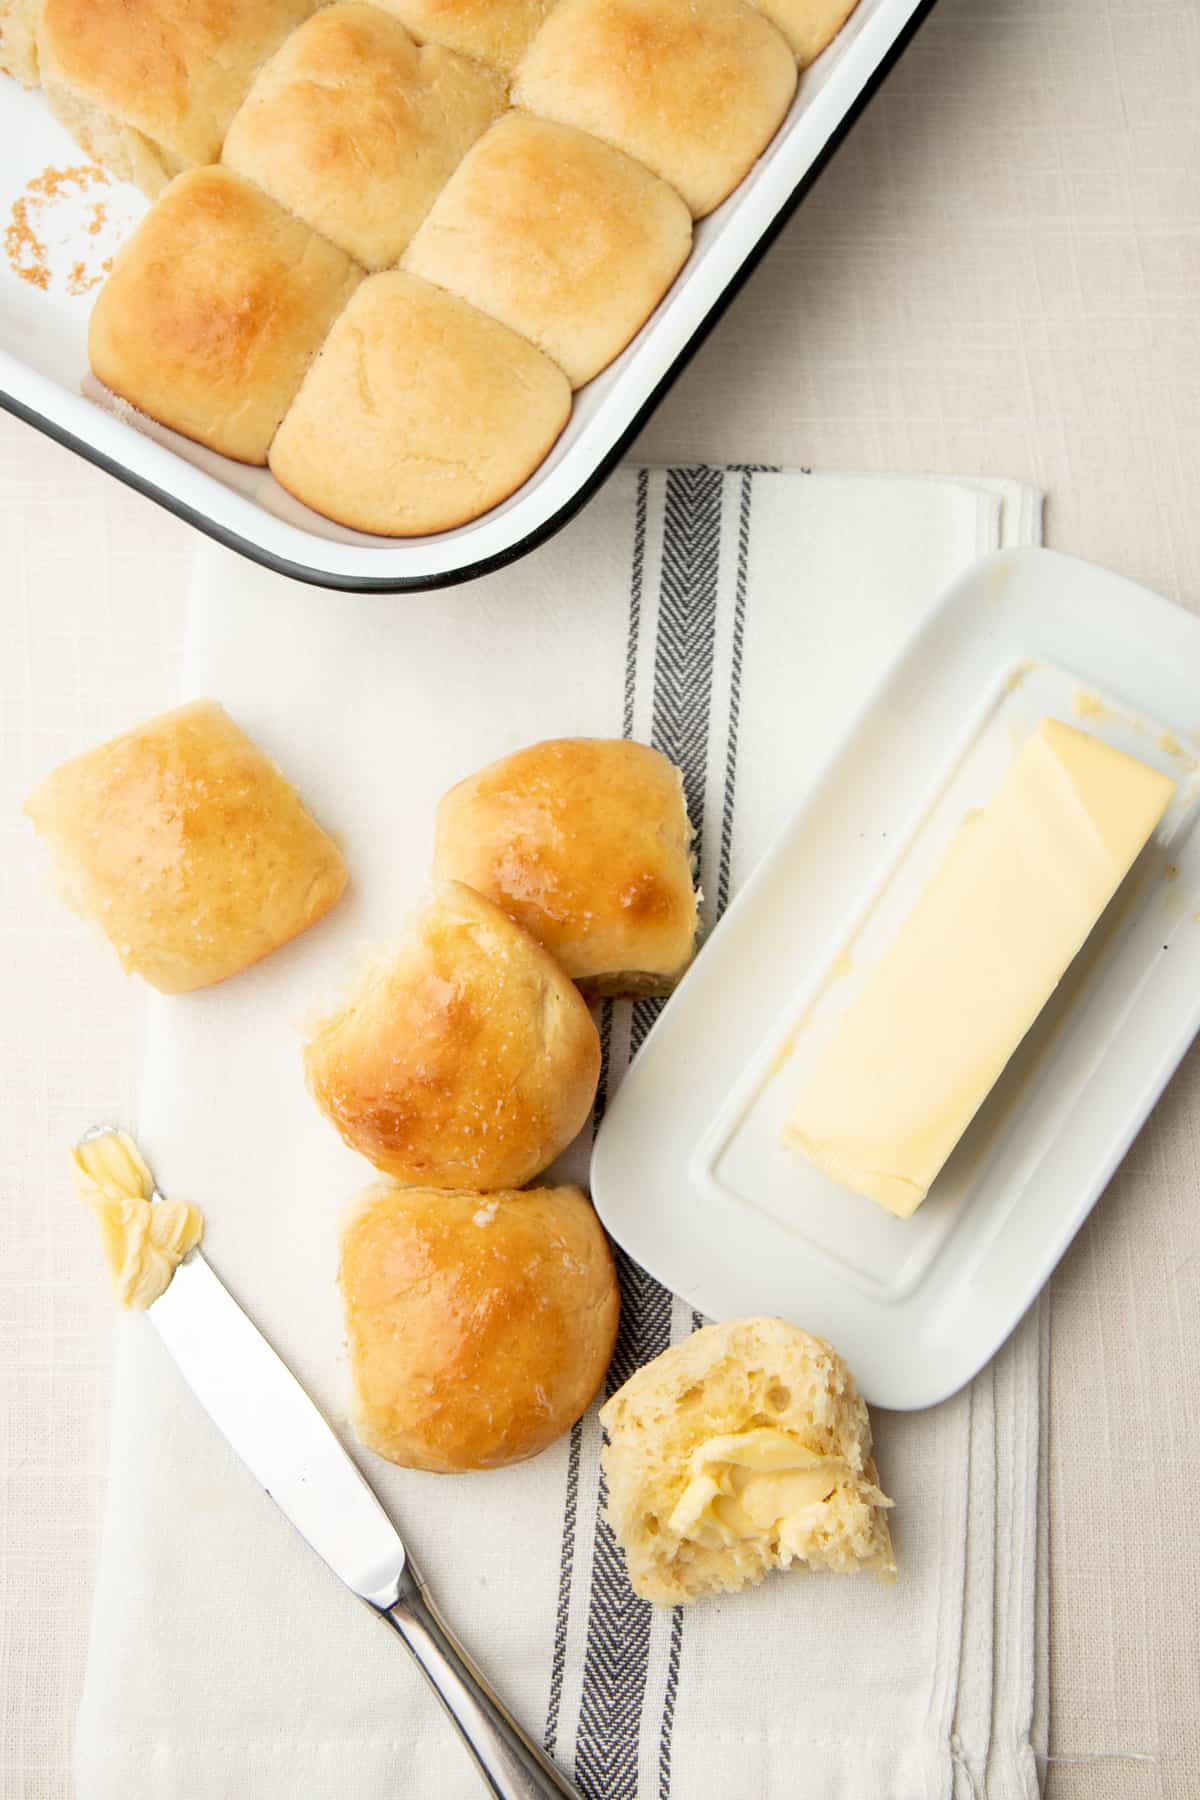
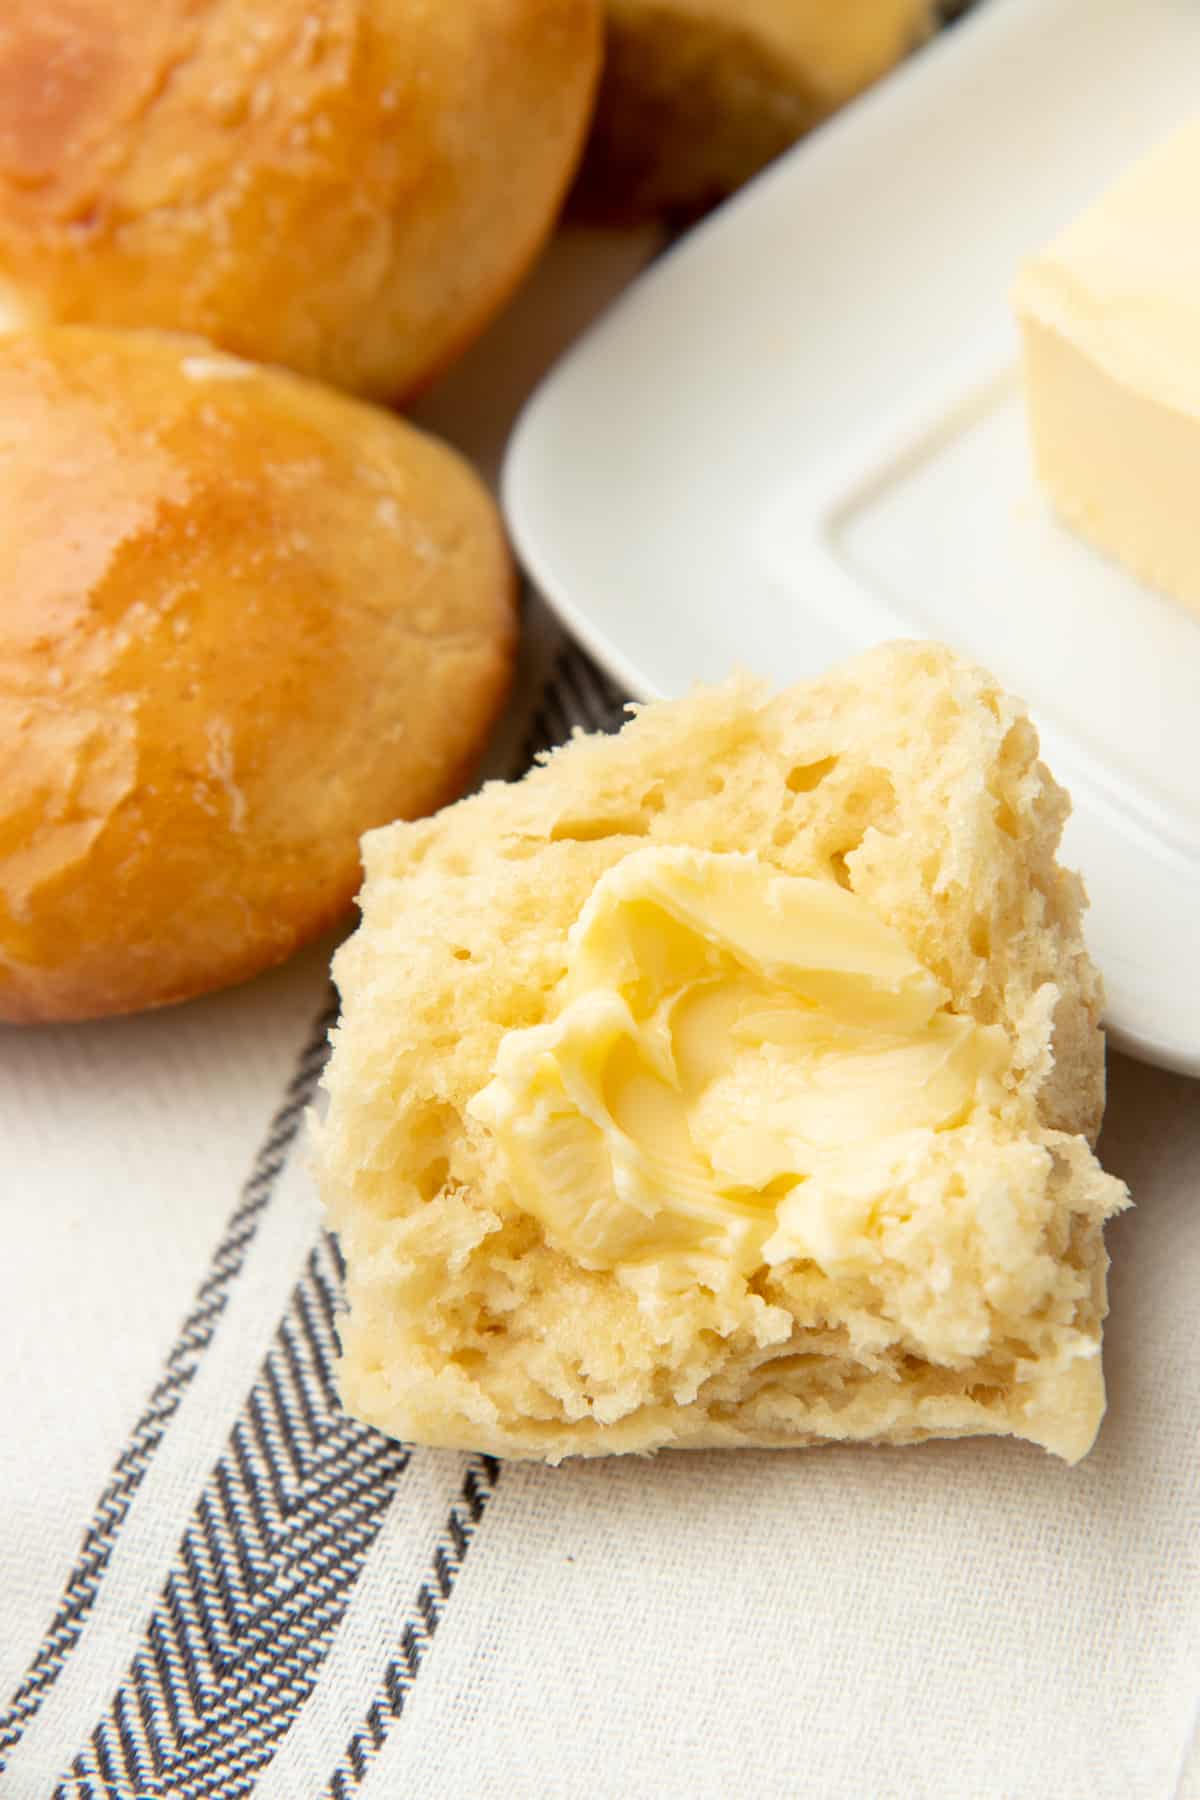
Well not anymore, friends, not anymore. Because I have perfected the recipe for EASY yeast dinner rolls from scratch. These no-fail rolls come together in a flash. The resulting roll is fluffy and tender, but sturdy enough to make a really good turkey or ham sandwich after your holiday dinner. You can do this!
How do I make homemade yeast dinner rolls from scratch?
Making yeast rolls is easy! It does require a bit of time—but most of that is hands-off rising time. Here’s what you’ll be doing:
- Mix up the dough (more on that below). All you’ll need is warm water, yeast, an egg, butter, honey, flour, and salt. That’s really it!
- Knead the dough. I do this with a stand mixer, but I’ve included instructions for using a bread maker or kneading by hand in the recipe as well.
- Shape the dough into rolls.
- Let the rolls rise. This is the part that takes the longest, and it is completely hands-off!
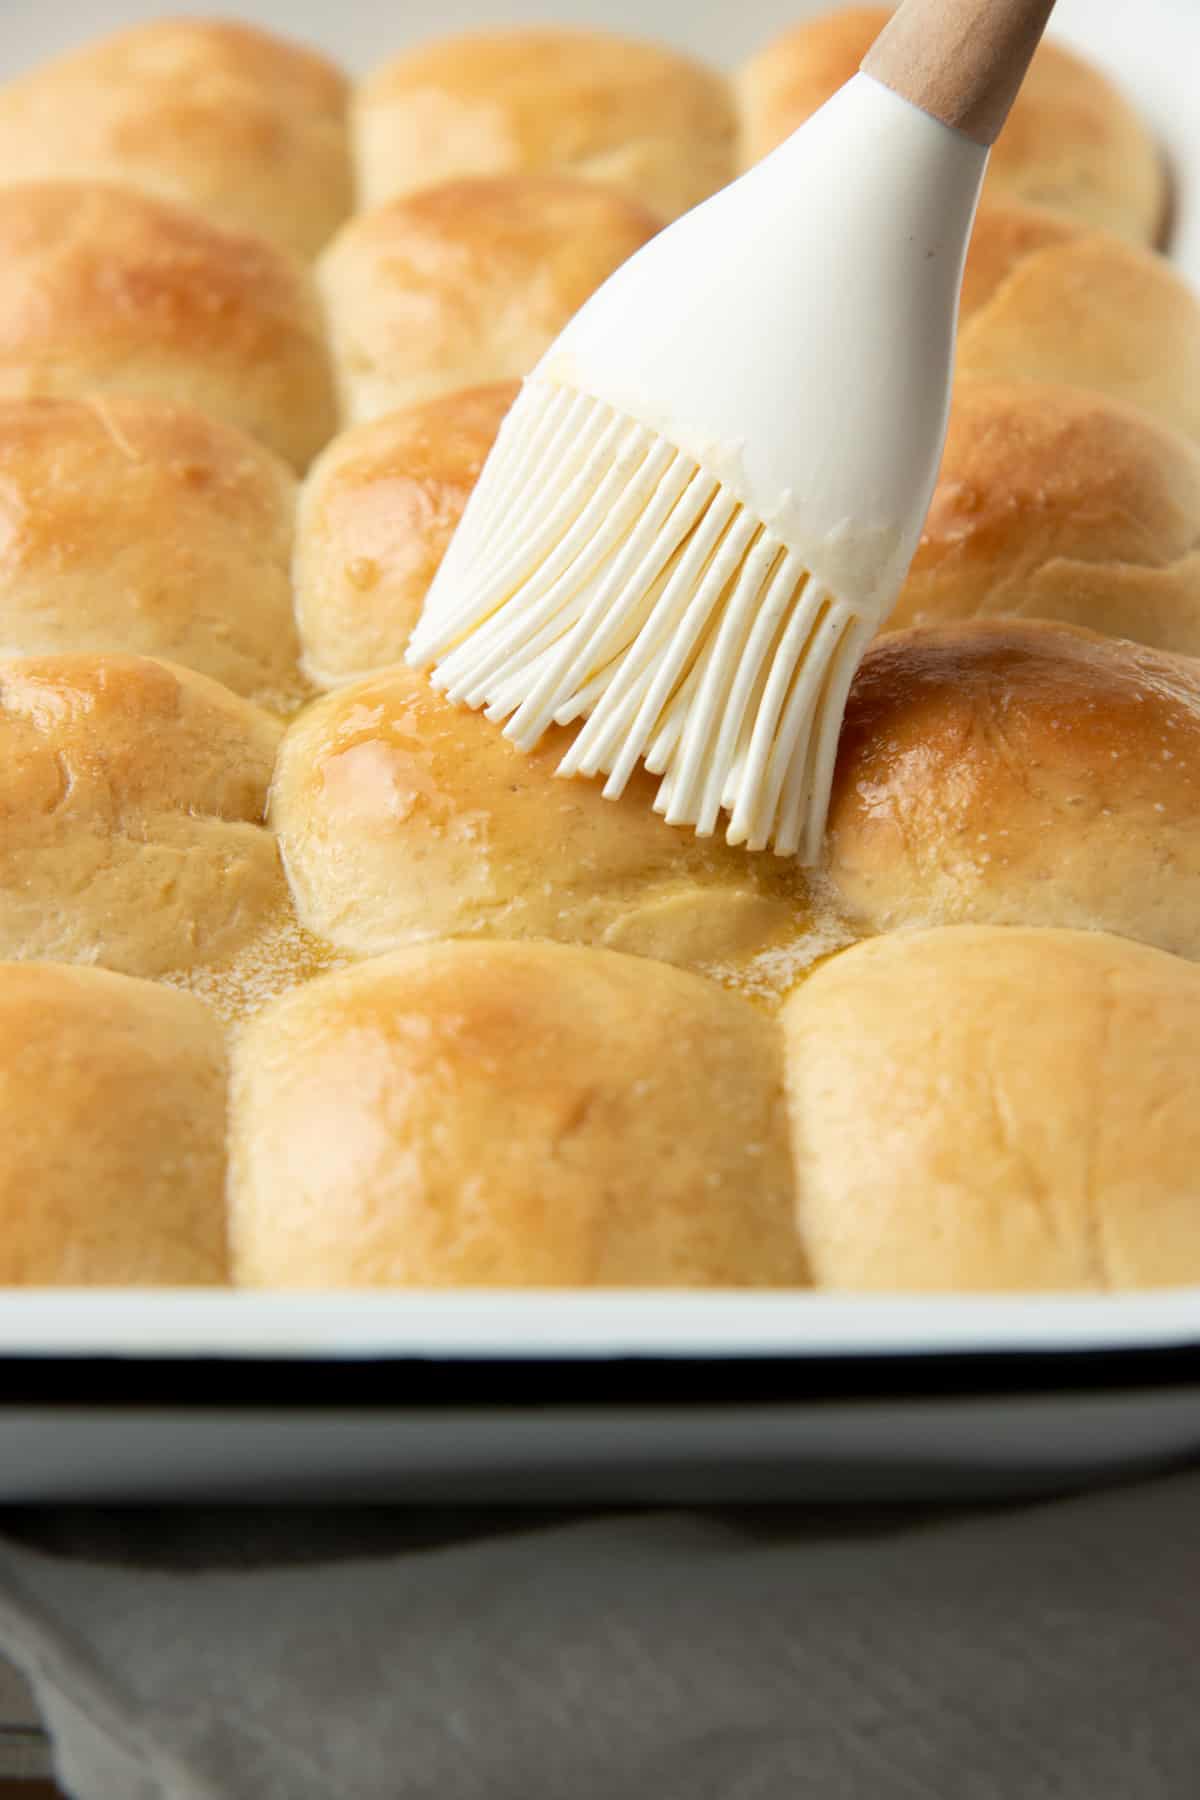
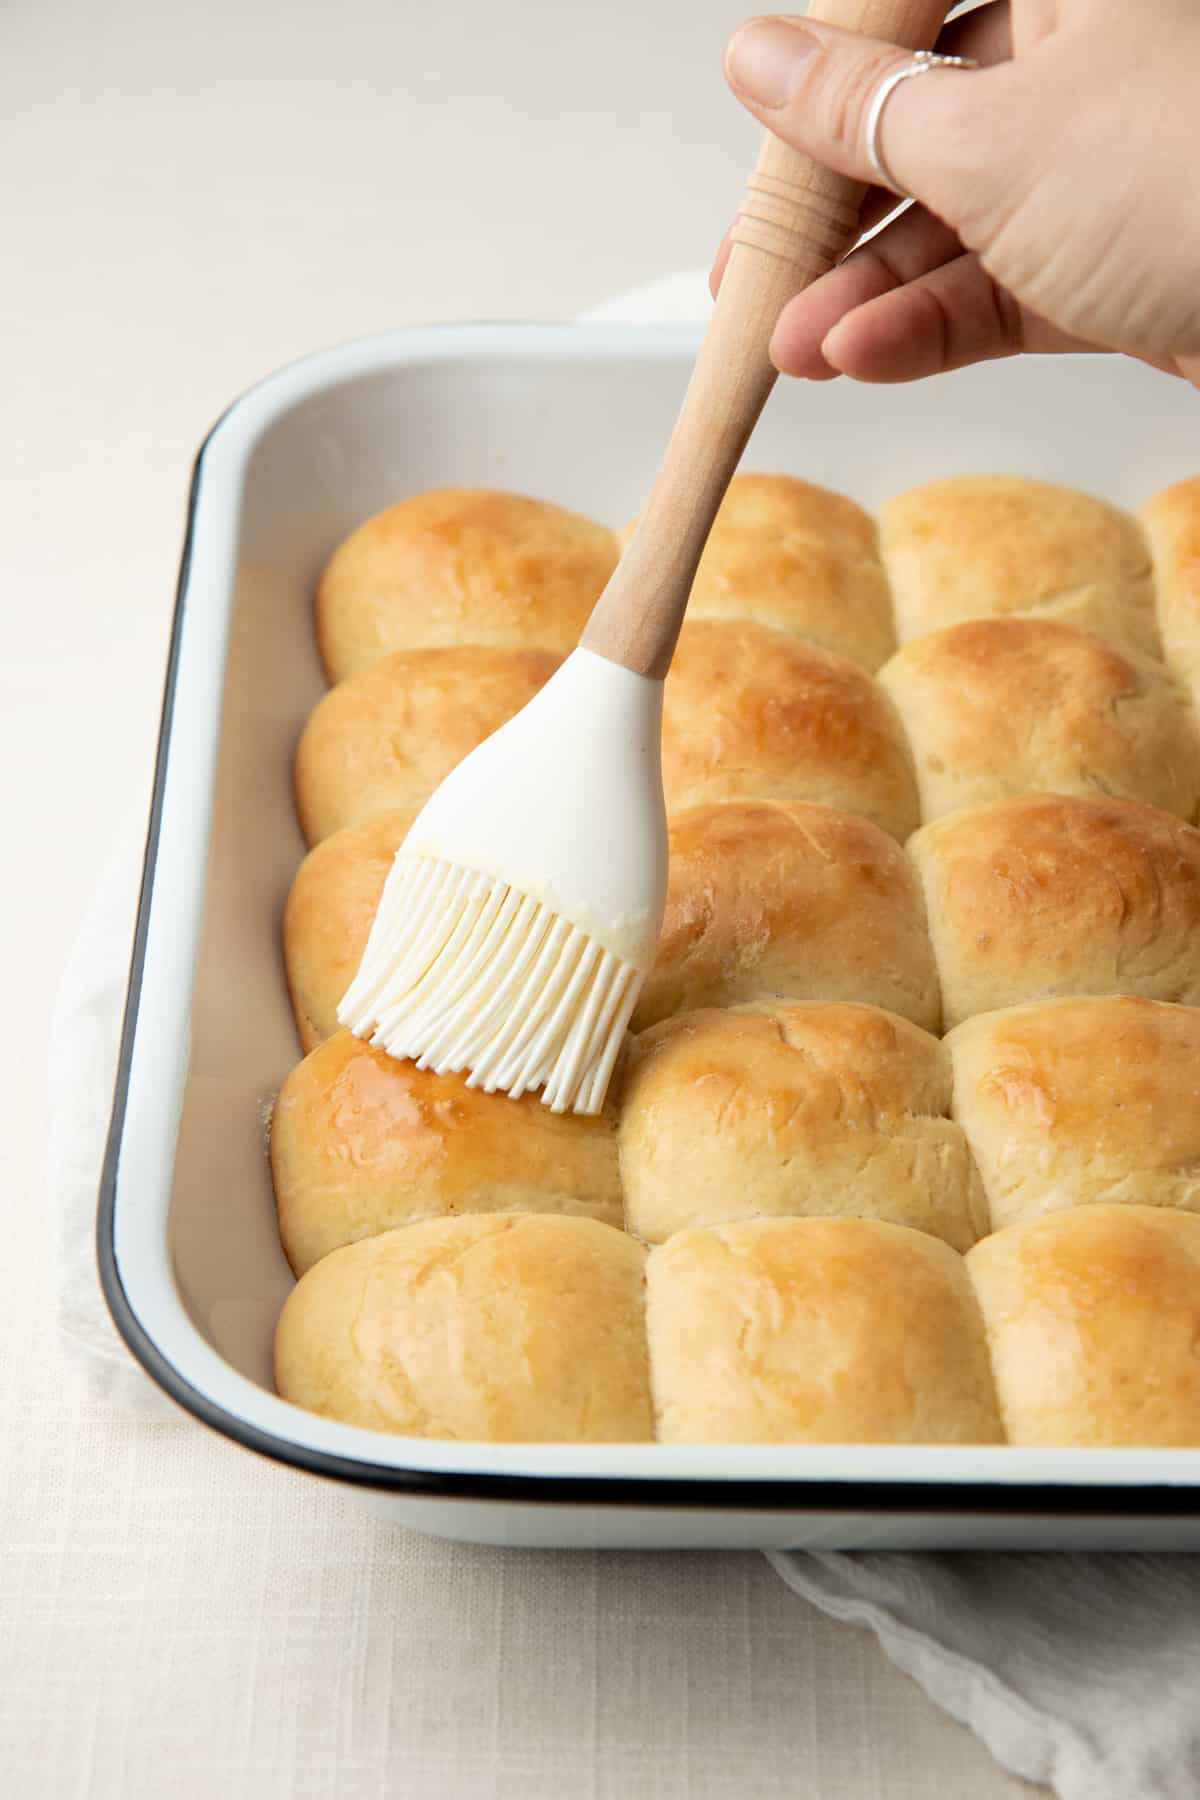
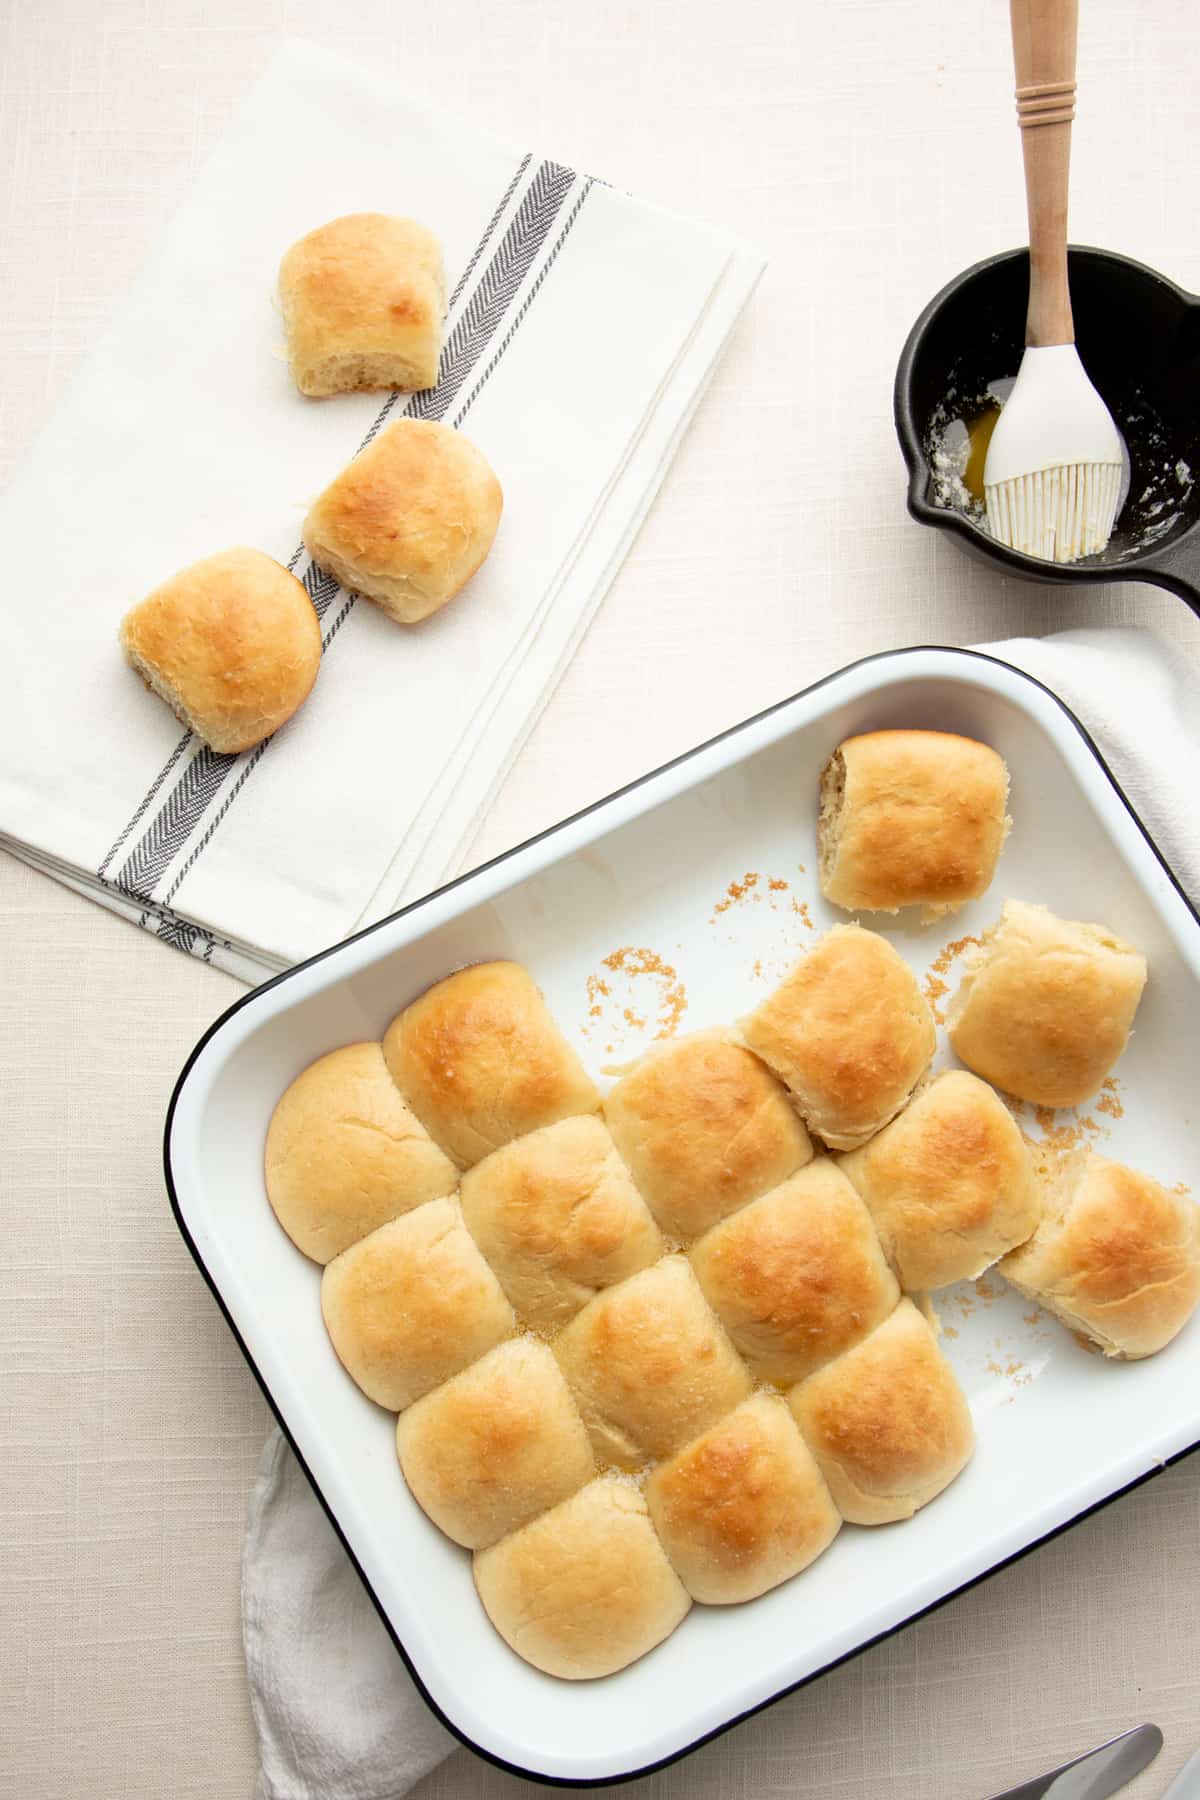
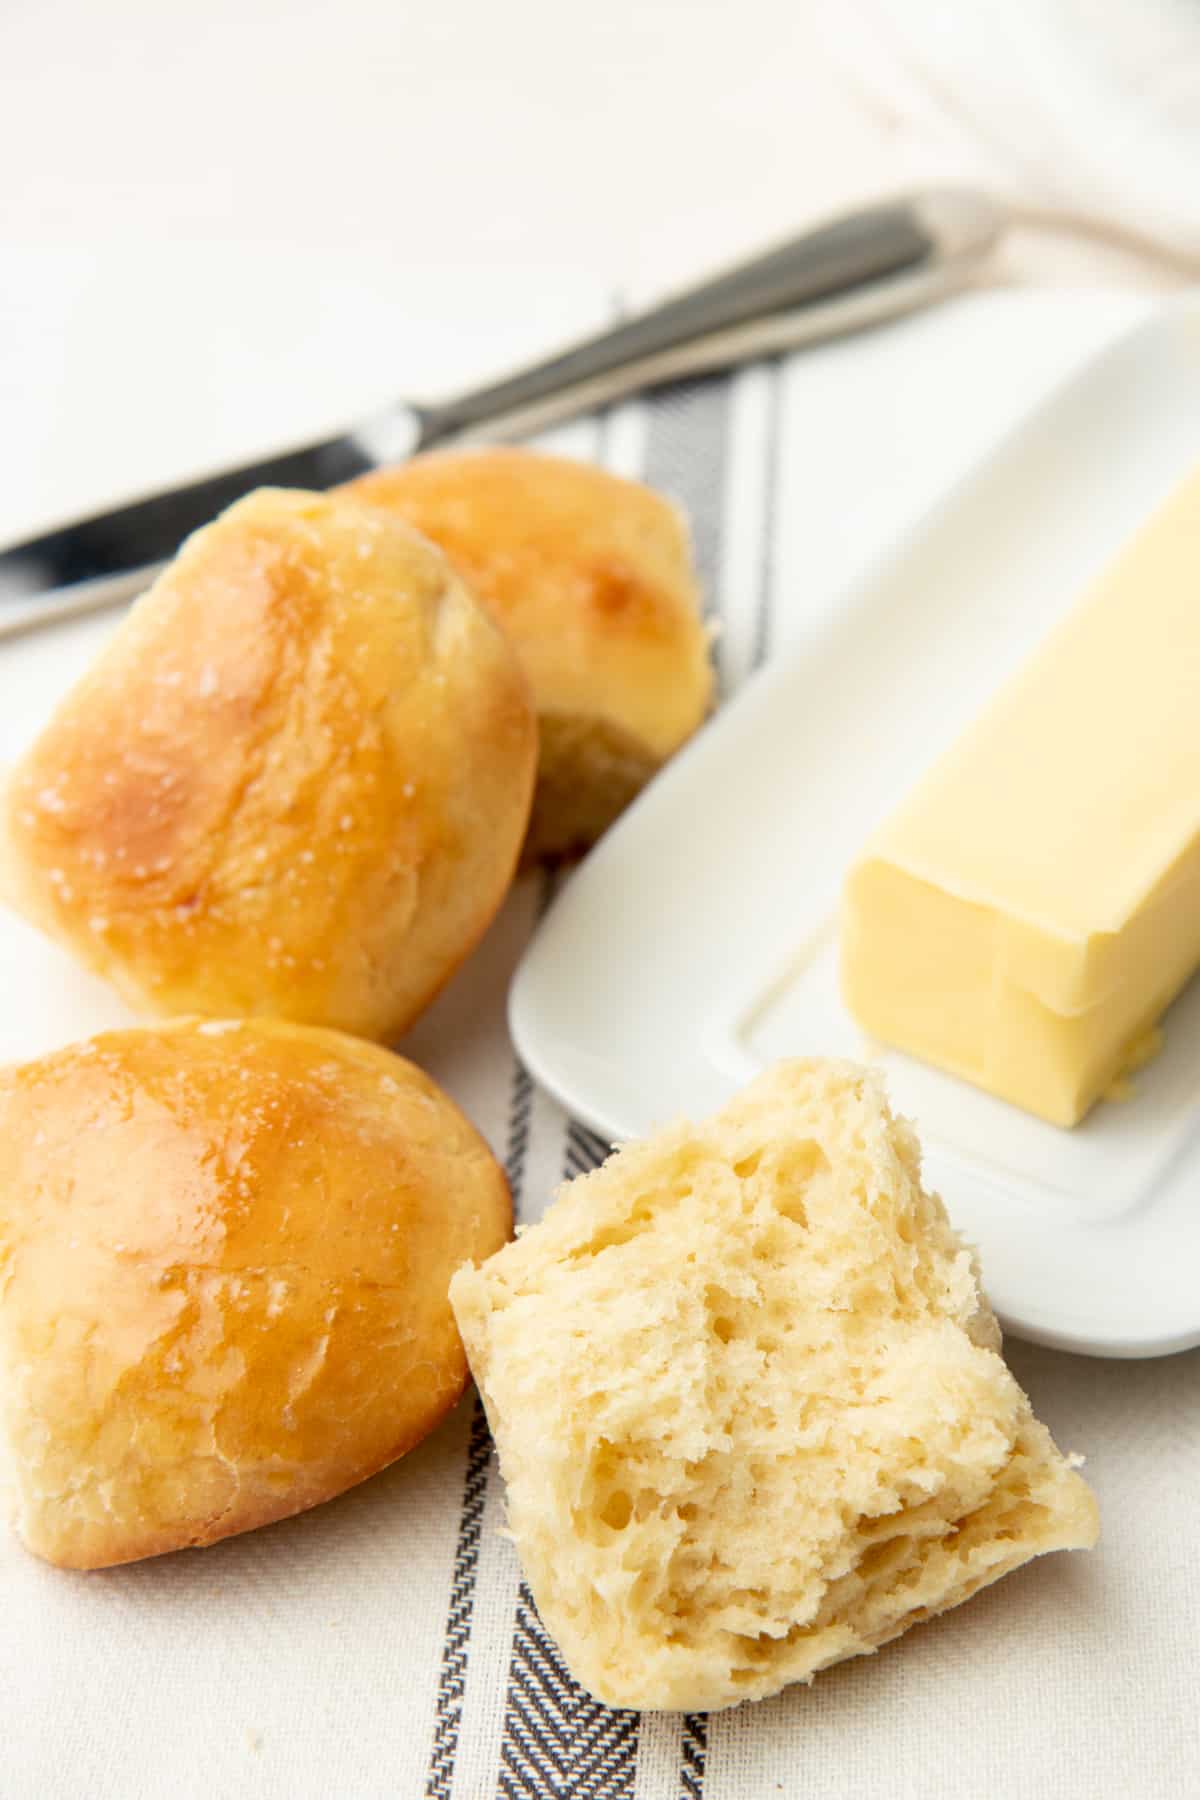
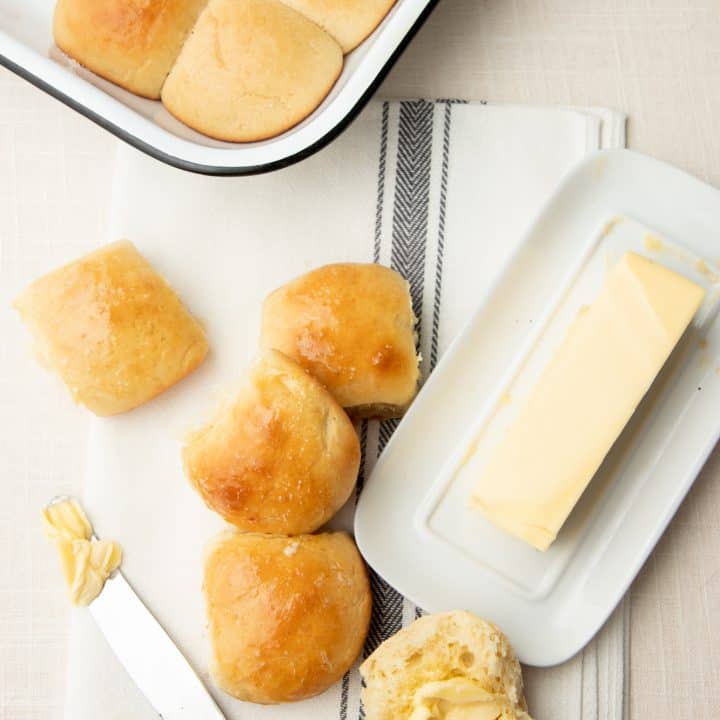
- Brush with melted butter, and bake for 12-15 minutes.
- Enjoy tasty, fluffy dinner rolls!
Wholefully Protip
While we usually use plain butter, you could also brush these yeast rolls with Parmesan garlic butter before baking for even more flavor.
But…I’ve never worked with yeast before!
I know a lot of folks find baking with yeast intimidating, but once you get the hang of it, you’ll wonder why you were ever afraid. There are a lot of hardcore bakers out there that will give you very specific rules and requirements about working with yeast—it can definitely be a science—but I honestly don’t think it has to be that complicated.
My suggestions when it comes to working with yeast are pretty simple:
- Make sure your yeast is fresh—I like to store mine in a closed canning jar in the fridge or freezer and get a new package every few months. Honestly, if you keep it in the freezer, it’ll last pretty much indefinitely.
- Don’t kill your yeast with hot water—Yeast will do its thing in warm spaces, at room temperature, or even in cooler temps (albeit much more slowly than at warm temps), but very hot water will kill the yeast. Err on the side of too cool.
Working with yeast still feels intimidating. Can I make dinner rolls without yeast?
A traditional dinner roll recipe is made with yeast—and there is no getting around that. We think anyone can bake with yeast, but if you’re still worried, we recommend trying out some of our quick breads that can work in place of dinner rolls:
What kind of yeast do I need?
This recipe calls for active dry yeast to get the best results. Instant yeast has its place, but you’ll want the active dry kind for these rolls!
What if I don’t have a stand mixer?
I almost always do all my dough-making in my stand mixer, but just in case you aren’t madly in love with a red KitchenAid like I am, I’ve also included directions for making these buttery yeast rolls both by hand and in a bread machine.
What’s the best way to shape these easy yeast rolls?
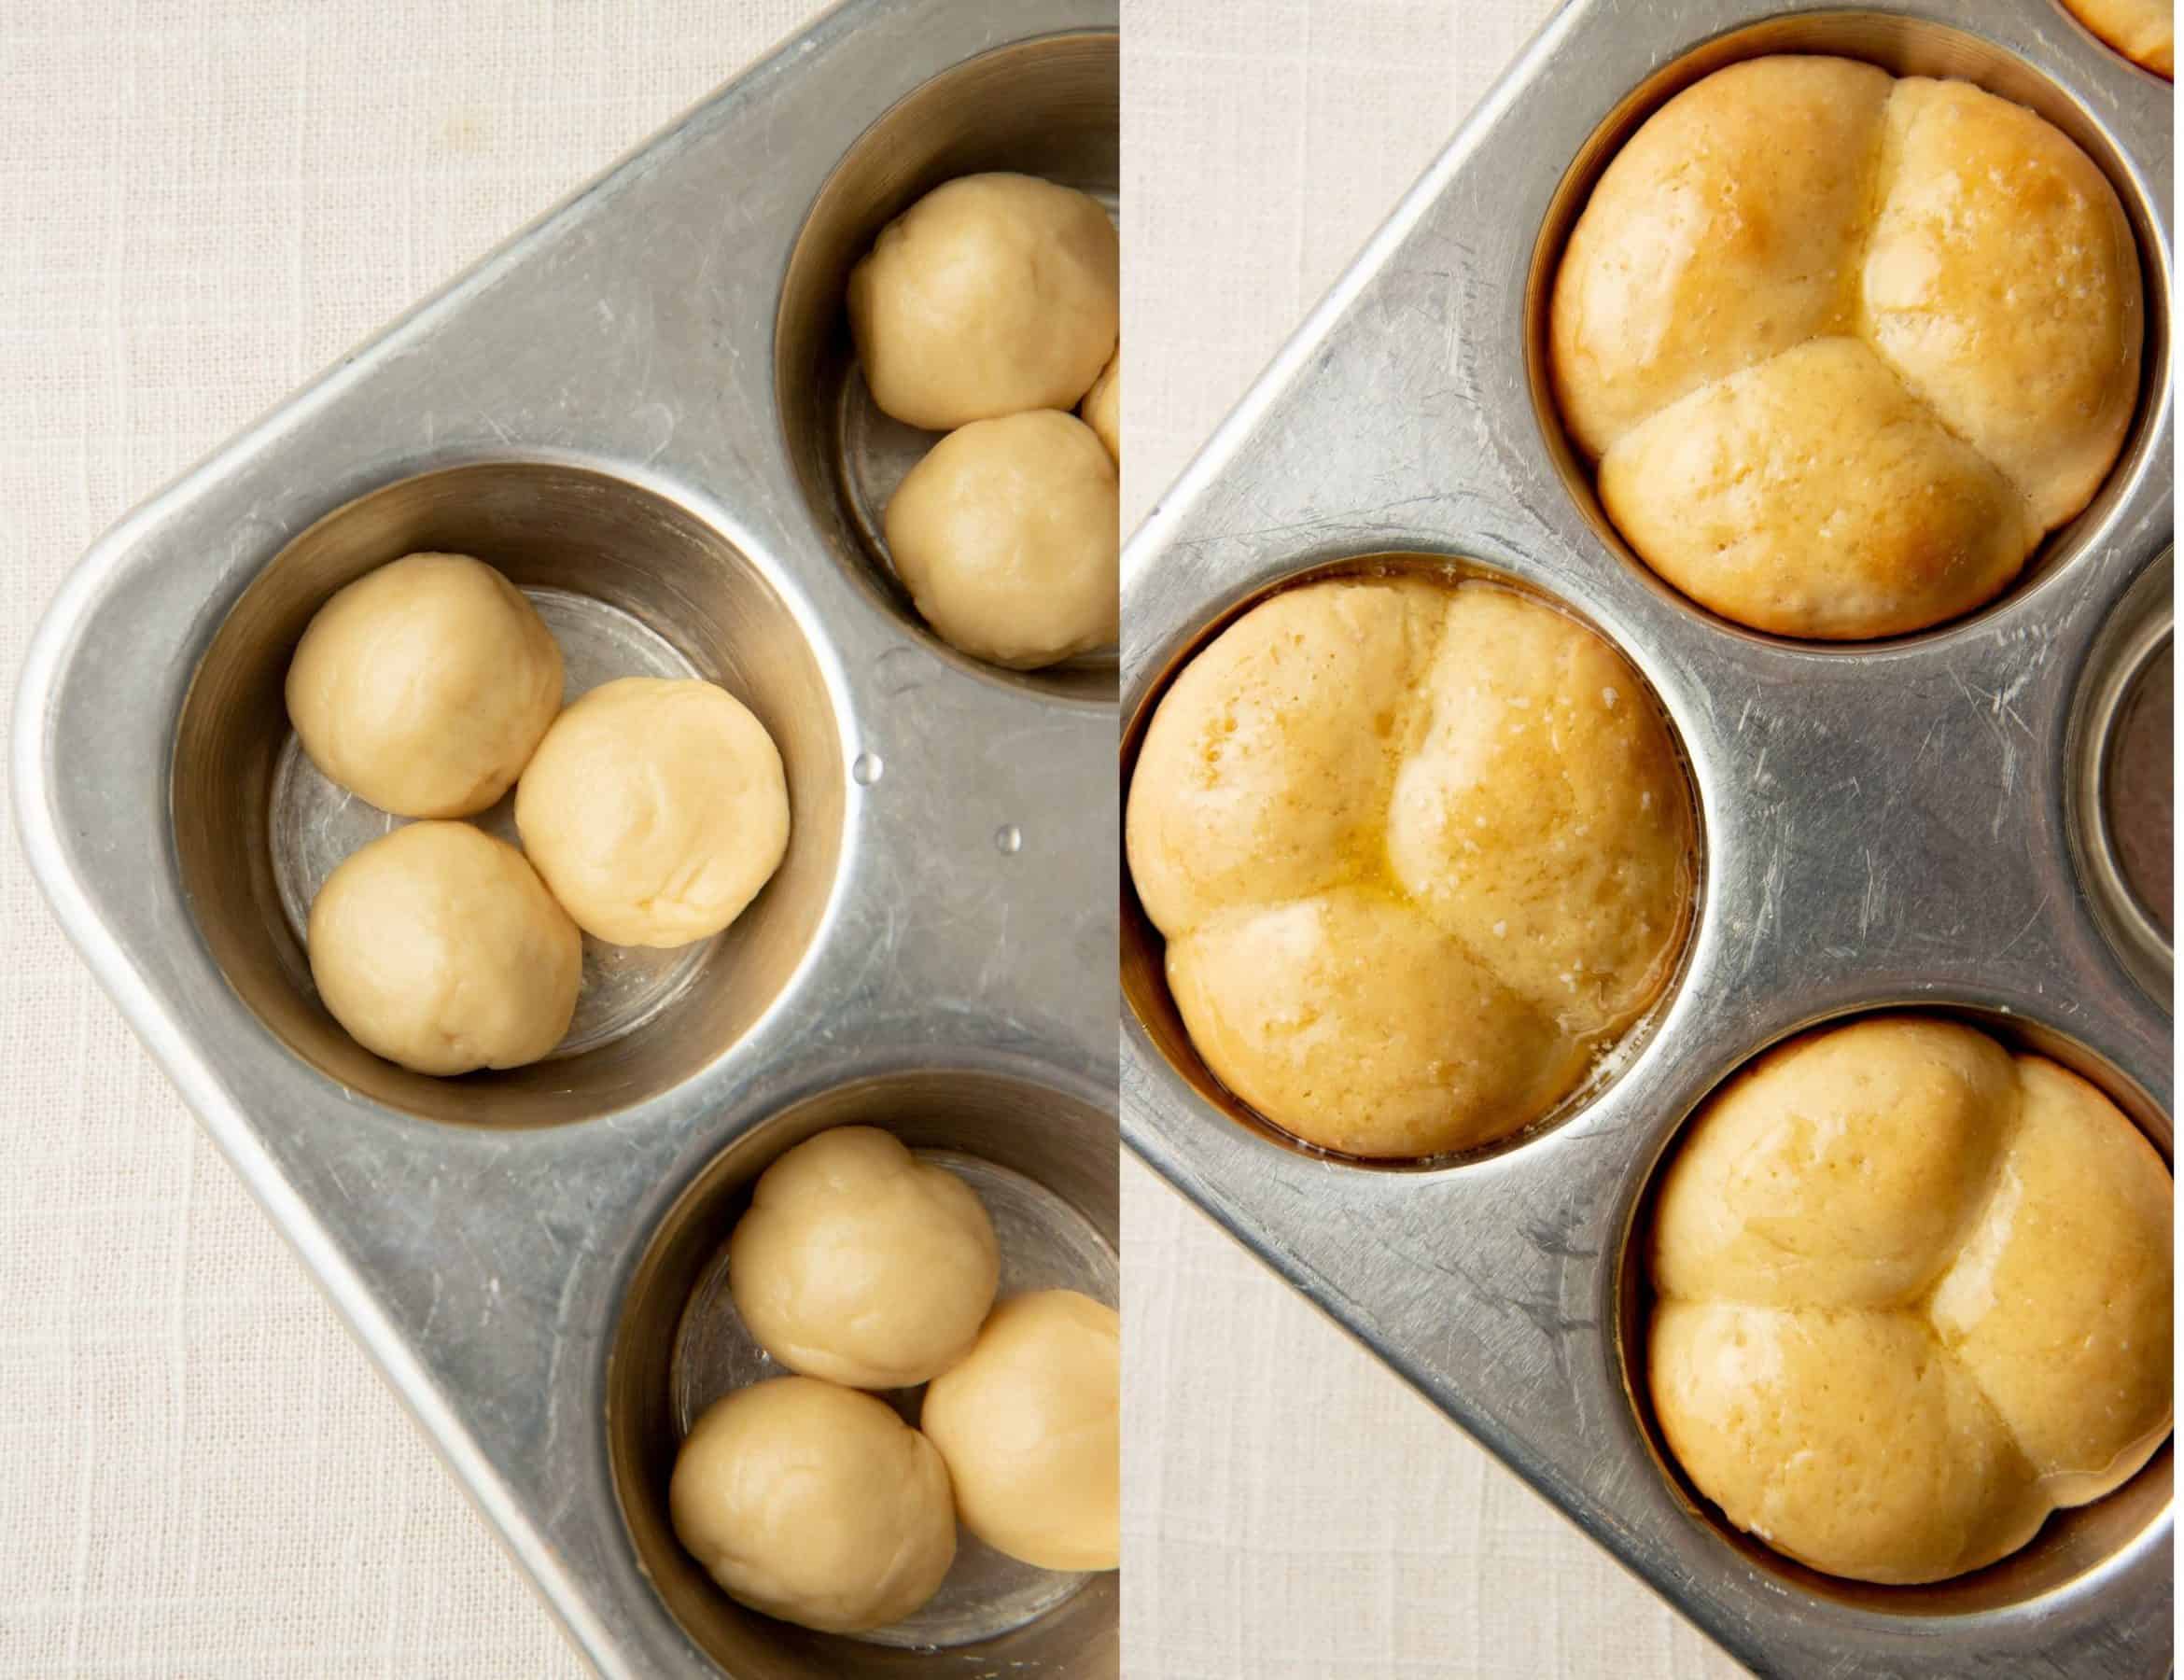
There are two ways I recommend shaping these rolls—either into the standard shape, or as adorable clover rolls! Shaping both types of rolls are done by weight—that’s how you get the most equal size rolls, which cook evenly.
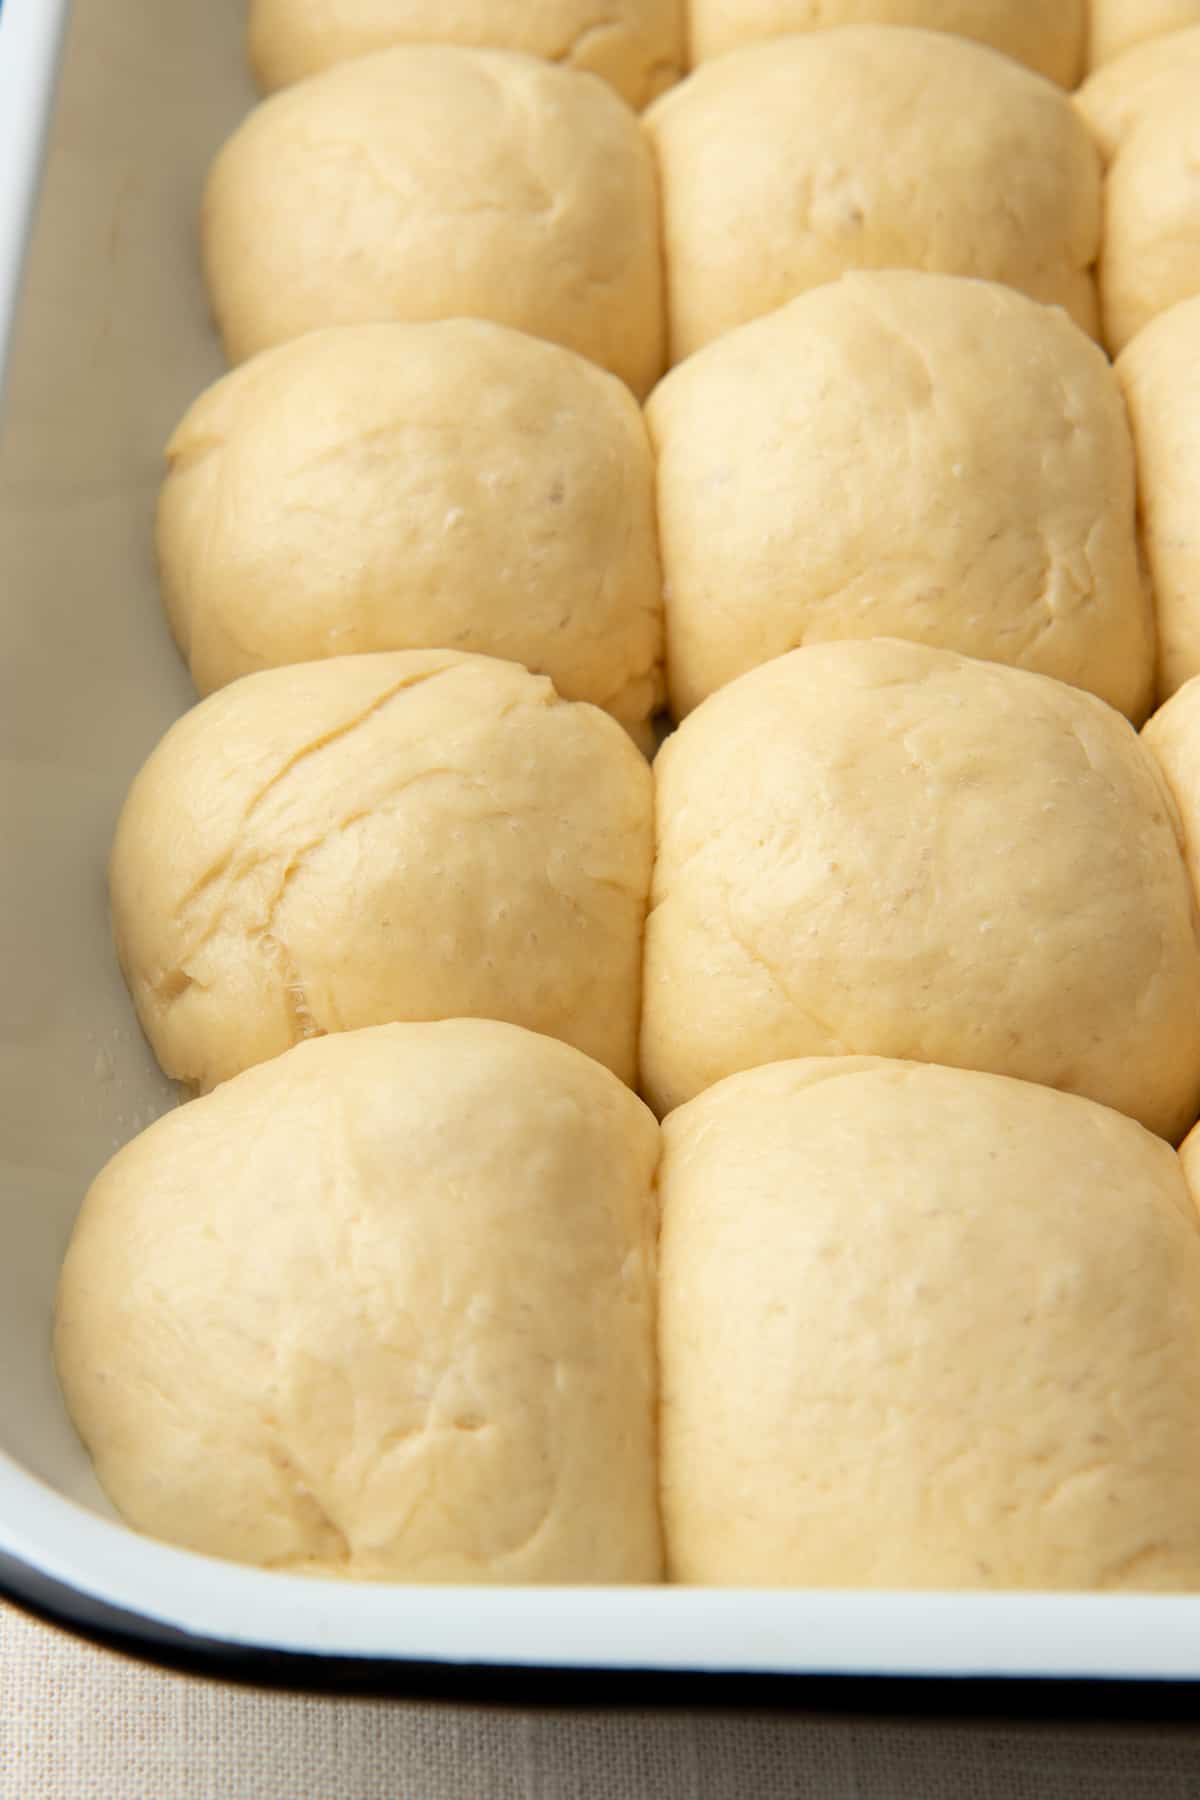
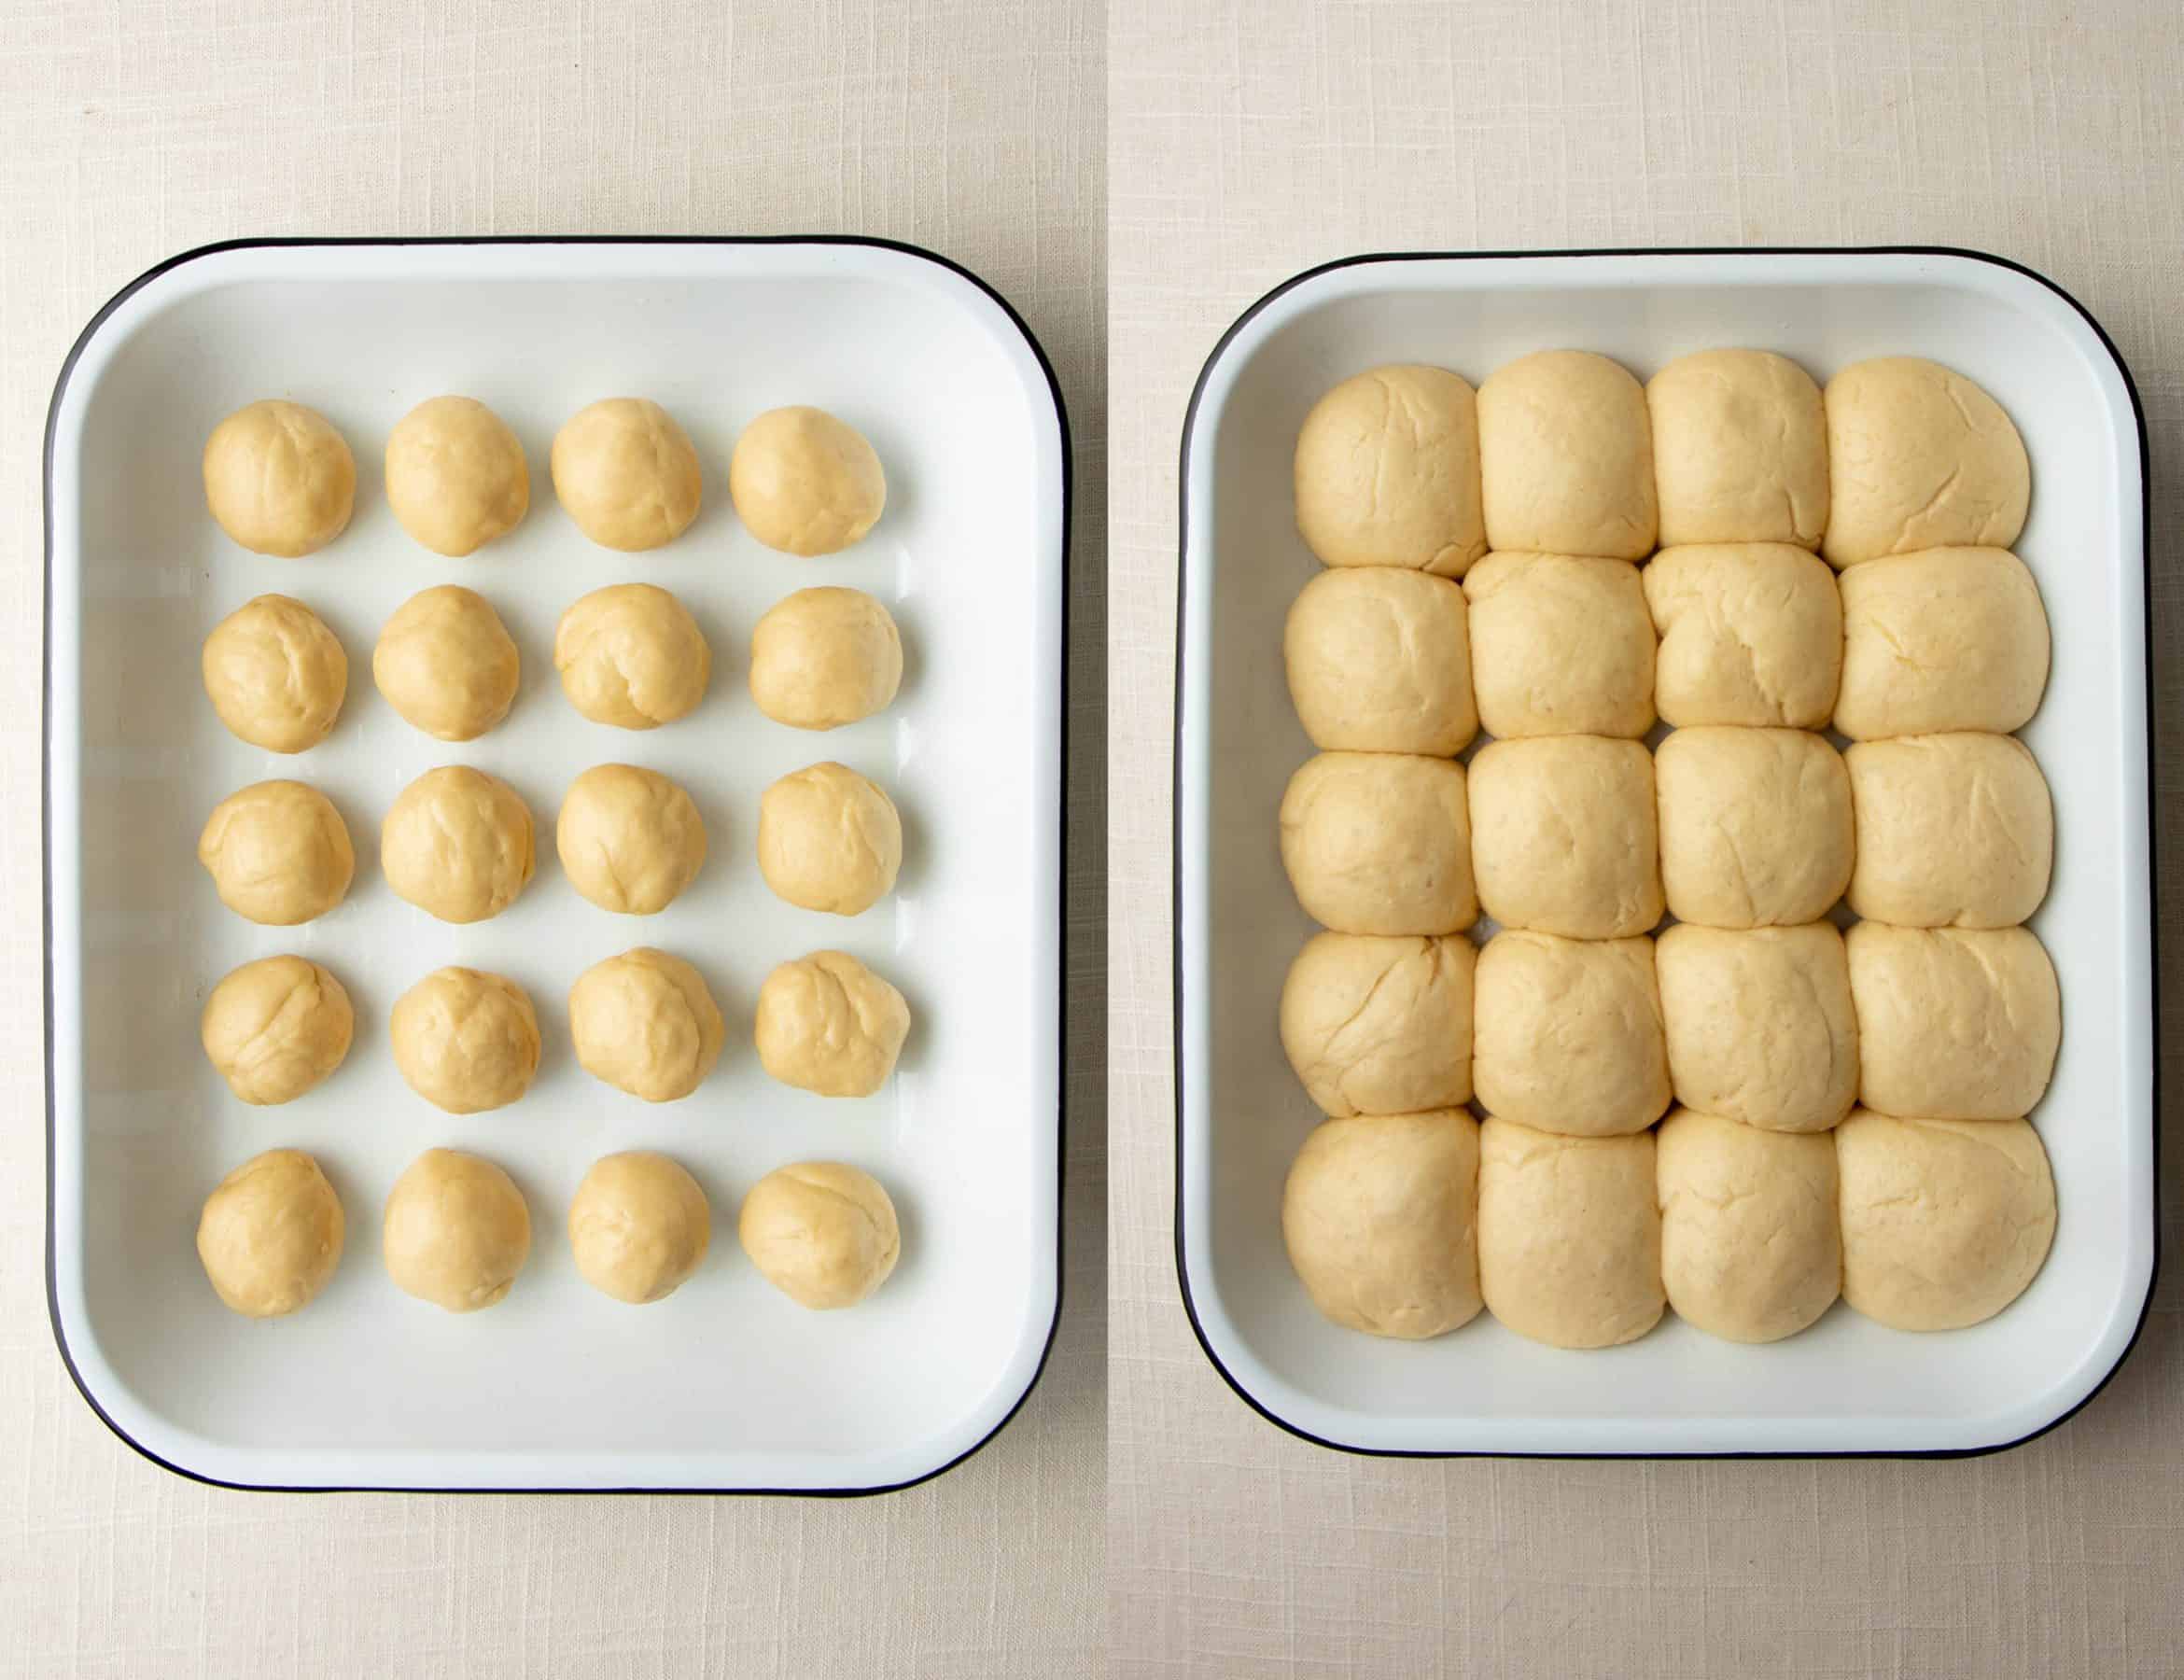
- To make regular-shaped rolls: Pinch off about 40 grams worth of dough, and roll into a ball about the size of a golf ball. Place the rolls 1/2 inch apart on a greased baking dish to rise until doubled in size.
- To make clover-shaped rolls: Pinch off three batches of about 13 grams of dough each, and form into small balls. Drop the three balls into the greased cups of a muffin tin, cover, and let rise until doubled in size.
How do I get the dough to rise?
When it comes to rising yeast dough, there are lots of ways to both speed up or slow down the rising (depending on what you need). If you’re pressed for time and need that dough to rise quickly, here are a few options:
- Use the oven. Many modern ovens have a “proof” setting. Turn that on and place your covered dough in there to rise. If you don’t have that setting, an oven light often pumps out enough heat too. Or, just turn your oven to a low temp (200°F or below) for a few minutes, then turn it off, and put the dough in the warm (but off!) oven.
- Use the fire/wood stove/furnace. Our fireplace hearth is an excellent place to let dough rise. Wood stoves, radiators, and other warm (but not too hot) sources of radiant heat are a good option, too. Just make sure to rotate the dough if the heat source is one-directional (like from a fireplace).
- Try the top of the fridge. The top of our fridge is nice and toasty! Yours might be, too. Try it.
- On top of a bowl of boiling water. This is my favorite tip, and the one that consistently works for me. Boil water in a kettle. Pour into a large mixing bowl. Rest covered pan/bowl of dough on top of the bowl of water. The heat from the steam does wonders to get dough to pop up fast!
- On top of a heating pad. This is a great trick! Pull out a heating pad, set it to medium, and place your pan on top of the heating pad.
- Try outside. This isn’t applicable in November in Indiana, but in August? You better believe I’m putting my dough out in the 90-degree sun on the back deck to rise.
How do I know when my rolls have risen enough?
We recommend deciding when your rolls are finished rising by checking the volume rather than the time. You want your rolls to be doubled in size before popping them in the oven. In some kitchens, this may happen as quickly as within the hour. In cooler kitchens, you might need three or four hours. You’ll have more success going by appearance instead of time.
Can I make these dinner rolls in advance?
Absolutely! You can prep these one to two days in advance by doing a slow rise in the fridge. Temps under 50°F will stall the activity of yeast nearly to a halt. Place the covered dough in the fridge, and then bring it out to rise for about an hour before baking.
Looking to prep your dinner rolls more than a day or two in advance? Read on for freezing instructions!
Can I freeze these yeast rolls before baking?
And, of course, to bring this full circle, you can freeze these rolls in the dough stage (before they rise), pop ’em in a bag, and have them ready for a meal whenever you need some bread for sopping. Just freeze them flat on a parchment paper-covered cooking sheet, and then once frozen, store in a labeled zip-top freezer bag. To bake, place the frozen dough balls in a greased baking pan, about 1/2 inch apart, and then let rise in a warm area until defrosted and at least doubled in volume. Bake as you would if they were fresh.
Can you bake these rolls directly from frozen?
Nope, you need to let the dough balls warm and rise to double in size before baking. If you don’t, you’ll have hard bricks instead of soft and fluffy rolls!
What can I do with leftover yeast rolls?
They may be called dinner rolls, but that doesn’t mean these babies can only be eaten at dinner. Use them for cute little breakfast sandwiches, serve them at lunch with some soup and salad, or use them for sopping up all the delicious juices from your turkey or chicken or ham. They would also make fun sliders! Use them to make amazing leftover roasted turkey or honey-glazed ham sandwiches. The possibilities are endless!
Can you freeze leftover dinner rolls?
You sure can! Line up your cooked dinner rolls on a baking sheet, and then freeze until solid. Transfer to a zip-top freezer bag or a glass food storage container and store in the freezer for up to three months. To use, defrost at room temperature for 30-60 minutes, or warm in the microwave for 20-30 seconds.
My protips for making the best easy yeast rolls:
- Start the recipe by proofing your yeast—mixing it with warm water and honey to ensure that your yeast is active. If the yeast mixture doesn’t bubble and foam after a few minutes, your yeast might be inactive, and you should toss the mixture and try again with fresh yeast.
- Use a kitchen scale to divvy out the dough to make sure your dinner rolls are the same size for even cooking.
Enjoy!
Easy Buttery Yeast Roll Recipe
Think working with yeast is scary? It isn't! This recipe for EASY Buttery Yeast Rolls will make you the star of Thanksgiving dinner!
Ingredients
- 1 cup (210g) warm, not too hot, water (~105°F)
- 3 tablespoons (70g) honey
- 2 1/4 teaspoons (1 packet, 8g) dry active yeast
- 1 large egg (48g, out of shell), beaten
- 1/2 cup (1 stick, 113g) butter, melted, plus more for brushing
- 3 1/2 cups (480g) all-purpose flour, plus an additional 1/4-1 cup (34-136g) flour
- 1 teaspoon (8g) salt
- Cooking spray
Instructions
Stand Mixer Directions
- In the bowl of a stand mixer fitted with the dough hook, add in the water, yeast, and honey. Turn on to low and mix for just a few seconds, until combined. Let proof for about 5 minutes, until bubbly and foamy—this is how you know your yeast is active. If your yeast is not active, toss it out and start again with fresh yeast.
- Add in the egg, butter, 3 1/2 cups of flour, and the salt. Turn on low and mix until well-combined. Add in the remaining flour, 1/4 cup at a time, until the dough is not too sticky, but still soft and pliable (you may not need all the flour).
- Turn the mixer up to medium, and let it knead the dough for 5-7 minutes, or until the dough is soft, smooth, and not as sticky.
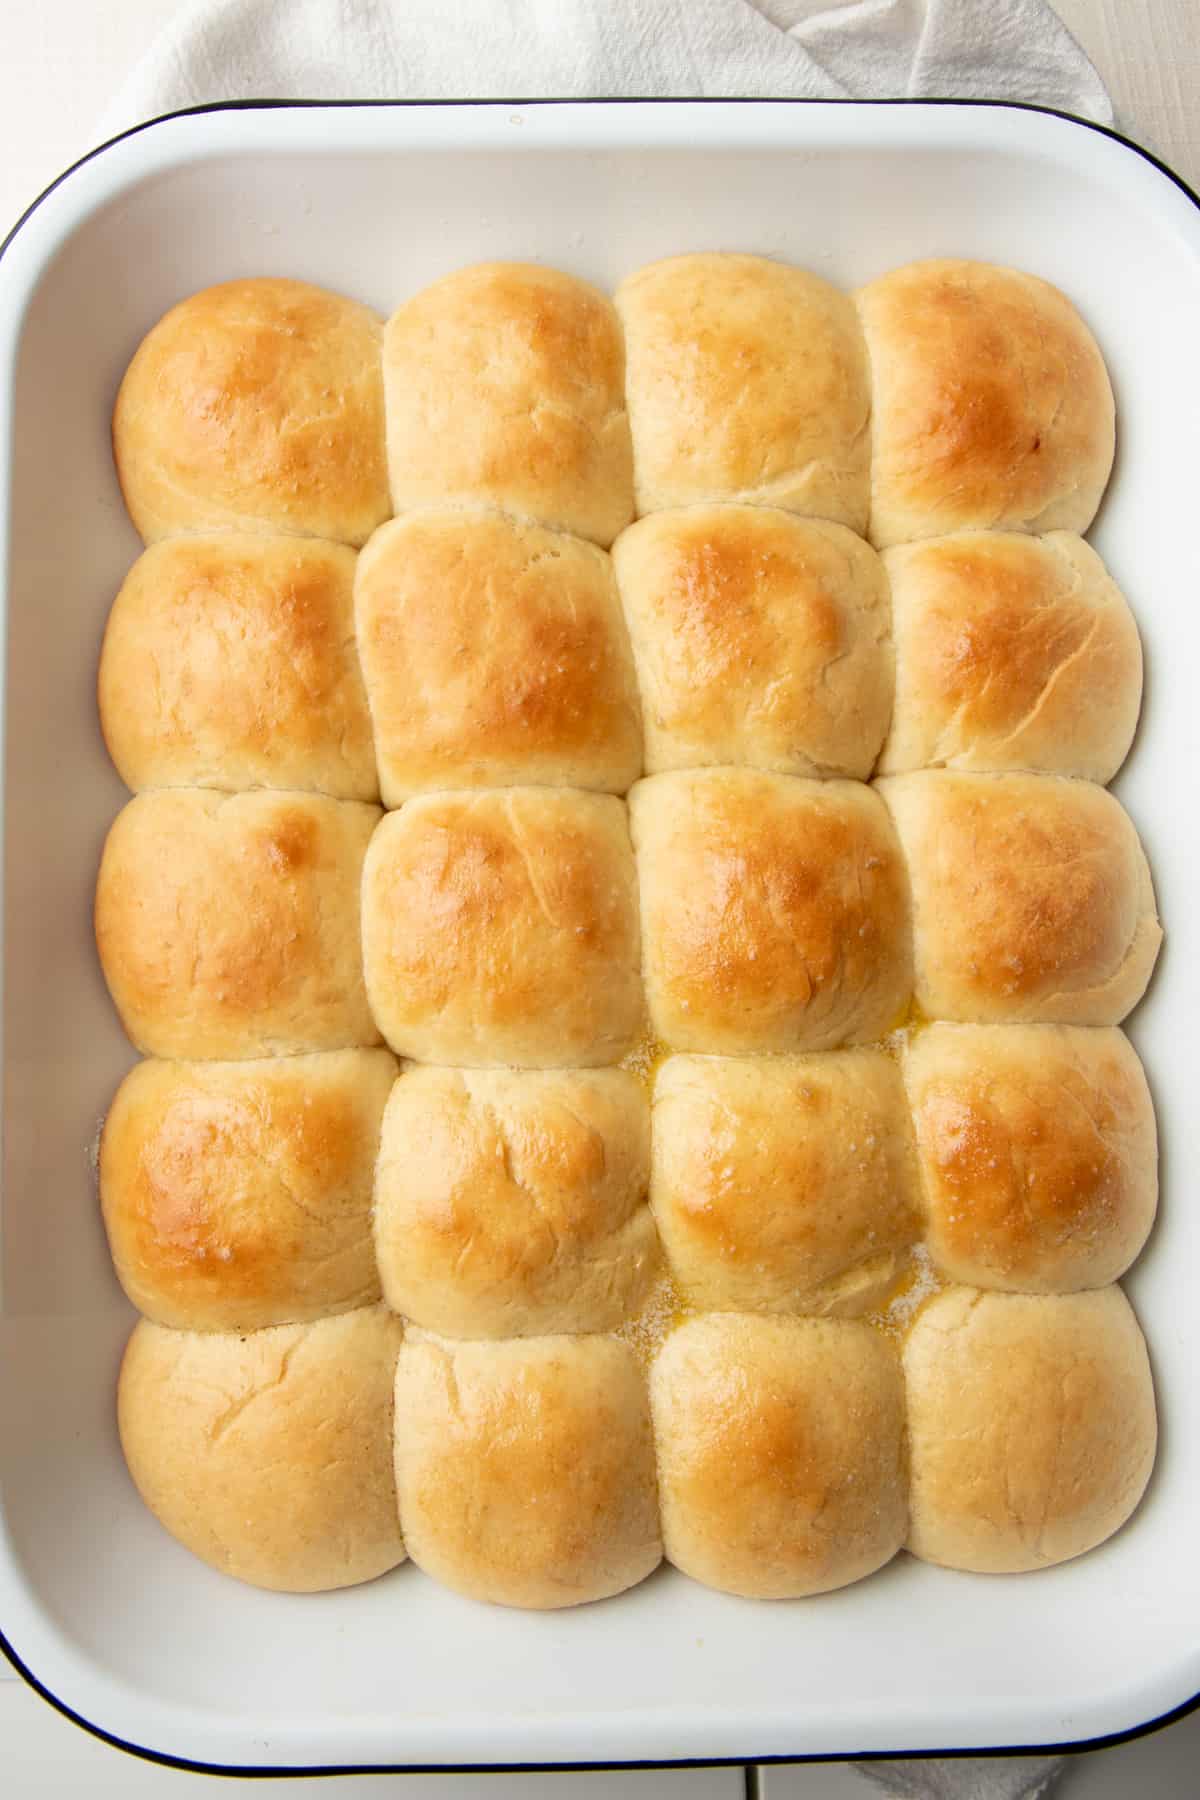
- Spray an 11 x 13 inch baking dish with cooking spray. Form the dough into small balls—about 40 grams worth each, or a little bigger than the size of a golf ball—and then place in the prepared baking dish, spacing them about 1/2 inch apart.
- Cover the baking dish loosely with plastic wrap, and then let rise in a warm spot until doubled in size (about an hour in my kitchen, but your results may vary).
- Preheat oven to 350°F. Once rolls have risen, brush tops with melted butter, and then bake in preheated oven for 12-15 minutes, or until the tops are golden brown. Brush with more melted butter just before serving.
Bread Machine Directions
- In the pan of a bread machine, mix the water, yeast, and honey. Stir for just a few seconds, until combined. Let proof for about 5 minutes, until bubbly and foamy—this is how you know your yeast is active. If your yeast is not active, toss it out and start again with fresh yeast.
- Add in the egg, butter, 3 1/2 cups of flour, and the salt. Turn the machine on the dough cycle. Check after a few minutes of mixing, and add more flour if necessary (you're looking for a slightly sticky, soft dough). You might not need all the flour.
- Once the dough has completed the kneading in the bread machine, turn off the machine and remove the dough.
- Spray an 11 x 13 inch baking dish with cooking spray. Form the dough into small balls—about 40 grams worth each, or a little bigger than the size of a golf ball—and then place in the prepared baking dish, spacing them about 1/2 inch apart.
- Cover the baking dish loosely with plastic wrap, and then let rise in a warm spot until doubled in size (about an hour in my kitchen, but your results may vary).
- Preheat oven to 350°F. Once rolls have risen, brush tops with melted butter, and then bake in preheated oven for 12-15 minutes, or until the tops are golden brown. Brush with more melted butter just before serving.
Bowl and Spoon Directions
- In a large mixing bowl, mix the water, yeast, and honey. Stir for just a few seconds until combined. Let proof for about 5 minutes, until bubbly and foamy—this is how you know your yeast is active. If your yeast is not active, toss it out and start again with fresh yeast.
- Add in the egg, butter, 3 1/2 cups of flour, and the salt. Stir until well-combined. Then, add in remaining flour, 1/2 cup at a time, until the dough is not too sticky, but still soft and pliable (you might not need all the flour).
- Dump the dough out onto a floured work surface. Knead for 7-10 minutes, until the dough is soft, smooth, and not as sticky.
- Spray an 11 x 13 inch baking dish with cooking spray. Form the dough into small balls—about 40 grams worth each, or a little bigger than the size of a golf ball—and then place in the prepared baking dish, spacing them about 1/2 inch apart.
- Cover the baking dish loosely with plastic wrap, and then let rise in a warm spot until doubled in size (about an hour in my kitchen, but your results may vary).
- Preheat oven to 350°F. Once rolls have risen, brush tops with melted butter, and then bake in preheated oven for 12-15 minutes, or until the tops are golden brown. Brush with more melted butter just before serving.
Nutrition Information:
Yield: 24 Serving Size: 1 rollAmount Per Serving: Calories: 71Total Fat: 0gSaturated Fat: 0gTrans Fat: 0gUnsaturated Fat: 0gCholesterol: 8mgSodium: 4mgCarbohydrates: 14gFiber: 1gSugar: 0gProtein: 2g
At Wholefully, we believe that good nutrition is about much more than just the numbers on the nutrition facts panel. Please use the above information as only a small part of what helps you decide what foods are nourishing for you.